How to Use the Difficulty Index to Filter Tests on Testlify
When creating assessments on Testlify, you can easily filter tests based on their difficulty level. Here's how you can utilize the Difficulty Index feature to choose the most suitable tests for your assessments
Step-by-Step Guide
Log in to your workspace: Start by logging in with your credentials.
Go to the Assessments page: Navigate to the assessment you're creating or editing.
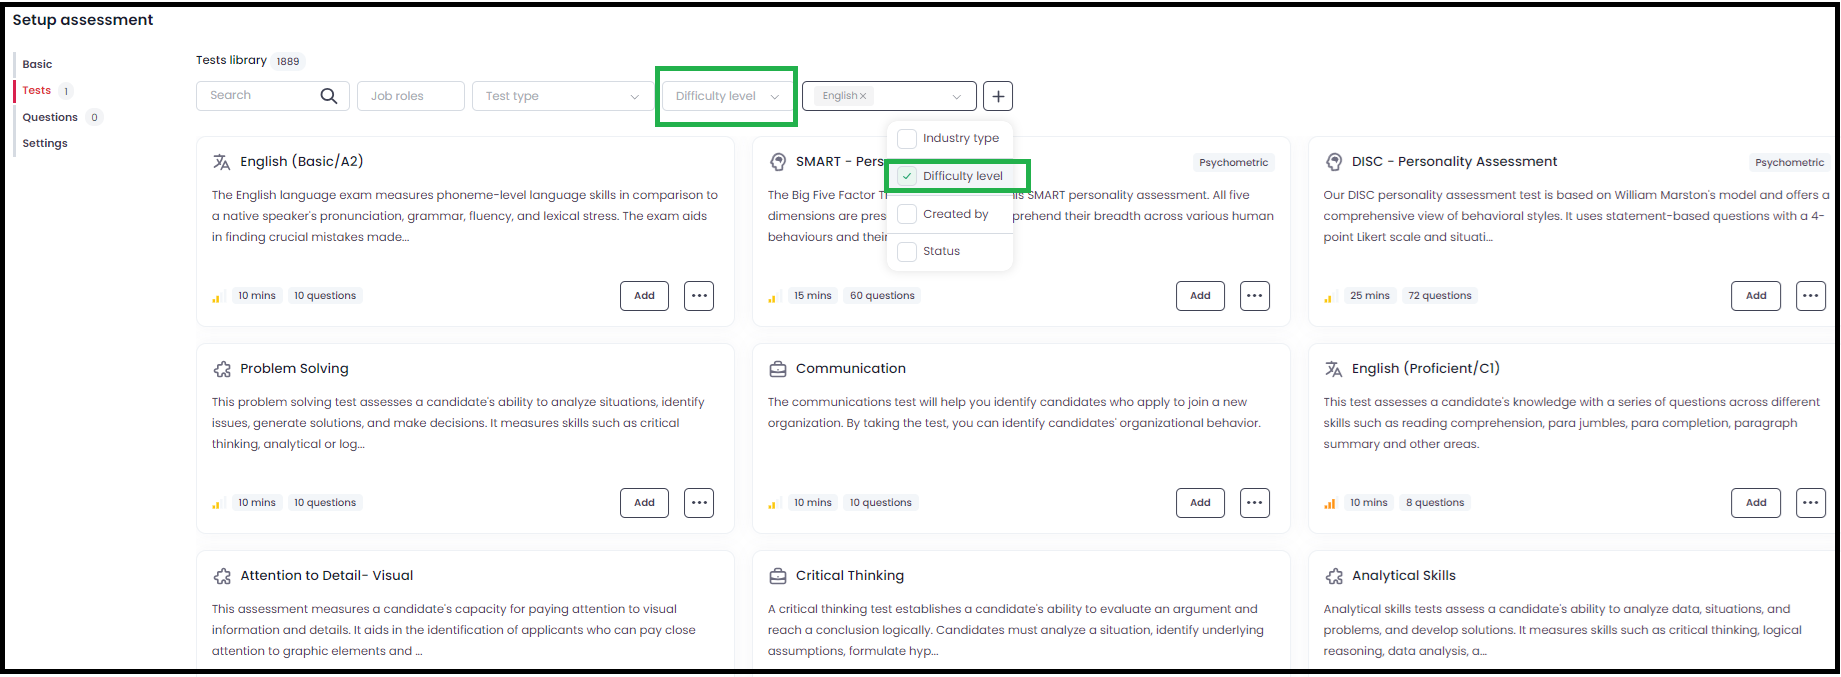
Open the Tests tab: Select the Tests tab, where you can browse through Testlify’s existing test library.
Add Difficulty Filter:
On the top right of the screen, next to the Filters box, you will see an Add button.

Click on the Add button, and from the available options, select Difficulty Level.

Select the Difficulty Level:
Once the filter is added, you can choose a difficulty level (e.g., beginner, intermediate, advanced and expert).

- This will display all the available tests from Testlify’s library that match the selected difficulty level.
- Use Tests in Your Assessments: After selecting the appropriate difficulty level, you can easily add the filtered tests to your assessment.
Why Use the Difficulty Index?
The Difficulty Index helps you tailor your assessments to match the required skill levels for the job role or the candidate’s experience. Whether you're looking for easy, intermediate, or advanced questions, the Difficulty Index ensures you're using the right level of challenge for each assessment.
This feature makes it easier to create balanced assessments that align with the role's requirements or the skills you're looking to evaluate.