How to Bulk Invite Candidates for Assessments
Efficiently managing the recruitment process is crucial for any organization, and one key aspect is the ability to bulk invite candidates for assessments. Streamlining this process not only saves time but also ensures a smooth and consistent experience for all candidates.
To streamline your recruitment process and efficiently invite multiple candidates for assessments, follow these steps within your Testlify account:
1. Access the Assessment
- Navigate to an existing assessment or create a new assessment within your Testlify account.
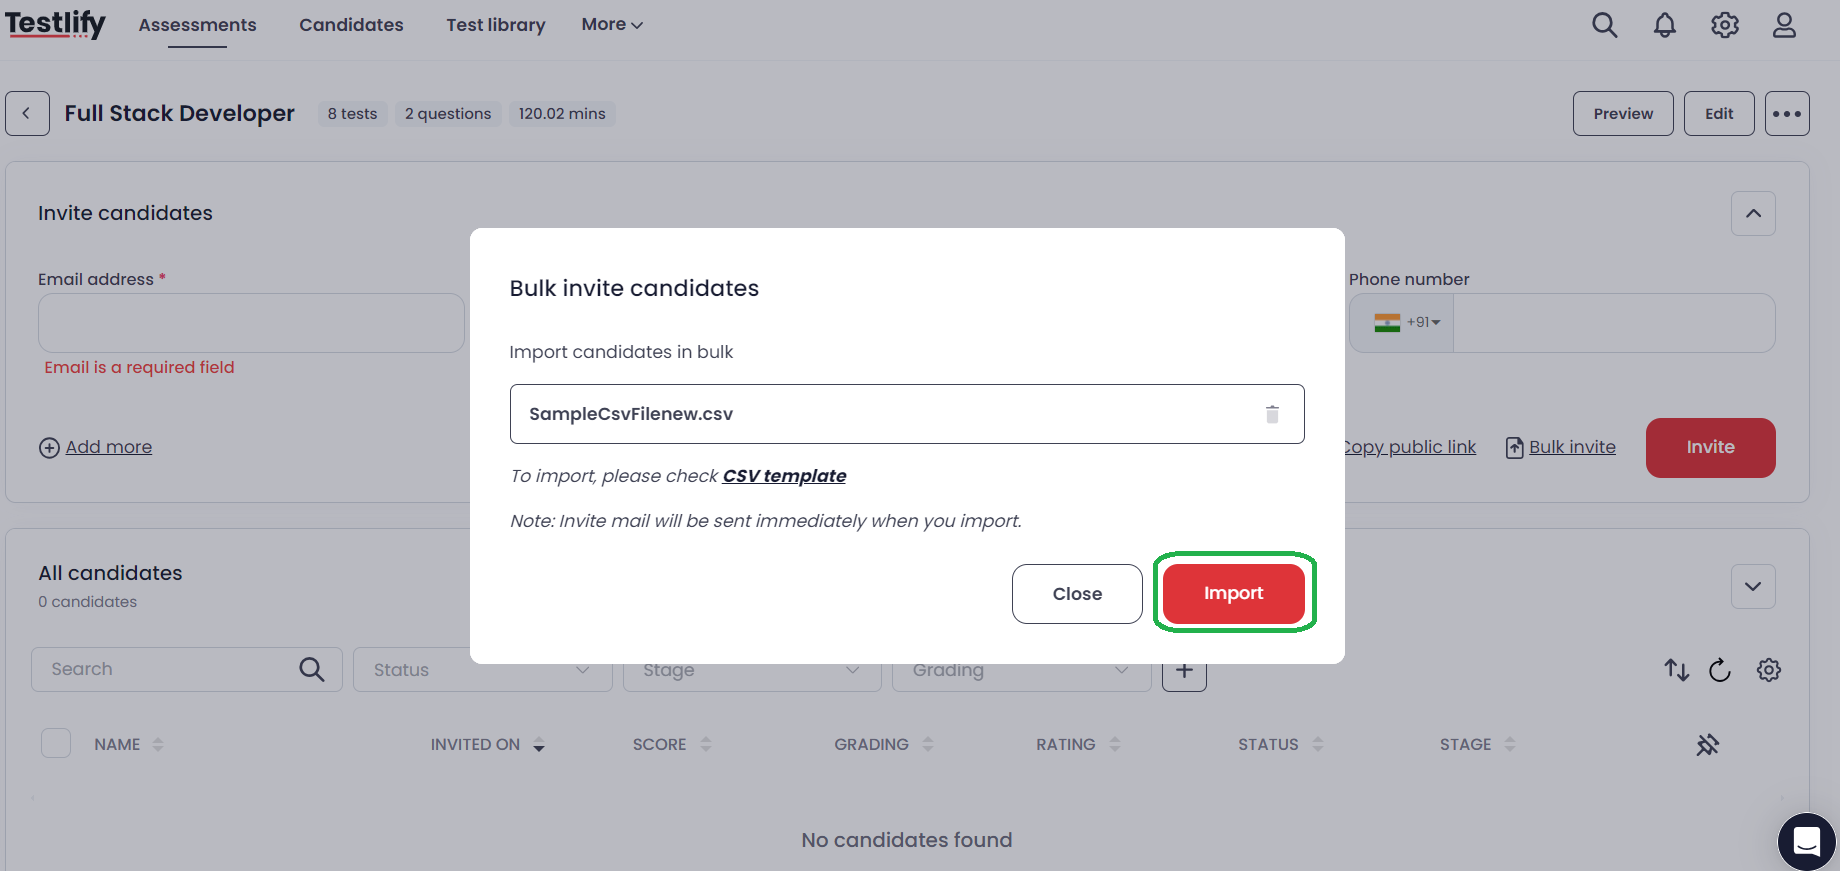
2. Select Bulk Invite
- In the 'Invite Candidates' section, select the "bulk invite" option.

3. Import Candidates
- To import candidates in bulk, ensure you have your candidates' details ready in the correct format.
- Check the CSV template provided for the required format.

4. CSV Template
- The format for the candidate details should match the structure mentioned in the CSV template. This ensures smooth and error-free importing.

5. Send Invites
- Once your candidate details are correctly formatted, import the CSV file.
- Please note the invitation emails will be sent immediately upon clicking 'Import'.
Important points to remember
- Do not add any space or special characters in the email column in the CSV template.
- It is mandatory to mention the first name, last name, and email for the invite to be sent successfully.
By following these steps, you can efficiently manage your candidate assessments and enhance your recruitment workflow.
For any further assistance, please connect with us at talent@testlify.com.