
Enable OTP Verification for Private Invites
OTP (One-Time Password) verification adds a security layer to private assessment invites — only candidates who confirm their email identity can start the test.
Before you begin
You need an active Testlify workspace with at least one assessment already created.
Enable OTP verification
-
Log in to your workspace at app.testlify.com.

-
Select the assessment you want to protect with OTP verification.

-
Click Edit on the assessment.

-
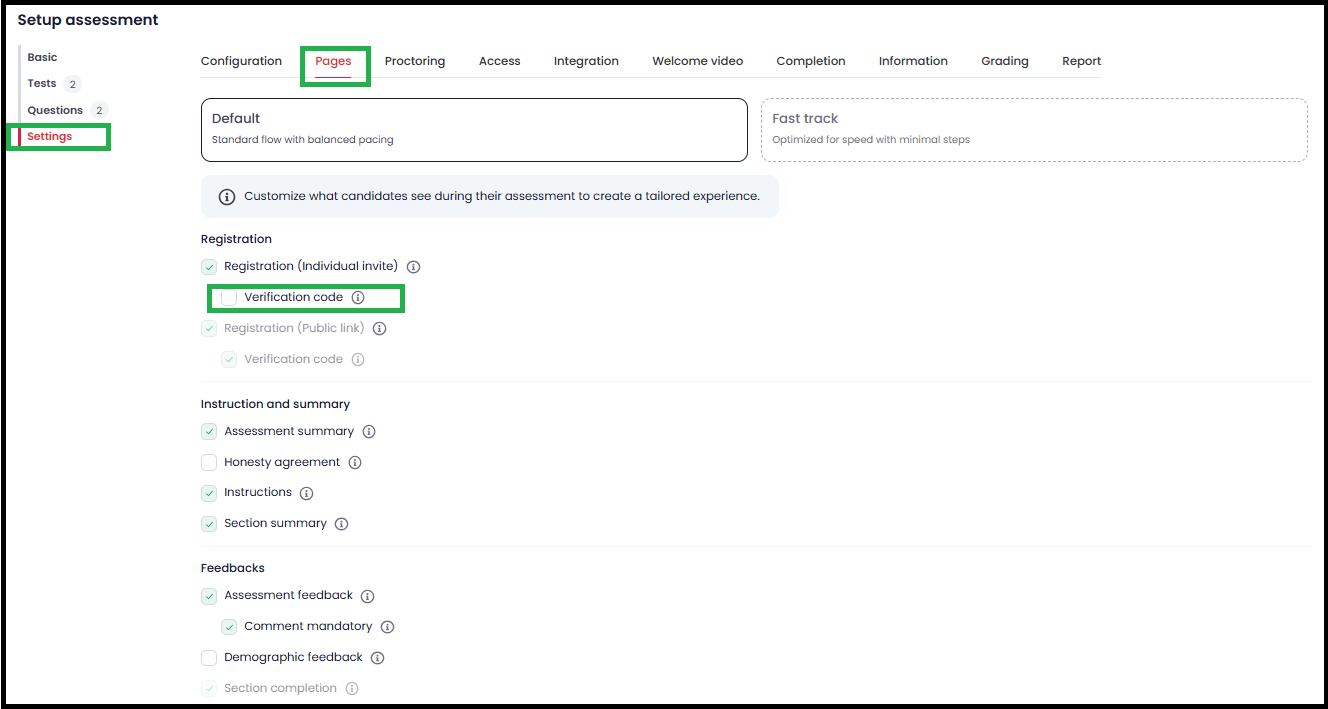
Open the Settings tab, then click Pages.
-
Under Pages, find Verification code and check the box to enable it.
-
Click Save.
How candidates complete OTP verification
Once OTP is enabled, candidates go through these steps every time they open the assessment link:
-
Click the assessment link to reach the registration page.

-
Enter their name and email address.

-
Open the OTP email, then enter the code on the verification page.

Tip: If the OTP doesn't appear in the inbox, check the Spam or Junk folder. It can take up to 5 minutes to arrive.
-
Click Confirm Code to verify identity and start the assessment.

Frequently asked questions
- Why isn't a candidate receiving the OTP? The email may be in their Spam or Junk folder. Allow up to 5 minutes for delivery.
- Can the OTP be resent? Yes — candidates can request a new code from the verification page.
- How long is the OTP valid? OTPs expire within minutes — candidates should enter the code as soon as it arrives.
- What if the OTP still doesn't arrive? Ask the candidate to confirm their email address is correct, or contact Testlify support.
- How do I disable OTP verification? Repeat the steps above and uncheck Verification code in Pages settings, then click Save.
Need help? Contact support.