
Managing Labels During Candidate Invites and Public Link Creation
Labels help organize candidates, assessments, and hiring workflows more efficiently within Testlify. You can now add and manage labels directly while inviting candidates or creating public links.
Where Can Labels Be Added?
The “Add +” label option is available in the following areas:
- Direct Candidate Invite
- Bulk Candidate Invite
- Public Link Creation
- Other assessment and candidate management sections across the platform
Using the “Add +” Label Dropdown
Clicking “Add +” opens an enhanced dropdown that allows you to:
- Search existing labels
- Select multiple labels
- View label usage counts
- Create new labels instantly
Dropdown Features
Search Labels
Use the search bar to quickly find existing labels.
Multi-Select Labels
Select one or multiple labels using checkboxes.
Usage Count Badge
Each label displays a count badge showing how many times it has been used.
Create New Labels
If the entered text does not match an existing label:
- A “Create new label” option appears
- Select it to create and apply the new label instantly
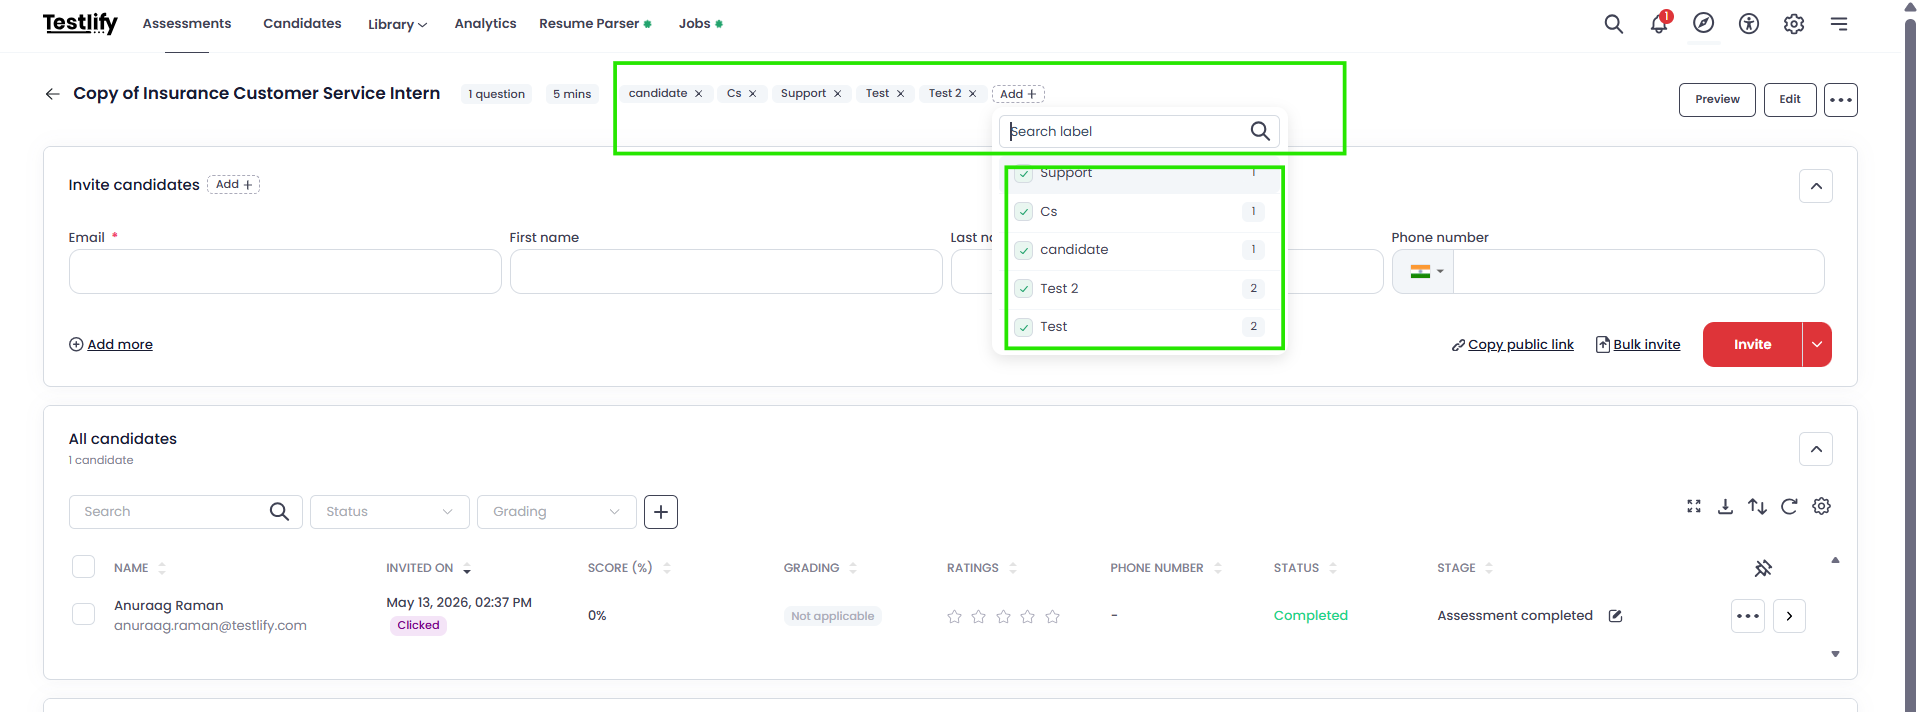
Add Labels During Direct Candidate Invite
You can now apply labels while manually inviting candidates to an assessment.
Steps
- Open the assessment
- Navigate to the Invite Candidates section
- Click “Add +” beside the title
- Search, select, or create labels
- Fill candidate details
- Click Invite
The selected labels will automatically apply to all candidates invited during that session.
Add Labels During Bulk Candidate Invite
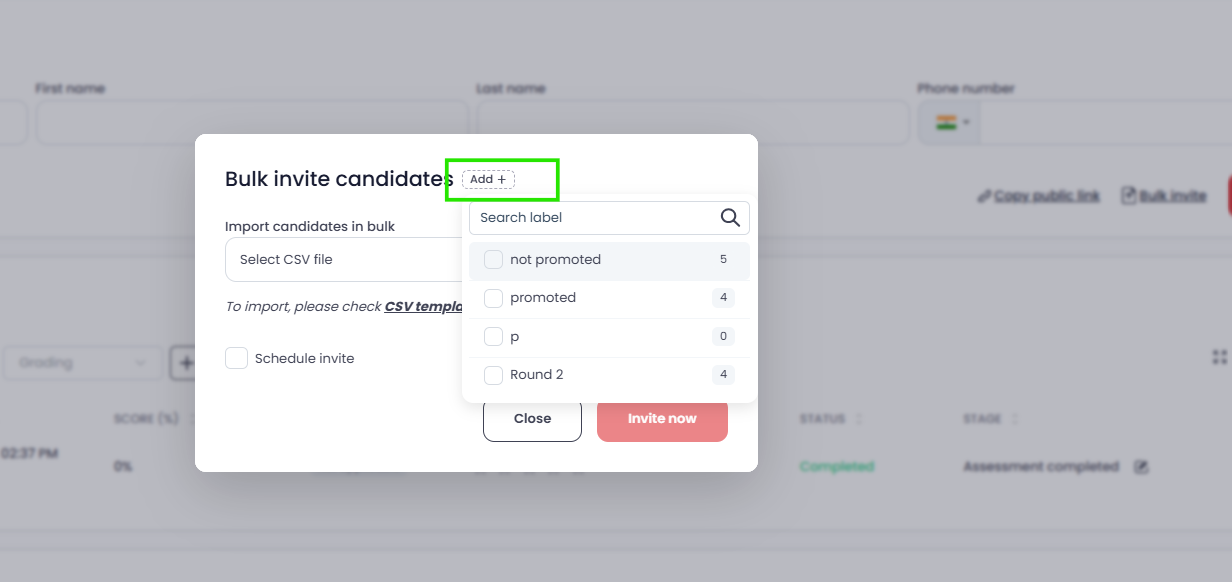
Labels can also be applied while importing candidates via CSV.
Steps
- Open the assessment
- Click Bulk Invite
- In the modal, click “Add +”
- Search, select, or create labels
- Upload the CSV file
- Click Invite now
All imported candidates will receive the selected labels.
Add Labels to Public Links
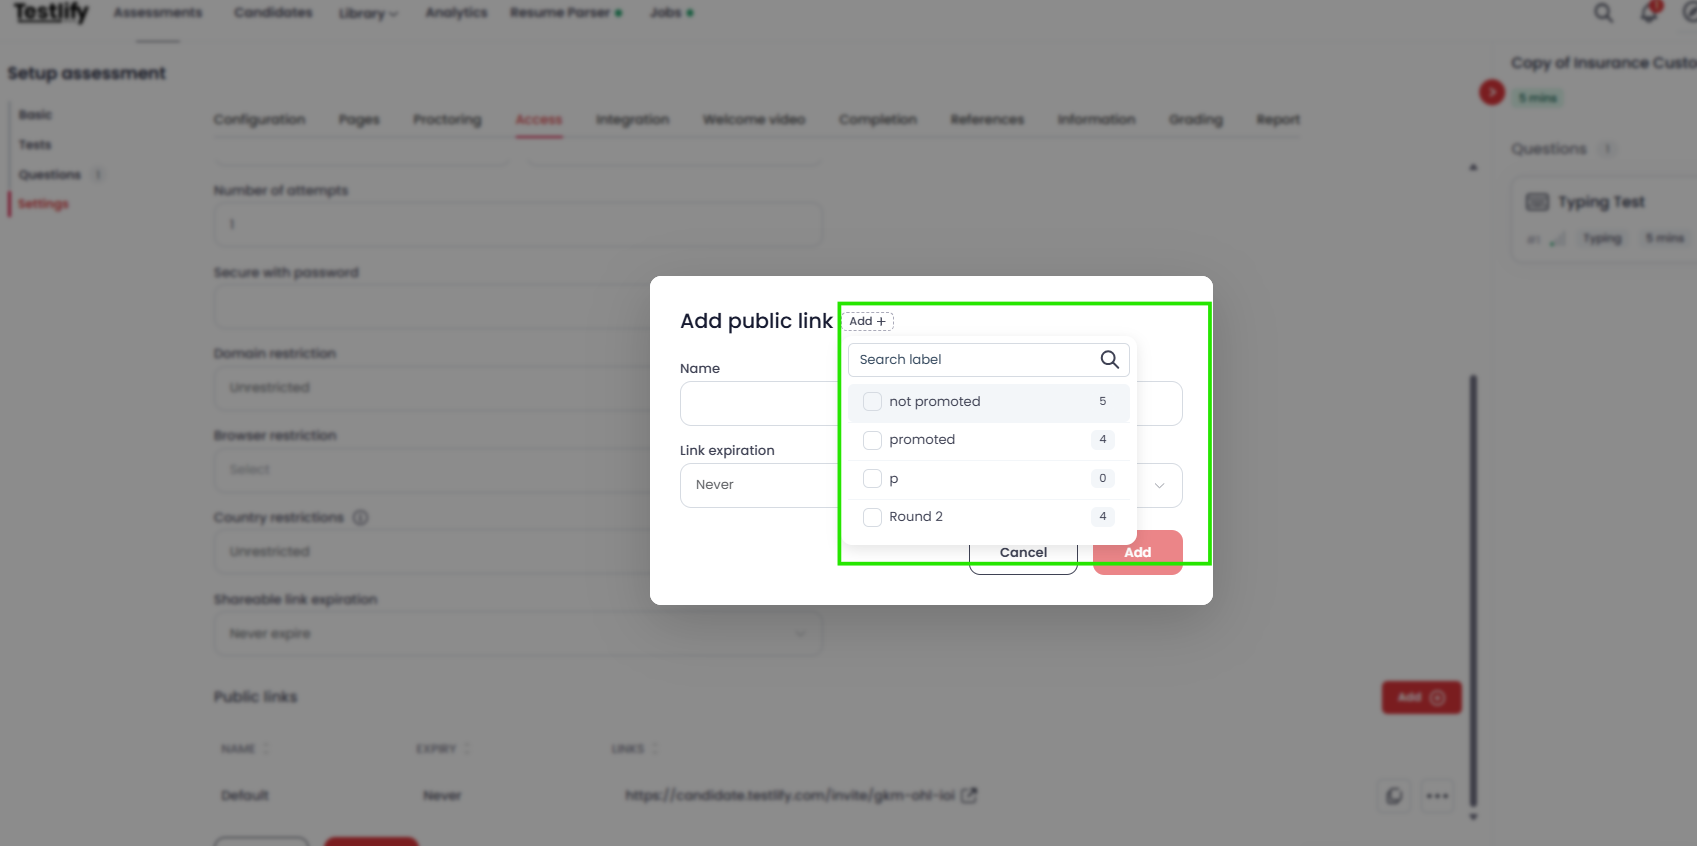
You can assign labels while creating or editing assessment public links.
Steps
-
Go to:
Assessment Settings → Access → Public Links
- Click Add
- Click the “Add +” option
- Search, select, or create labels
- Save the public link
Candidates accessing the assessment through that public link will be associated with the selected labels.
Responsive Label Layout Behavior
To maintain a clean and organized interface, labels now behave responsively across the platform.
If Labels Fit in One Line
Labels appear beside the title.
If Labels Exceed One Line
All labels automatically move to a new row below the title.
This ensures:
- Better readability
- Stable UI layout
- No shifting of surrounding elements
This behavior is consistent across:
- Candidate Invite
- Bulk Invite
- Public Link Creation
- Other sections using labels
Best Practices
- Use labels for hiring stages, departments, campaigns, or recruiter ownership
- Keep naming conventions consistent
- Use searchable labels for easier filtering and reporting
- Avoid duplicate or similar label names
If you need any further assistance, please feel free to reach out, we’re always happy to help at support@testlify.com