How to Post a Job Opening on Testlify
Testlify streamlines the technical hiring process, allowing you to post jobs, collect applications, and assess candidates in one place. Follow this comprehensive guide to create, publish, and manage your job postings effectively.
Detailed Description
Posting a job on Testlify is more than just listing an opening. It’s about creating a structured pipeline. You can define role-specific skills, customize application forms, choose where the job is published, and even trigger automated skill assessments—all from a single dashboard. This guide covers the entire workflow, from initial setup to managing incoming candidates.
Step-by-Step Guide
Step 1: Log in to Your Workspace
- Navigate to app.testlify.com.
- Log in using your registered email ID and the OTP sent to your inbox.
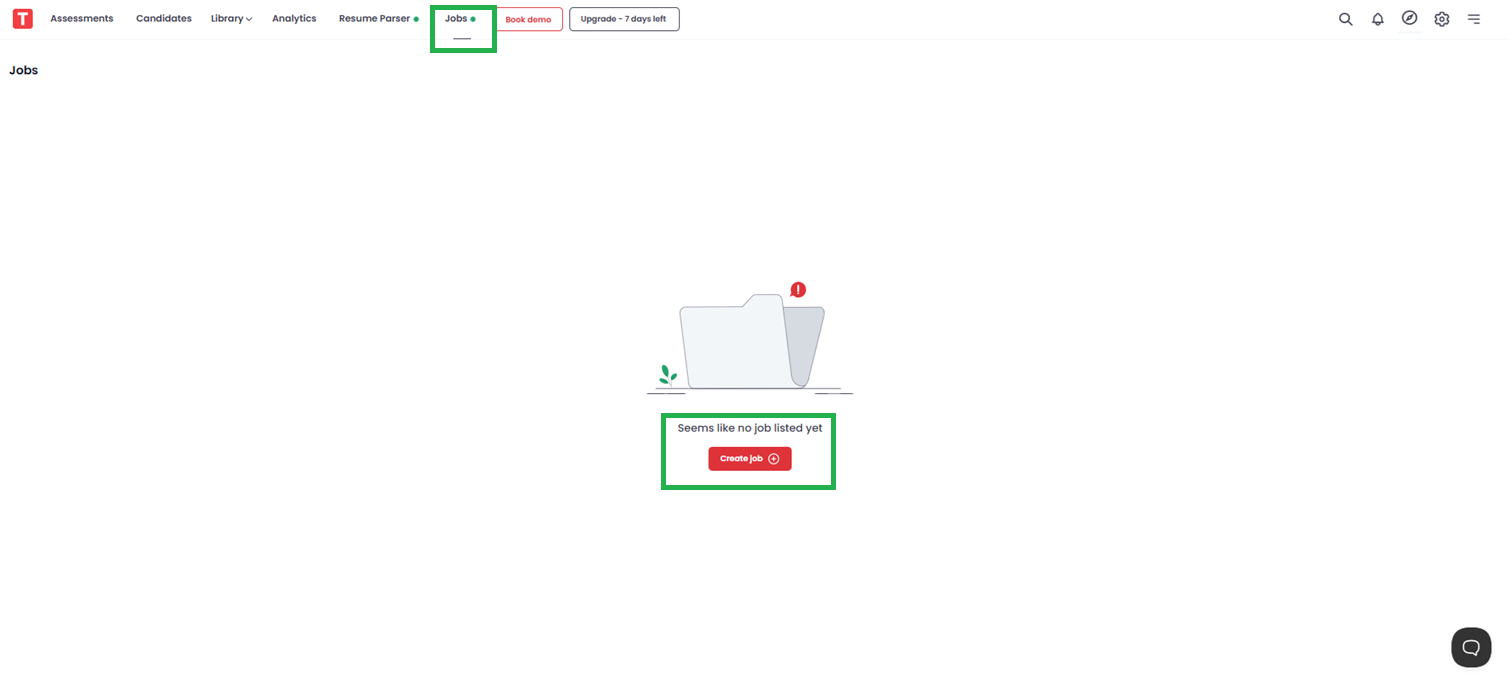
Step 2: Navigate to the Jobs Section
- From the dashboard, select the Jobs tab.
-
Click the Create Job button to start posting a new opening.

Step 3: Fill Out the Basic Setup Page
Under the setup page, enter the following details:
- Job title (e.g., Senior Frontend Developer)
- Job role (e.g., Developer, Designer, Product Manager)
- Job description (responsibilities, requirements, benefits)
- Skill preferences (select relevant skills for assessment)
- Job note (optional internal note for your team)
Once complete, click Next.

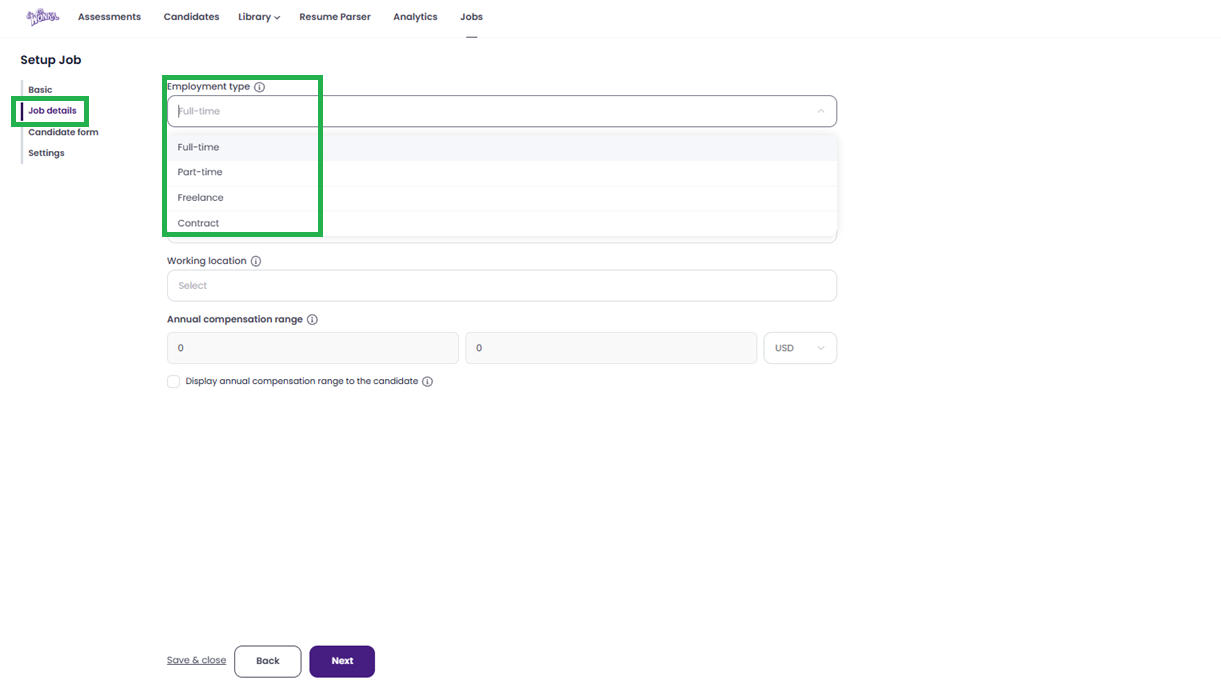
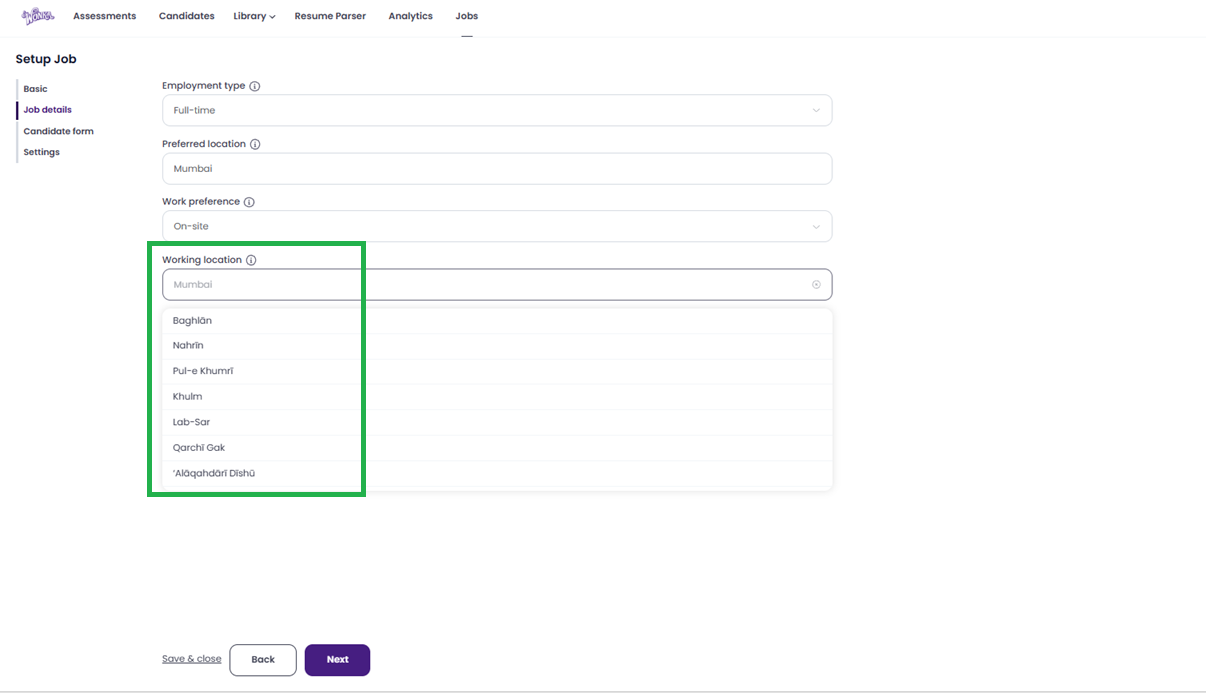
Step 4: Provide Detailed Job Information
In this section, specify:
-
Employment type – Full-time, Part-time, Freelance, or Contract
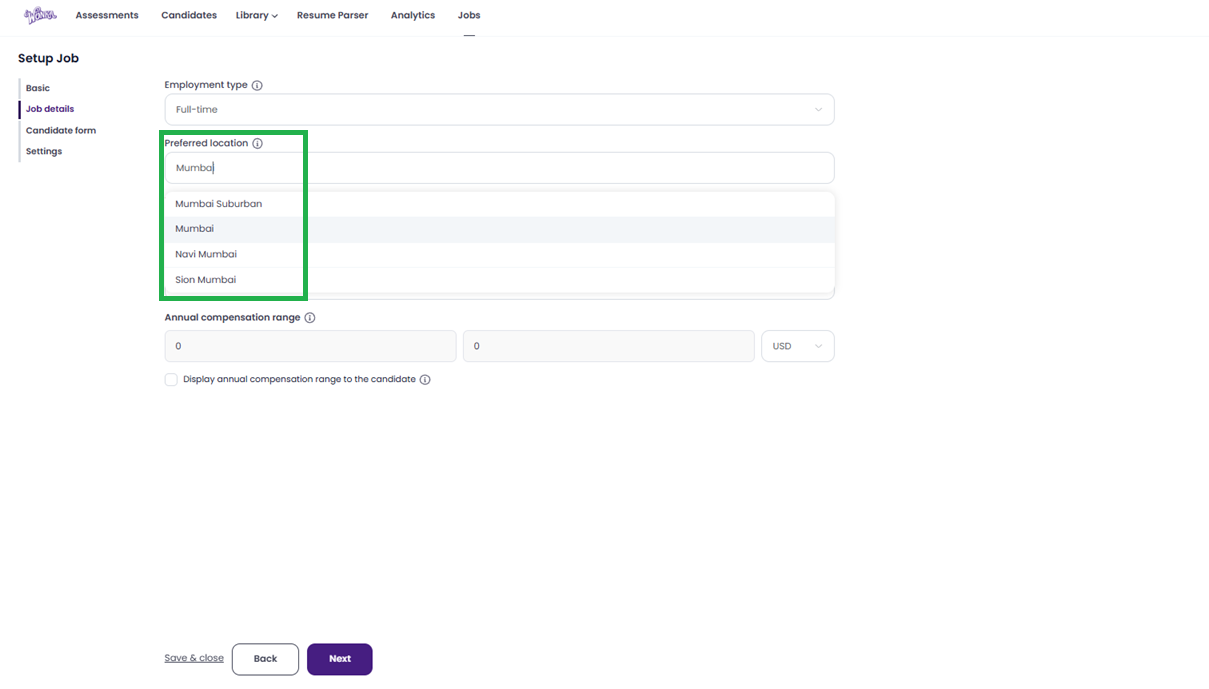
-
Preferred location – City, state, or remote region
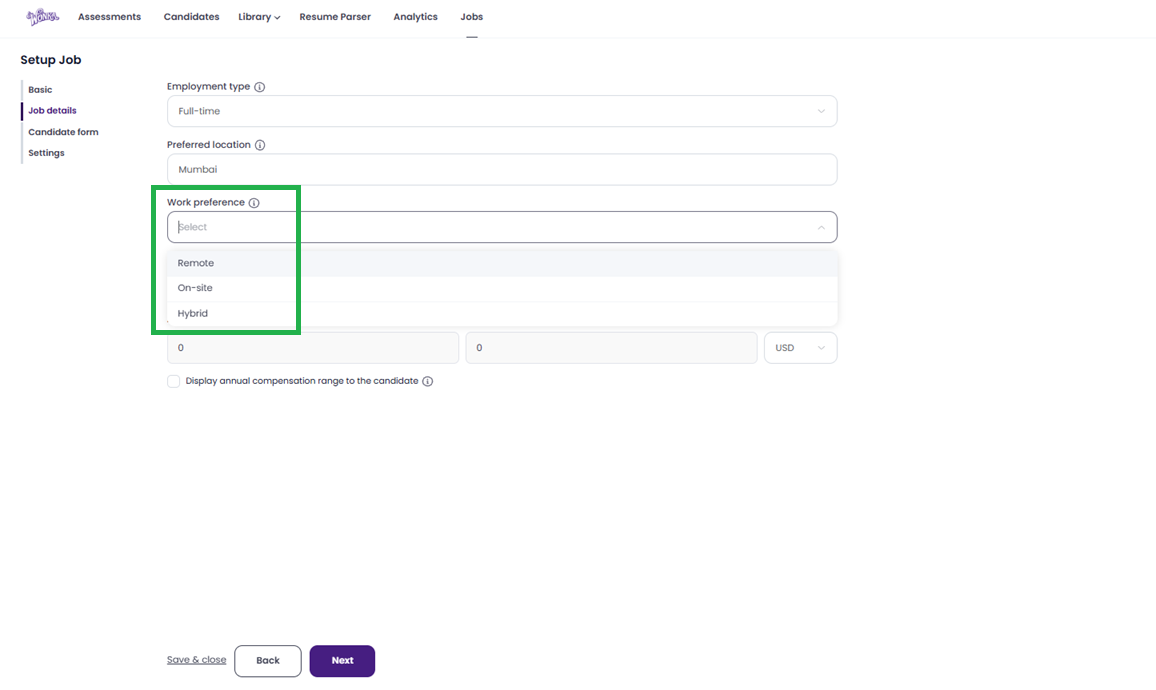
-
Work preference – Remote, Onsite, or Hybrid
-
Working location – Specific address or virtual location (his field appears only if you selected Remote or Hybrid. Enter the specific location requirements or time zone if applicable.)
-
Annual compensation range – Select preferred currency and set min/max range
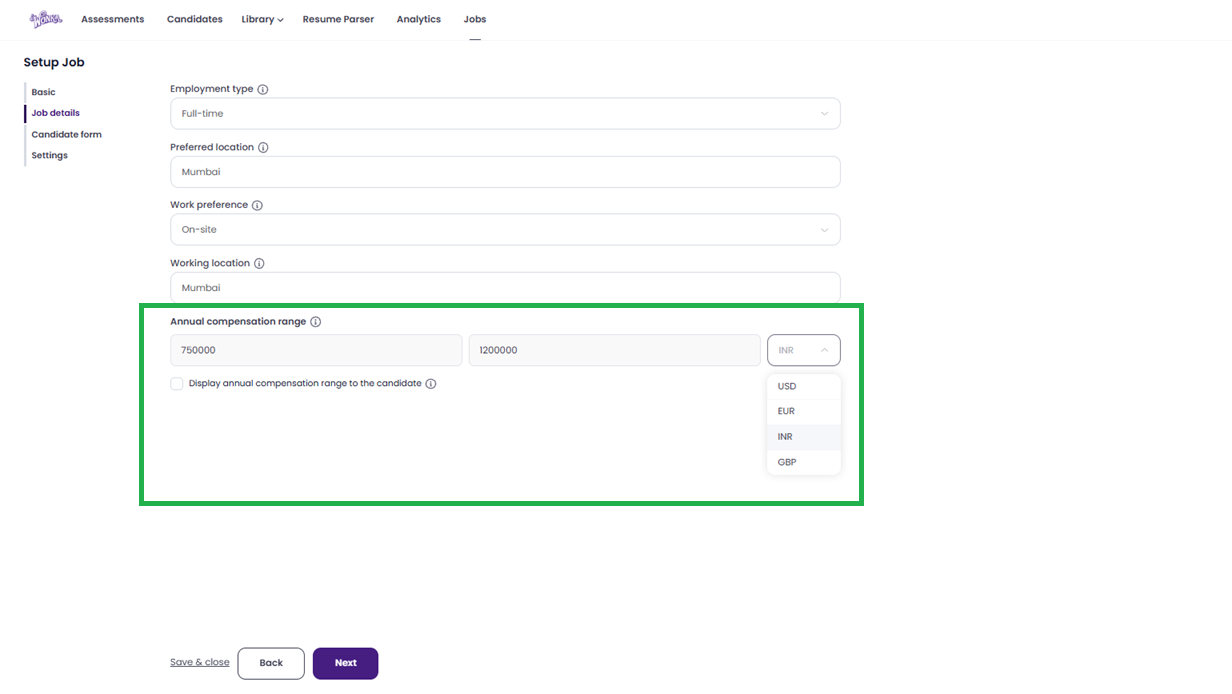
- Display compensation to candidates? – Tick the box if you want to Display annual compensation range to the candidate on the job post.


Click Next to proceed.
Step 5: Build the Candidate Application Form
This form is what candidates fill out when applying.
Default fields include:
-
Email, First Name, Last Name, Phone Number, Resume, Portfolio.
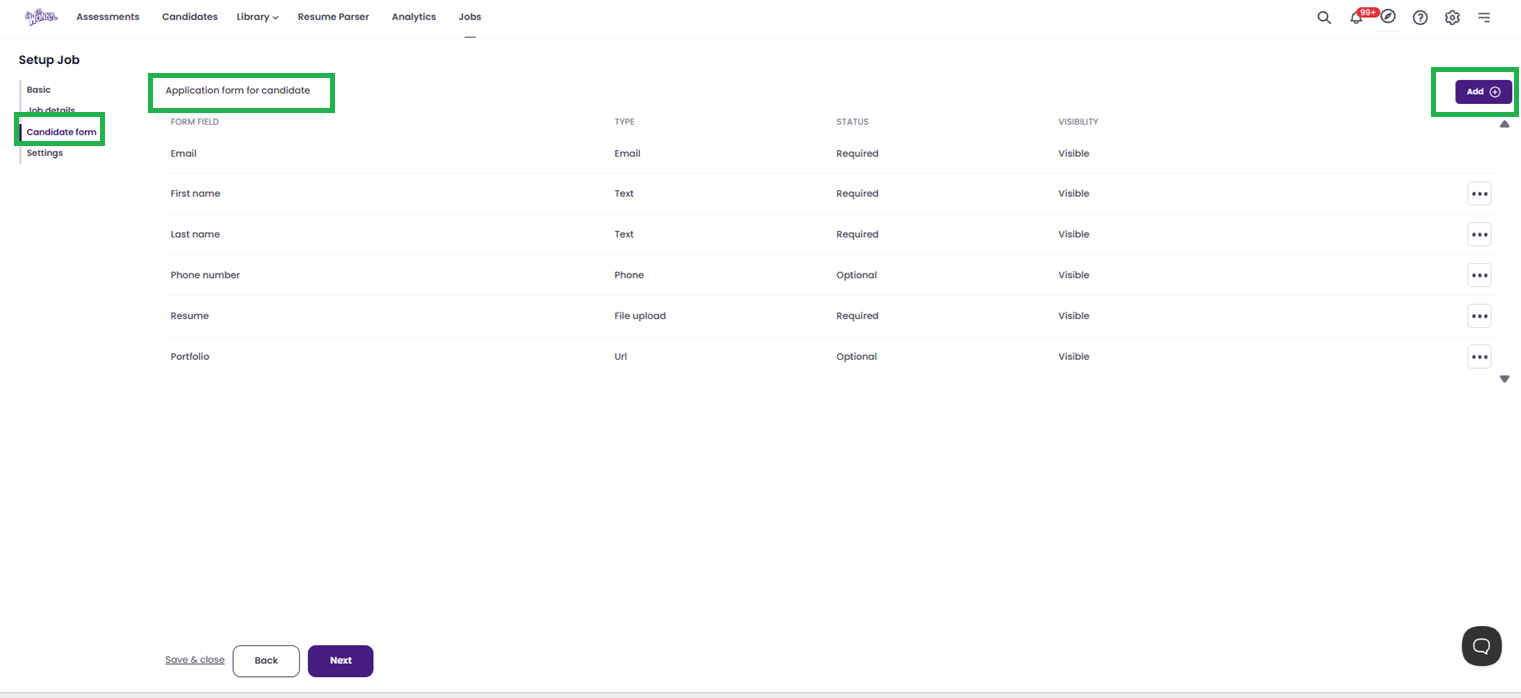

To add more fields:
- Click + Add.
- Enter the field label (e.g., "Years of Experience").
- Choose an input type (Checkbox, Date, Dropdown, File Upload, etc.).
- Check Mandatory if required.
-
Click Add to insert the new field.
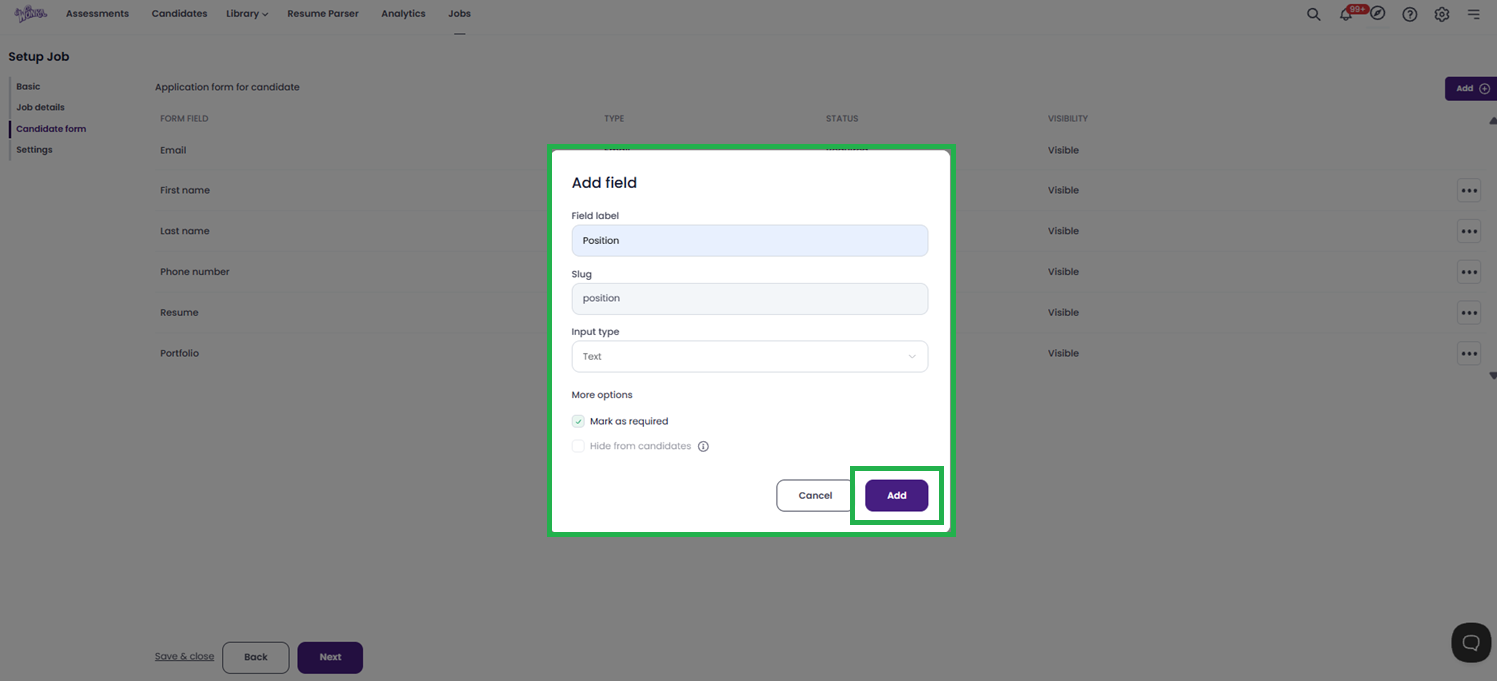

After customizing the form, click Next.
Step 6: Configure Settings & Publish
Here you’ll define notifications, publishing channels, and post-application actions.
- Recipient for notifications – Select who receives application alerts (e.g., hiring manager, recruiter).
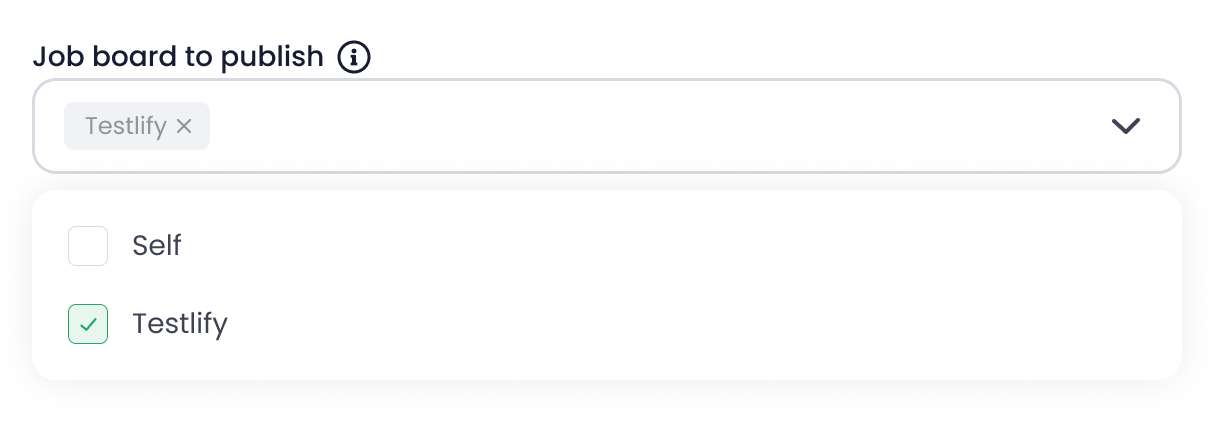
- Job Board to publish:
- Testlify – Posts your job on the Testlify job portal.
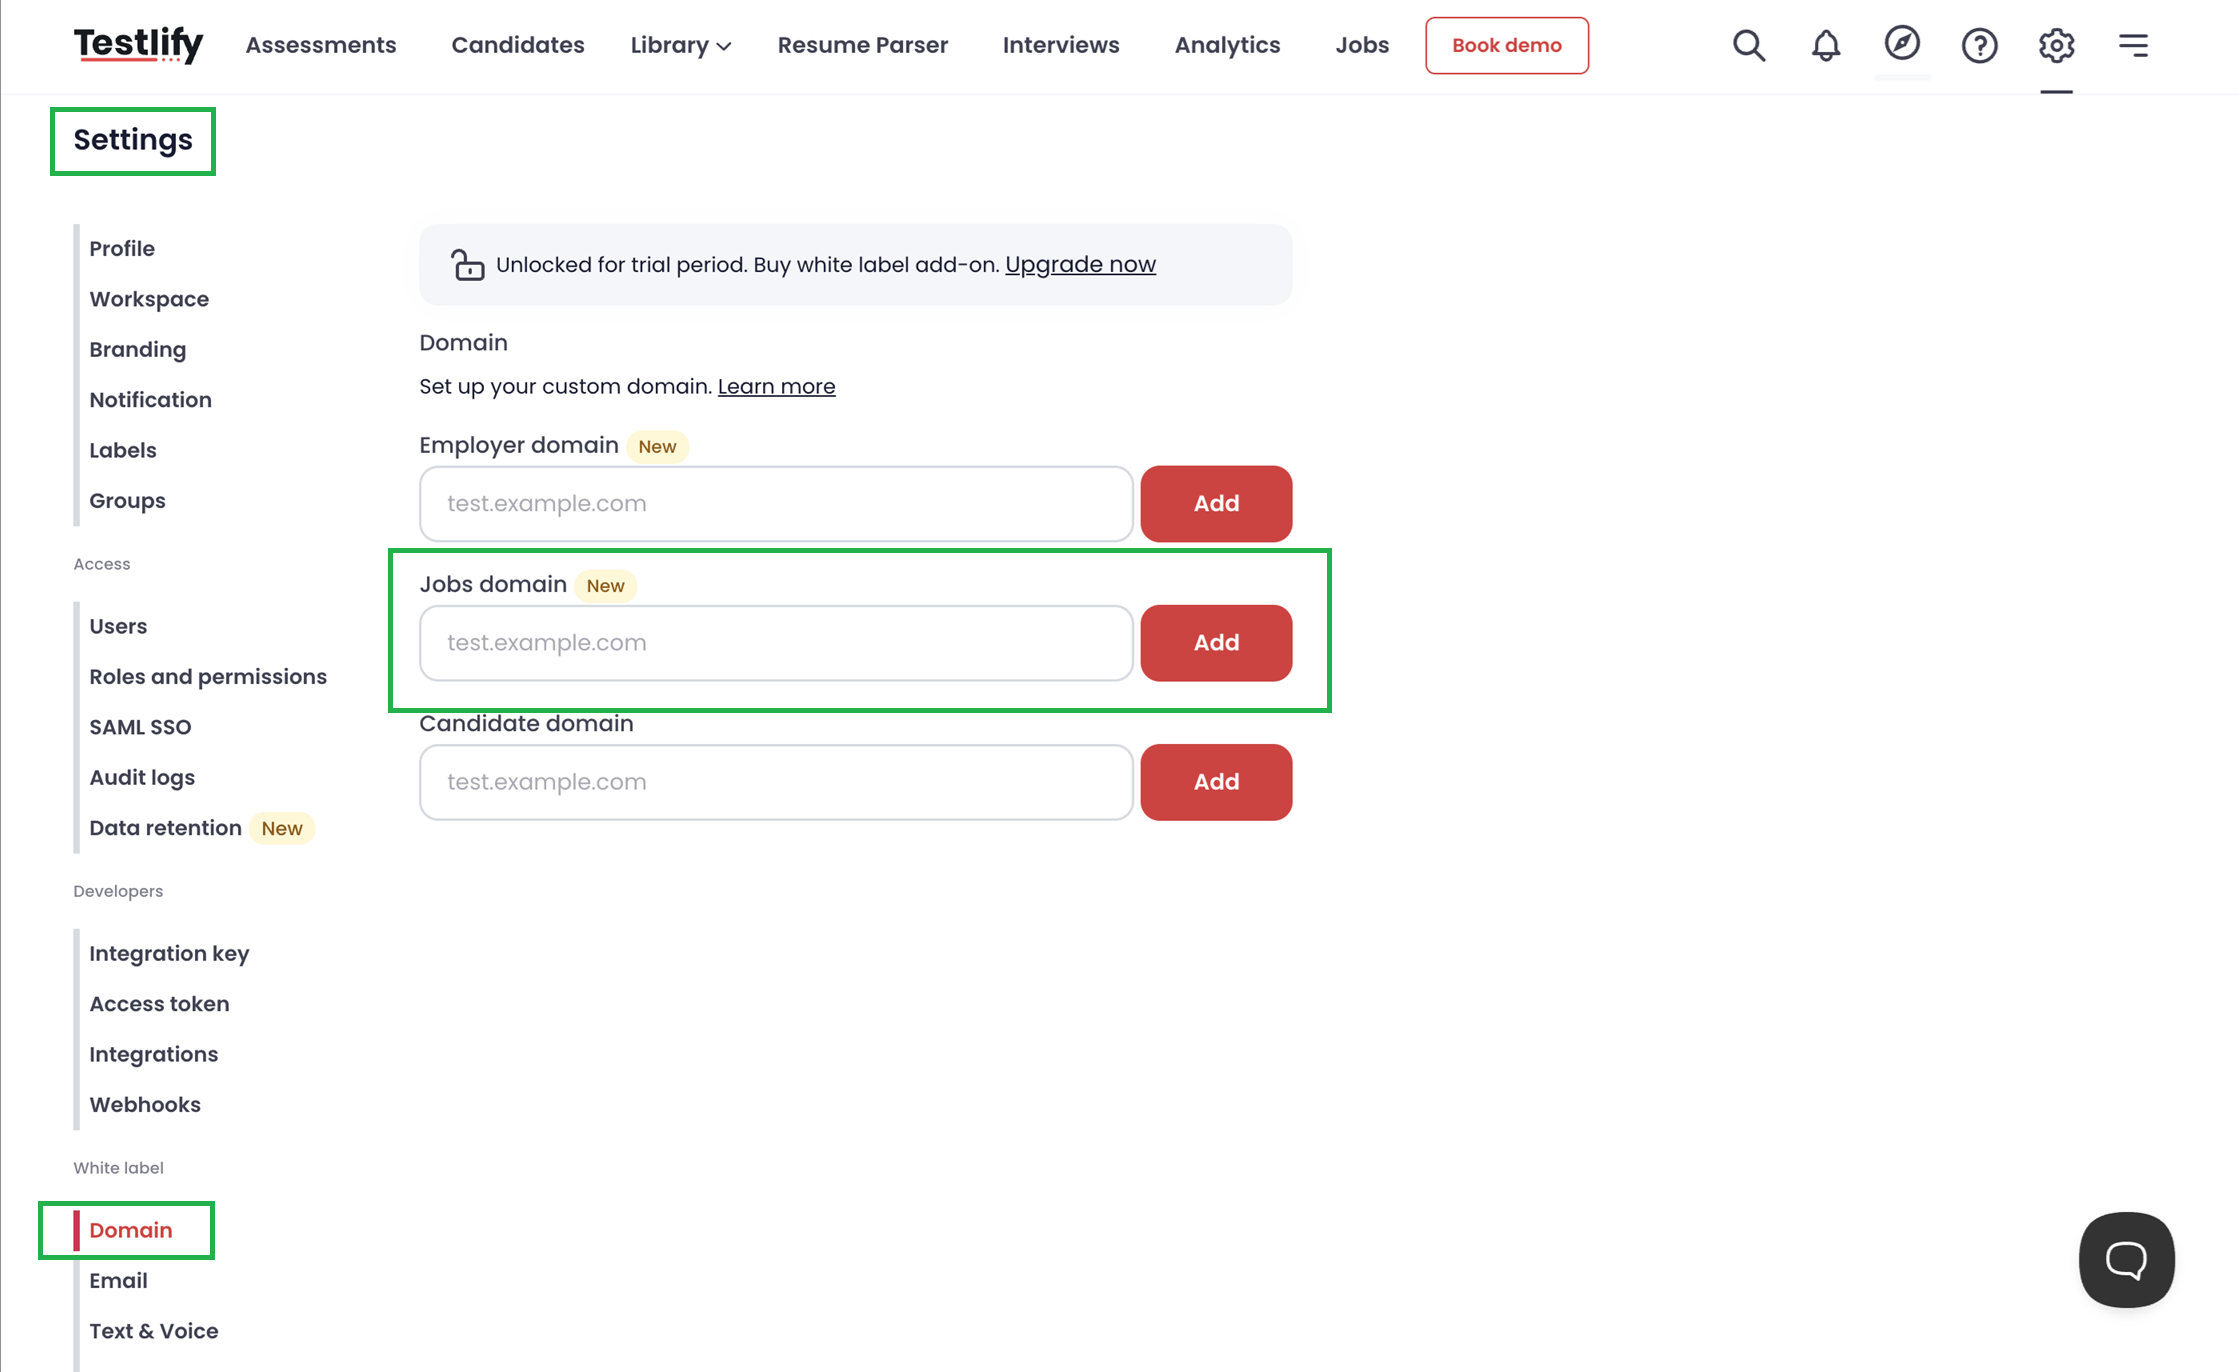
-
Self – Posts to your own job portal (requires white-label service + Domain, extra cost).
- Confirmation page after apply:
- Default confirmation page (standard Testlify thank-you message)
- Redirect to external link – Paste your custom URL
-
Invite to an assessment – Select an assessment from the dropdown. Candidates will receive an auto-invite immediately after applying.

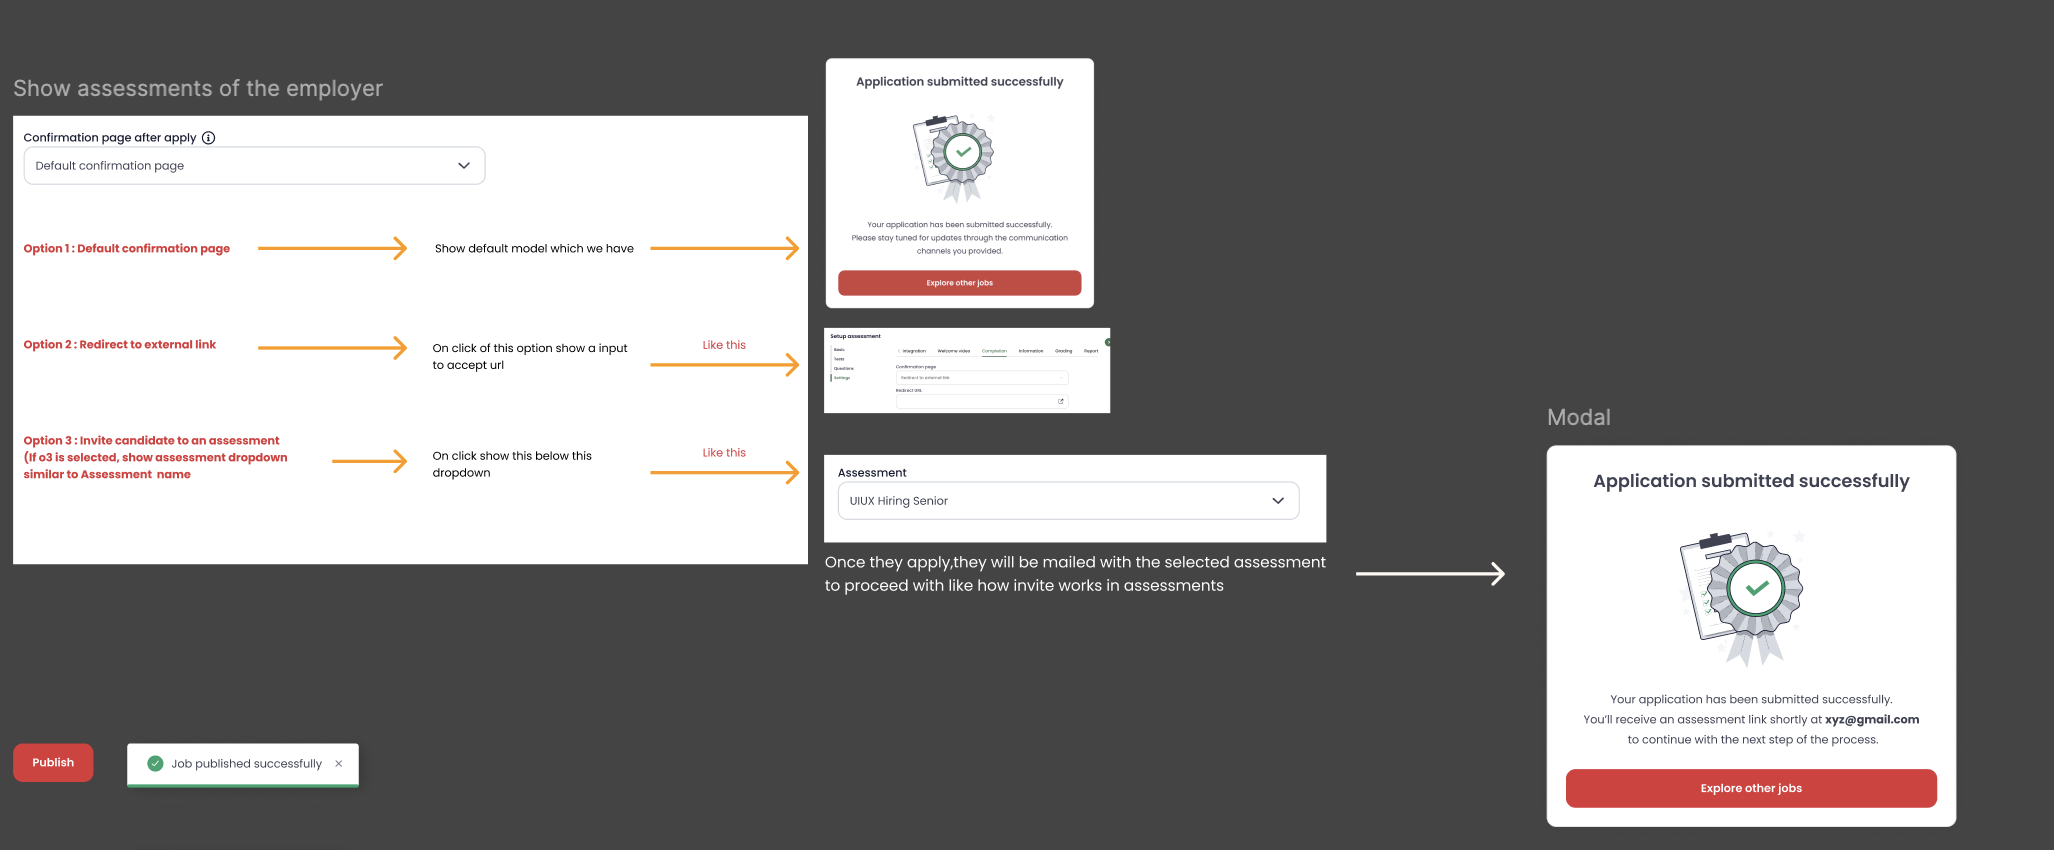


Finally, click Publish.
Step 7: View Your Published Job
Once published, your job will appear under the Jobs tab. You can see its status, posting date, and number of applicants.

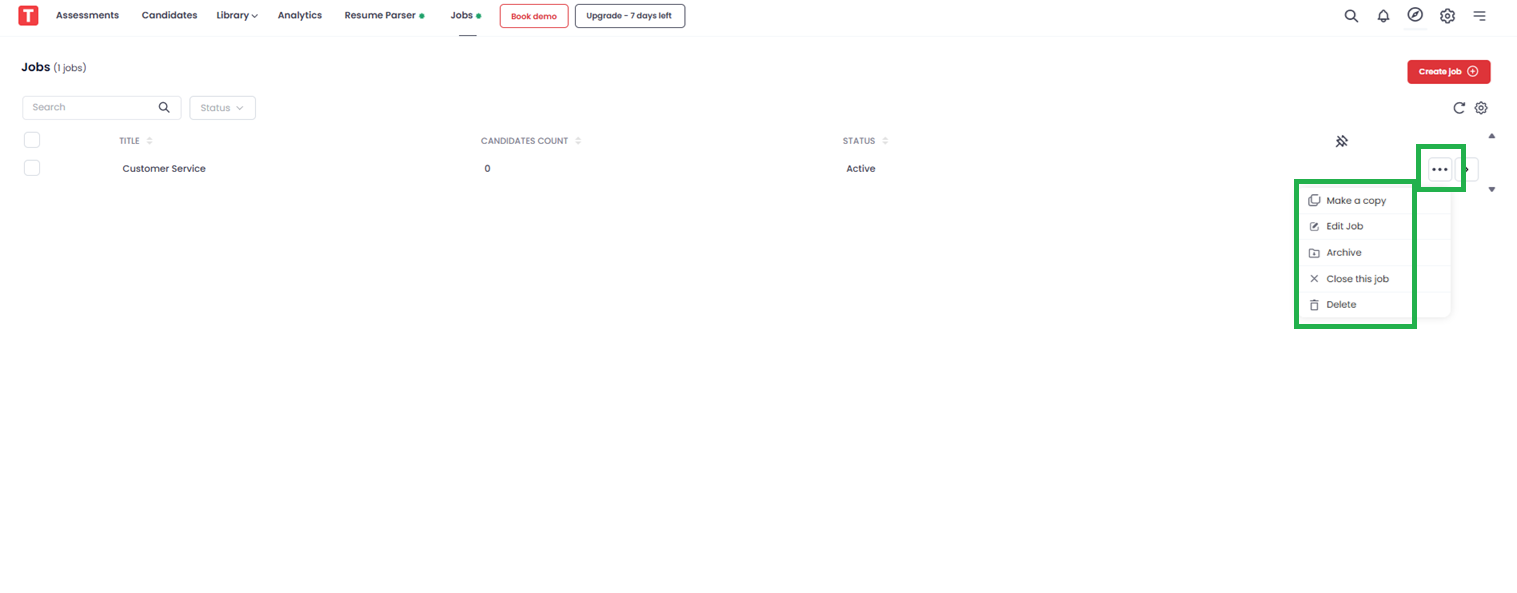
Step 8: Edit or Manage an Existing Job Post
On the Jobs page, locate your published job and click the three dots (⋮) to access these options:
- Make a copy – Duplicate the job post for a similar role
- Edit the job – Modify any details (title, description, form, etc.)
- Archive this job – Remove from active list without deleting
- Close this job – Mark as complete when hiring is done
-
Delete – Permanently remove the job post (cannot be undone).
Note: If jobs have pending applications that you haven’t acted on, the system will prevent deletion until those candidates are removed/deleted.

Step 9: View and Manage Candidate Applications
- Click on the job posting from the Jobs tab.
-
Go to the Candidates section to see all applicants and click on the candidate name to view more details.
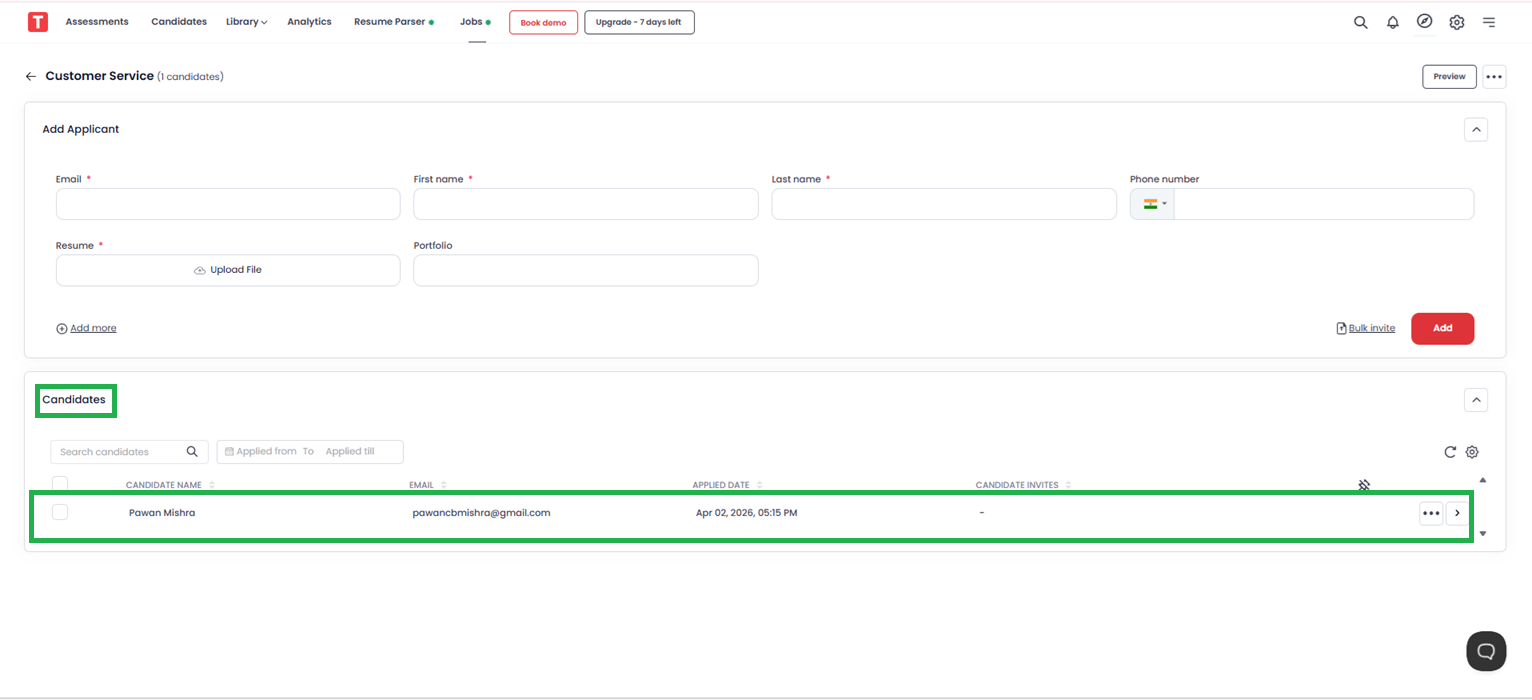

From here, you can view:
- Basic candidate information
- Uploaded resume
- Assessment status (attempted, invited, or pending)
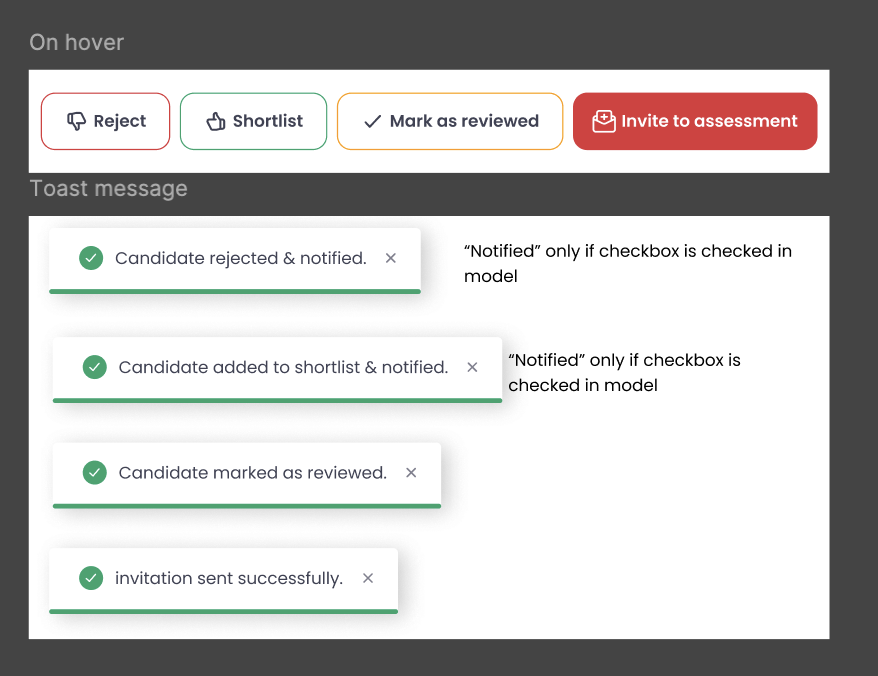
Click on a candidate’s name to access detailed options:
- Reject – Send a rejection email
- Shortlist – Send a shortlisted email
- Mark as viewed.
-
Invite for an assessment – Select an assessment name and send the invite


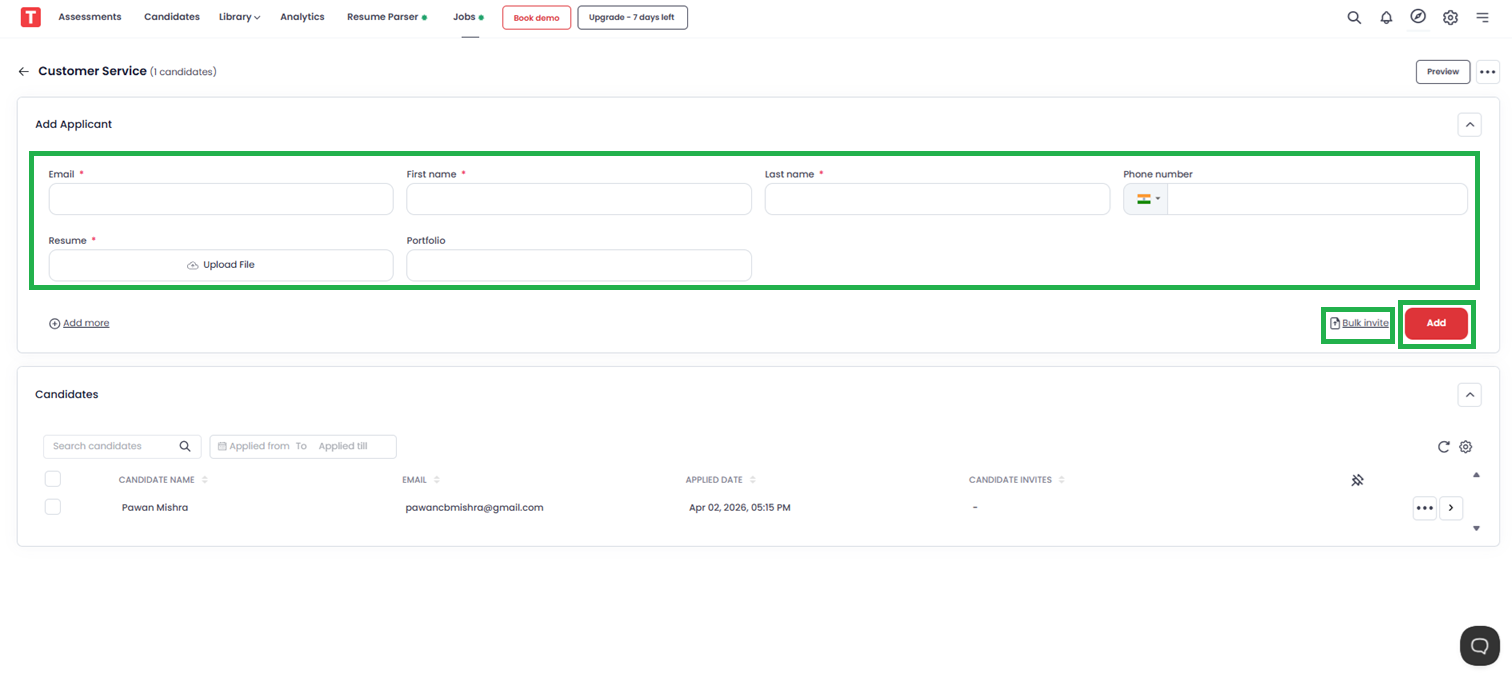
Step 10: Invite Candidates Manually or in Bulk
You don’t have to wait for candidates to apply—you can proactively invite them.
Single invite:
- Click on the job posting.
- Under the Invite section, enter candidate details (name, email, etc.).
- Click Add. The candidate will receive an email with the job details.
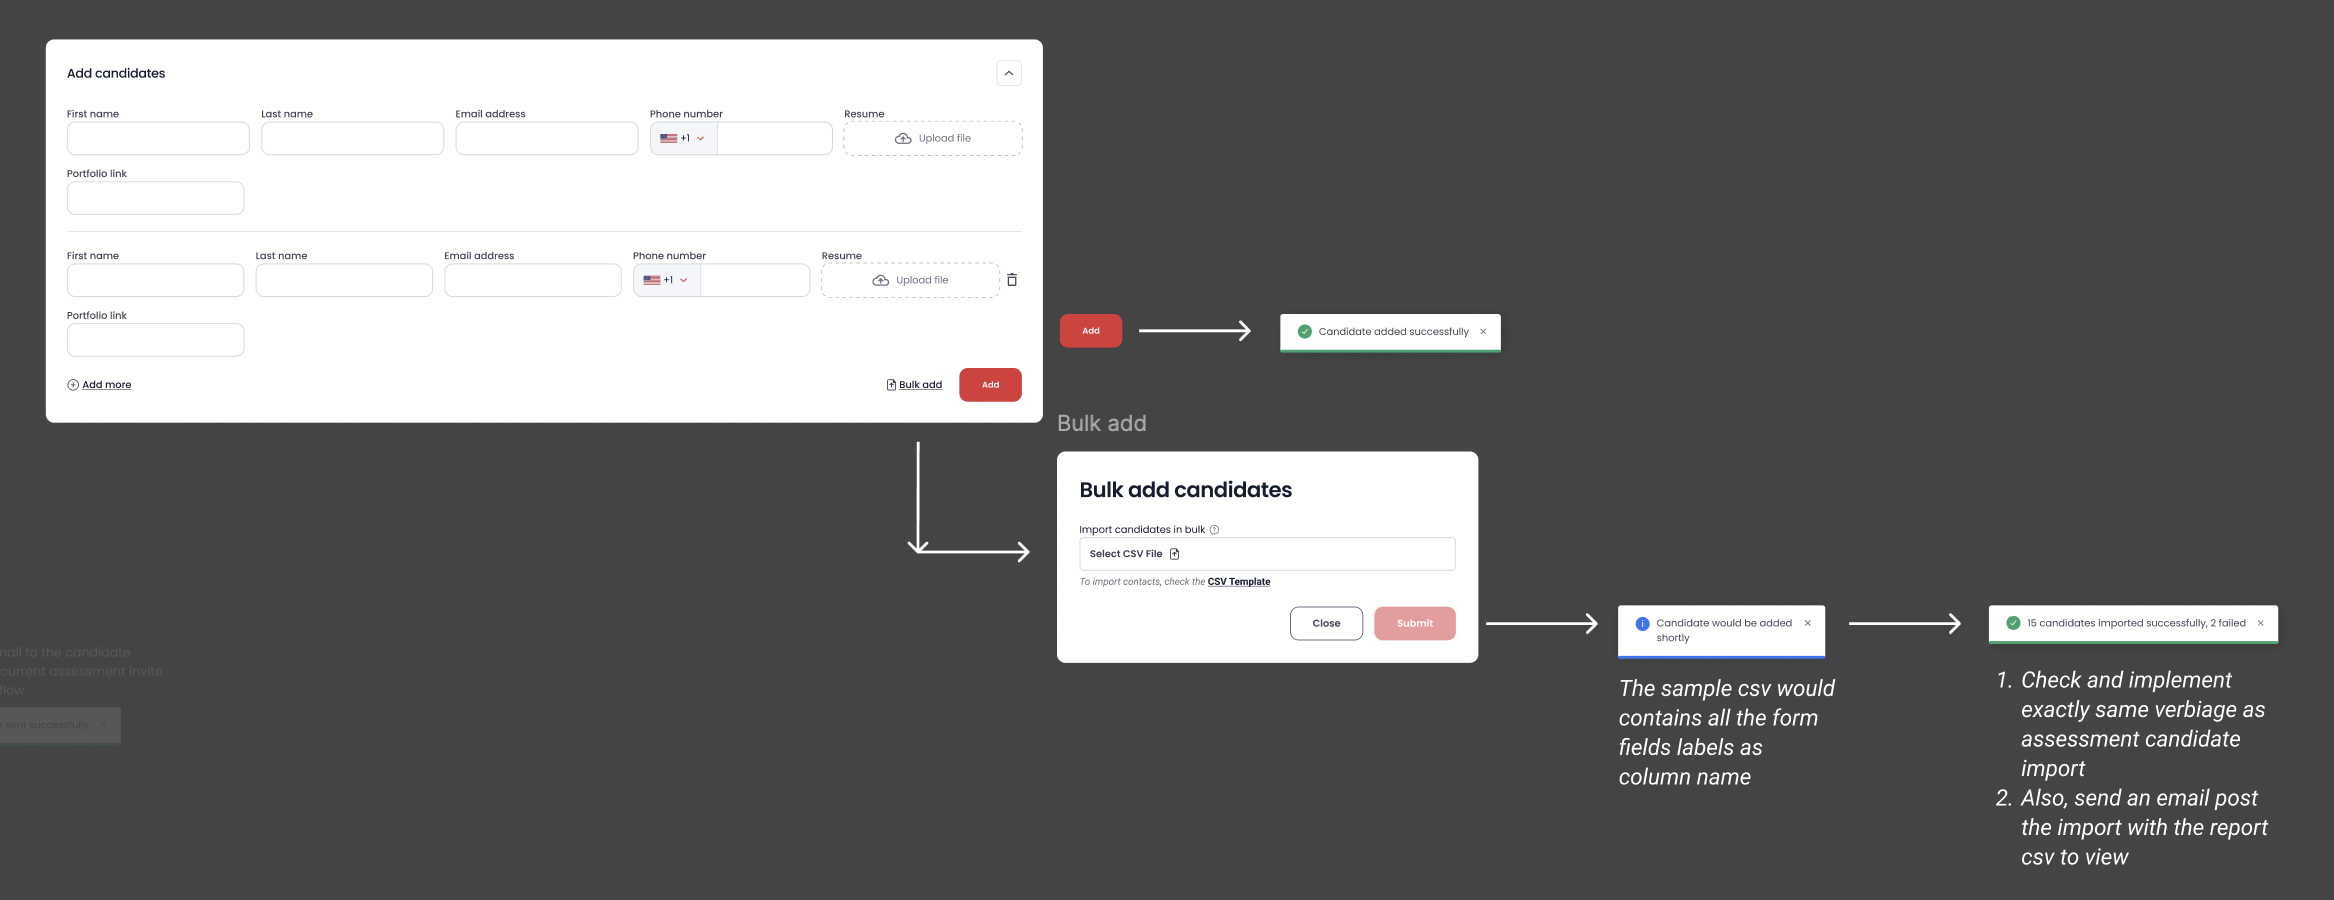
Bulk invite:
- Click Bulk download to get a CSV template.
- Fill in candidate details.
-
Upload the completed CSV file and click Add.


Step 11: View Assessment Invites for Candidates
Under the job post page, you can see which candidates were invited for:
- Single assessments
- Multiple assessments
To manage this, click the Settings icon beside the candidate and select Candidate Invite.


Step 12: Delete a Candidate from a Job Posting
- Click on the job posting.
- Under the Candidates section, find the candidate you want to remove.
- Click the three dots (⋮) and select Delete.
- You can also find other shortcuts here.
From the same menu, you can also invite the candidate to another assessment if needed.

🎯 Conclusion
Posting a job on Testlify is not just about listing an opening—it’s about building a structured, automated hiring pipeline. From customizable application forms and skill-based assessments to bulk candidate invites and real-time application management, Testlify gives you full control over your recruitment process.
By following this guide, you can:
- Publish jobs in minutes
- Automate post-apply assessments
- Manage candidates from a single dashboard
- Scale your hiring without chaos
📧 Need Further Assistance?
If you have questions or run into any issues, please reach out to our support team:
Email: support@testlify.com
We’re happy to help you make the most of Testlify.