Master the Hiring: How to Create and Publish a Job on Testlify
Posting a job on Testlify is more than just listing an opening; it is the start of a streamlined, data-driven hiring journey. From defining the role to collecting standardized candidate information and setting up notifications, our step-by-step process ensures you don't miss a single detail. Follow this guide to go from a blank page to a published job posting—and learn how to manage applicants once they start rolling in.
Step-by-Step Guide
Step 1: Log in to Your Workspace
Go to app.testlify.com and enter your email address to receive a One-Time Password (OTP). Use the OTP to securely log in to your dashboard.
Step 2: Access the Jobs Section
On your workspace homepage, locate and click on Jobs in the main navigation menu. This will take you to the overview of your current job postings.

Step 3: Start a New Job
Click the Create Job button.

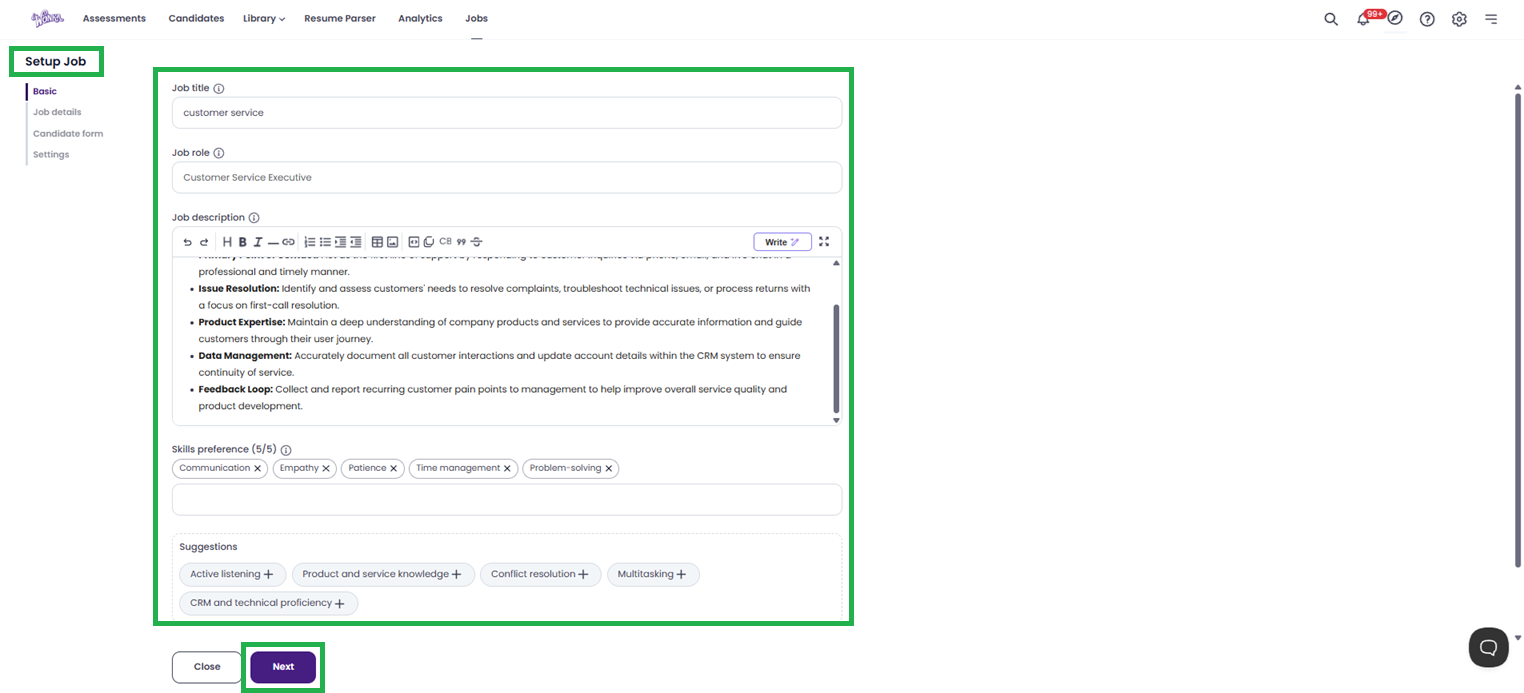
Step 4: Set Up Job Basic
You will now be on the Setup Job Basic page. Fill in the following details:
- Job Title: Enter the title of the position (e.g., "Marketing Specialist").
- Job Role: Select or specify the function of the role.
- Job Description: Use the editor to outline responsibilities and requirements.
- Skills Preference (0/5): Add up to five key skills required for the role. This helps in matching candidates later.
-
Job Note (Optional): Add any internal notes for your team (candidates will not see this).
Once all fields are filled, click Next.

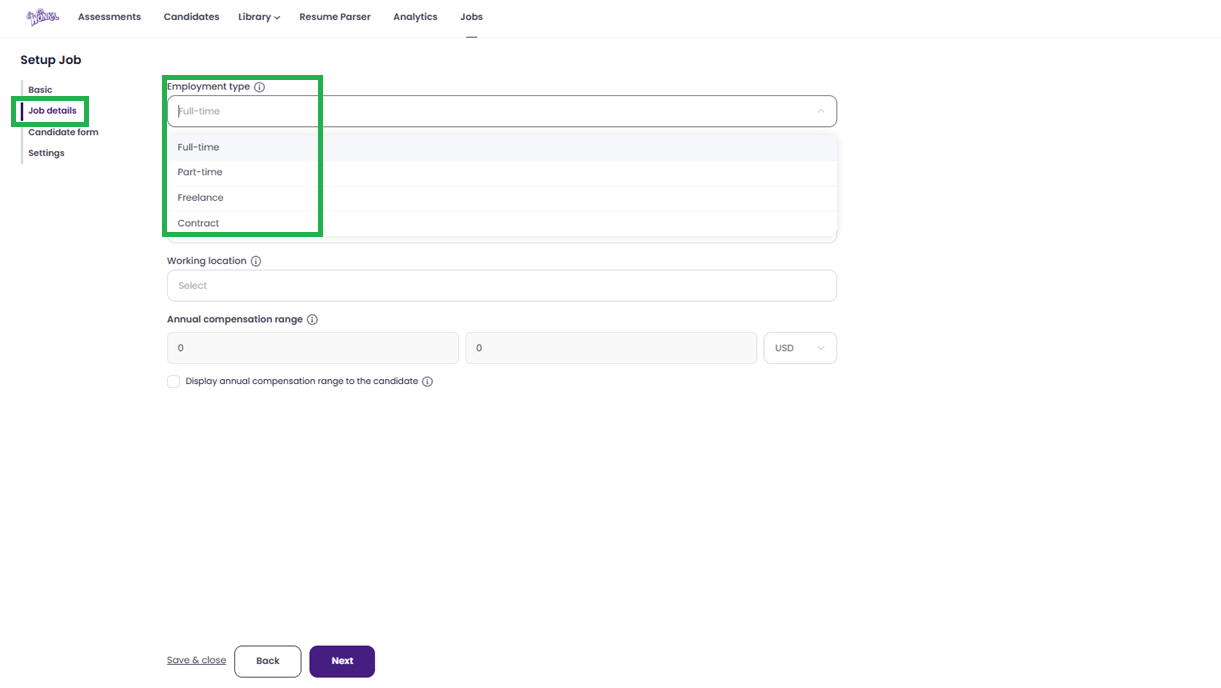
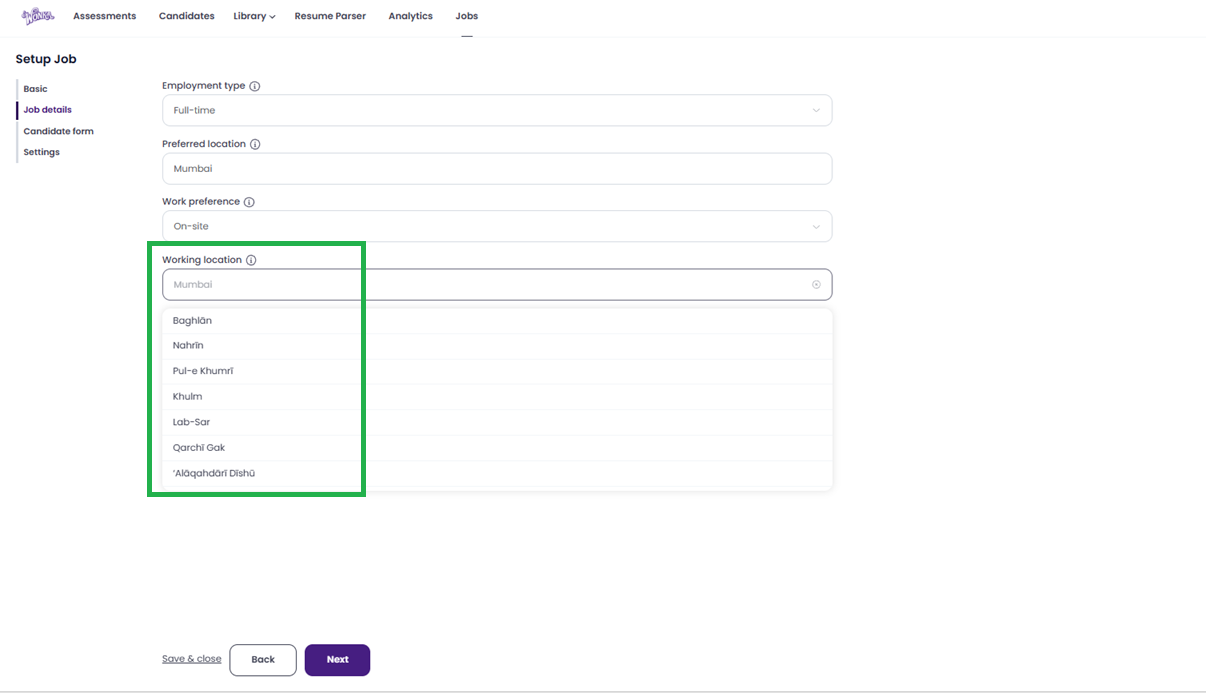
Step 5: Fill in Job Details
On the Job Details page, you need to define the logistics of the position:
-
Employment Type: Choose between Full time, Part time, Freelance, or Contract.
-
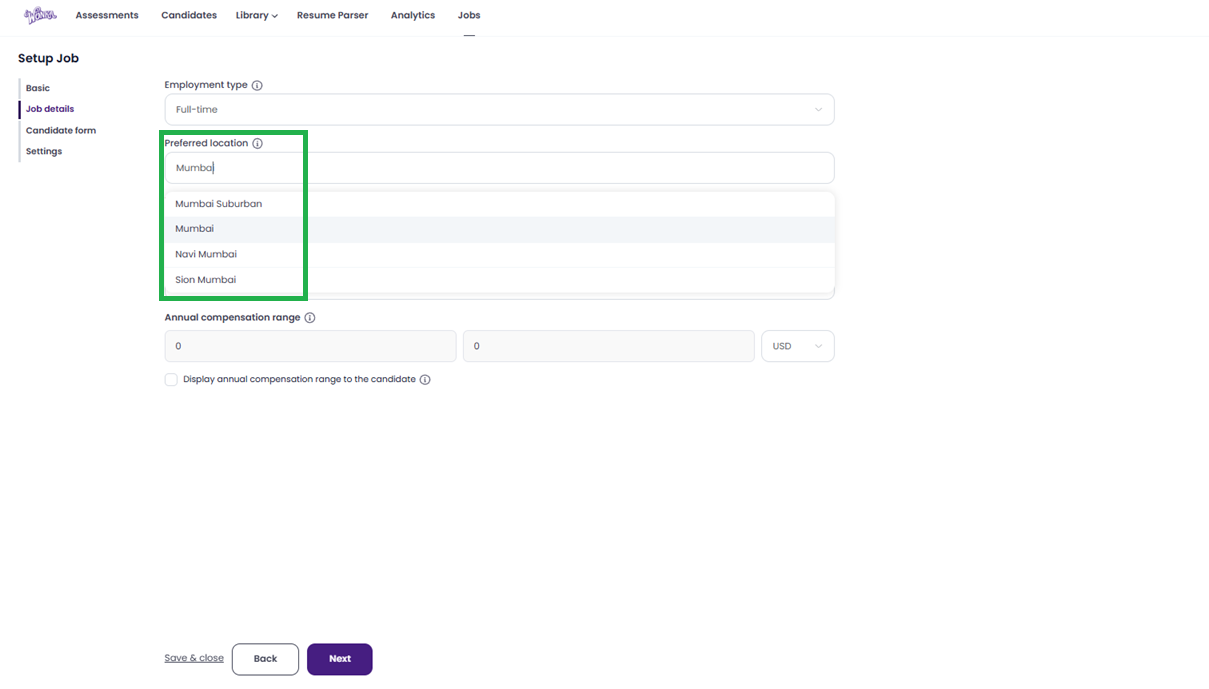
Preferred Location: Enter the city, region, or country for the job.
-
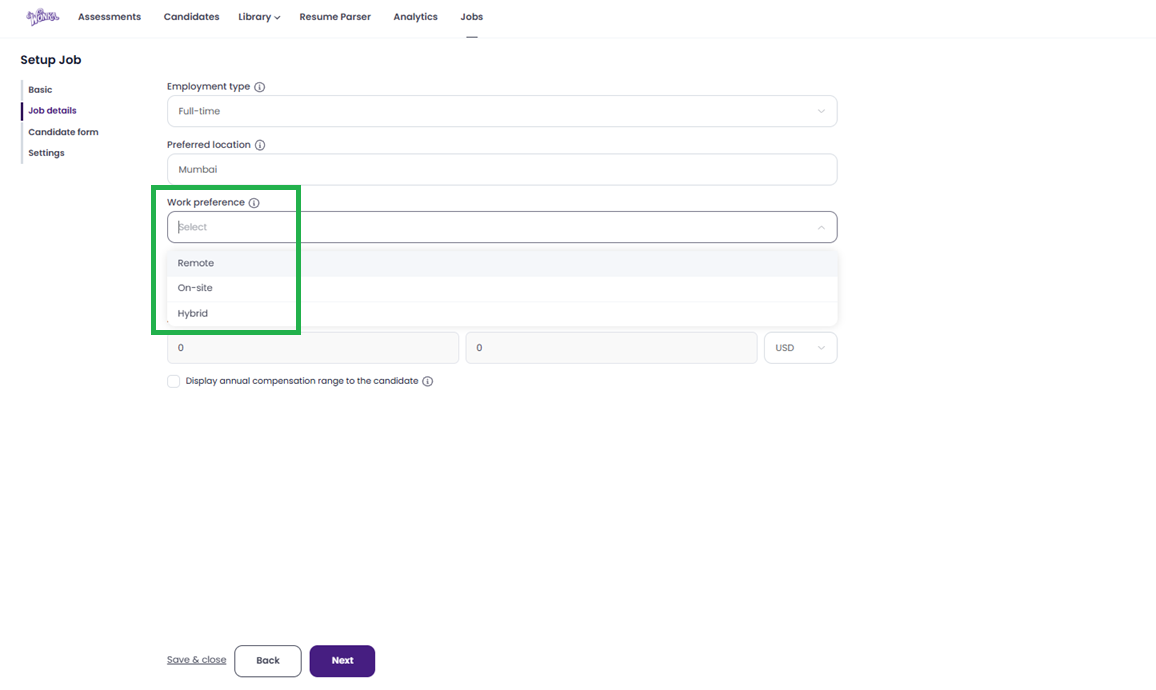
Work Preference: Select Remote, Onsite, or Hybrid.
-
Working Location: This field appears only if you selected Remote or Hybrid. Enter the specific location requirements or time zone if applicable.
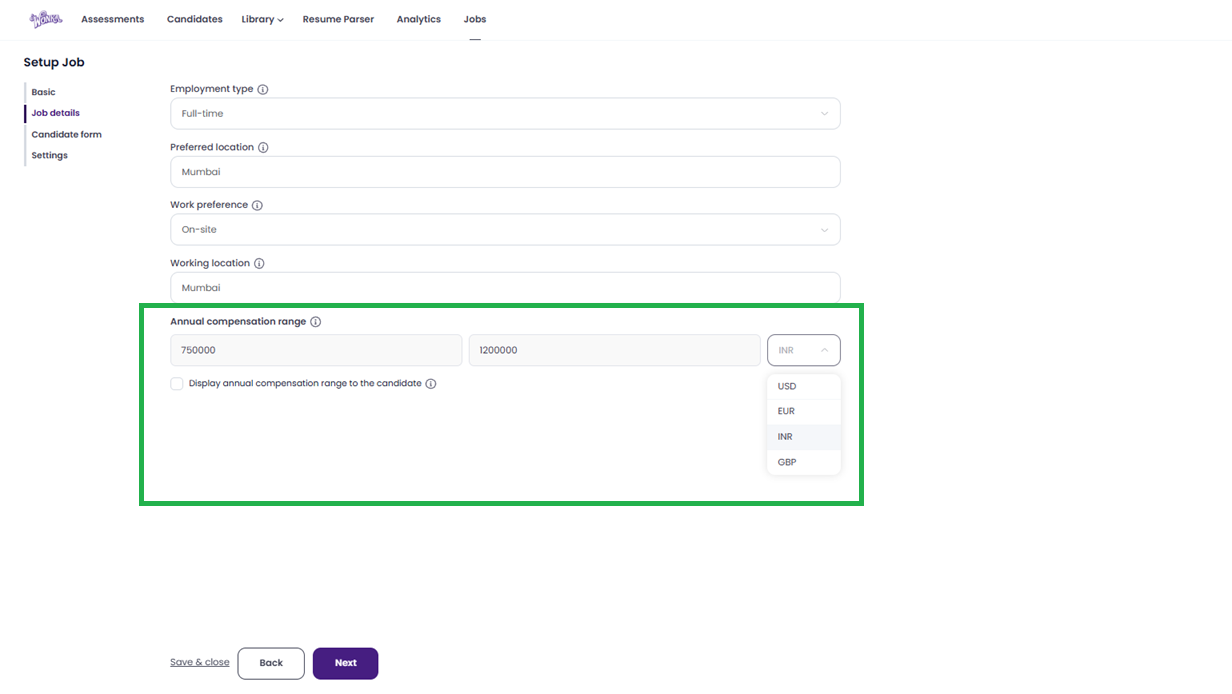
- Annual Compensation Range: Select the currency and enter the minimum and maximum salary range.
-
Tick the box if you want to Display annual compensation range to the candidate on the job post.
After reviewing these details, click Next.
-


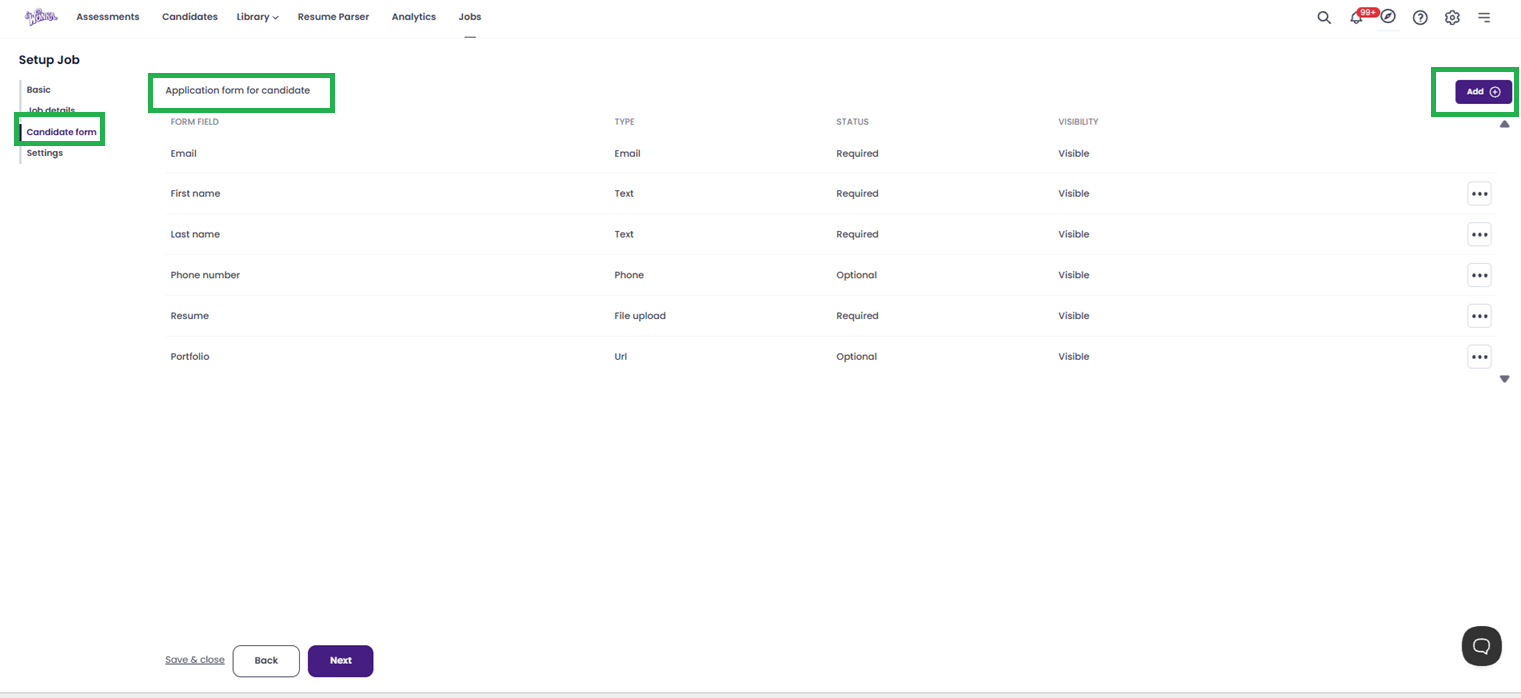
Step 6: Configure the Candidate Form
You will now land on the Candidate Form page. This is where you decide what information you collect from applicants.
- The form will have default fields (like Name, Email). To add more:
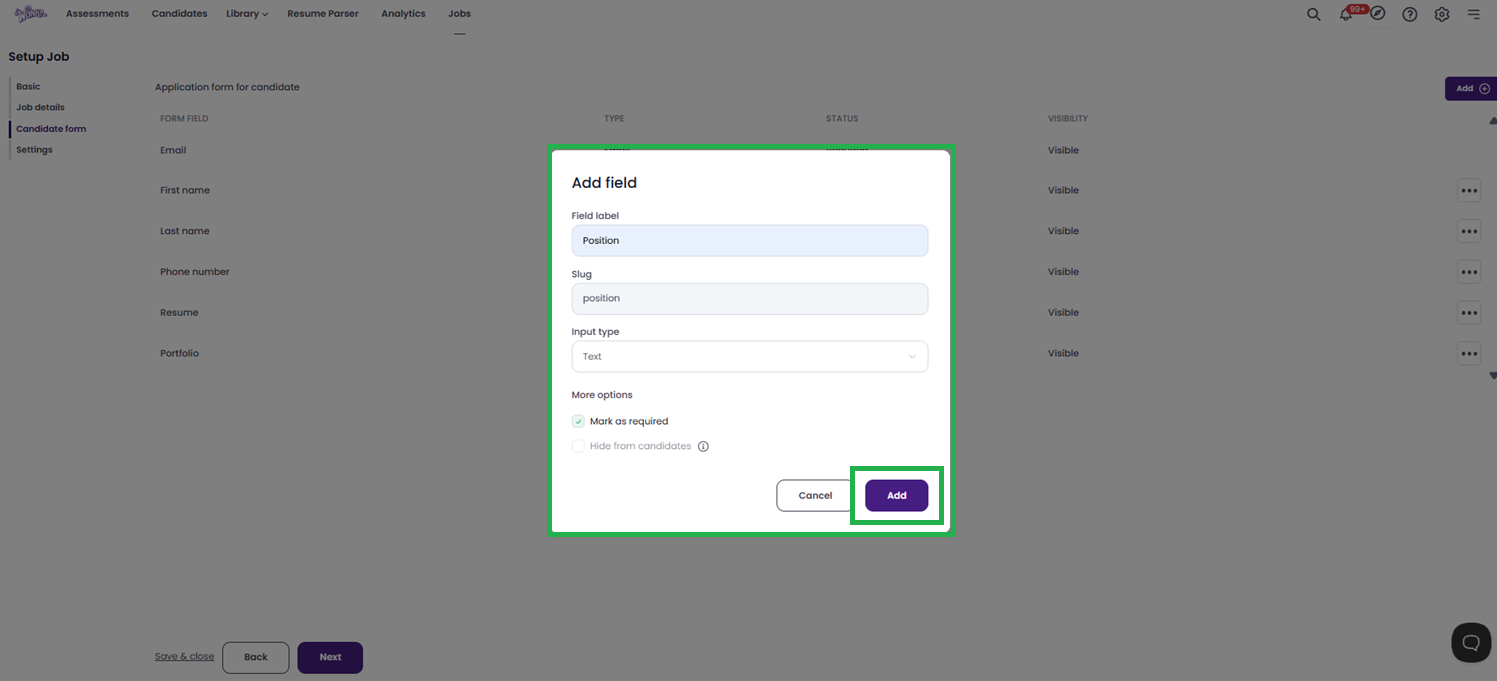
- Click on Add.
- Enter the Field Label (e.g., "Portfolio Link").
- Select the Input Type (e.g., Text, File Upload, Dropdown).
- Choose whether to mark it as Required.
-
Choose whether to Hide from candidates (useful for internal tracking fields).
-
Once you have added all necessary fields, click Next.


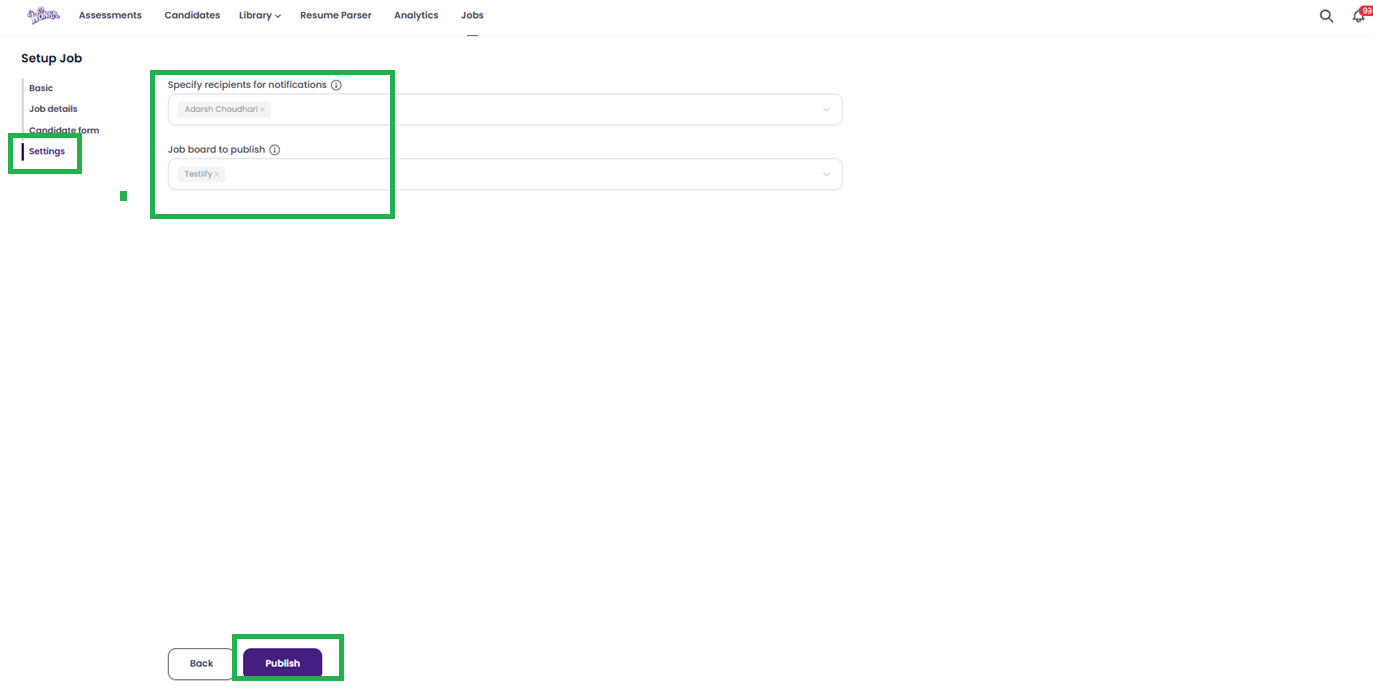
Step 7: Adjust Job Settings and Publish
On the Job Setting page, configure the final details:
- Specify recipients for notifications: Select the users from your workspace who should receive an email alert whenever a new candidate applies.
- Job board to publish: Select Testlify (Note: Integration with external job boards may be available in the future).
-
Once everything is set, click Publish.

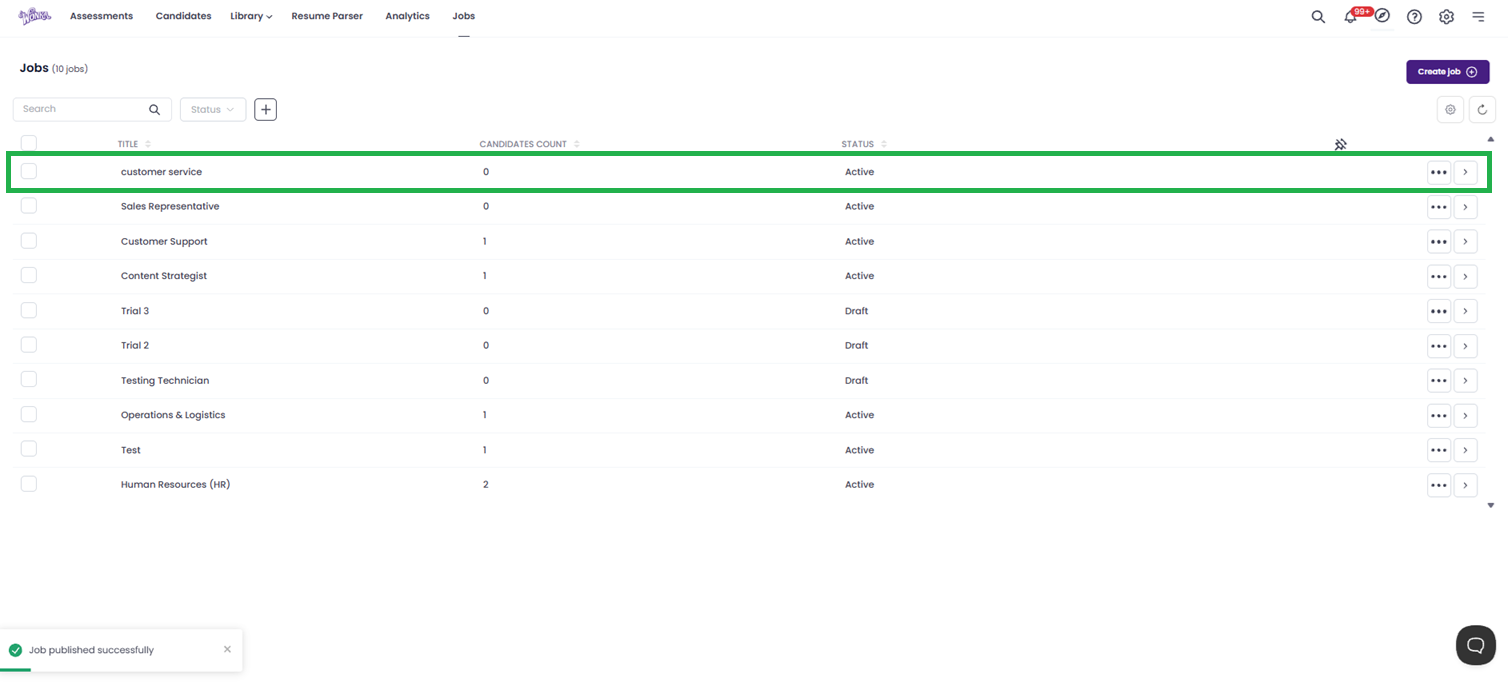
Step 8: Manage Applicants
After publishing, you will be redirected to the job posting page. Here you can view the candidates who have applied.
-
Click on a Candidate Name to view their full entry.
From this detailed view, you can:
- View the candidate's details and form submissions.
-
Download their resume.
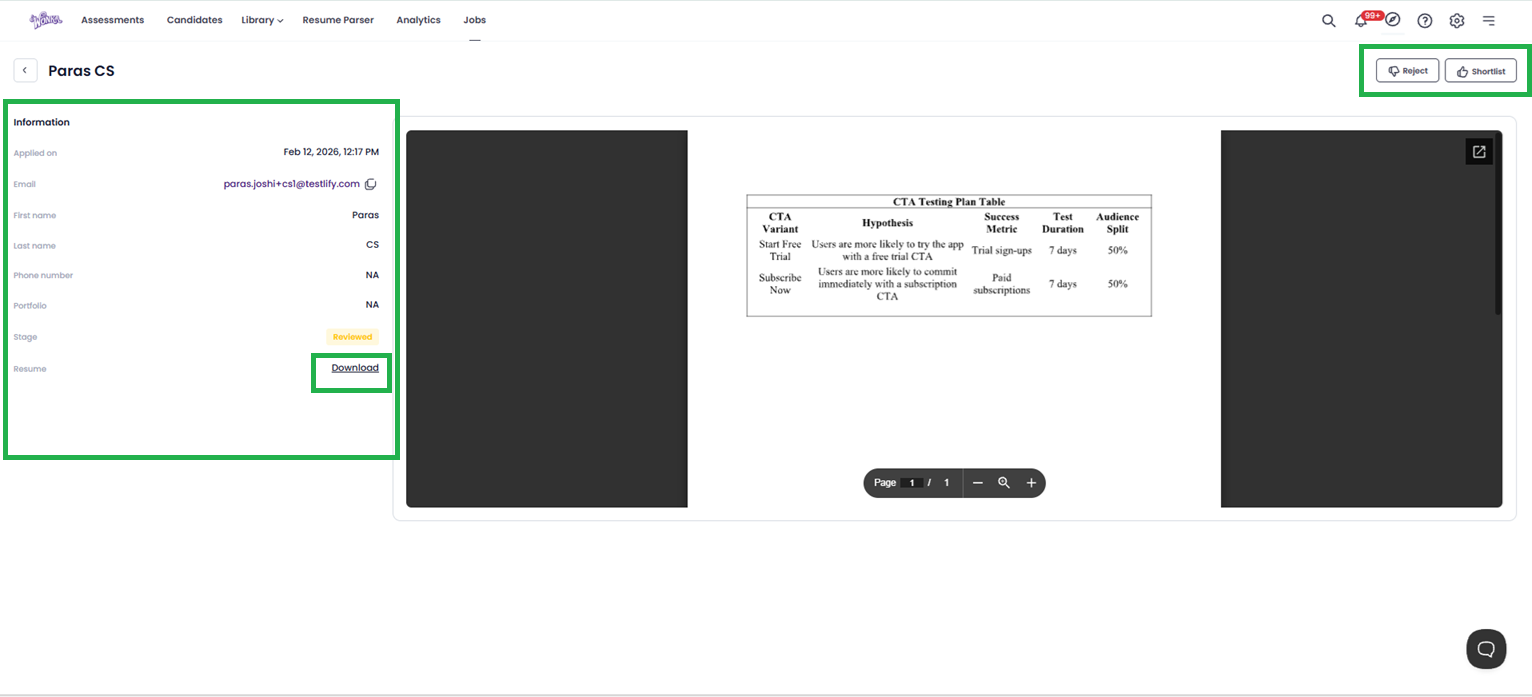
-
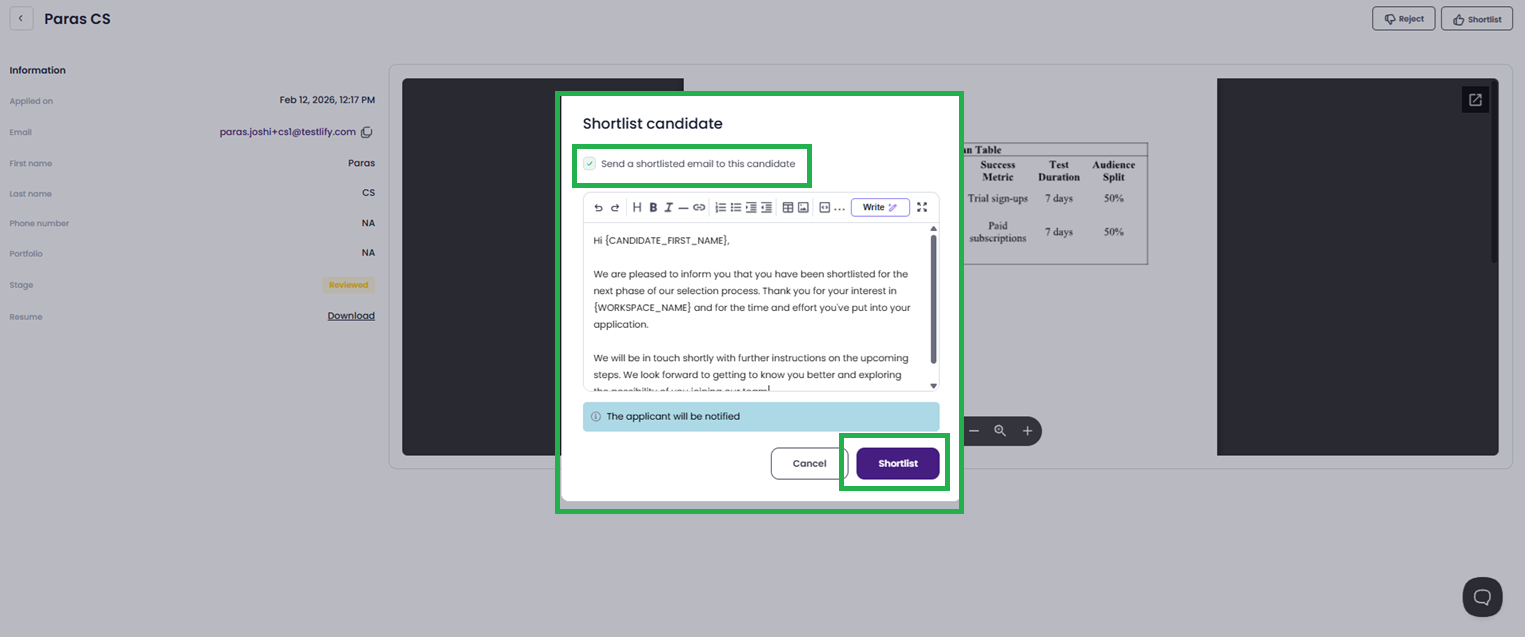
Shortlist: Clicking this will automatically send an email notification to the candidate informing them they have been shortlisted.
-
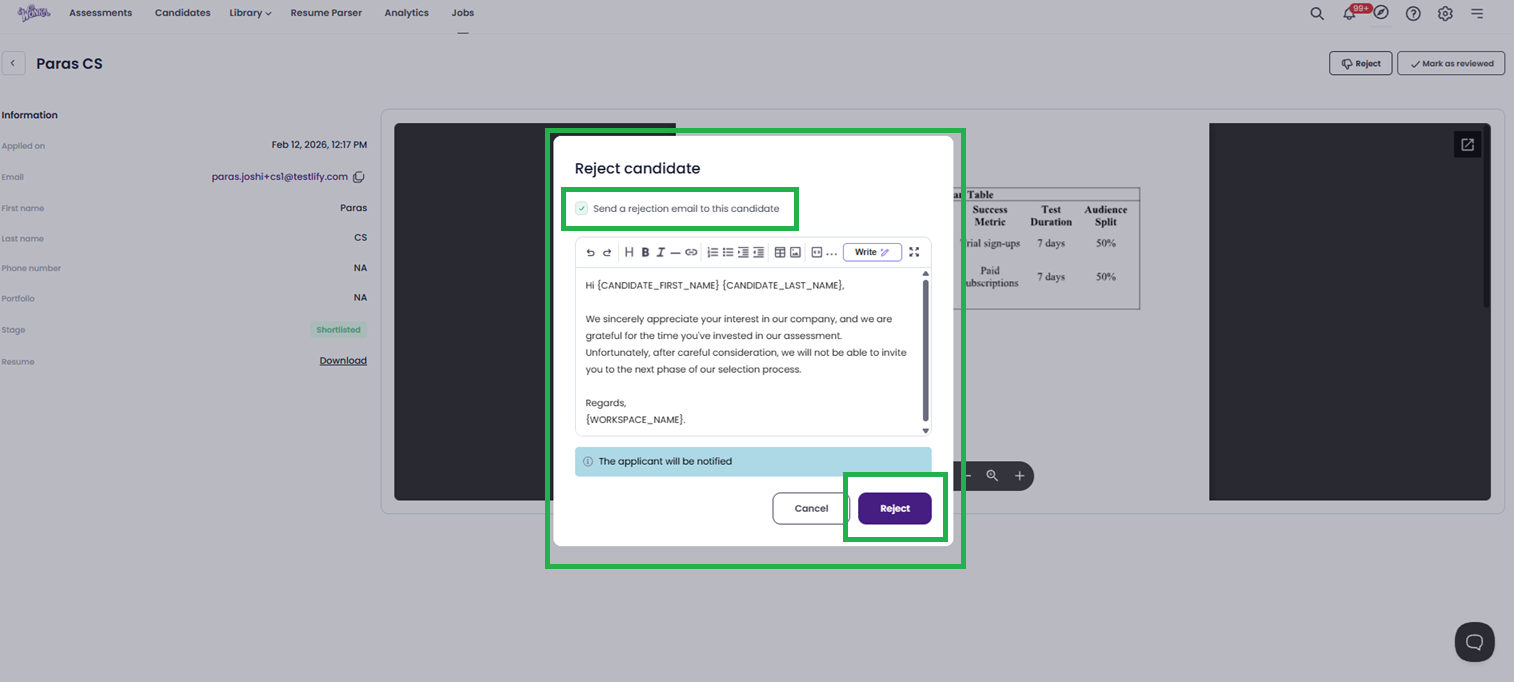
Reject: If you choose to reject, the system will ask if you want to send an email notification to the candidate. Confirm your choice to finalize the rejection.


Step 9: Invite for Assessment
If you want to proceed with a candidate (whether they applied via the form or you found them elsewhere), you can manually invite them to take an assessment:
Conclusion
Congratulations! You have successfully posted a job and set up your candidate management pipeline on Testlify. By using this structured approach, you ensure that every applicant provides the information you need, and your team stays updated on new applications in real-time. Happy hiring!
Frequently Asked Questions (FAQ)
Q: Can I edit a job after it has been published?
A: Yes, you can. Navigate to the Jobs section, find the published job, and click on the edit/settings icon to make changes to the description, details, or candidate form.
Q: What happens if I don't select a recipient for notifications?
A: If no specific user is selected in the "Specify recipients" field, notifications may not be sent. We recommend always selecting at least one workspace member to ensure you don't miss new applicants.
Q: The "Working Location" field is grayed out. Why?
A: The "Working Location" field is only active when you select Remote or Hybrid as the Work Preference. If you selected "Onsite," this field is disabled by default.
Q: Can candidates see the Skills Preference I set?
A: The Skills Preference (0/5) is primarily for your internal matching and filtering algorithms. It helps you track required skills but is not always prominently displayed as a list to the candidate, depending on your template settings.
Q: I rejected a candidate by accident. Can I undo this?
A: Unfortunately, rejection actions are usually final to maintain data integrity. However, you can manually change the candidate's status back to "New" or "In Review" from their profile if you have the correct permissions.
Need Further Assistance?
If you encounter any issues or have questions not covered in this guide, please reach out to our support team at support@testlify.com.