Resume Parser
Testlify's Resume Parser is designed to streamline and automate the resume screening process, enabling recruiters to effortlessly evaluate a high volume of inbound job applications. With the Resume Parser, employers can quickly screen candidates by parsing resumes directly from their Applicant Tracking System (ATS).
Watch the detailed setup video here:
Step 1: Navigating to the Resume Parser
To get started with the Resume Parser feature, follow these steps:
- Navigate to the Resume Parser:
- You can find the Resume Parser option in the top navigation bar of your Testlify dashboard.
- If it's not directly visible, it may be nested within the Library dropdown menu.

Step 2: Connect Your ATS
Before you can start using the Resume Parser, you must connect your ATS (Applicant Tracking System) account.
- Before ATS Connection:
- If your ATS isn't connected yet, you will see a prompt: "Automate inbound chaos. Once and forever."
- You will also see a "Connect ATS" button.

- ATS Supported:
- Currently, Testlify supports the integration with Greenhouse ATS. Once you connect your ATS account, you will see a "ATS connected successfully. Jobs are synced." message confirming the successful integration.

Step 3: Set Up Job Listings
After ATS integration, the Resume Parser will automatically pull job data from your ATS.
- Job List:
- The table will display:
- Job title.
- Number of applied candidates (broken down by high, medium, low scores).
- Job status (Not setup, Ongoing, Closed, Archived).
- Created Date.
- The table will display:

-
Job Status:
The possible statuses of a job are:
- Not setup – Jobs that need to be set up.
- Ongoing – Active jobs that are accepting candidates.
- Closed – Jobs that are no longer accepting applications.
- Archived – Archived jobs that are no longer in active use.
-
Empty State (Before ATS Connection):
If there are no candidates available, you will see a message: "No candidates found in your ATS yet."
You will also have the option to Retry fetching candidates to sync data from your ATS.

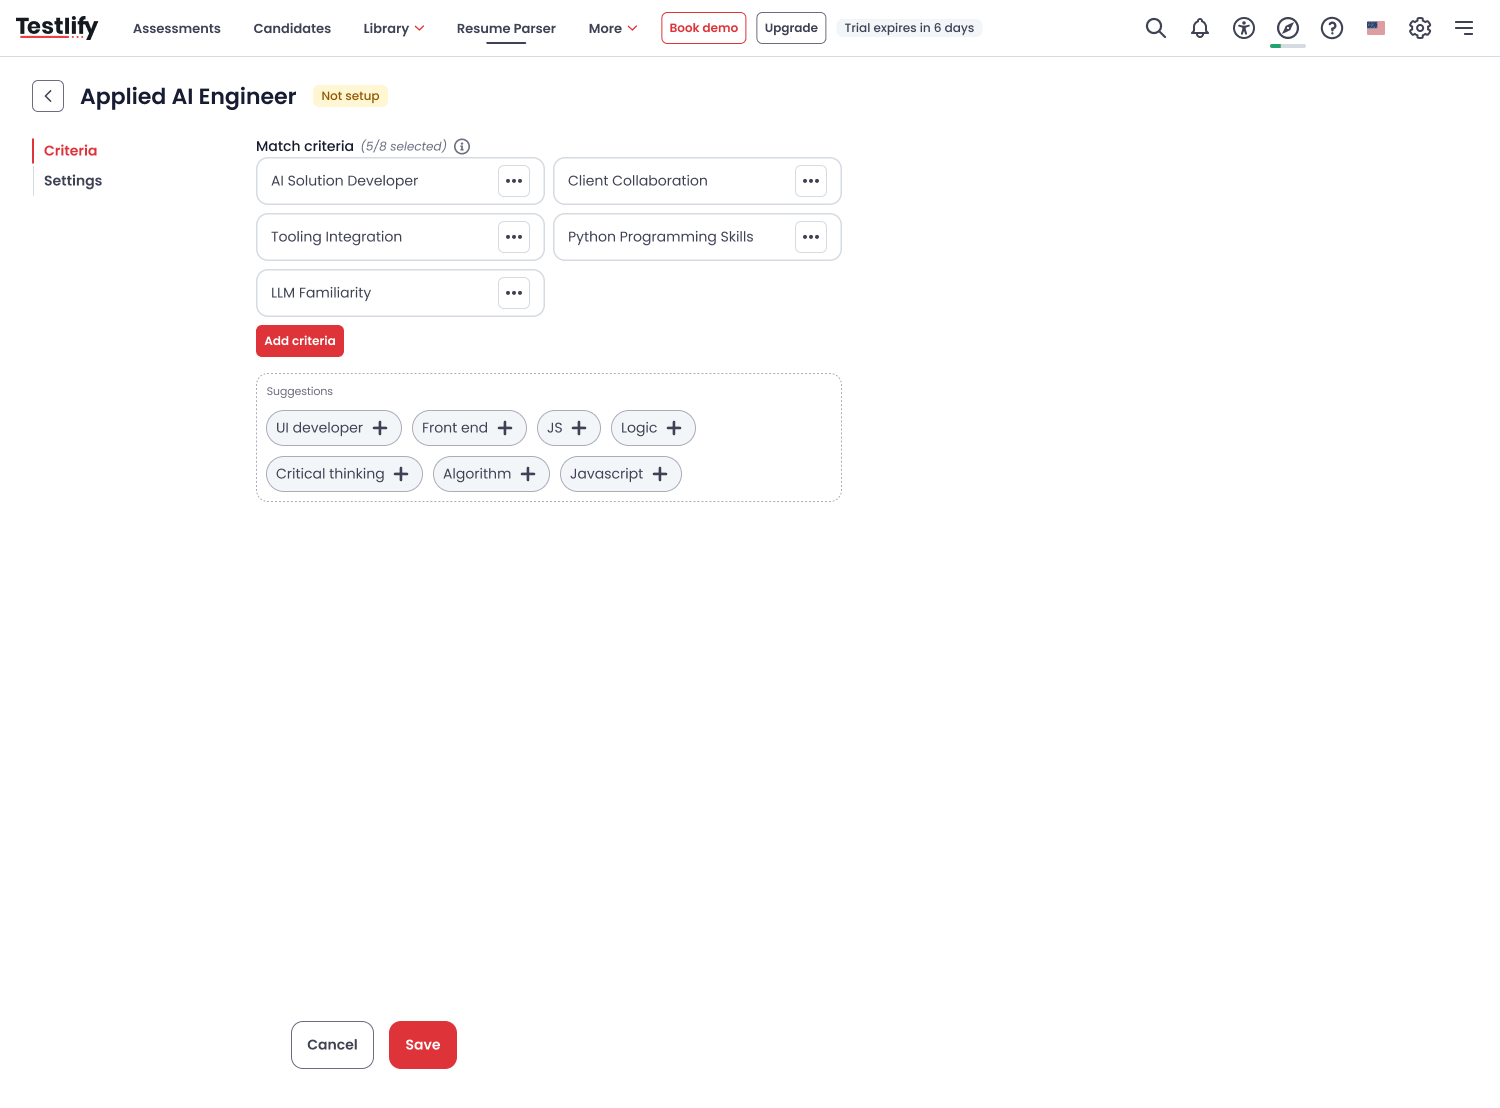
Step 4: Setting Up Criteria
The Resume Parser uses AI to evaluate candidates based on job-specific criteria.
- Matching Criteria:
- AI will automatically suggest 10-15 criteria based on the job role.
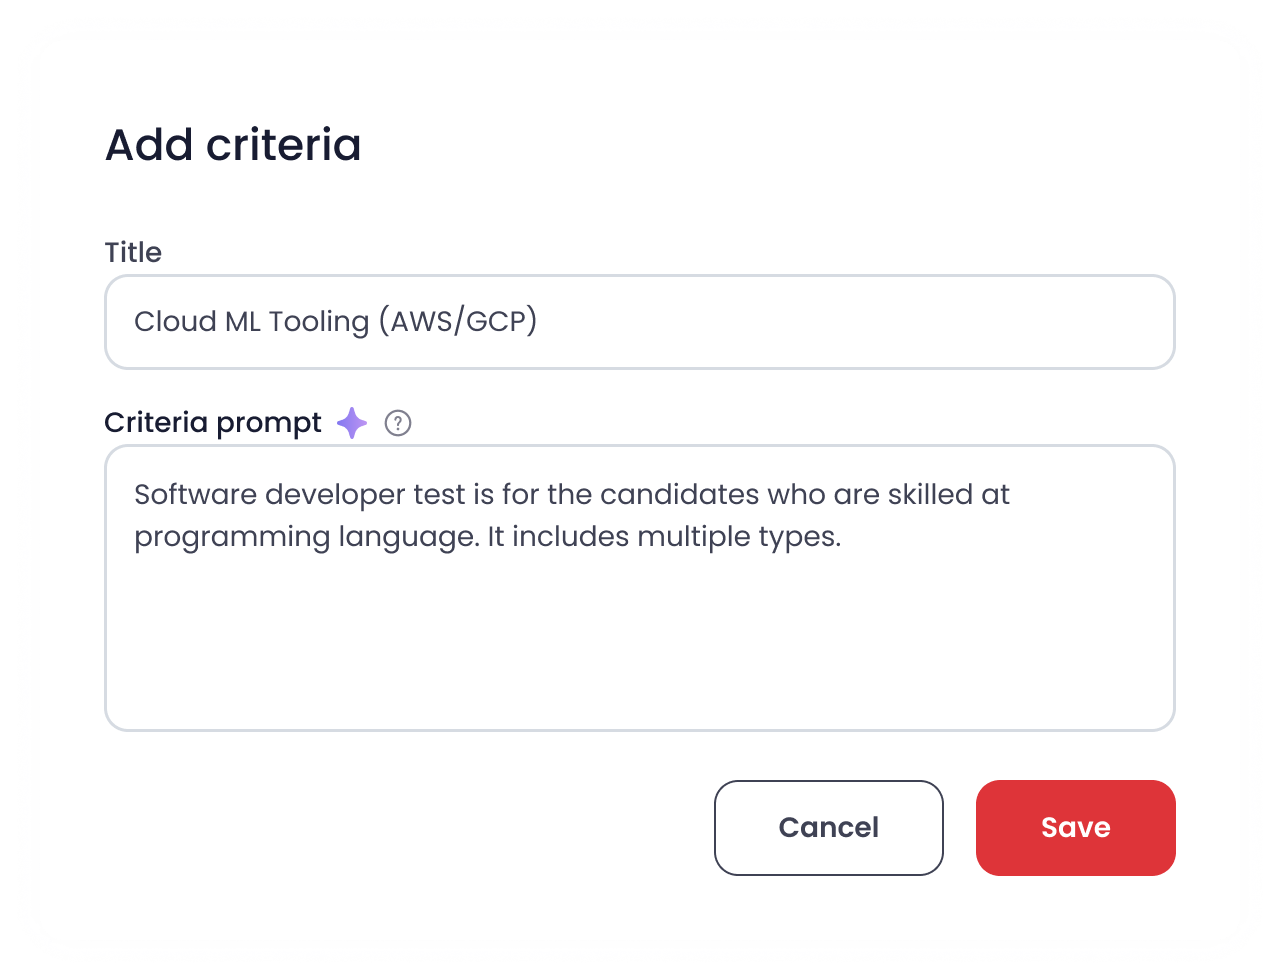
- You can add additional custom criteria by clicking on the Add criteria button.
-
- AI Prompt Tooltip:
- An AI tooltip will help guide you in writing detailed prompts, which will assist the AI in evaluating resumes more accurately.
-
- Example Criteria:
- Suggested criteria might include things like:
- AI Solution Developer.
- Tooling Integration.
- Python Programming Skills.
- You can also create custom criteria as needed.
- Suggested criteria might include things like:
- Rejection and Screening Settings:
- Screening Limit: By default, it is set to 50.
- Auto Advance to Next Stage: This is enabled by default.
- Rejection Threshold: Set a percentage threshold to automatically reject candidates with a score below the defined limit (e.g., 34.99%).


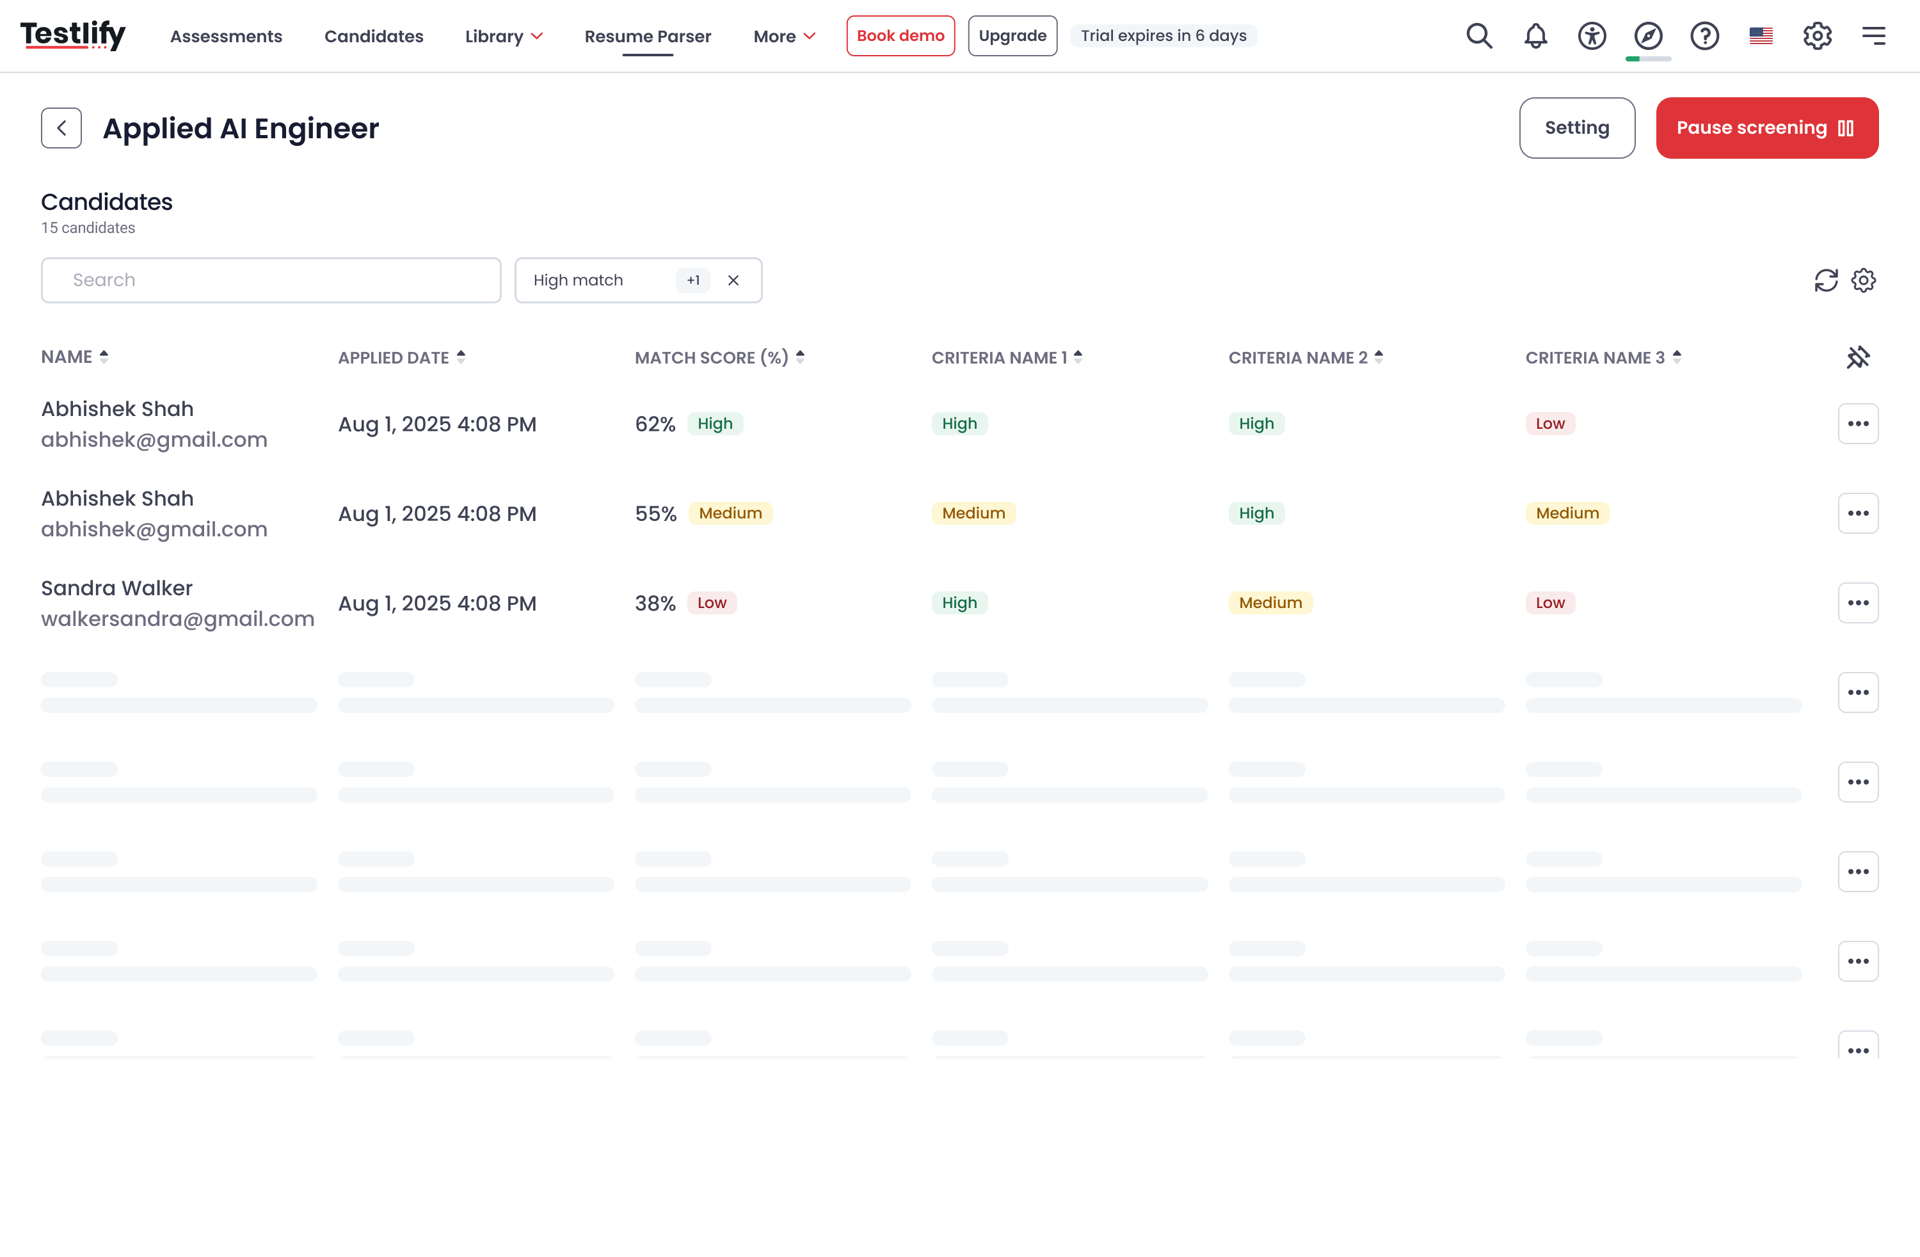
Step 5: Job Detail and Candidate Screening
Once your jobs are synced and candidates are matched to the jobs, you can manage them directly in the Job Detail Page.
- Job Detail Page:
- Latest added candidates will appear at the top.
- You can sort candidates and view their detailed data, including their match score and criteria fit.
- Candidate Match Score:
- Candidates will be scored based on match percentage, with color-coded bars indicating the score:
- Green for high match.
- Amber for medium match.
- Red for low match.
- Grey for candidates that haven’t been screened.
-
- Candidates will be scored based on match percentage, with color-coded bars indicating the score:
- Pause/Resume Screening:
- You can pause the screening process at any time.
- If there are candidates still to be screened, you can resume the screening process.
- Re-screening:
- If all candidates have been screened, the system will provide a Re-screen button for re-evaluating candidates.
- Rejection and Actions:
- Candidates with low match scores can be rejected.
- You can also move candidates to the next stage in the ATS pipeline or invite candidates to an assessment.

Step 6: Filter and Sort Candidates
To make your screening process more efficient, you can filter and sort candidates based on the following:
- Match Score: Filter by High, Medium, and Low match categories.

- Column Settings: Customize the table by adding or removing columns such as:
- Applied Date.
- Match Score (%).
- Criteria.
- Candidate Details.

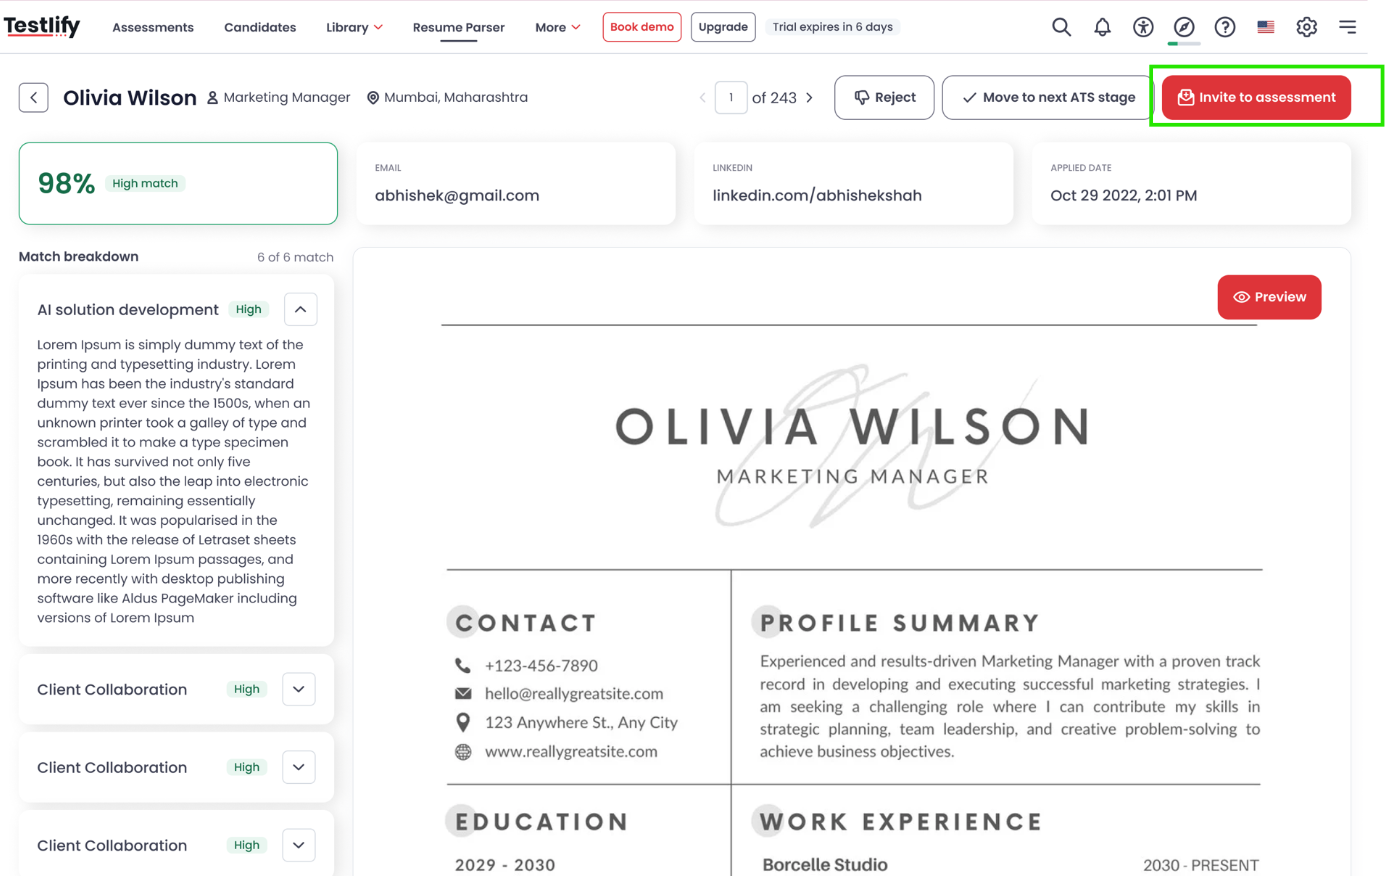
Step 7: View Candidate Details
When you click on a candidate's name, you’ll be taken to the Applicant Detail Page where you can view:
- Match Score Explanation:
- The AI will provide a detailed breakdown of how well the candidate matches the selected criteria.
- Resume View:
- View the candidate’s resume in a scrollable window or in full-screen mode.
- Actions:
- Invite to Assessment: If the candidate meets the required criteria, you can invite them to an active assessment.
-
- Reject Candidate: If the candidate doesn't meet the threshold, you can reject them.


Step 8: Reporting and Analytics
Testlify provides reporting tools to help you track candidate performance and progress:
- Exporting Data:
- You can export data for reporting purposes, which provides insights into the performance of candidates across multiple criteria.
- Analytics:
- Group Analytics provides a visual breakdown of candidate scores and match metrics, helping you make data-driven decisions.
Conclusion
By following these steps, you can seamlessly manage your job candidates using the Resume Parser. This tool will help you efficiently parse resumes, screen candidates based on job criteria, and make more informed hiring decisions.
If you need any assistance, don’t hesitate to contact the support team at support@testlify.com.