How to Set Up and Use the 360 Feedback Review in Testlify
Testlify provides a seamless workflow to set up and manage 360-degree feedback assessments. This feature allows feedback to be gathered from the self-assessment of the candidate and multiple stakeholders such as peers, subordinates, managers. Follow these steps to set up and manage a 360 feedback test for your workspace.
Step 1: Enabling the 360 Feedback Feature
To begin setting up the 360 feedback process:
-
Create or Edit an Assessment:
Start by navigating to your assessments page and either create a new assessment or edit an existing one.
-
Enable the 360 Feedback Option:
In the assessment setup, you will see a checkbox labeled “Use as 360 feedback review of candidate.” By default, this option is turned off. Enable it to trigger the 360-degree feedback process.

Once this option is enabled, the relevant settings for 360-degree feedback will be activated.
Step 2: Adding the 360 Feedback Test
- Search and Add the 360 Test:
- Navigate to tests and find the 360 test.
-
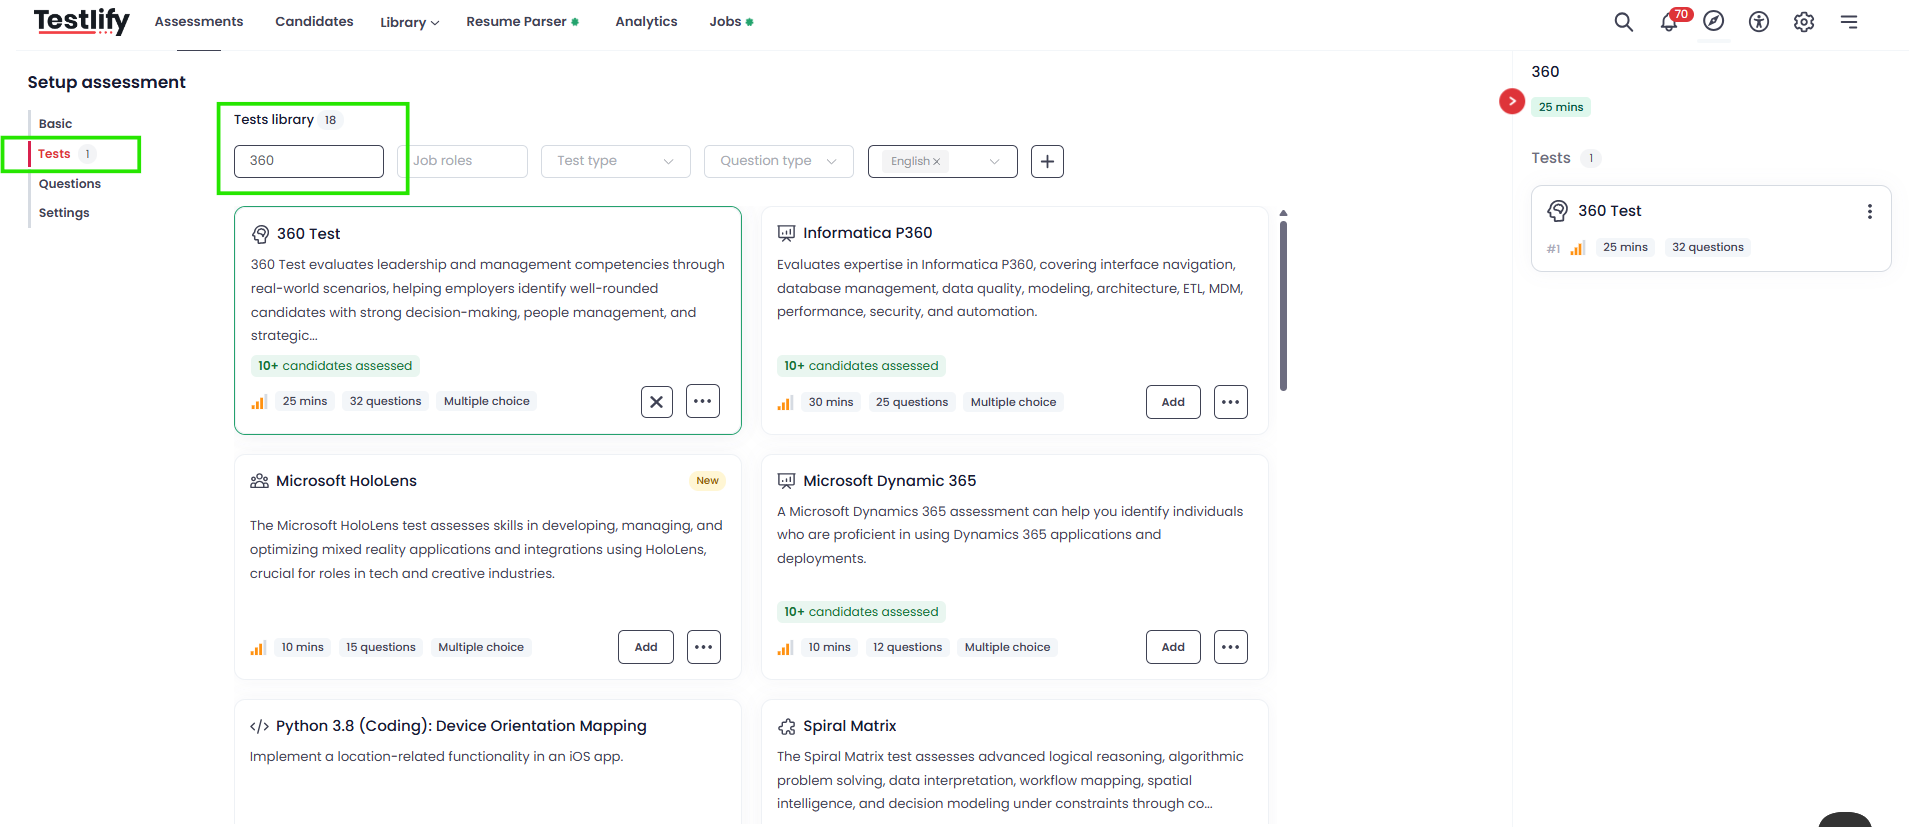
- Select and add the test to your assessment.
-
Adding Custom Questions (Optional):
If you wish to further customize your feedback, you can add custom questions to the test. This can be done in the same manner as with other assessments.

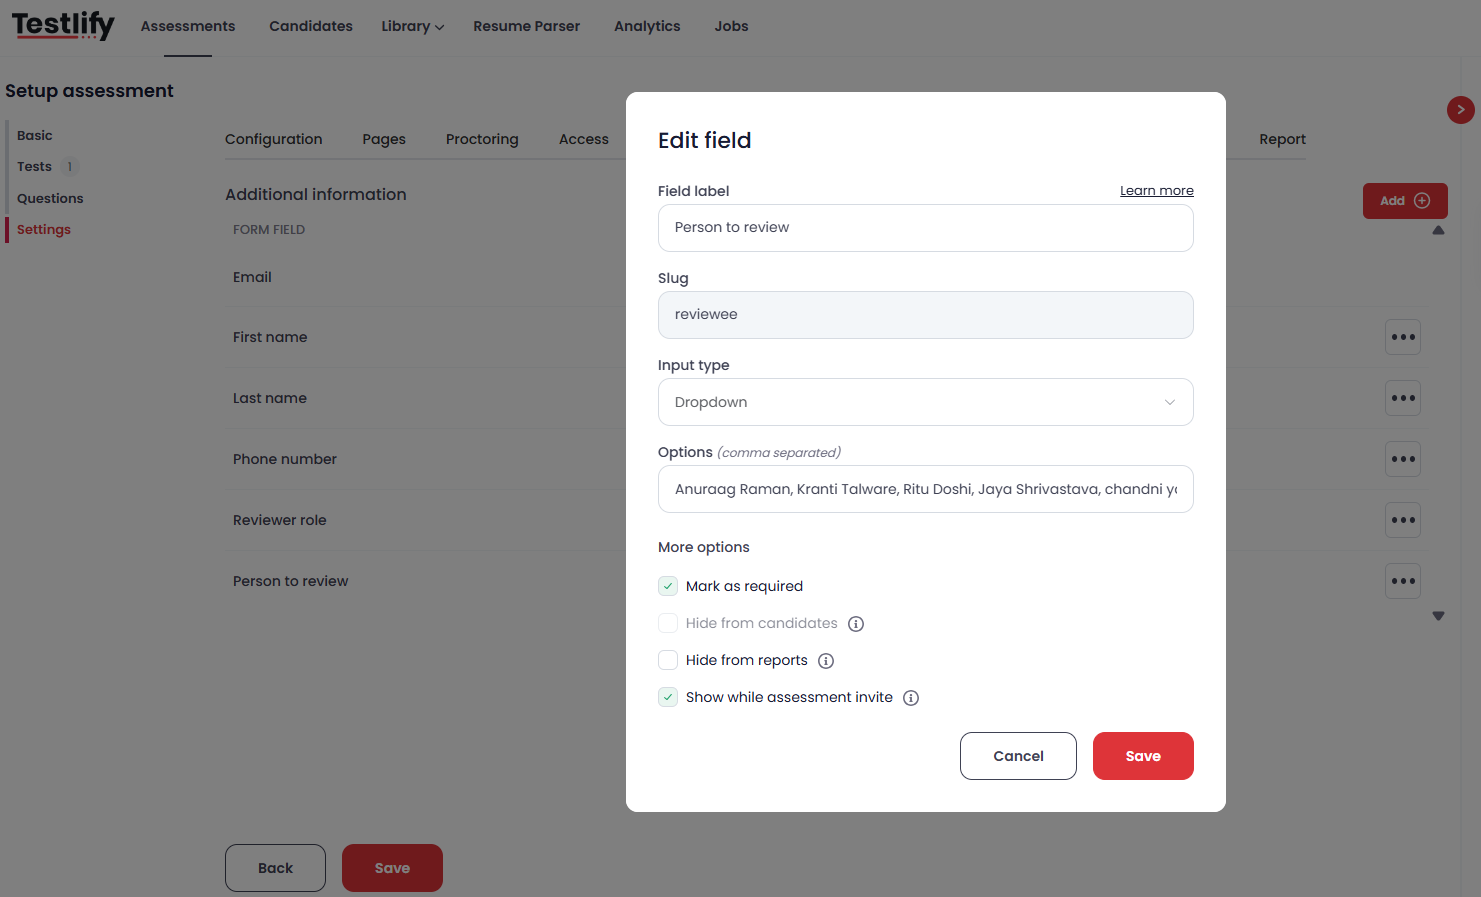
Step 3: Configuring the Information Fields
When the 360 feedback feature is enabled, two new information input fields will be automatically added to the assessment settings:

- Reviewer Role:
-
Dropdown options: Self, Manager, Peer, Reportee.
You can add more roles (e.g., Senior Manager) if required.
Settings:
- Hide from candidate: Set this option to OFF, so reviewers are visible to candidates.
- Show while assessment Invite: This should be ON for the reviewer role to be visible during the invitation process.
-

-
- Person to Review (Reviewee):
-
Dropdown options: Add names of candidates being reviewed.
Settings:
- Hide from candidate: OFF.
-
Show while assessment Invite: ON, so reviewees appear during the invitation process.
Usage: This information will be reflected in email invitations and CSV uploads for bulk invitations.
-
-


Step 4: Inviting Reviewers
-
Inviting Reviewers:
Once you’ve set up the roles and individuals for review, you can begin inviting reviewers.
- Invite Reviewer:
- You will now see the fields “Reviewer Role” and “Person to Review” while inviting reviewers.
- Add reviewer email addresses, assign roles (e.g., Manager, Peer, Reportee), and send invitations.
- The new fields will also appear in the bulk CSV template for multiple reviewers.
- Roles and Reviewers:
- Example: To gather feedback for yourself, you can add yourself in the “Person to Review” field, assign roles like Manager or Peer, and invite the relevant people.
- Invite Reviewer:

Step 5: 360 Feedback Email Invitations
When the 360 flag is ON, a customized email will be sent to the reviewers:

Step 6: Candidate Flow During the 360 Feedback Test
-
Candidate View:
When a candidate is reviewing another individual, the following message will appear at the top of the page throughout the assessment:
“Hi, give your review for {{REVIEWEE}}”

Step 7: Assessment Completion and Report Generation
-
Completing the Assessment:
Reviewers need to complete their respective feedback for the report to be generated. A report will not be generated until all invited reviewers have completed the assessment.
- Download the 360 Feedback Report:
- Navigate to the Assessment Detail Page, where you will find an option to Download 360 Feedback Report.

-
The report will include the feedback gathered from all reviewers, broken down by each individual and their corresponding roles.
Note: If there are multiple reviewees, you can select a specific reviewee and download the feedback for that person.

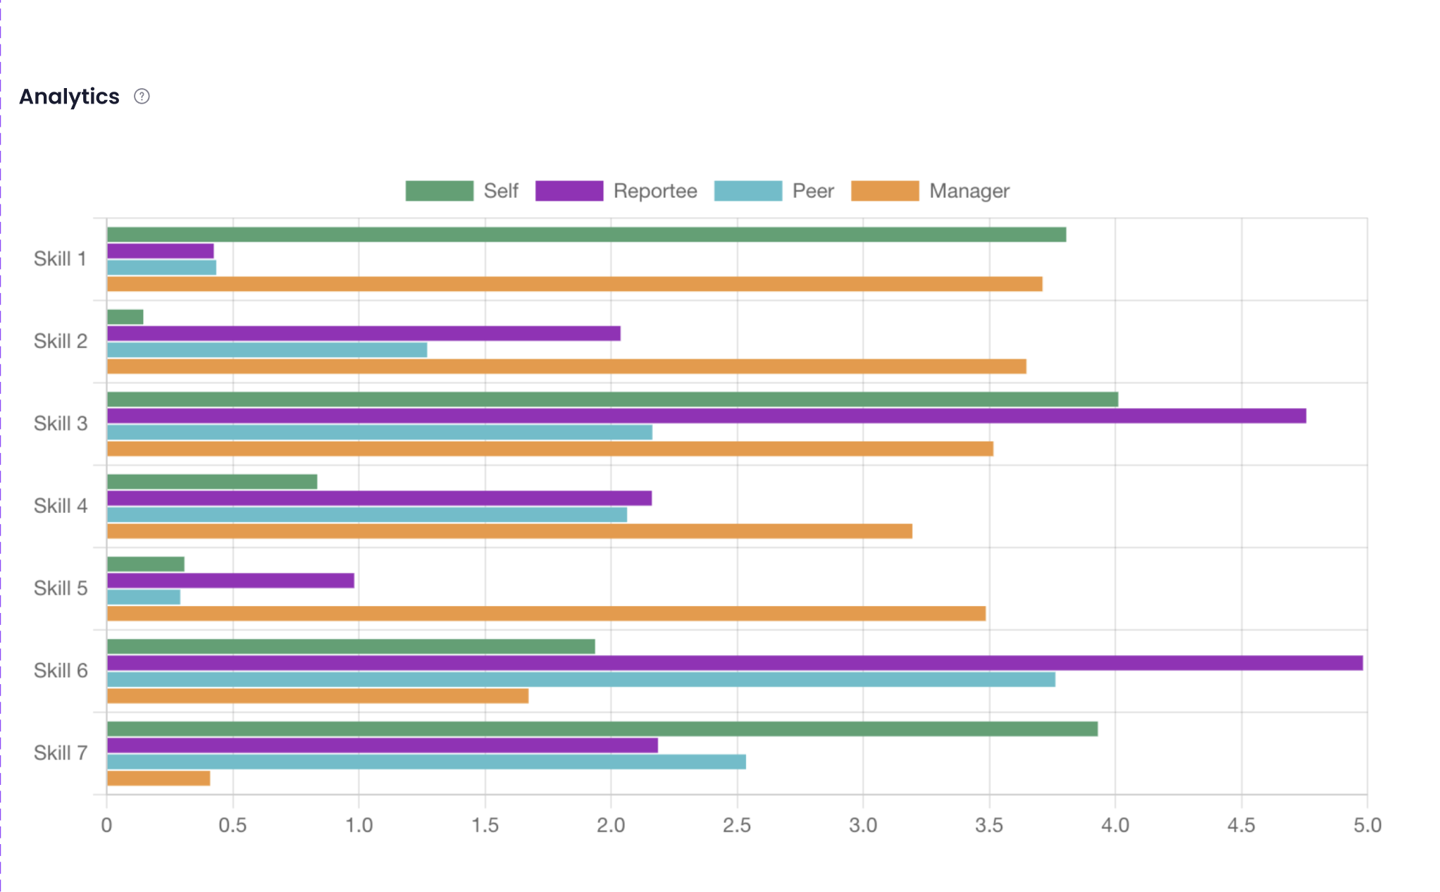
Step 8: Analytics and Gap Analysis
-
Analytics:
Once the feedback is collected, you can view group analytics for each skill, broken down by Reviewer Role (Self, Reportee, Peer, Manager). This provides an overview of the candidate's performance across various areas.
-
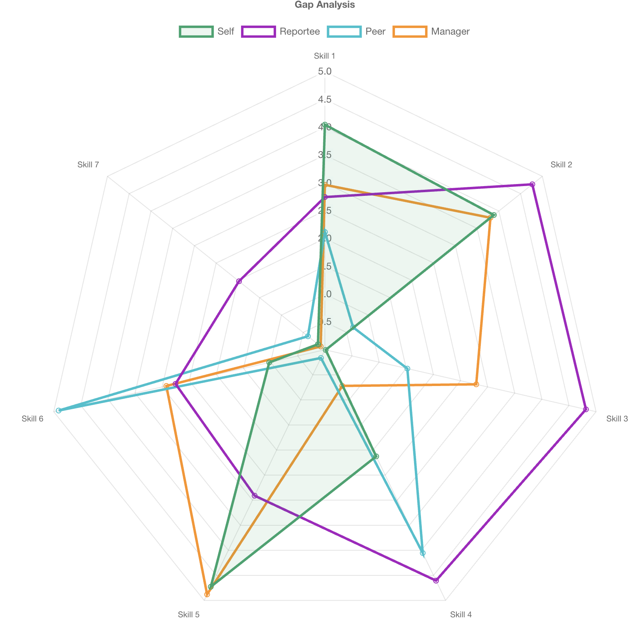
Gap Analysis:
A gap analysis is available to identify discrepancies in how the candidate was rated across different reviewer categories. This analysis can highlight areas for improvement and development.


Step 9: Bulk Upload and Customization for Larger Teams
-
CSV Upload:
If you have a large team, you can use the CSV bulk upload feature to invite multiple reviewers at once. Ensure that the "Reviewer Role" and "Reviewee" columns are included in the template.
-
Custom Feedback Questions:
Custom questions can be set up in the feedback test to further personalize the review process.
Conclusion
Setting up the 360 feedback review process in Testlify provides a powerful way to gather diverse feedback from multiple sources. By following the steps outlined above, you can configure your assessment, invite reviewers, and analyze the feedback received to gain valuable insights into a candidate's performance and growth potential.
If you have any questions, please reach out to our support team at support@testlify.com.