Automate Candidate Rejections with Testlify’s Auto Reject Feature
How to Auto-Reject a Candidate on Testlify
The Auto Reject feature on Testlify helps you automatically reject candidates who don’t meet your required performance threshold. This saves time by eliminating manual review for underqualified candidates and keeps your hiring pipeline clean.
For example, let’s say you’re hiring for a Software Engineer role and only want candidates who score at least 70% to move forward. By enabling Auto Reject, anyone scoring below 70% will be automatically marked as Rejected in your dashboard (and optionally receive a polite rejection email).
Here’s how you can set it up step by step.
Step-by-Step Guide
1. Log in to Your Workspace
- Go to app.testlify.com.
- Enter your registered email address.
-
Use the OTP sent to your email for secure login.

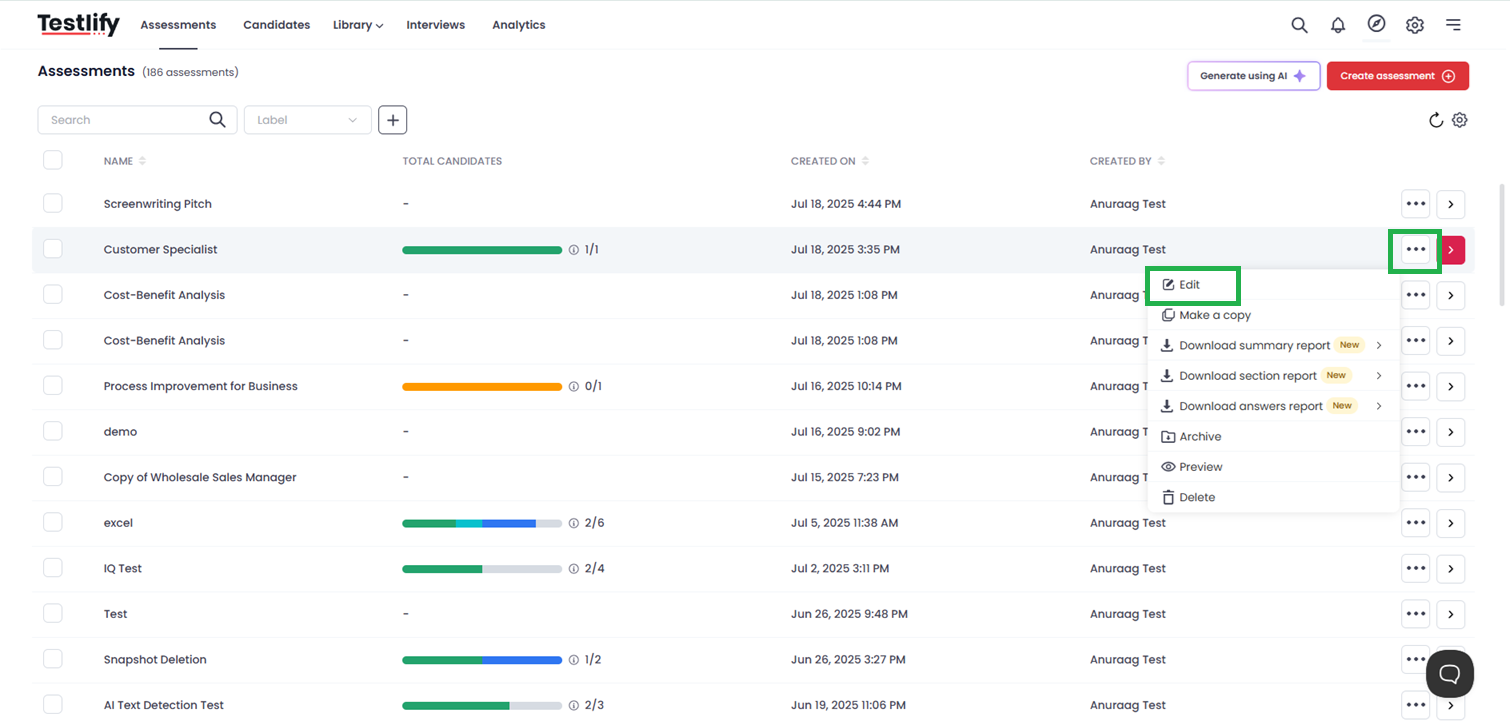
2. Find and Edit the Assessment
- From your dashboard, search for the assessment you want to configure.
-
Click Edit next to that assessment.

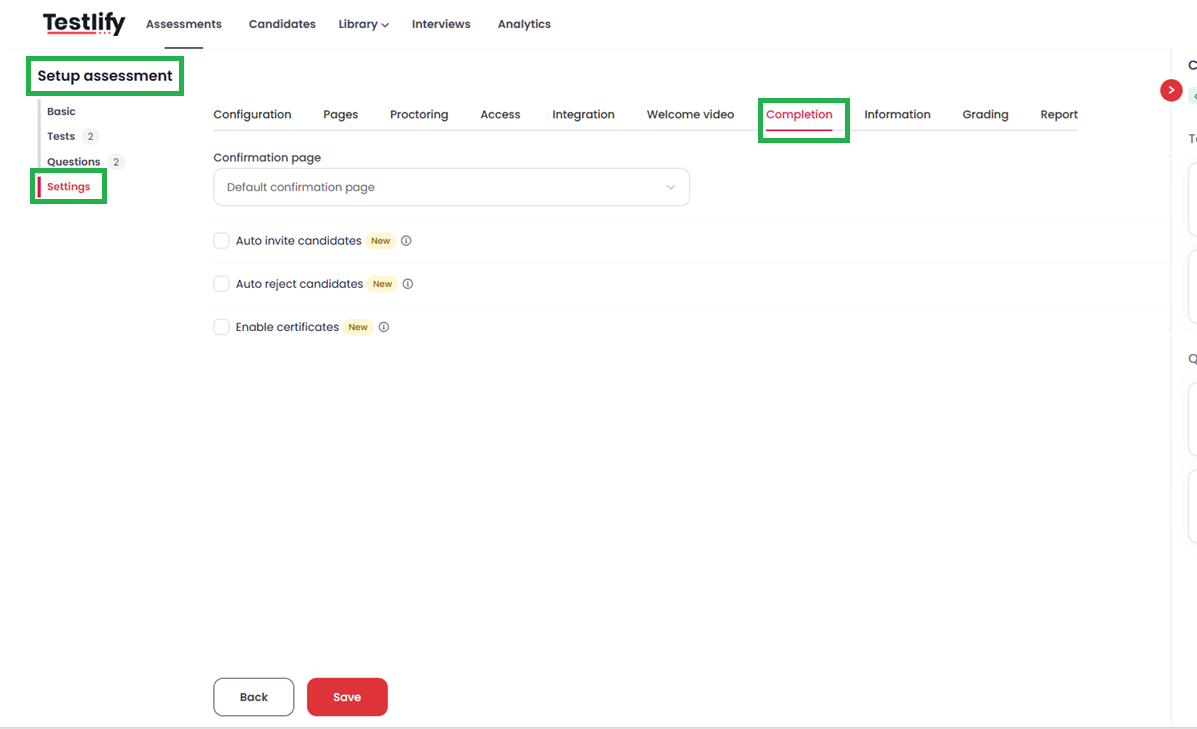
3. Navigate to Settings
- On the Setup Assessment page, select Settings from the left menu.
-
Find the Completion section.

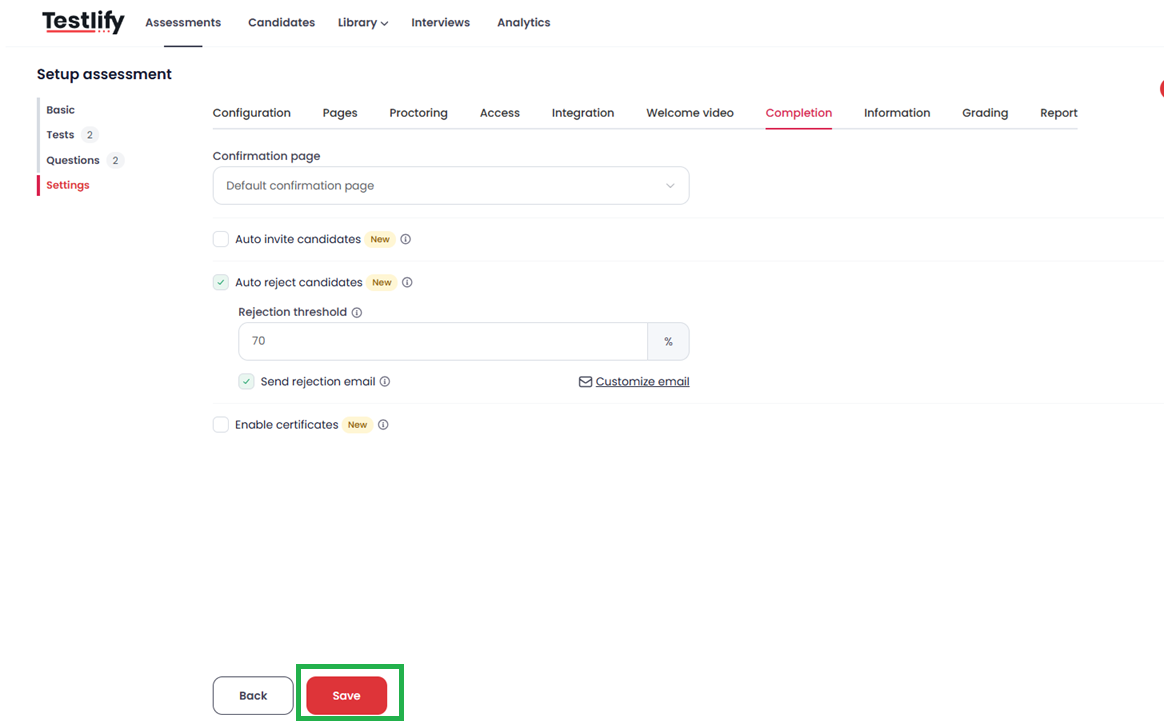
4. Enable Auto Reject Candidates
- In the Completion section, check the box Auto reject candidates.
- This means any candidate who scores below your defined threshold will be automatically rejected.
Note: Rejection doesn’t happen if the assessment isn’t fully scored. For example, if your test includes manually scorable questions like video responses, the system will wait until you score them before deciding rejection.

5. Set the Rejection Threshold
- Enter the minimum percentage required for a candidate to pass the assessment.
Example:
- You set the Rejection Threshold to 70%.
- A candidate who scores 65% will be automatically rejected.
- A candidate who scores 85% will remain in the qualified list.
This ensures only candidates meeting your criteria move forward.

6. Enable Rejection Email Notification (Optional) & Customize the Rejection Email (Highly Recommended)
- If you want candidates to be notified, enable Send rejection email to candidate.
- This will automatically send a polite rejection email after the system marks them as rejected.
- You can edit and personalize the rejection email to make it more professional and aligned with your company tone.
Example:
Once a candidate scores below 70%, they will immediately receive an email like:
“Thank you for completing the assessment. Unfortunately, you did not meet the required threshold for this position.”
Example of customization:
Hi [Candidate Name],
Thank you for taking the time to complete the assessment for [Job Role].
After reviewing your results, unfortunately, you did not meet the required criteria for this position. We truly appreciate your effort and wish you the best in your future endeavors.
Best regards,
[Your Company Name]
Customizing this email ensures a better candidate experience even when rejecting them.

8. Save Your Assessment
- After making all these changes, click Save.
-
Your Auto Reject settings are now active for this assessment.

FAQs
1. Will candidates be rejected if the test has unscored questions?
No. Auto rejection only happens after all questions are scored (including manual scoring like video or open-ended answers).
2. Can I change the threshold later?
Yes, you can always go back and edit the rejection threshold whenever needed.
3. What if I don’t enable the rejection email?
The system will still mark them as Rejected in your dashboard, but candidates won’t be notified.
4. Can I customize the rejection email for different assessments?
Yes, each assessment can have its own customized rejection email.
Example Scenario
Let’s say you’re hiring for Customer Support Executives and you want only candidates scoring 50% or above to move forward.
- You enable Auto Reject and set the threshold at 50%.
- A candidate scores 42% → The system marks them as Rejected and sends your customized email.
- Another candidate scores 78% → The system marks them as Qualified, and you can move them to the next step.
This saves you the hassle of manually filtering candidates.
Conclusion
Auto Reject is a powerful feature to automate your screening process, save time, and ensure only the most qualified candidates move forward.
If you face any difficulties or need help setting it up, reach out to us anytime at support@testlify.com.