Connect Testlify with Ashby
This guide walks you through connecting Testlify with Ashby so you can send assessments directly from your Ashby hiring workflow.
Before you begin
- You need Admin access in both Testlify and Ashby.
- Keep both platforms open in separate browser tabs to move through the steps quickly.
Part 1: Generate your Testlify API key
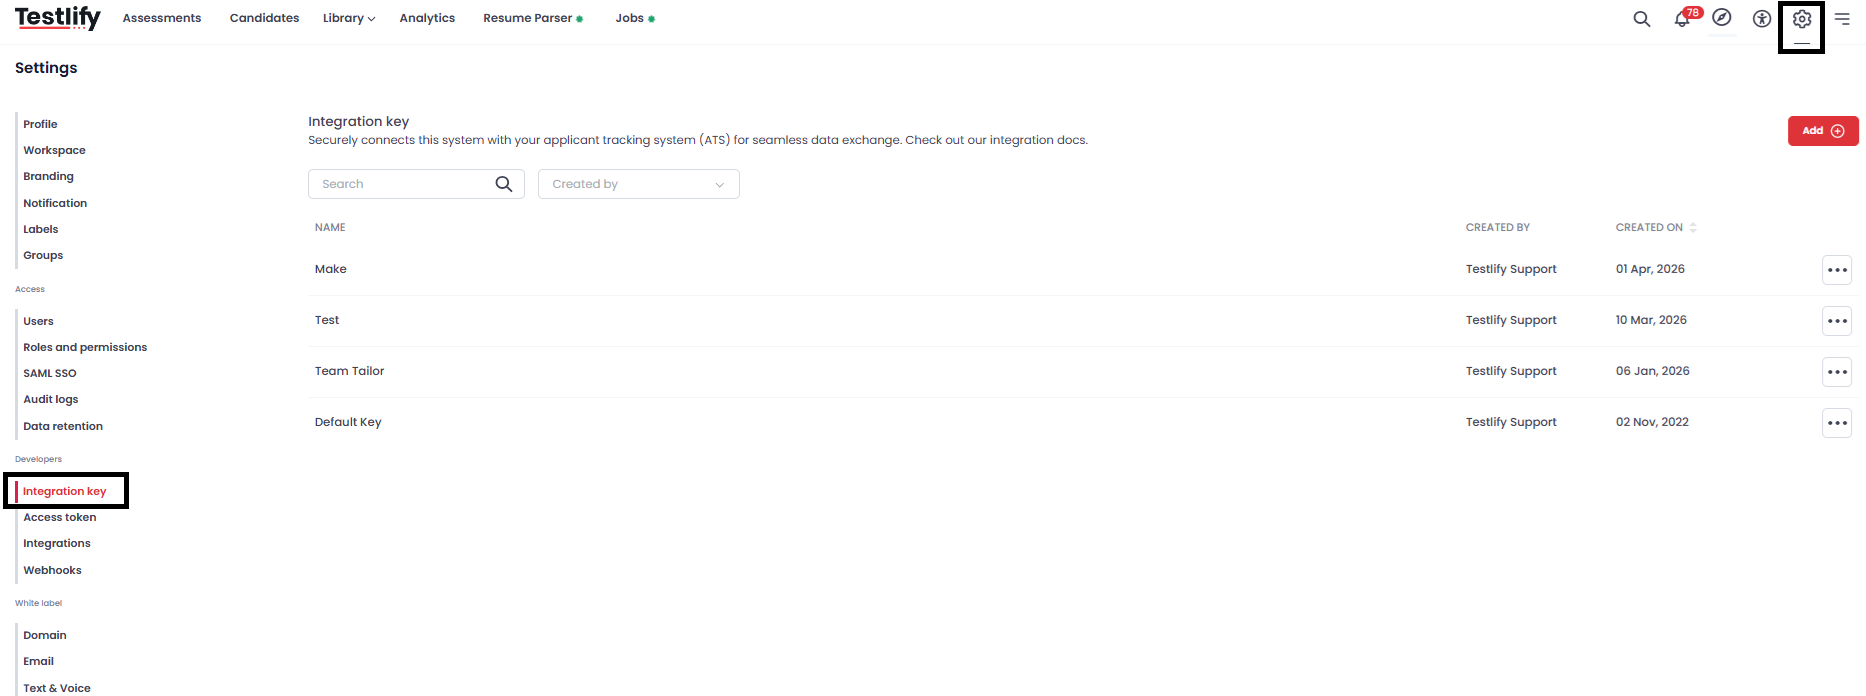
- In Testlify, click the Settings icon and go to Settings > Integration Key.
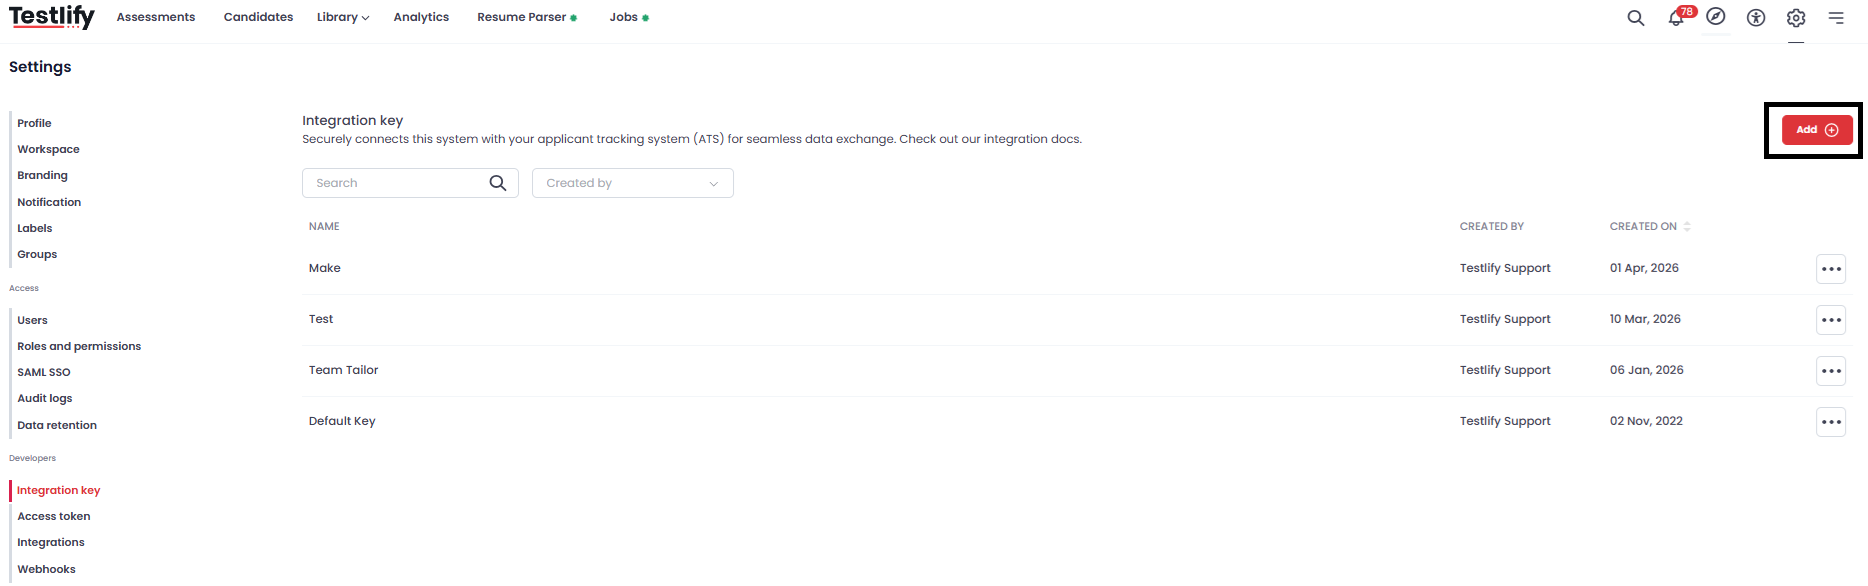
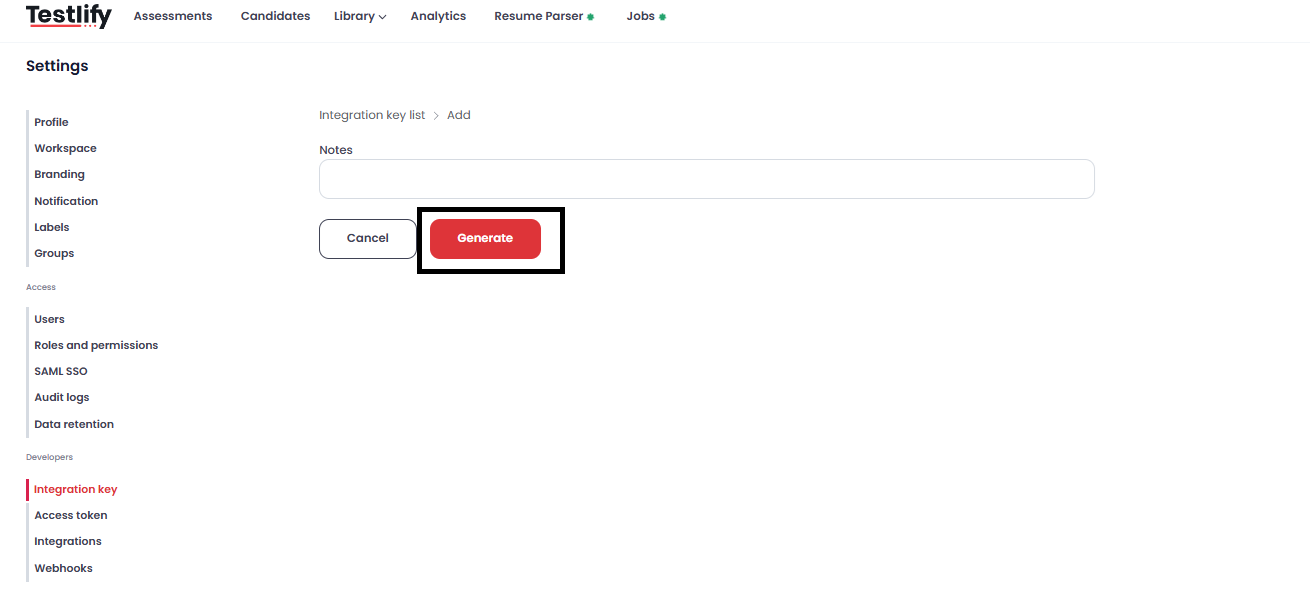
- Click Add, then click Generate Key.
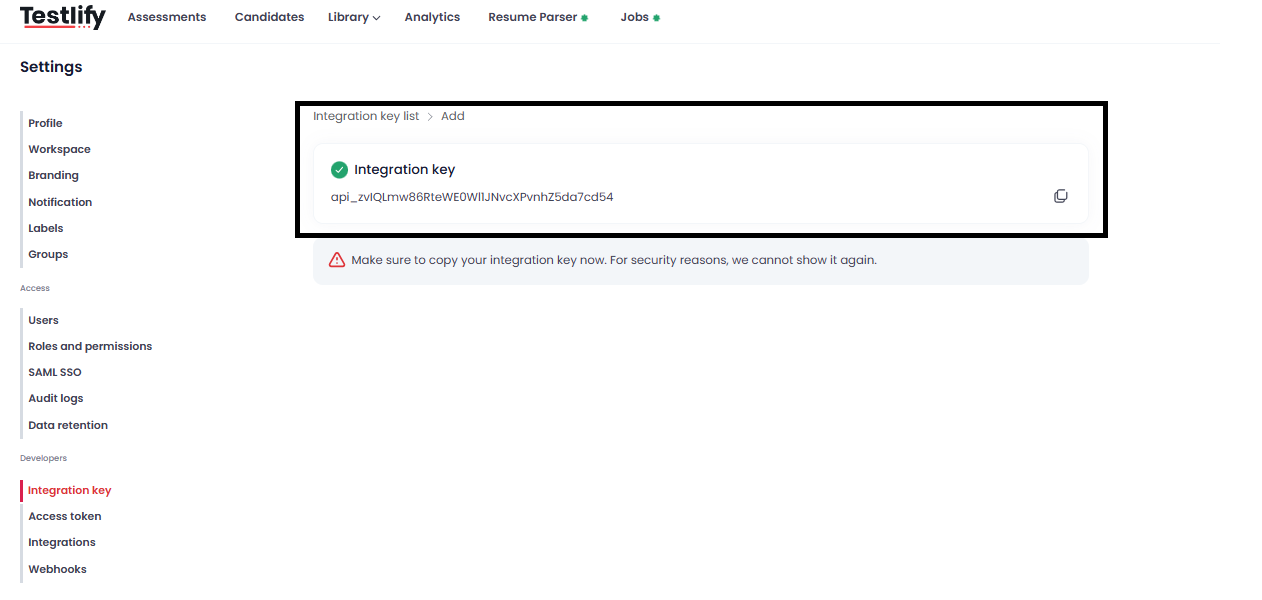
- Click Copy Key to copy the key to your clipboard.


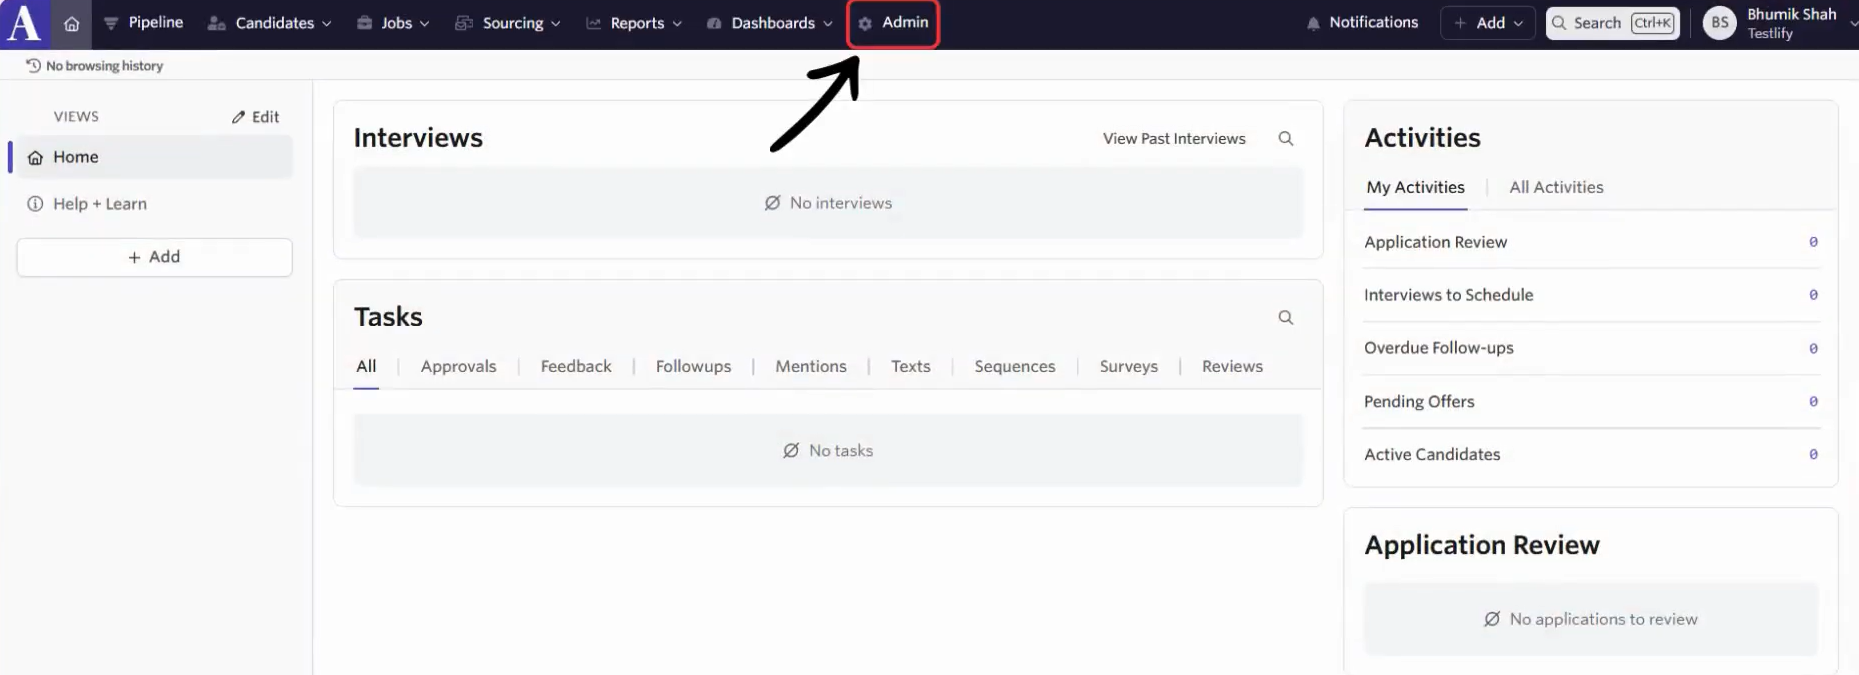
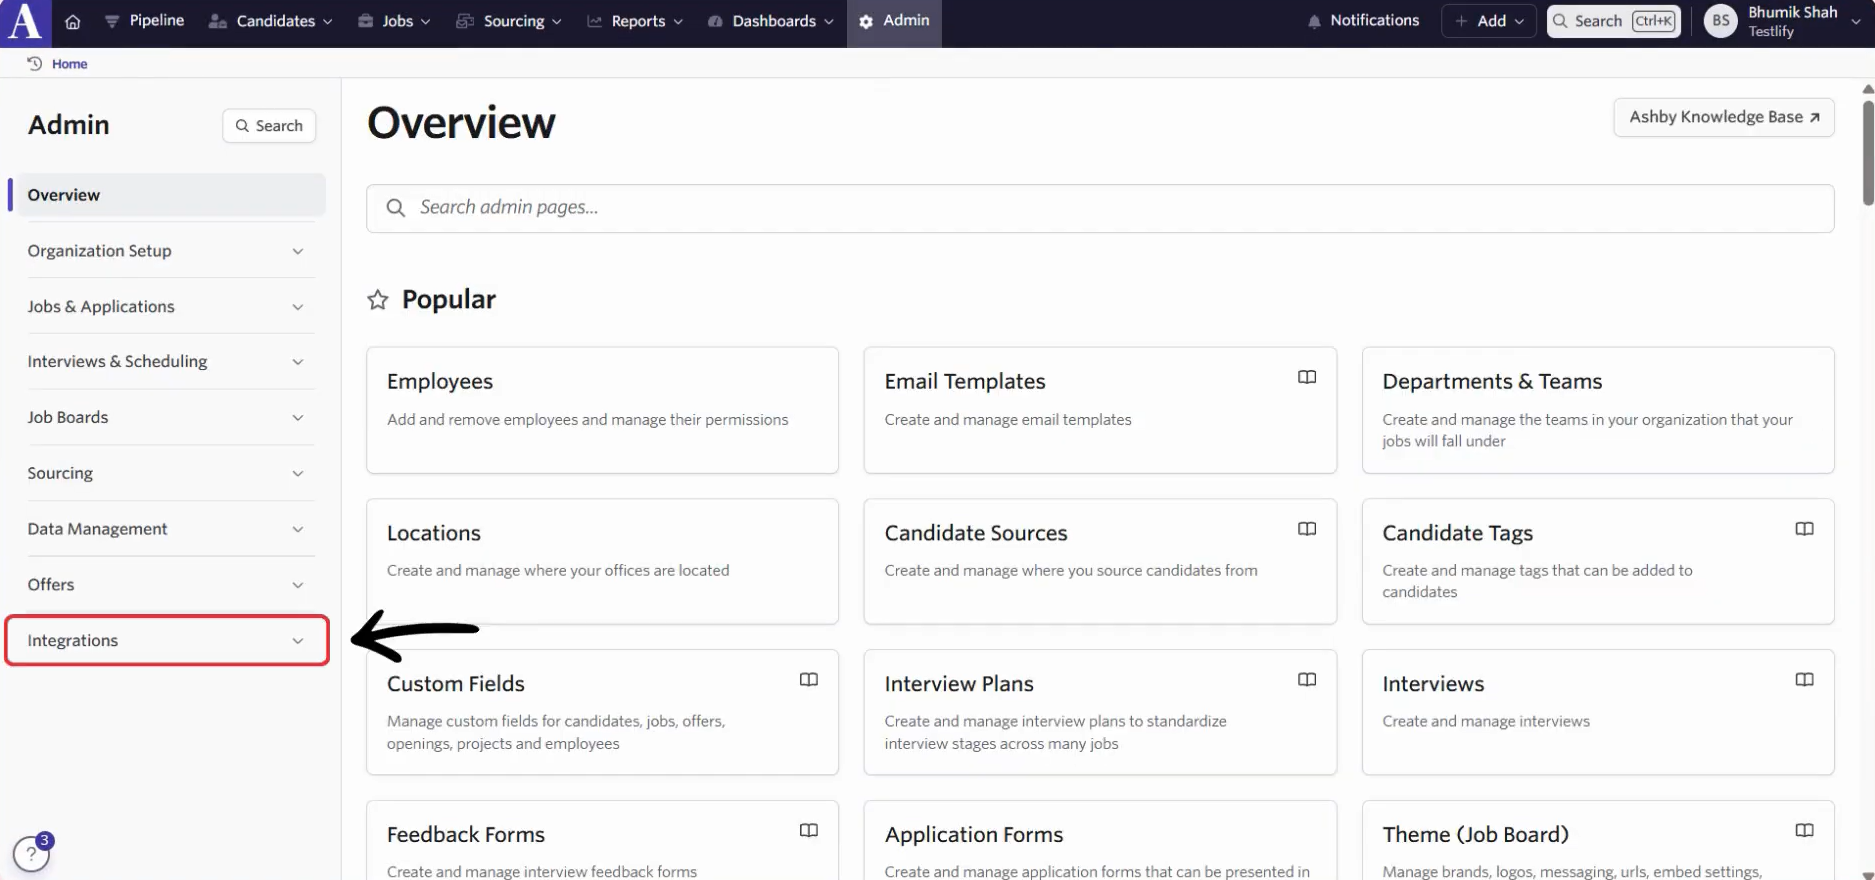
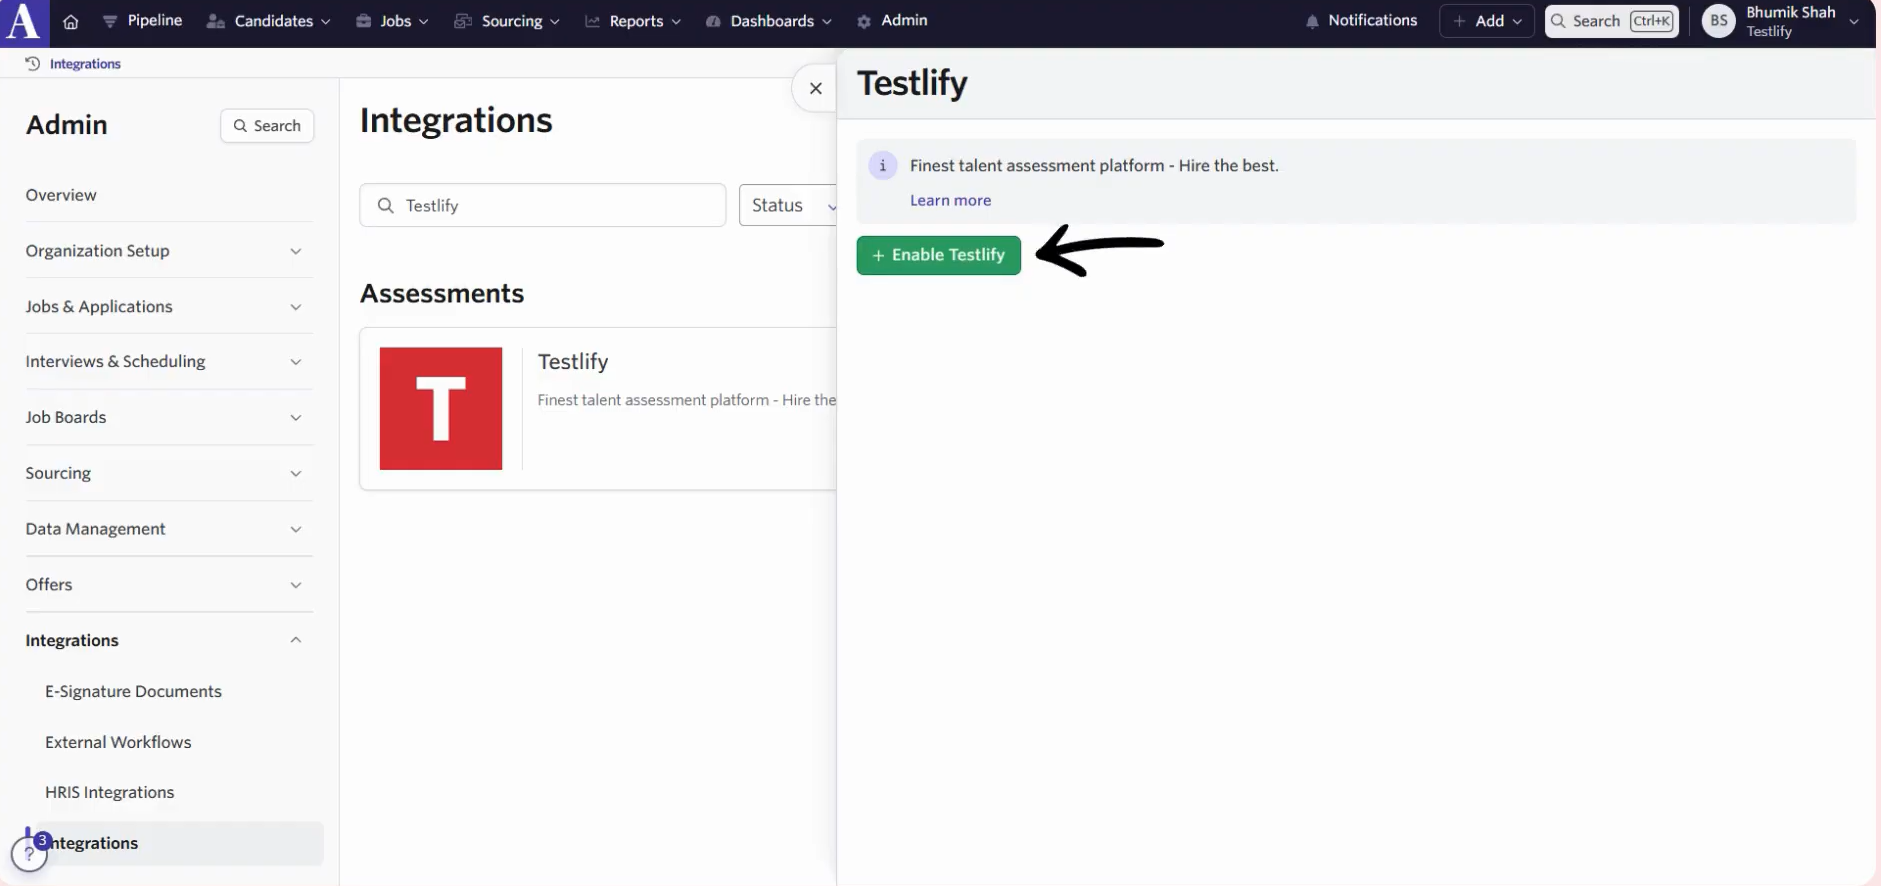
Part 2: Enable Testlify in Ashby
- In Ashby, click Admin, then open the Integrations tab and search for Testlify.
- Select Testlify and click Enable Testlify.

- Paste the Testlify API key you copied in Part 1.


Part 3: Generate your Ashby API key
- Click Ashby API Key, enter a name for the key, and click Create New.
- Click Copy to copy the generated Ashby API key.


Part 4: Add the Ashby API key in Testlify
- In Testlify, click your Profile icon and go to Settings.
- Under the Developers tab, click Integrations and select Ashby.
- Paste the Ashby API key and save.


The integration is now active. Assessments can now be triggered from Ashby candidate profiles.
Need help? Contact support.