How to Integrate Testlify with Make
How to Integrate Testlify with Make
Use Make to automate two workflows: sending assessment invitations when a candidate is added to Google Sheets, and routing results back to your spreadsheet automatically.
Before you begin
- Active Testlify and Make accounts
- A Google Sheet set up with candidate rows
- Admin access to Testlify Settings to generate an API key
Part 1: Send Assessments When a New Row Is Added
Watch a quick walkthrough before starting:
-
Click Create a new scenario to send assessments whenever a new candidate row is added to your Google Sheet.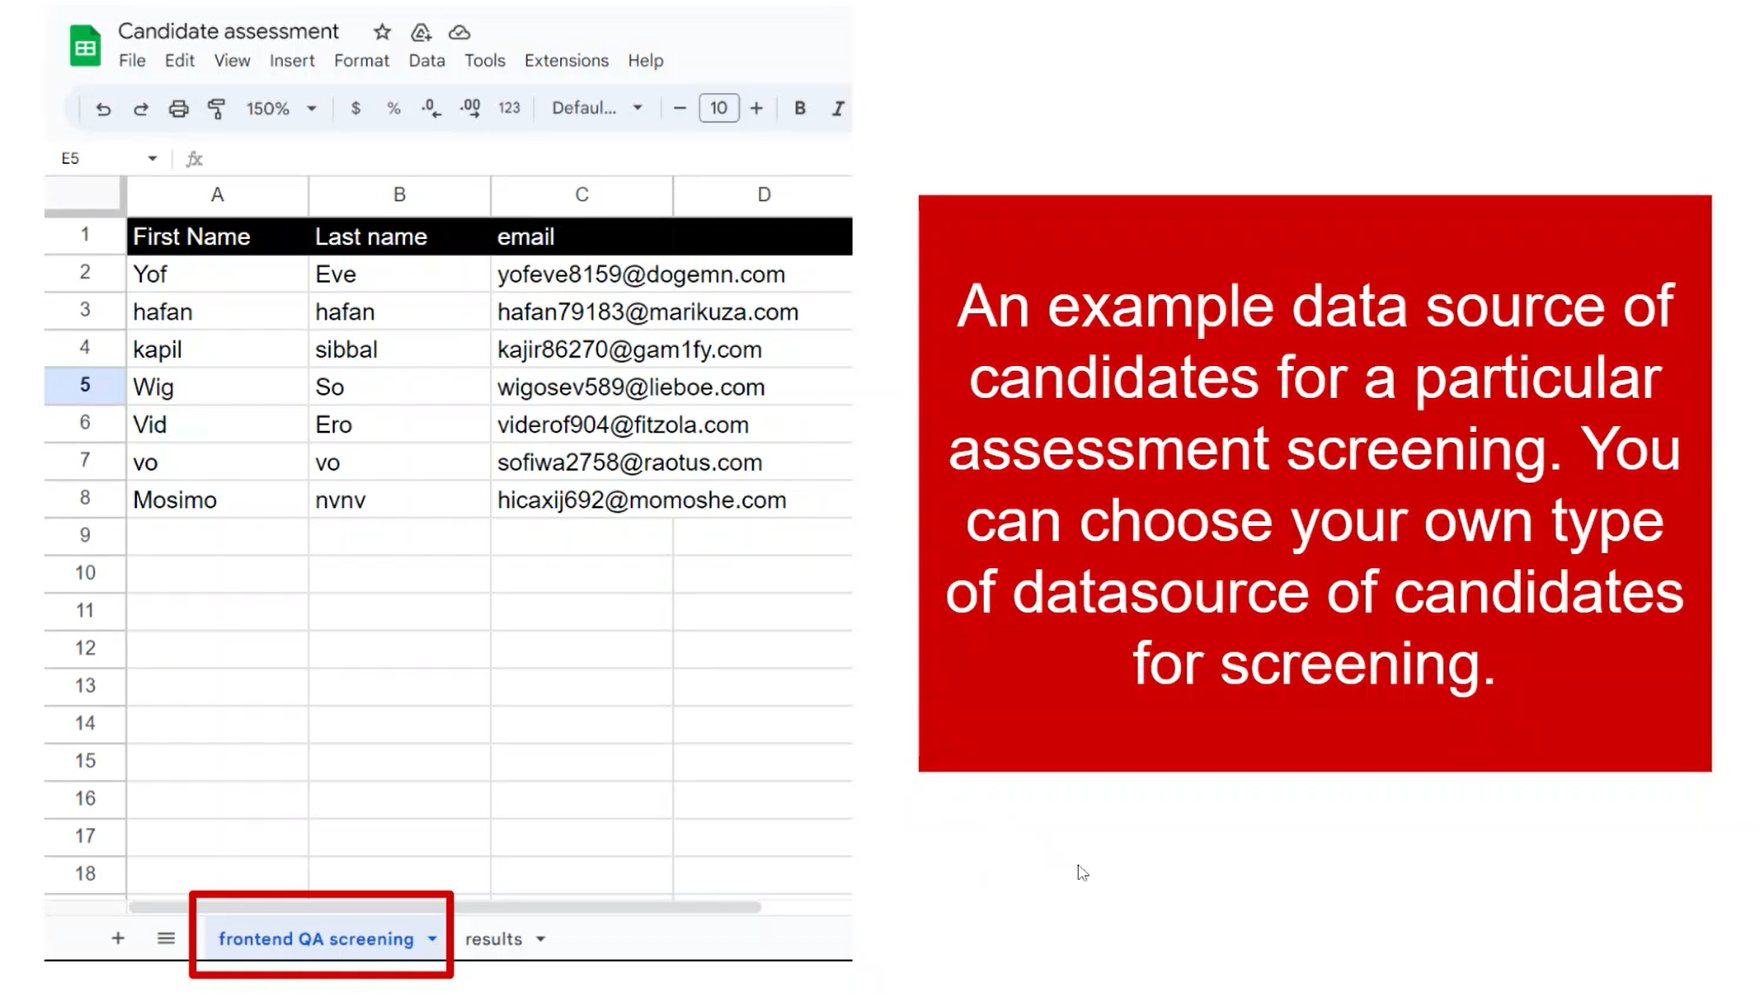
-
Select Google Sheets as your candidate data source.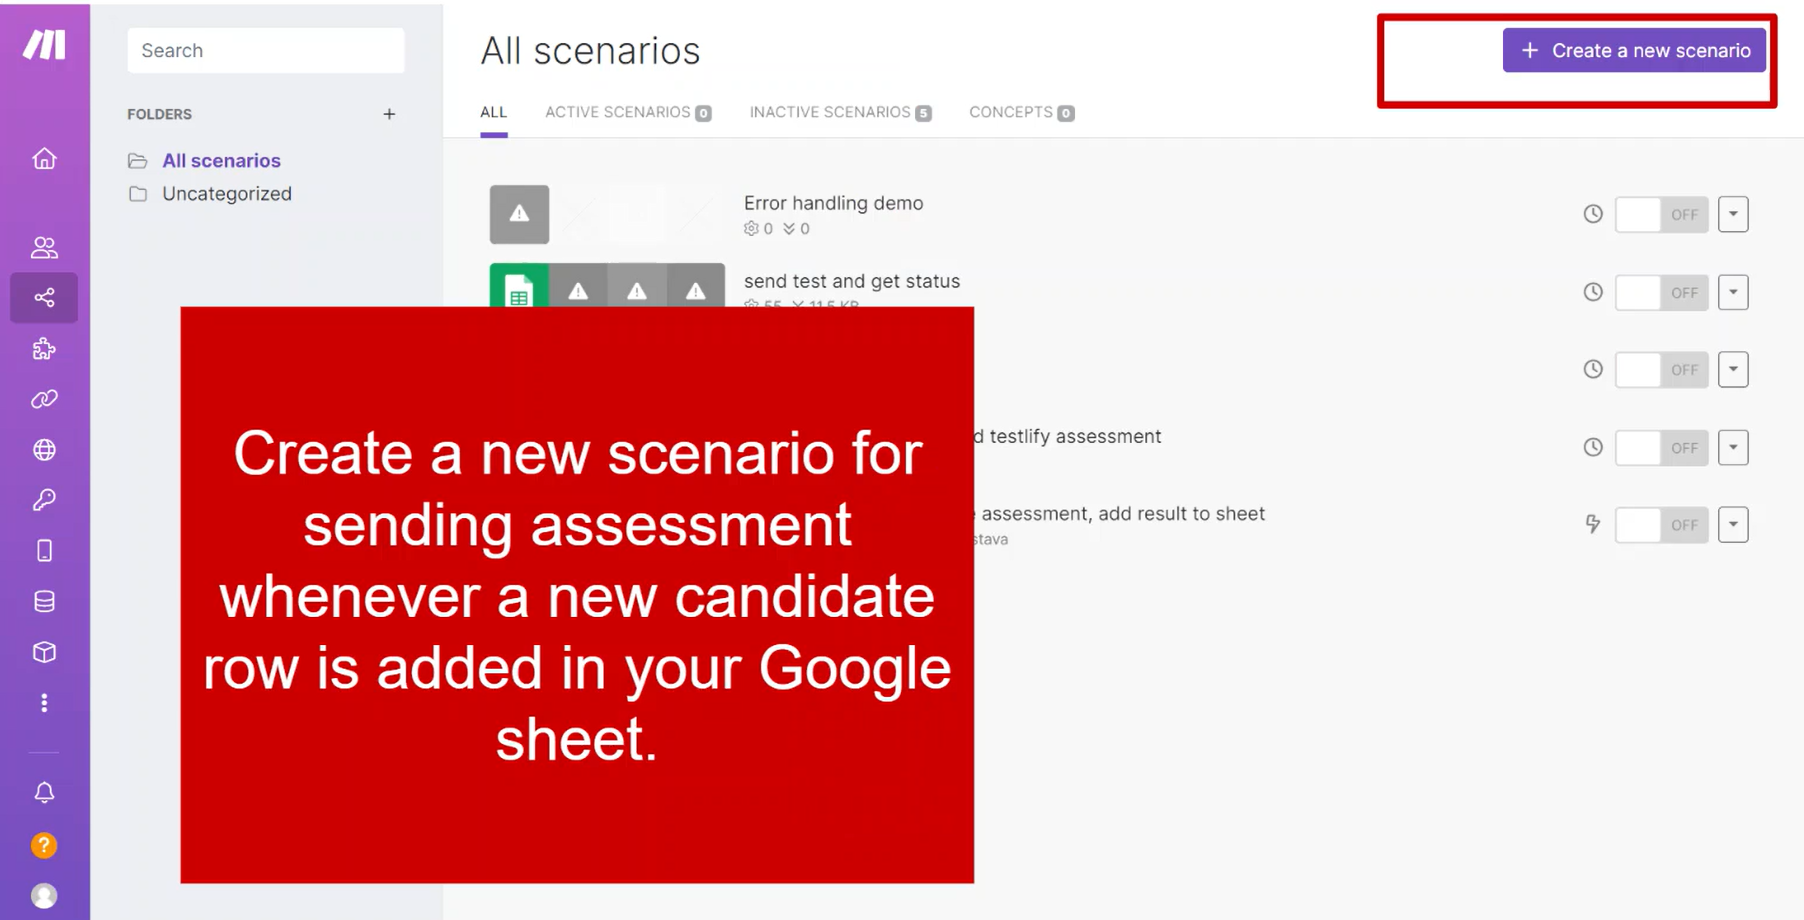
-
Choose the Watch New Rows trigger to activate the scenario when a new row is appended.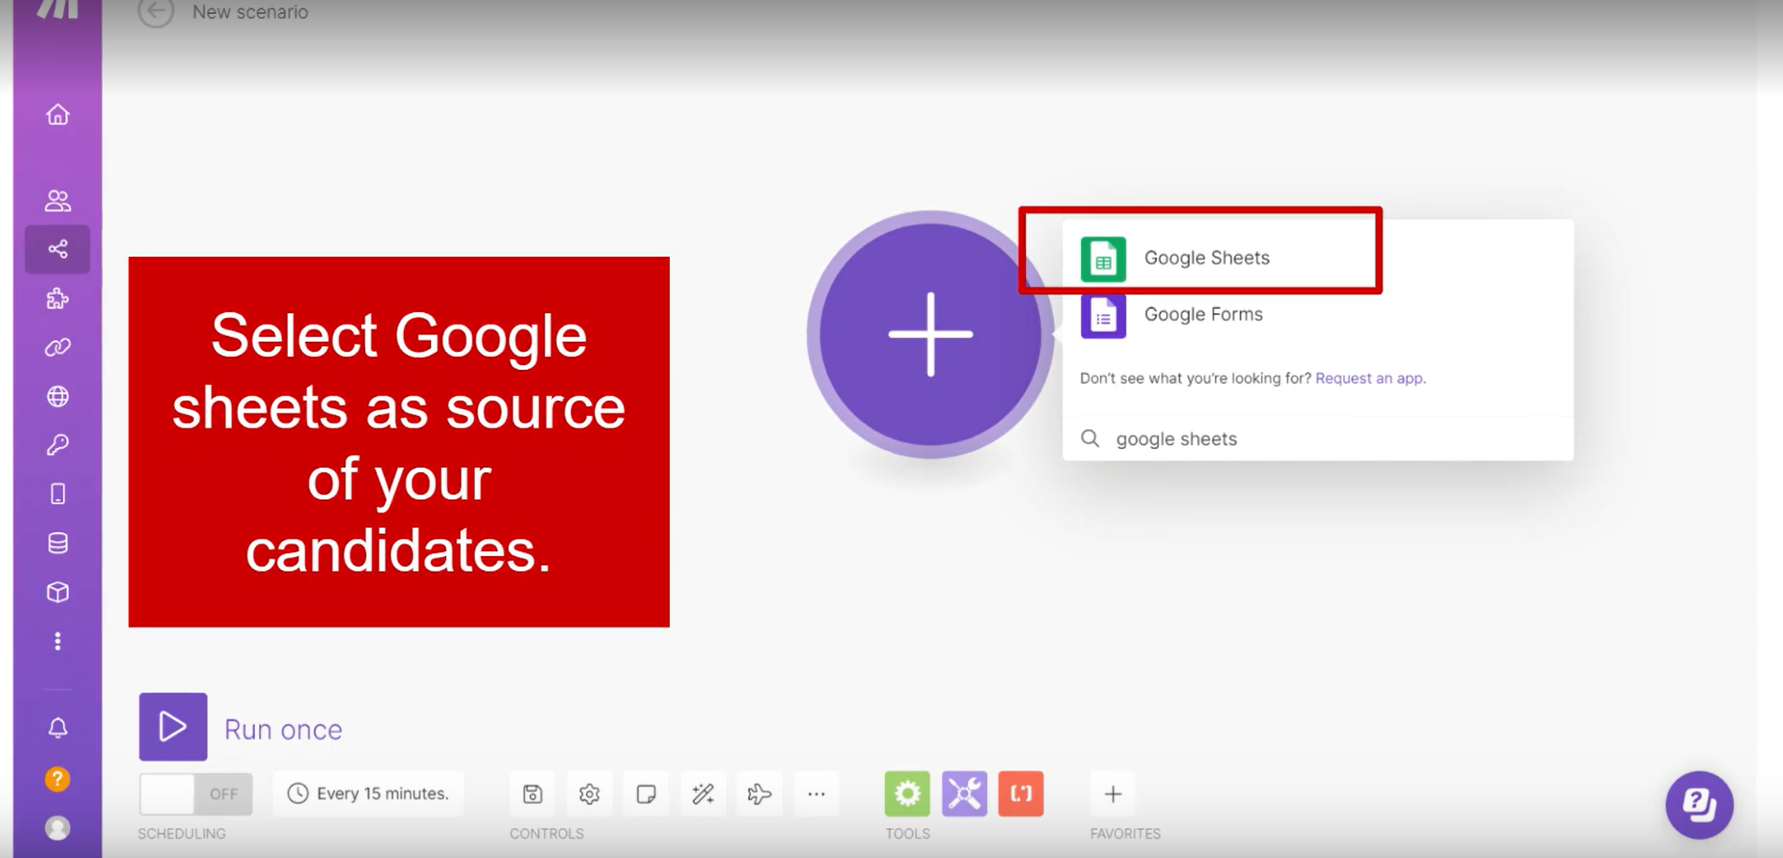
-
Configure your Google Sheet settings to point to the correct spreadsheet and sheet tab.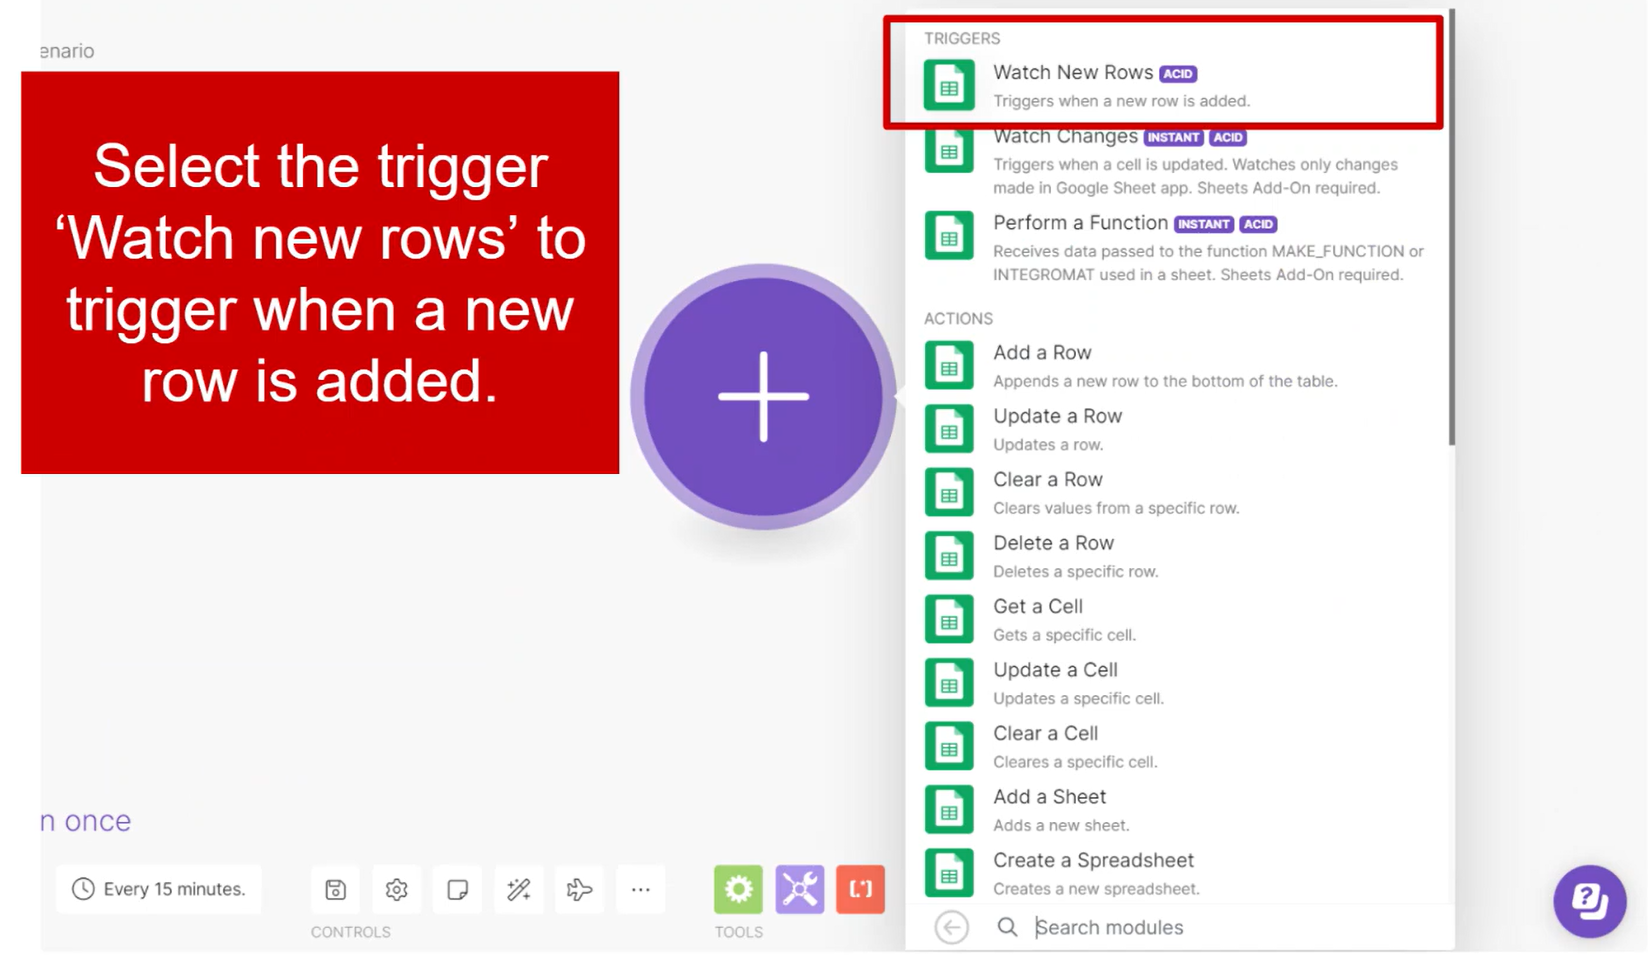
-
Add the Testlify app as the next step in the scenario.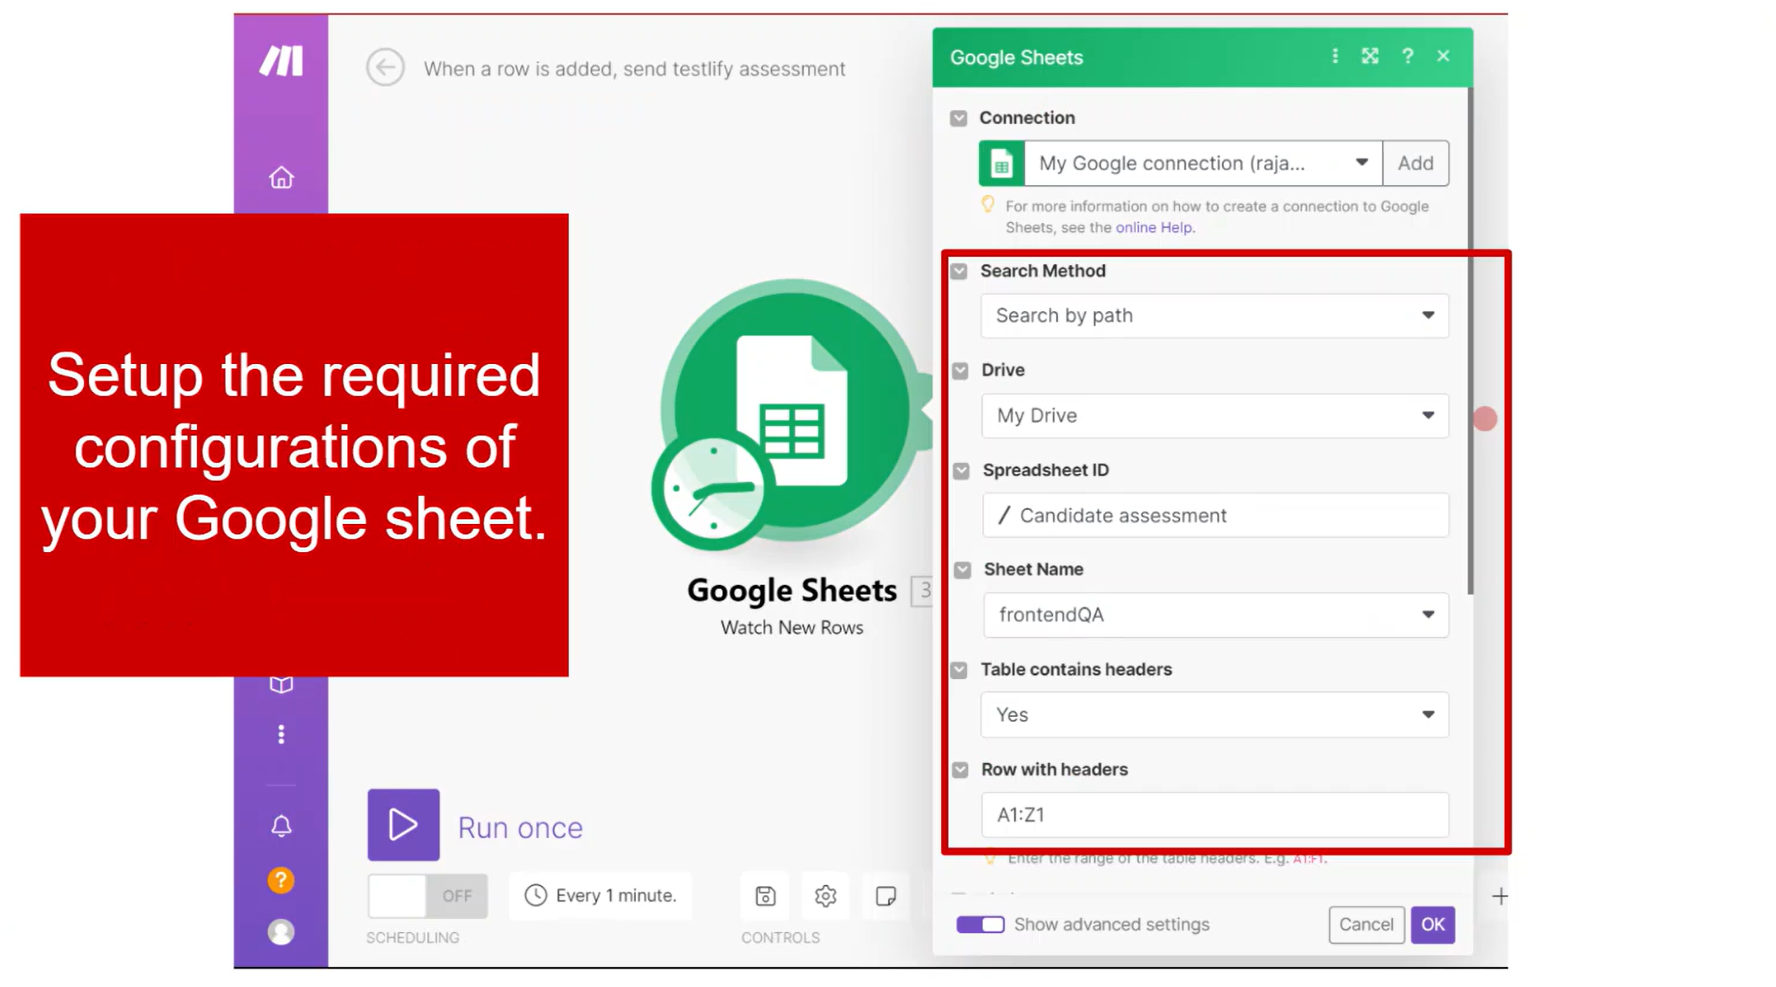
-
Select the action Send an Assessment.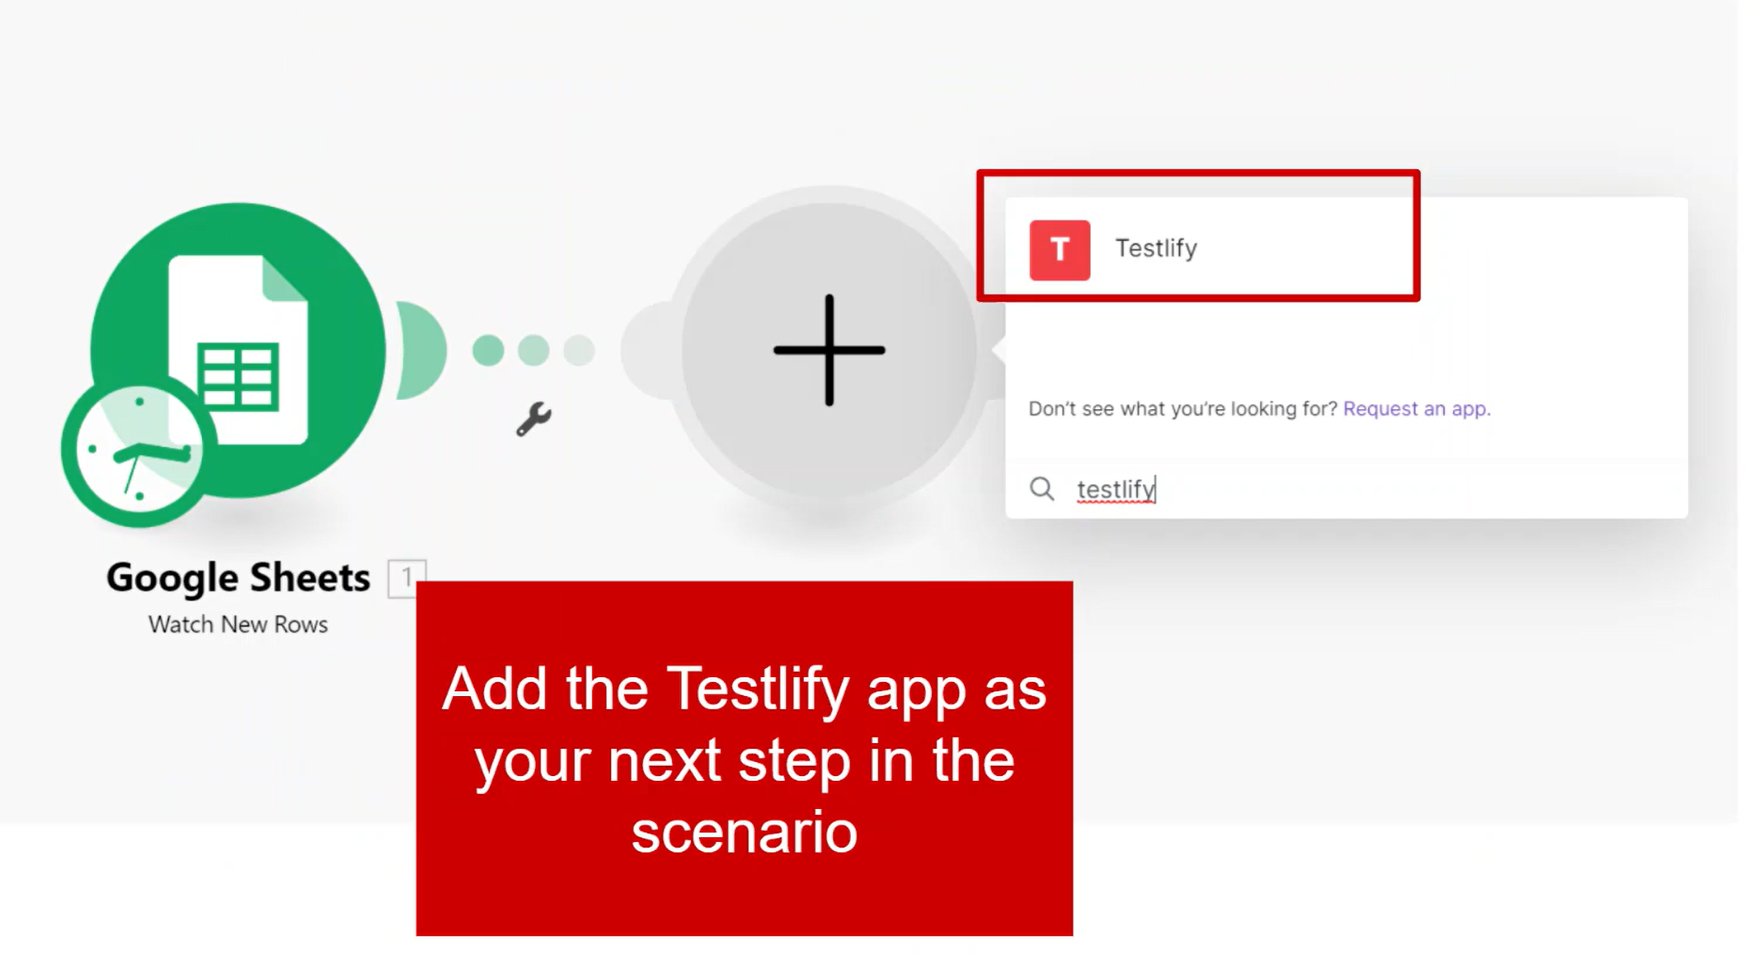
-
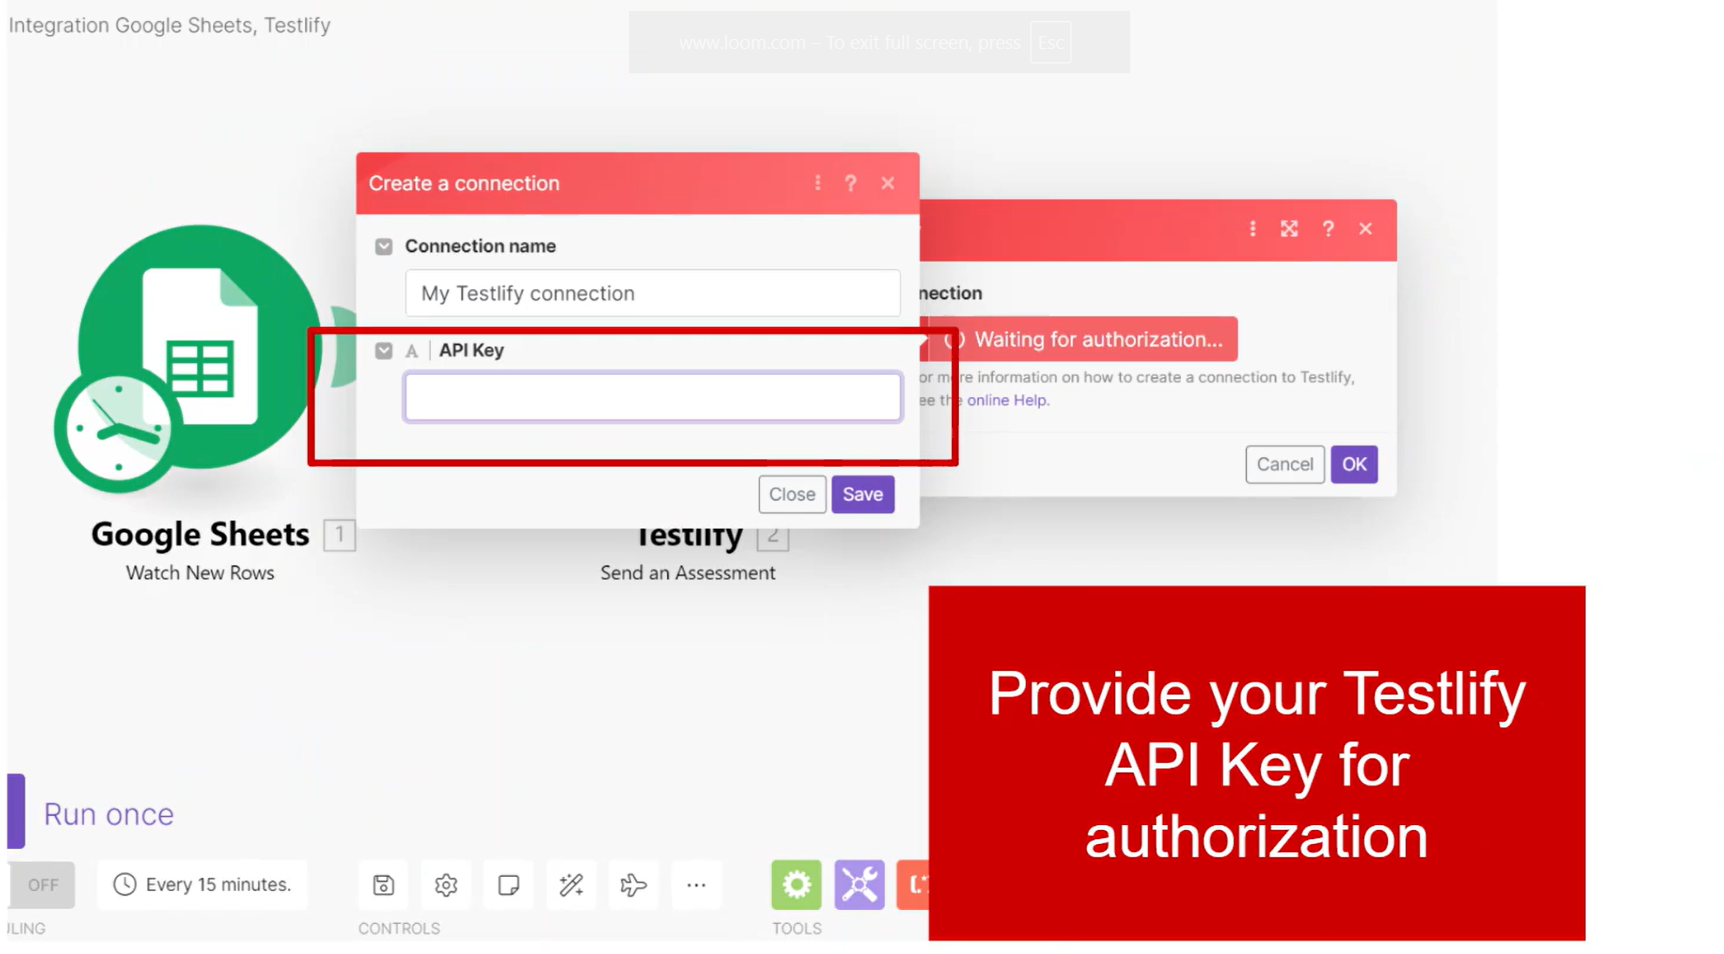
You will be directed to the Testlify authorization page.


Part 2: Generate Your Testlify API Key
- Go to https://app.testlify.com/login and log in to your Testlify account.
- Click Settings in the sidebar.
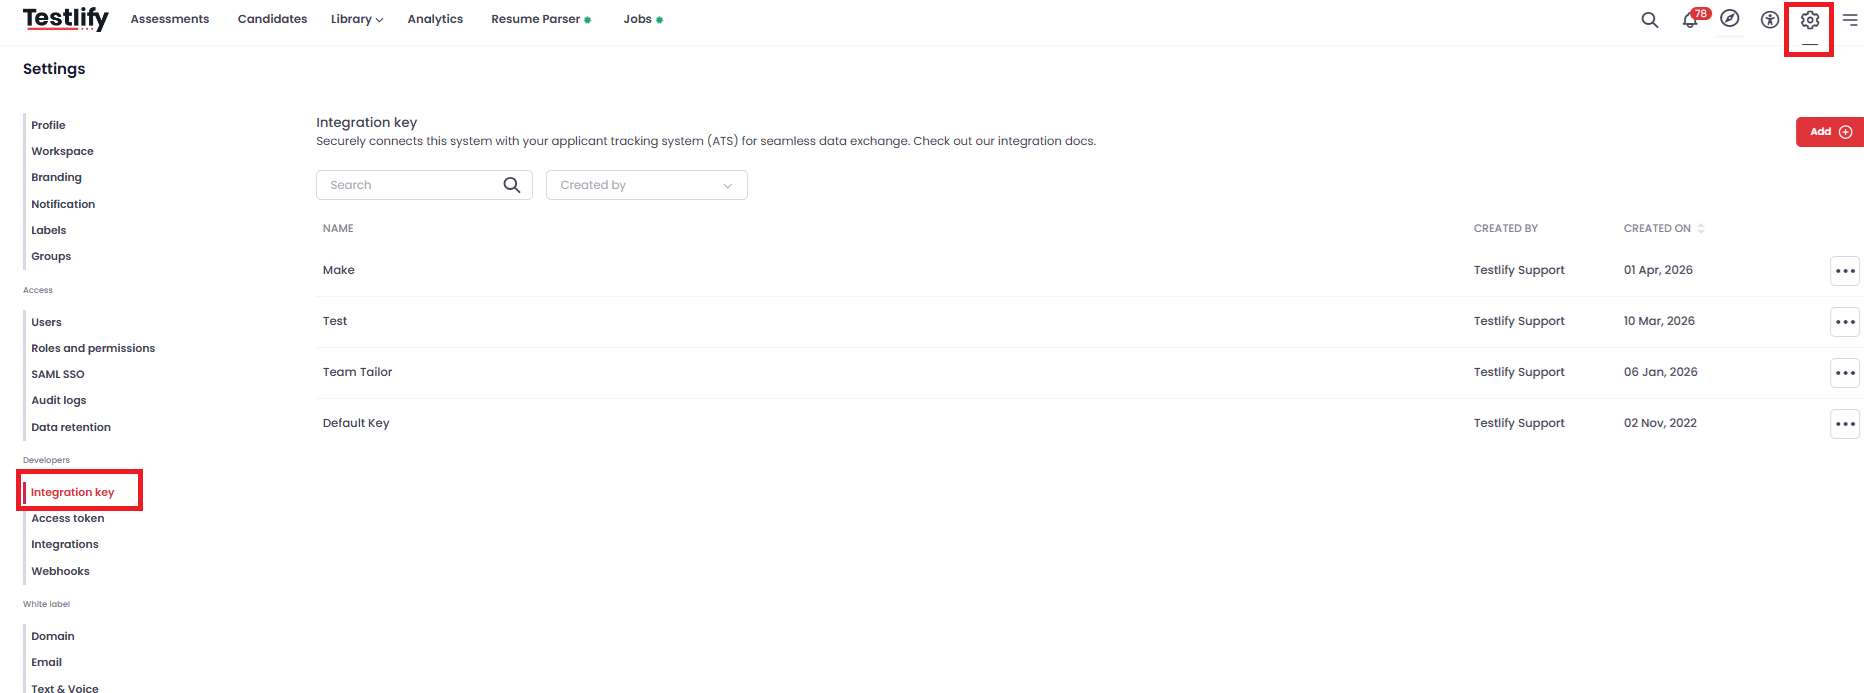
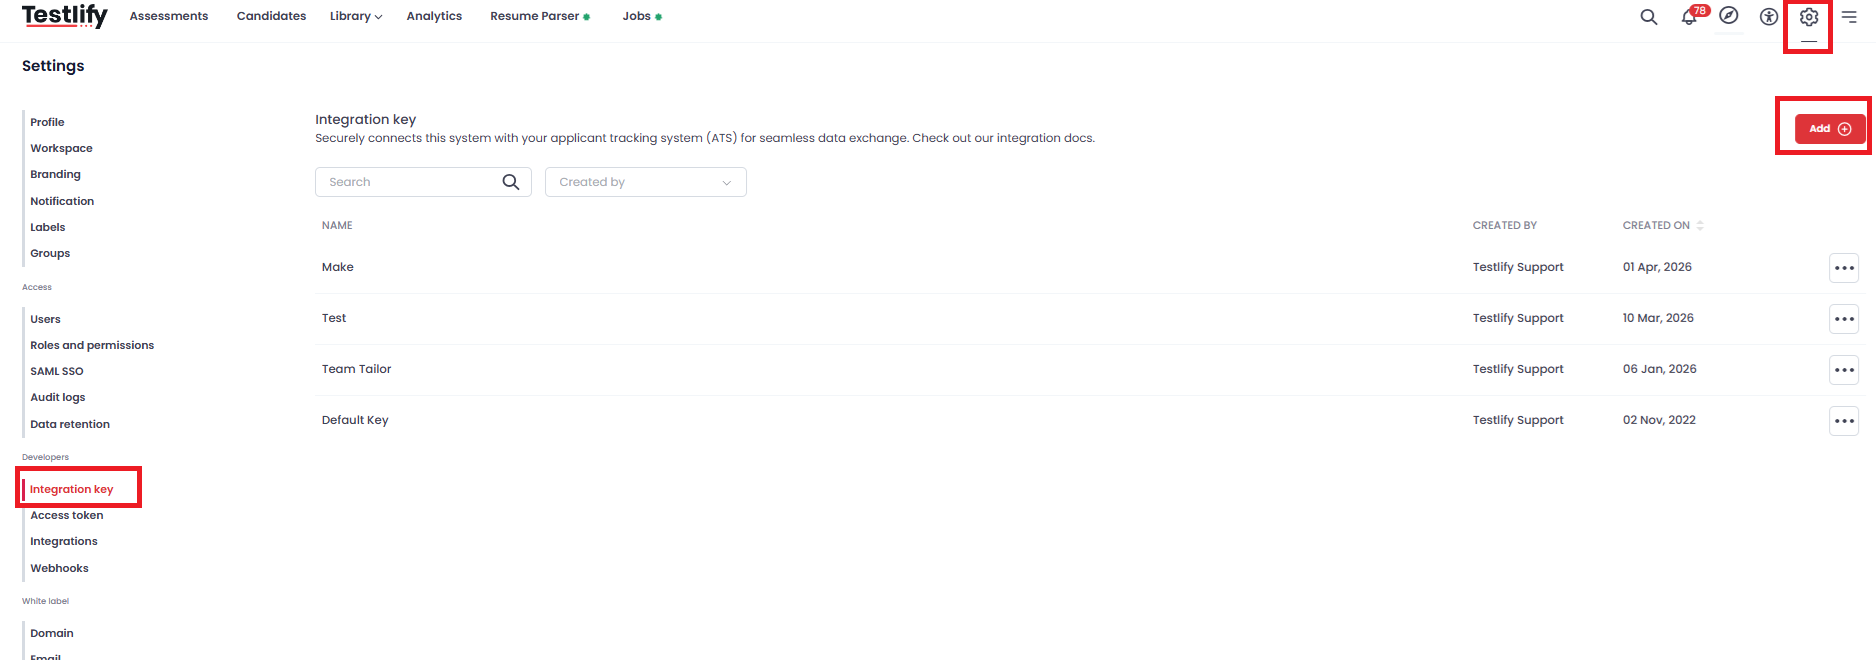
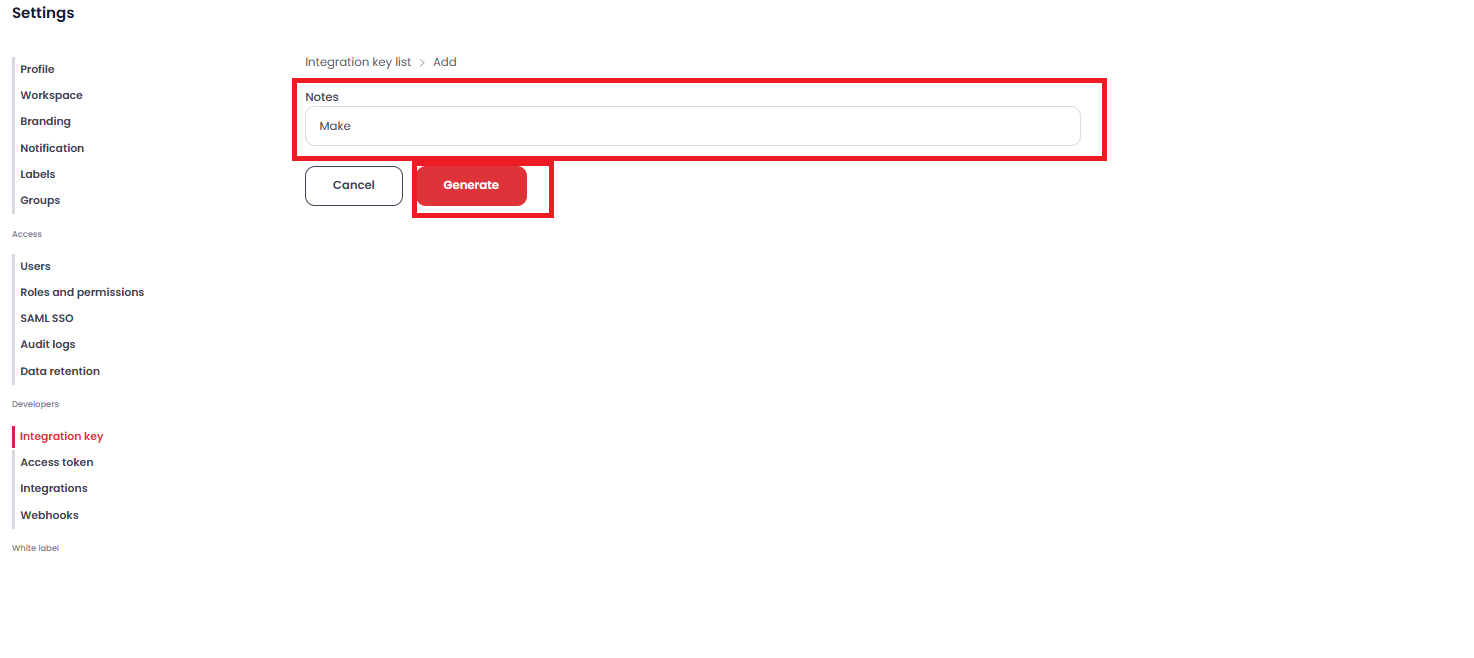
- Select Integration Key, click Add, then click Generate Key.
- Click Copy API Key.
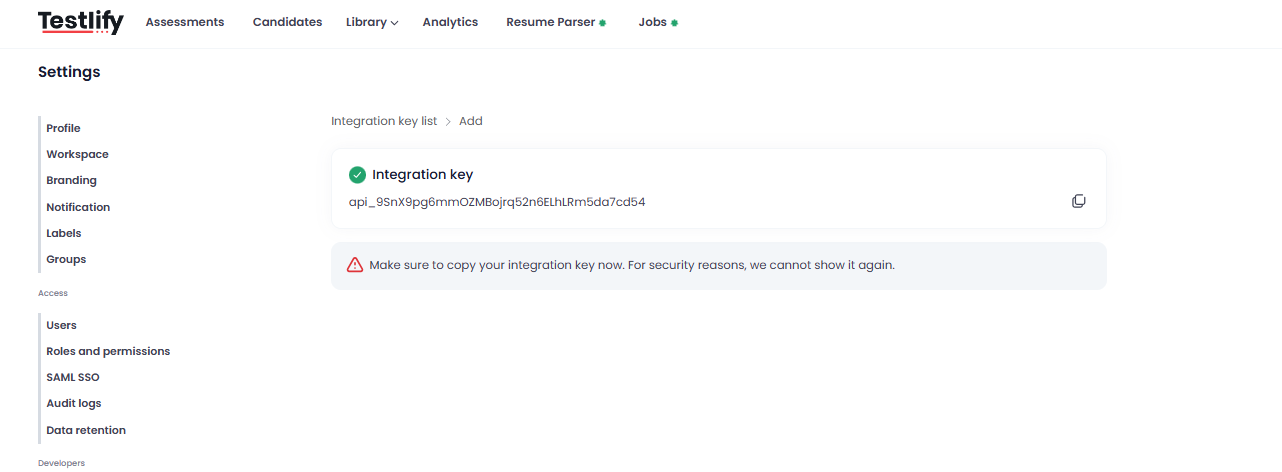
- Paste the API Key into the Make authorization field to connect your Testlify account.

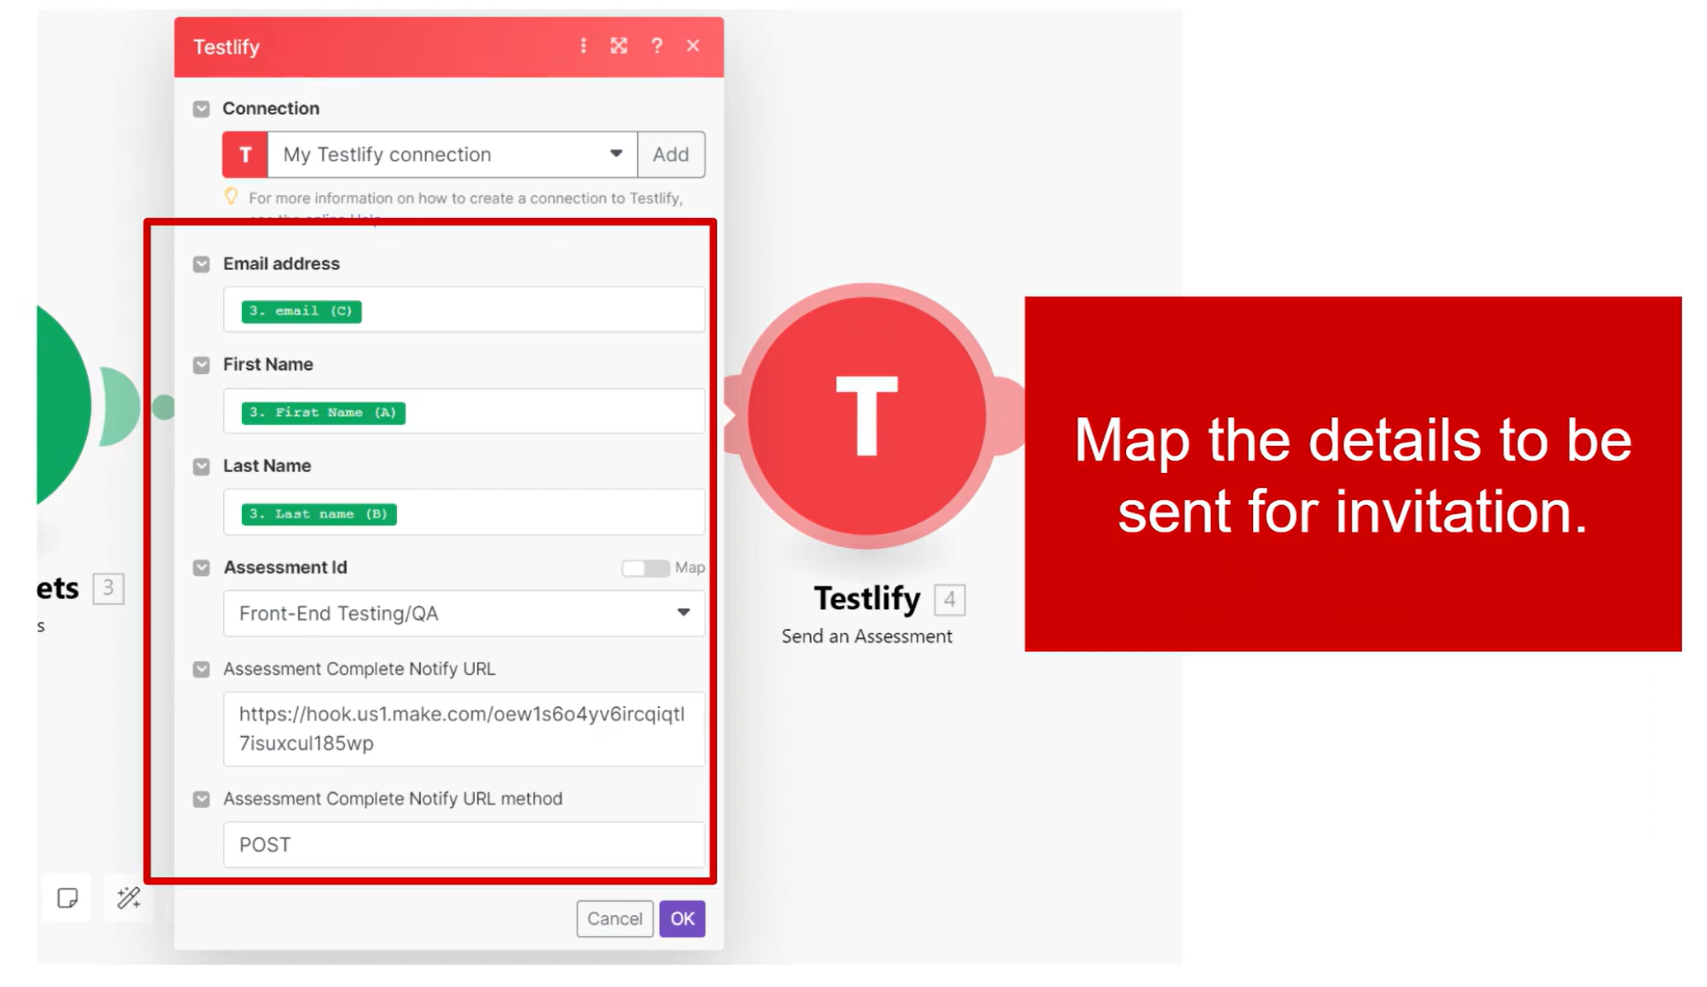
- Map the candidate fields (name, email, etc.) to the corresponding columns in your Google Sheet.
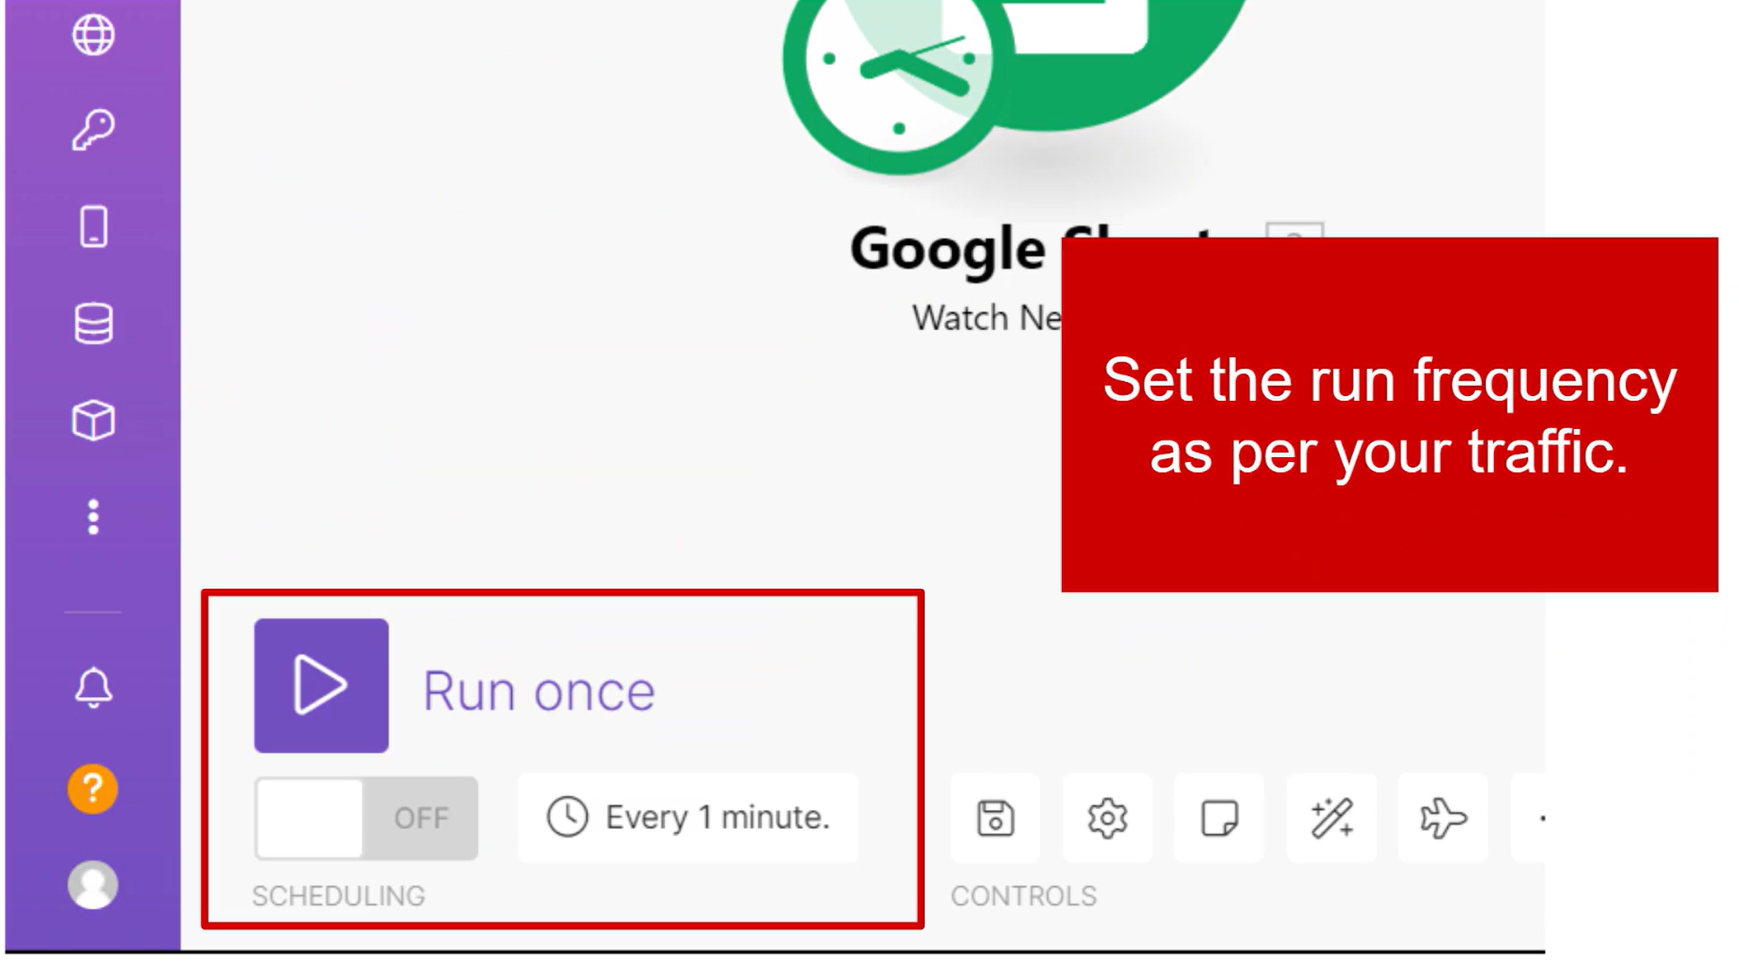
- Set the run frequency based on your expected candidate volume.


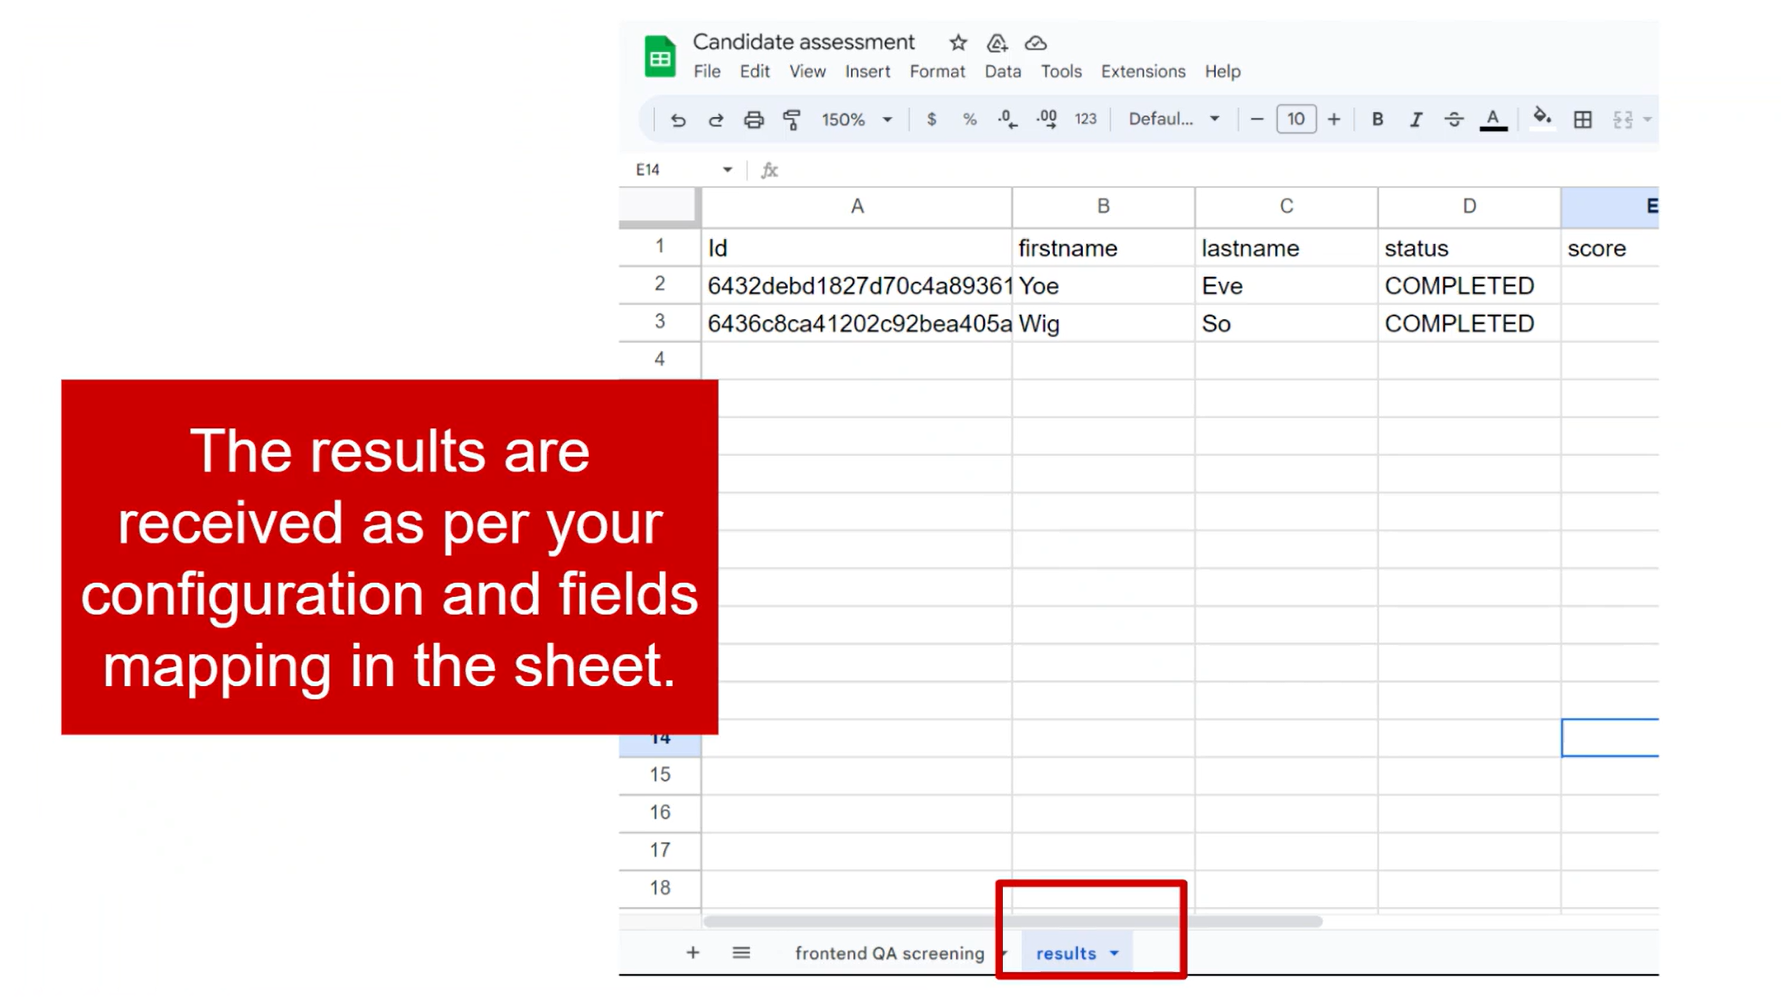
Part 3: Receive Assessment Results in Google Sheets
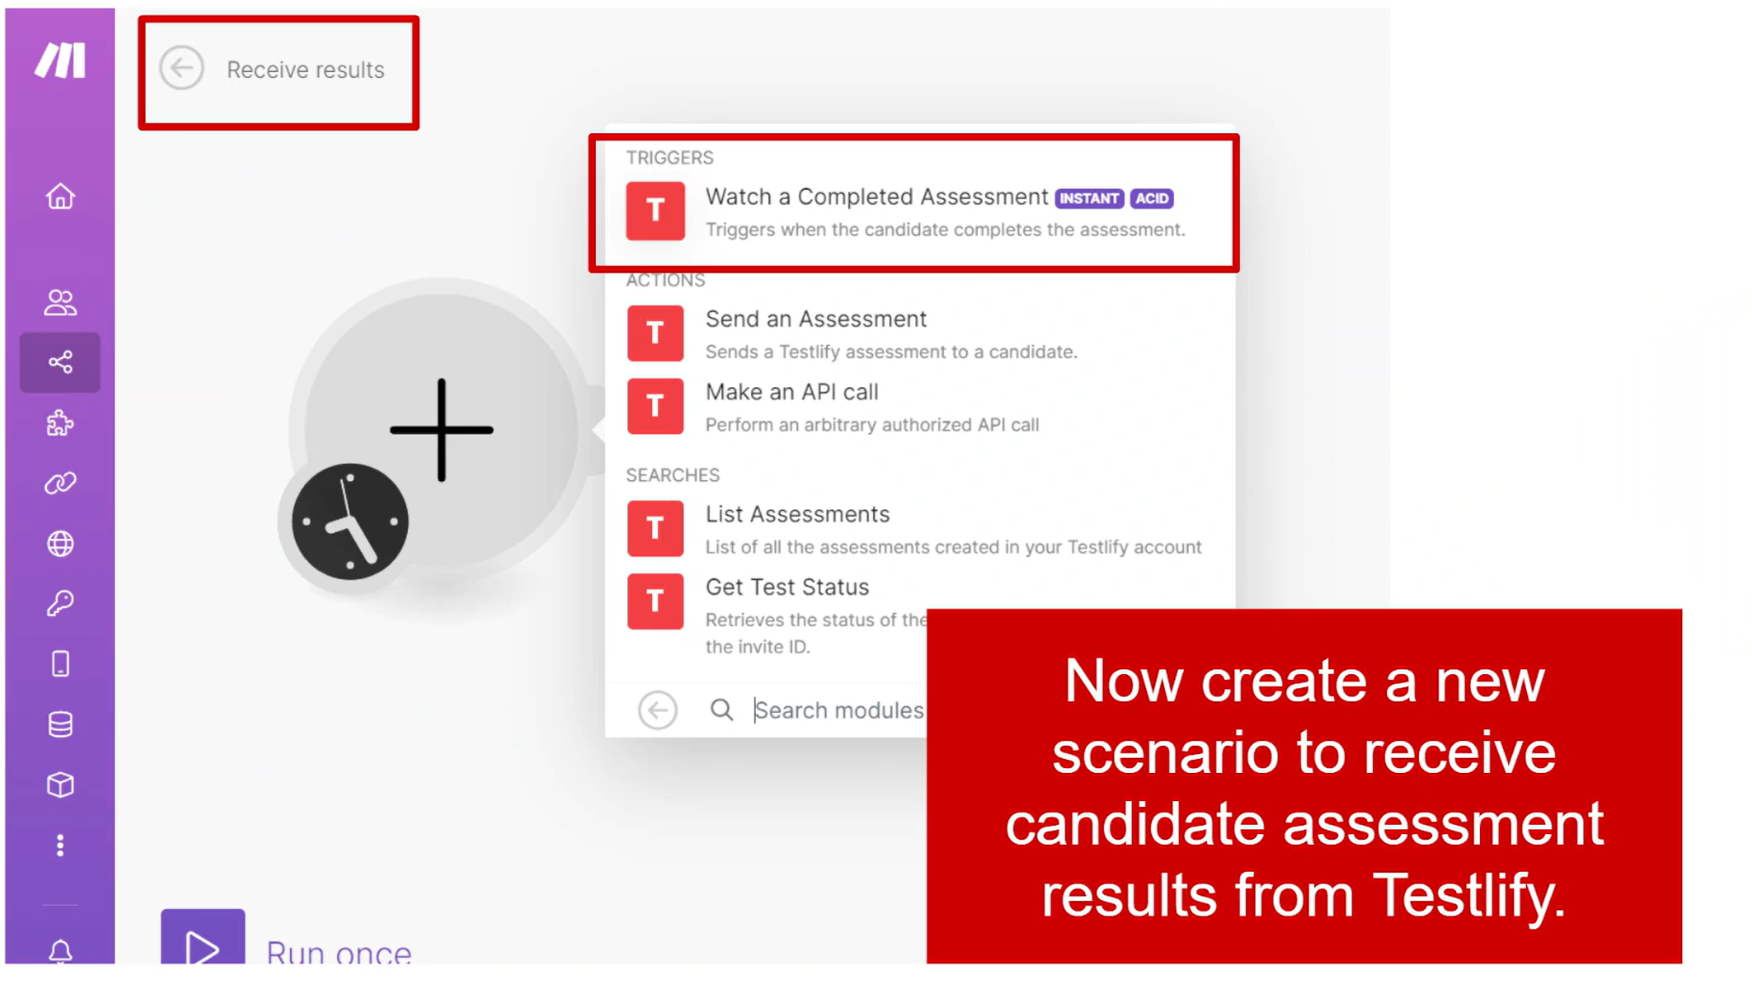
- Create a second scenario in Make to receive assessment results from Testlify.
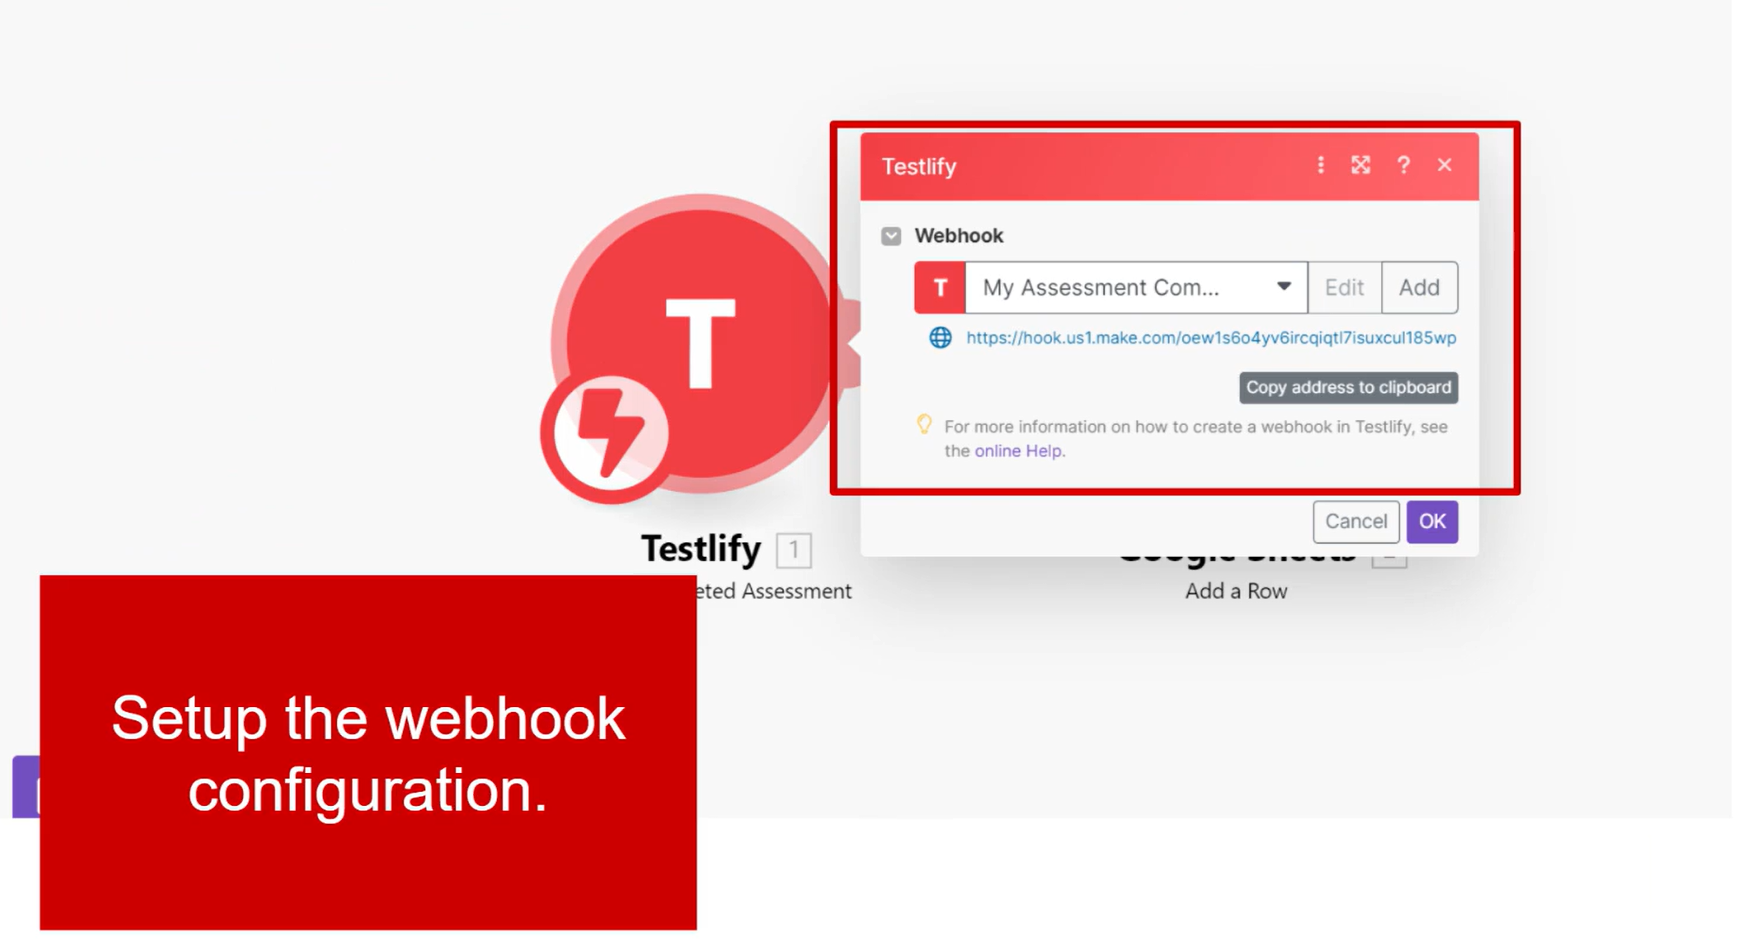
- Configure the webhook settings to capture incoming results from Testlify.
- Add Google Sheets as the next step and select the action Add a Row.

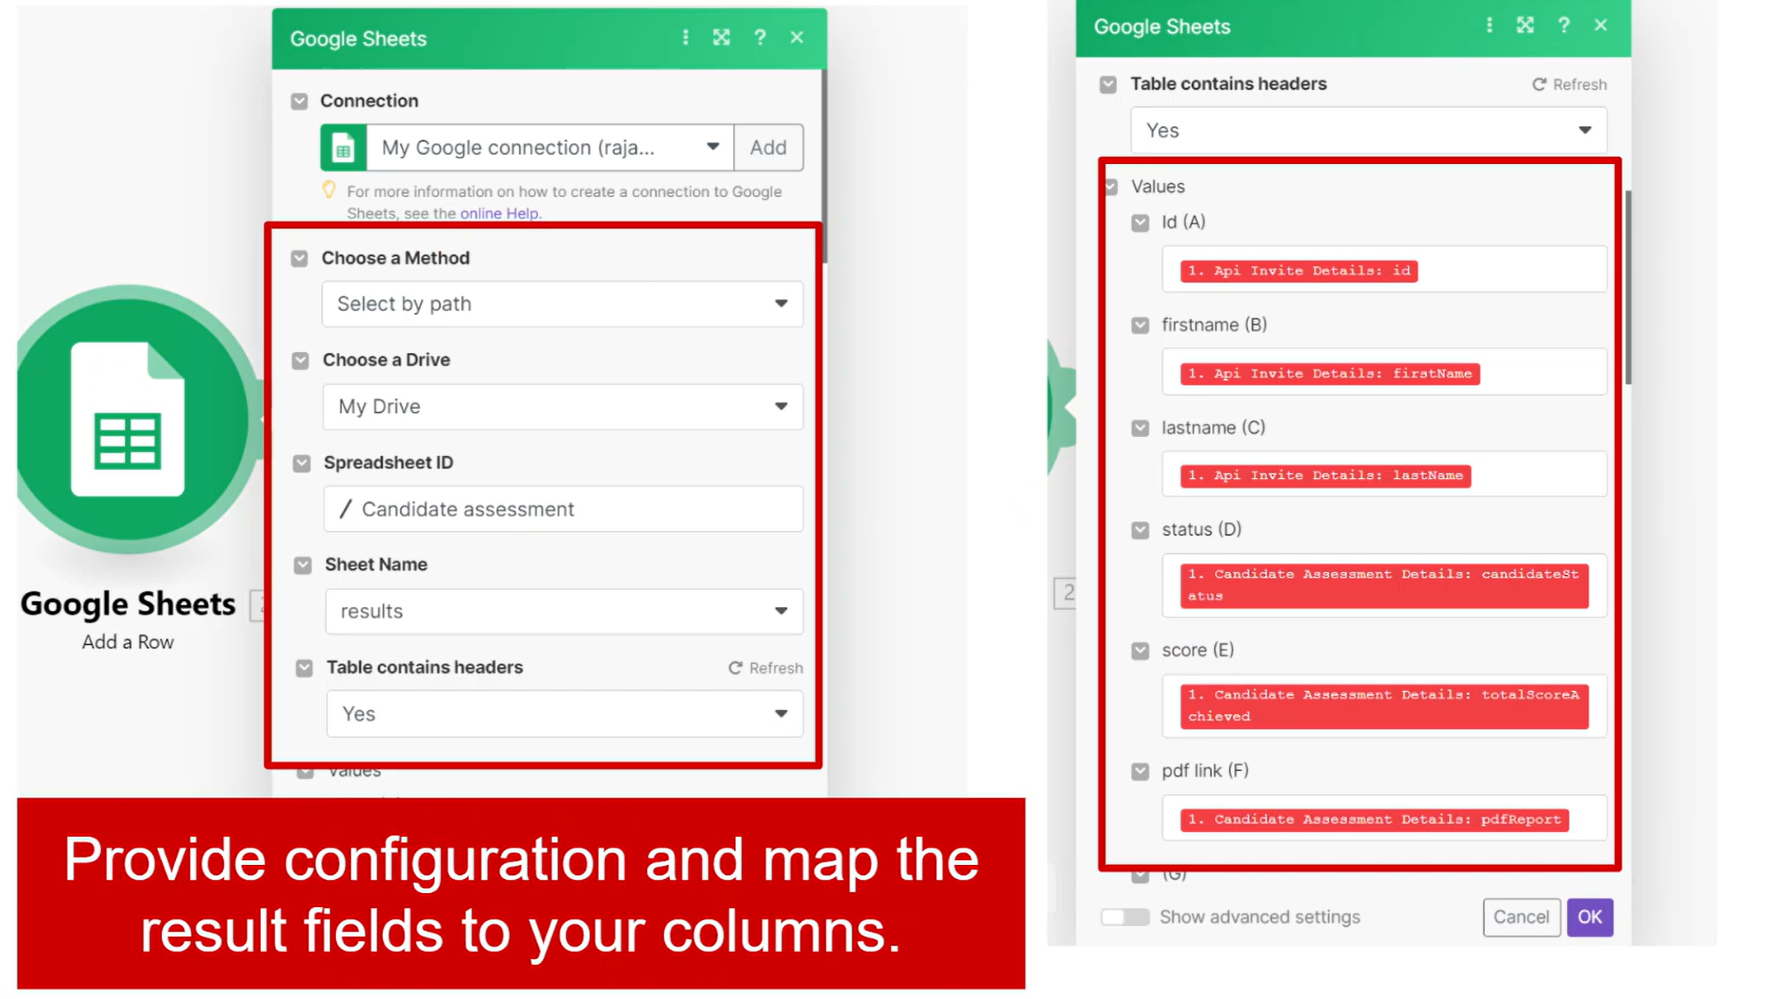
- Map the Testlify result fields to the corresponding columns in your spreadsheet.
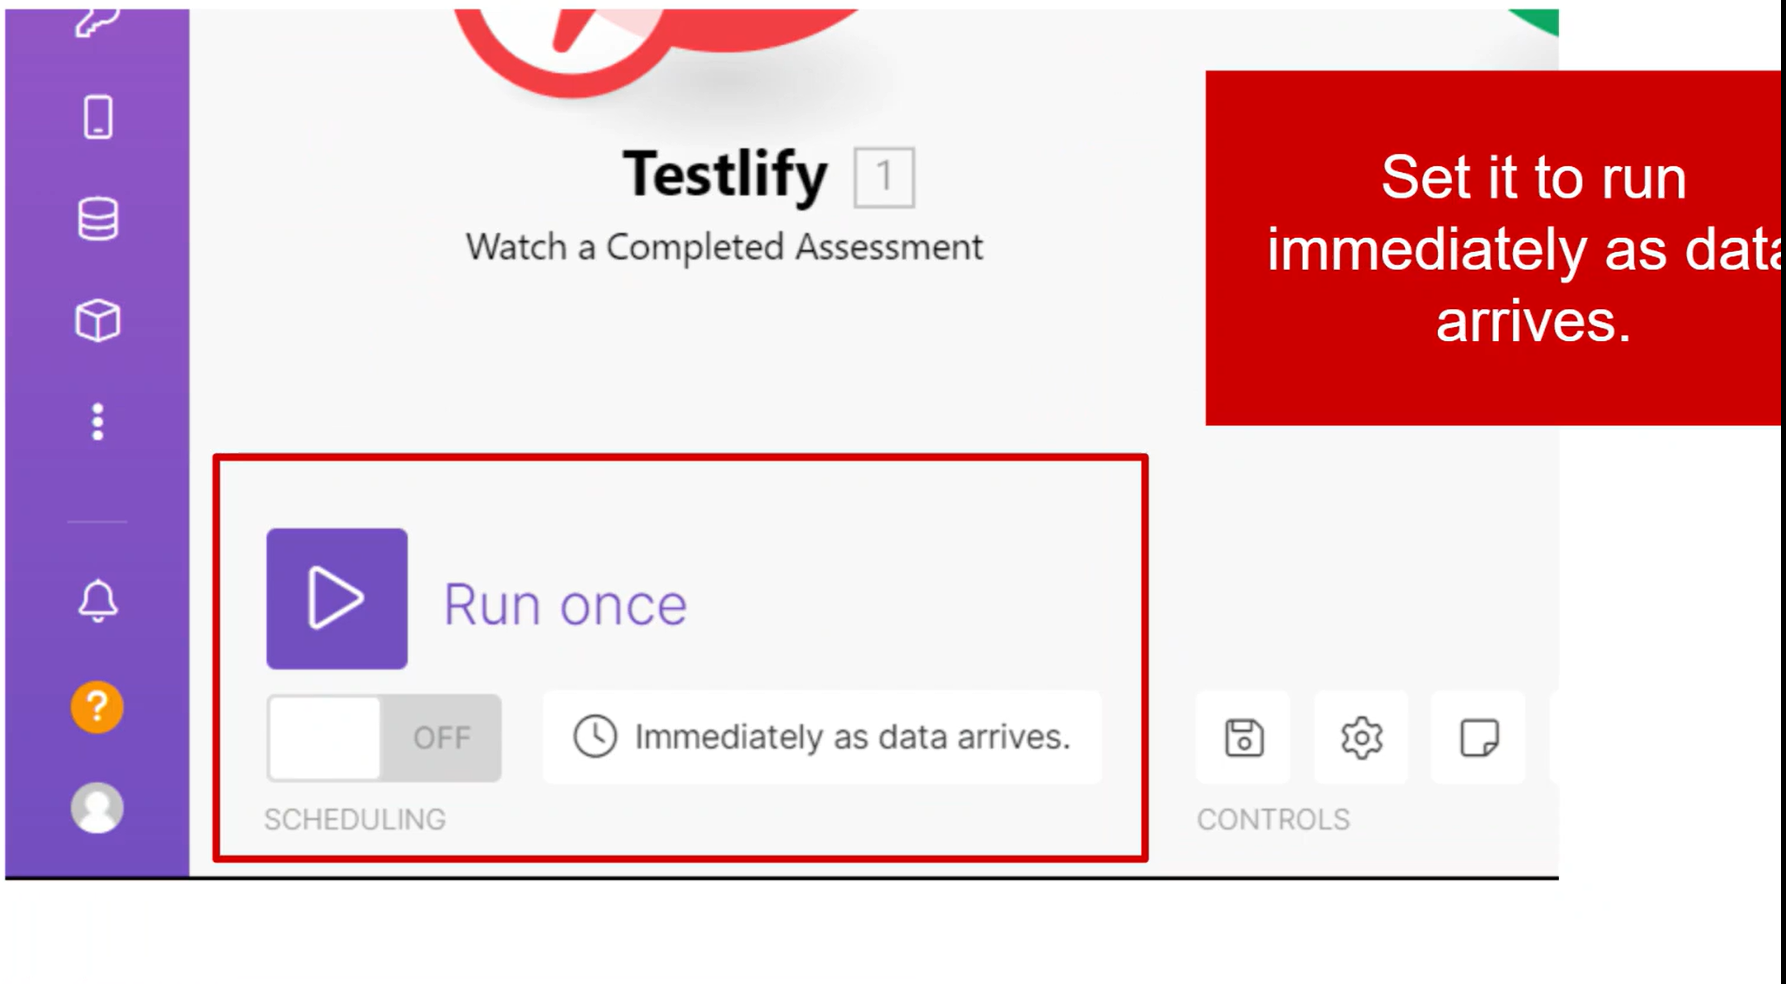
- Set the scenario to run immediately upon data arrival.


Tip: Keep your two Make scenarios separate — one for sending invitations and one for receiving results. This makes each easier to test and troubleshoot independently.
Need help? Contact support.