Set Up the Zoho Recruit Integration with Testlify
Before you begin
- Administrator access to your Zoho Recruit account
- Administrator access to your Testlify workspace
- Access to the Zoho Recruit Marketplace
Part 1: Install the Testlify extension in Zoho Recruit
-
Click Marketplace in your Zoho Recruit account.
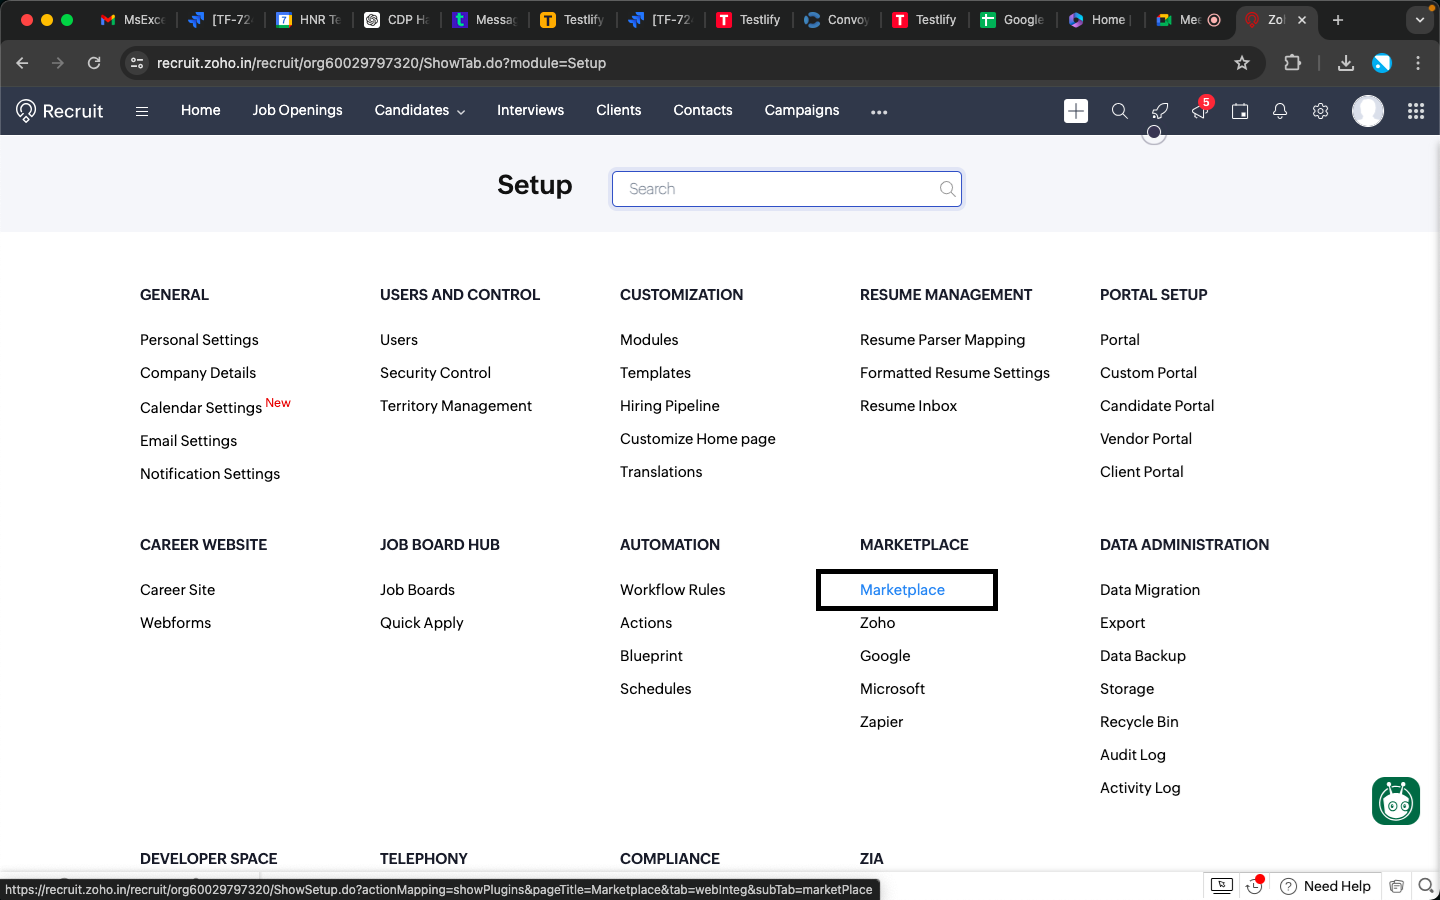
-
In the Marketplace search bar, enter Testlify For Zoho Recruit.

-
On the extension page, click Install.

-
Select the checkbox, then click Install Now.
-
Click Agree and Continue.
-
Select Install for all users (recommended), then click Confirm.
Part 2: Authorize the integration
- Click Authorize.
-
Click Accept.
-
Click Finish.
Part 3: Configure the automation webhook in Zoho Recruit
Create a Workflow Rule with a Webhook action so Zoho Recruit automatically triggers Testlify assessment invitations when a candidate's status changes. This is a one-time setup.
Tip: Before going live, confirm that the connection is active, all parameters are mapped correctly, and the stage names in Zoho match the stages you configure in Testlify.
Step 1: Navigate to Workflow Rules
- Go to Settings in your Zoho Recruit account.
- Under Automation, click Workflow Rules.
- Click Create Rule.


Step 2: Create a new rule
Fill in the rule details:
- Module: Applications
- Rule Name: TestlifyQA (example)
- Description: QA (example)
Click Next.
Step 3: Set the trigger condition
- Select On a Record Action.
- Choose Change Status.
Click Next.

Step 4: Apply rule criteria
- Select All Applications.
- Click Next.

Step 5: Configure the instant action (Webhook)
- Click Instant Actions.
- Select Webhook.

Step 6: Configure webhook details
Fill in the following:
- Name: Invitation Testlify
- URL to Notify:
https://integrations.testlify.dev/hooks/v1/zoho-recruit/send-assessment-change-status - Method: POST
- Authorization Type: Connection
- Select the appropriate Connection from the dropdown.

Step 7: Add webhook parameters
Add the following parameters:

| Parameter Name | Module | Field Value |
|---|---|---|
| candidateId | Candidates | Candidate Id |
| Candidates | ||
| candidateFirstName | Candidates | First Name |
| candidateLastName | Candidates | Last Name |
| jobId | Job Openings | Job Opening Id |
| clientId | Organization | Organization Name |
| status | Applications | Application Status |
Step 8: Generate preview and save
- Click Refresh to generate the Preview URL.
- Click Save and Associate.
- Click Save.


The webhook rule is now active. Any candidate status change in Zoho Recruit automatically triggers Testlify to send or update the assessment.
Part 4: Connect Zoho Recruit in Testlify settings
-
In Testlify, click Settings.

-
Select Integration from the side panel.

-
Choose Zoho Recruit from the list of integrations.

-
Log in with your Zoho Recruit credentials.

Part 5: Link an assessment to the Zoho Recruit integration
-
Select an assessment and click Edit.
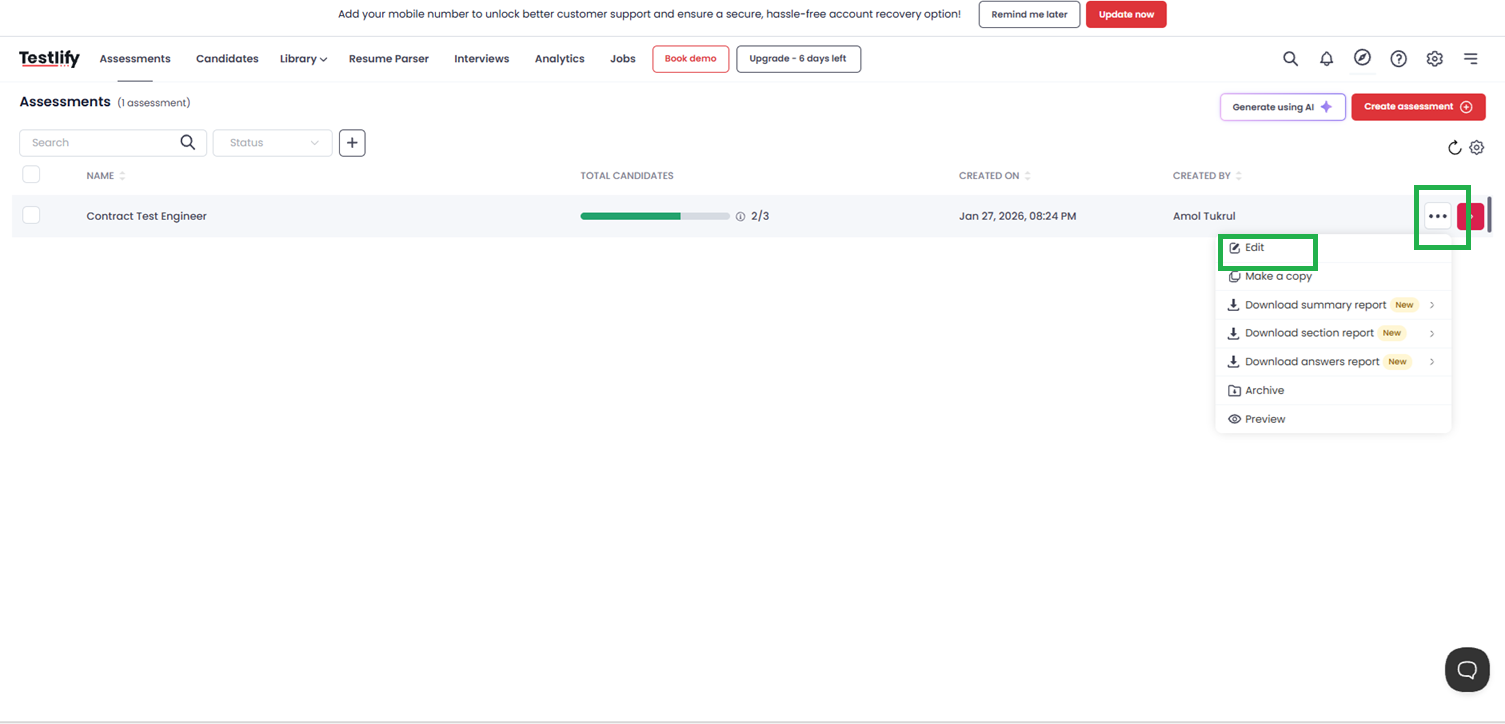
-
Under Setup Assessment, go to Settings and click Integration.
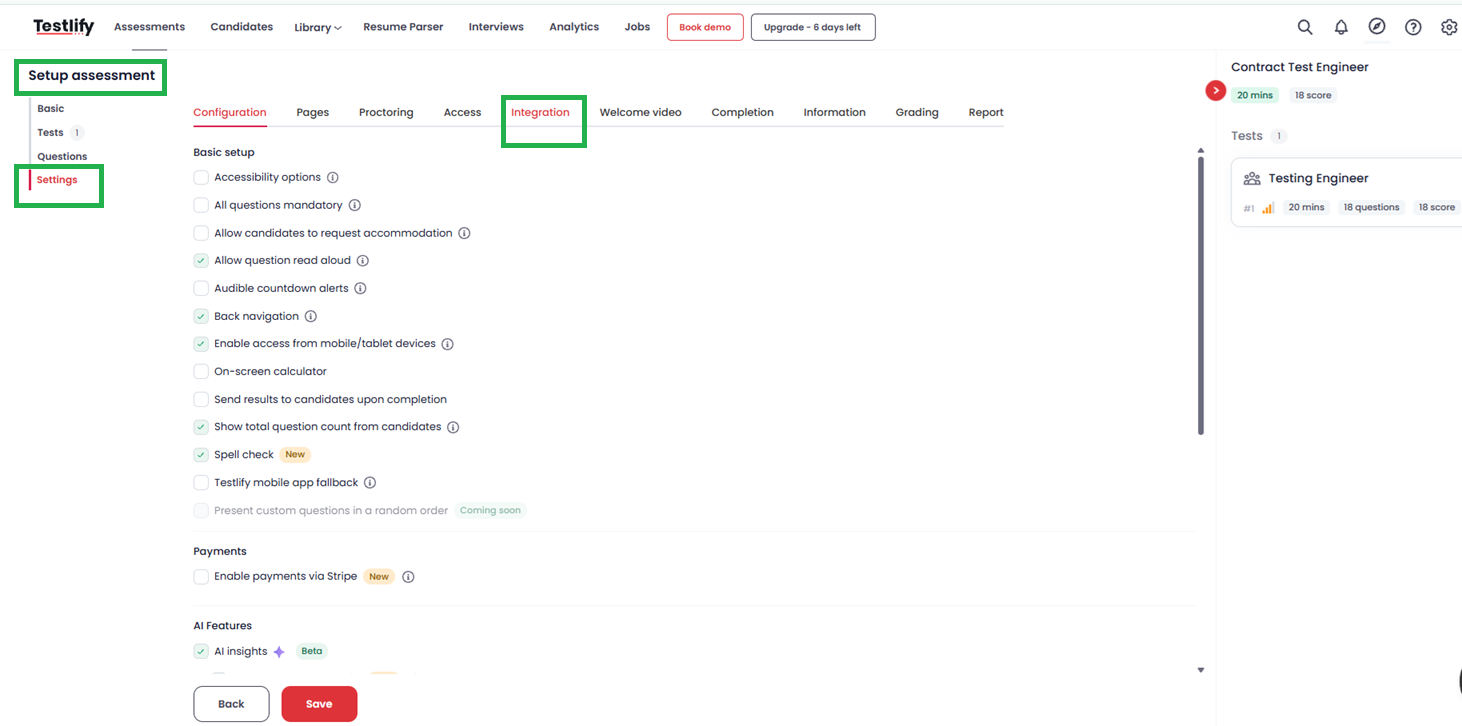
-
Click Add, select Zoho Recruit, choose the Job Role, enter the Invitation Stage and Completion Stage, then click Add.
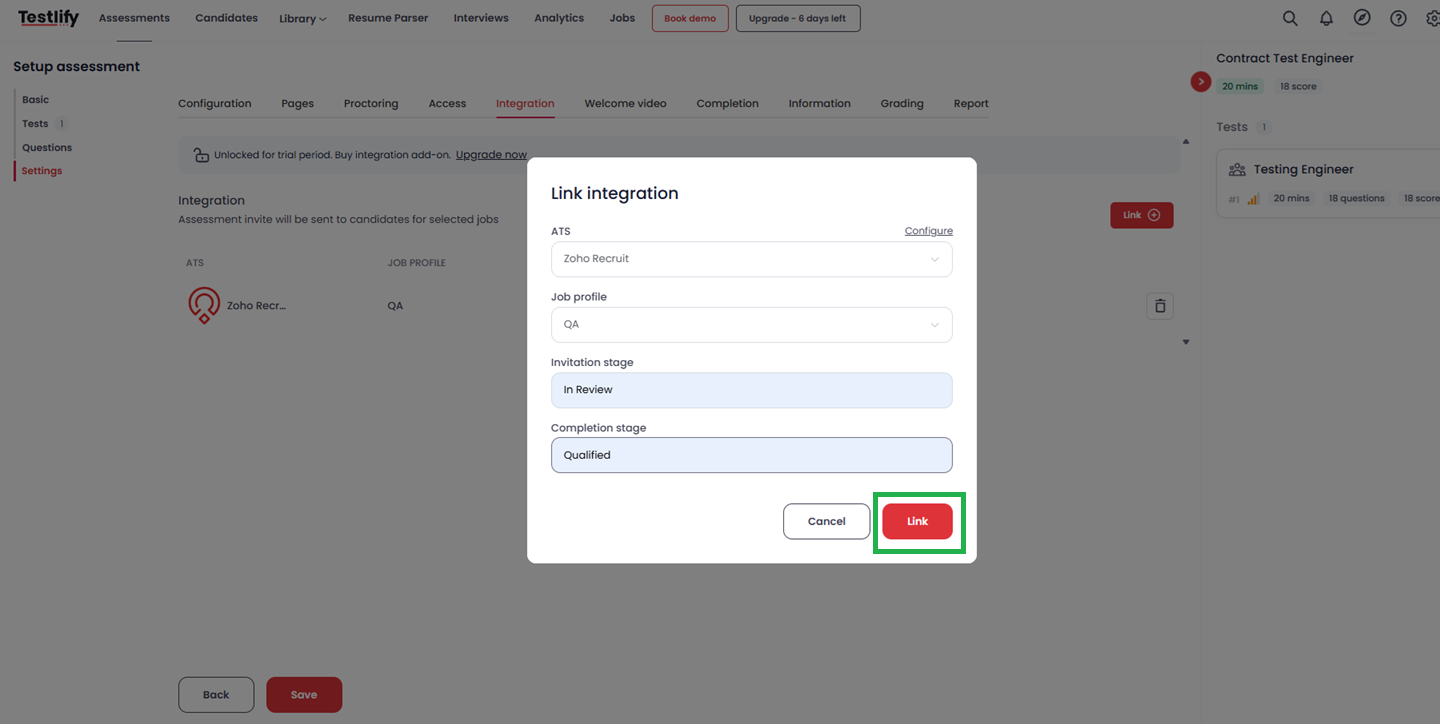


Tip: The Invitation Stage is the Zoho Recruit pipeline stage that triggers the assessment invitation (for example, In Review). The Completion Stage is the stage candidates move to automatically once they finish the assessment (for example, Qualified). These stage names must exactly match the stages in your Zoho Recruit pipeline.
Part 6: Send an assessment to candidates
-
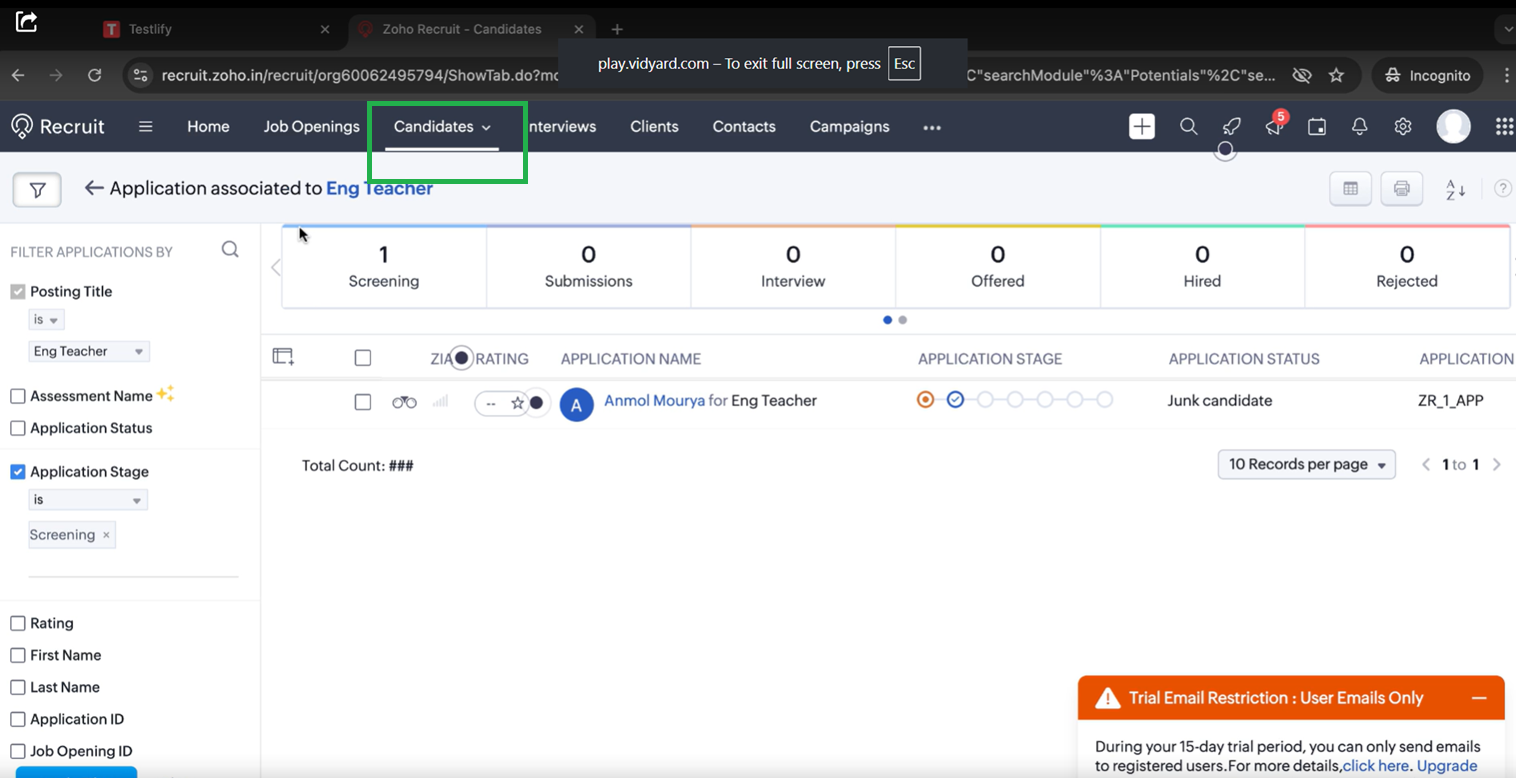
In Zoho Recruit, click Candidates.
-
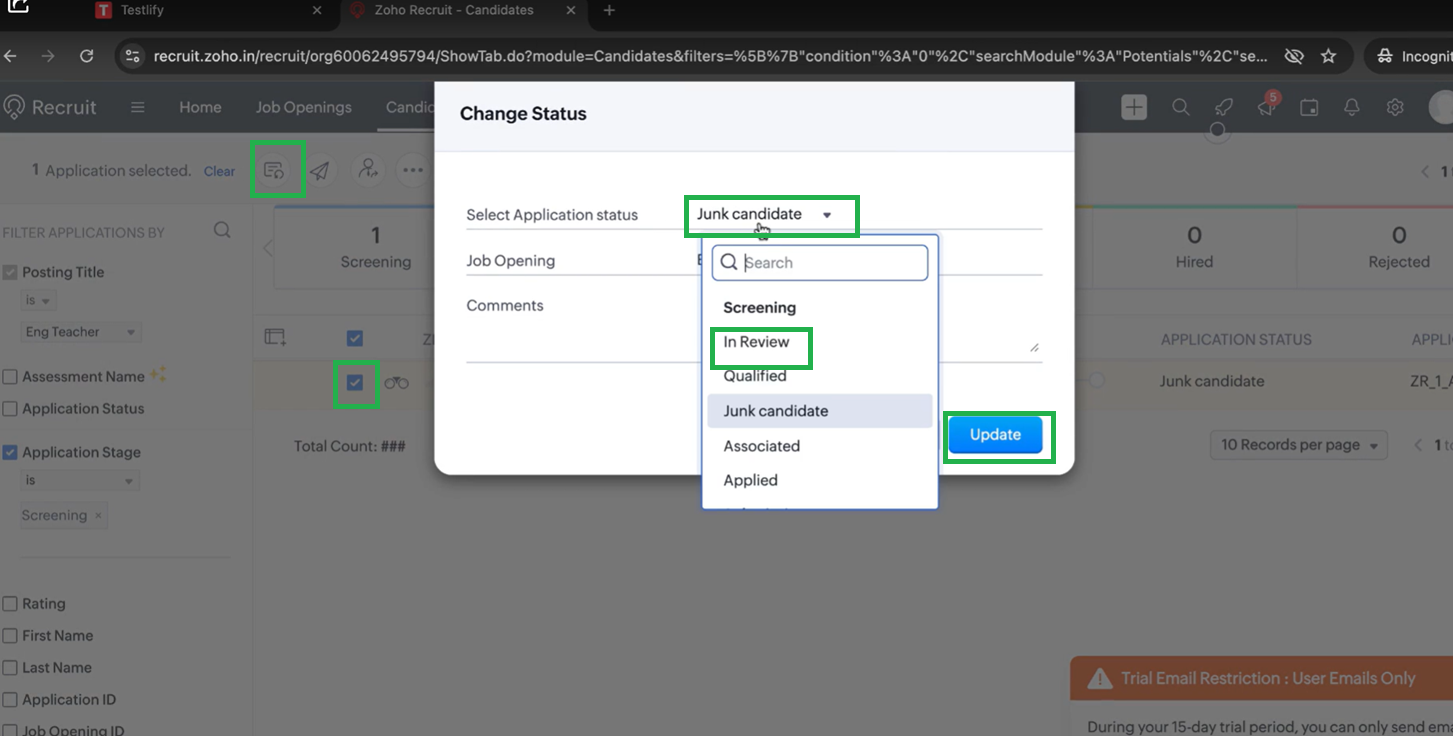
Select a candidate and move them to the Invitation Stage (for example, In Review).
-
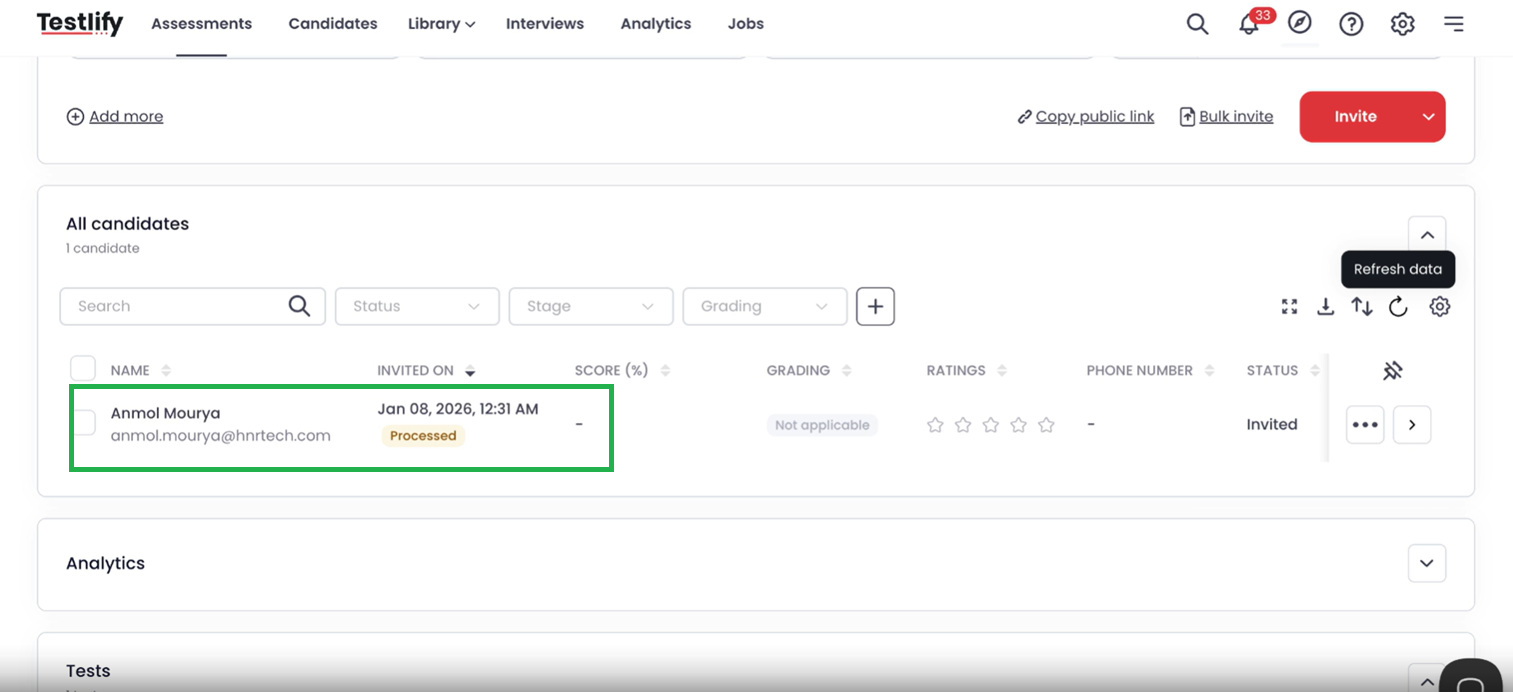
The candidate receives an assessment invitation automatically. You can also confirm the invitation in the Testlify platform.
-
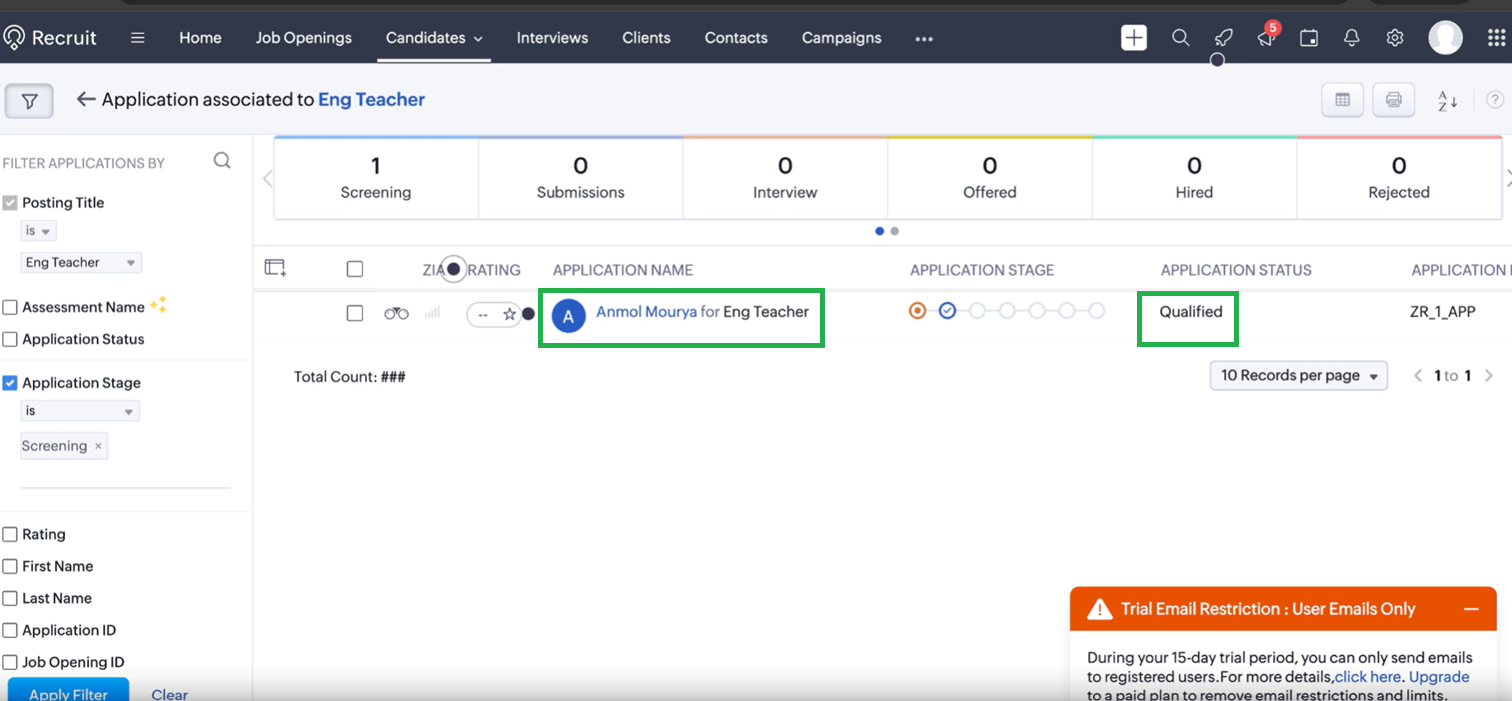
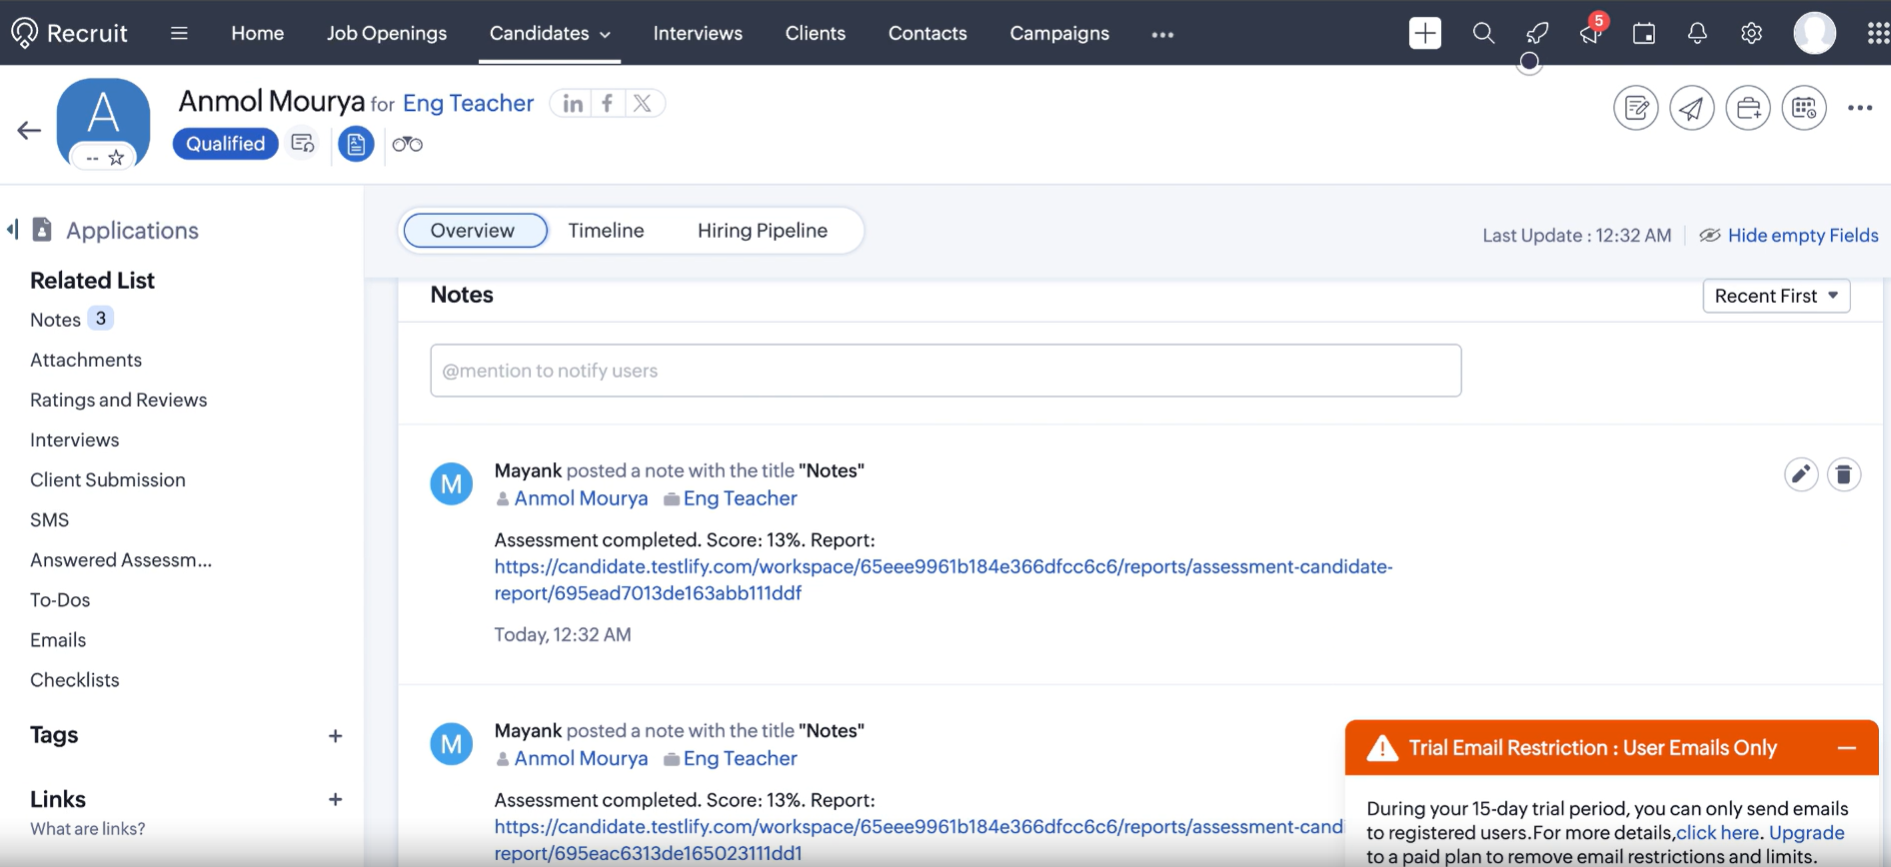
When the candidate completes the assessment, they move to the Completion Stage (for example, Qualified) automatically. After a few minutes, open the candidate's profile in Zoho Recruit, scroll down to Notes, and find their score and report link.


Need help? Contact support.