
How to Create and Manage Assessments on Testlify
This guide covers every stage of assessment management on Testlify — from creation through archiving and deletion.
In this article:
- What is an assessment?
- Create an assessment
- Edit an assessment
- Clone an assessment
- Archive an assessment
- Delete an assessment
Before you begin
You need an active Testlify account with the role of Owner, Admin, or Member. If you don't have an account yet, register for free.
What is an assessment?
An assessment is a collection of tests and questions used to evaluate a candidate for a specific job role. Each assessment can include three types of content:
- Qualifying questions — Screening questions candidates must answer before the main test. A wrong answer disqualifies the candidate automatically. Examples: years of experience, license type, or required skill level.
- Tests — Skill-based evaluations drawn from Testlify's library of 1,000+ pre-built tests.
- Custom questions — Questions you design to assess work history, personality, or role-specific knowledge.
Create an assessment
Step 1 — Name and set up
- Click "Create New Assessment" in the top-right corner of your dashboard.
- Enter a Name and the Job Role. The name helps you track assessments; the job role lets Testlify recommend relevant tests.
Step 2 — Add tests
- Browse the Test Library. Use the search box or the Test type filter to find tests by skill area.
- Click any test card to read its summary, view tagged skills, and preview sample questions via View Sample Questions.
- Click Add to include a test. Added tests appear in the cart on the right with the running total time.


Tip: Keep total assessment time under 60 minutes. Longer assessments increase candidate drop-off rates.
Step 3 — Add qualifying and custom questions
- In the assessment builder, go to the Questions section and click the Custom tab.
- Select Qualifier Questions to add screening questions. Candidates who answer incorrectly are disqualified and cannot continue.
- Add any custom questions to evaluate experience, motivation, or job-specific skills.

Step 4 — Configure settings and publish
- Open the Settings tab and apply the proctoring controls appropriate for your use case.
- Enable optional features as needed:
- Welcome Video — Play a greeting video before candidates begin.
- Completion — Show a custom message after submission.
- Information — Display instructions or role details to candidates.
- Grading — Set pass/fail score thresholds.
- Report — Configure what appears in the candidate report.
- Click Save (bottom-right) to publish the assessment.


After creating your assessment
- Preview it — Attempt the assessment yourself before inviting candidates to catch issues early. If you find problems, clone the assessment, fix the clone, and use that instead.
- Invite candidates — Send individual or bulk email invitations, or share the Public Link.
Edit an assessment
You can edit an assessment at any time. Changes apply only to newly invited candidates — candidates already invited before the edit are not affected.
- Go to the Assessments tab and click the arrow on the far right of the assessment row.
- On the assessment detail page, click Edit (top-right, below your profile icon).
- Make your changes, then click Save.
Clone an assessment
Cloning copies an existing assessment — including its tests, qualifying questions, custom questions, and settings — so you can adapt it without starting from scratch.
- Go to the Assessments page and click the three-dot menu on the far right of the assessment row.
- Select Make a copy.
- Update the clone's name, questions, or settings as needed, then invite candidates.

Archive an assessment
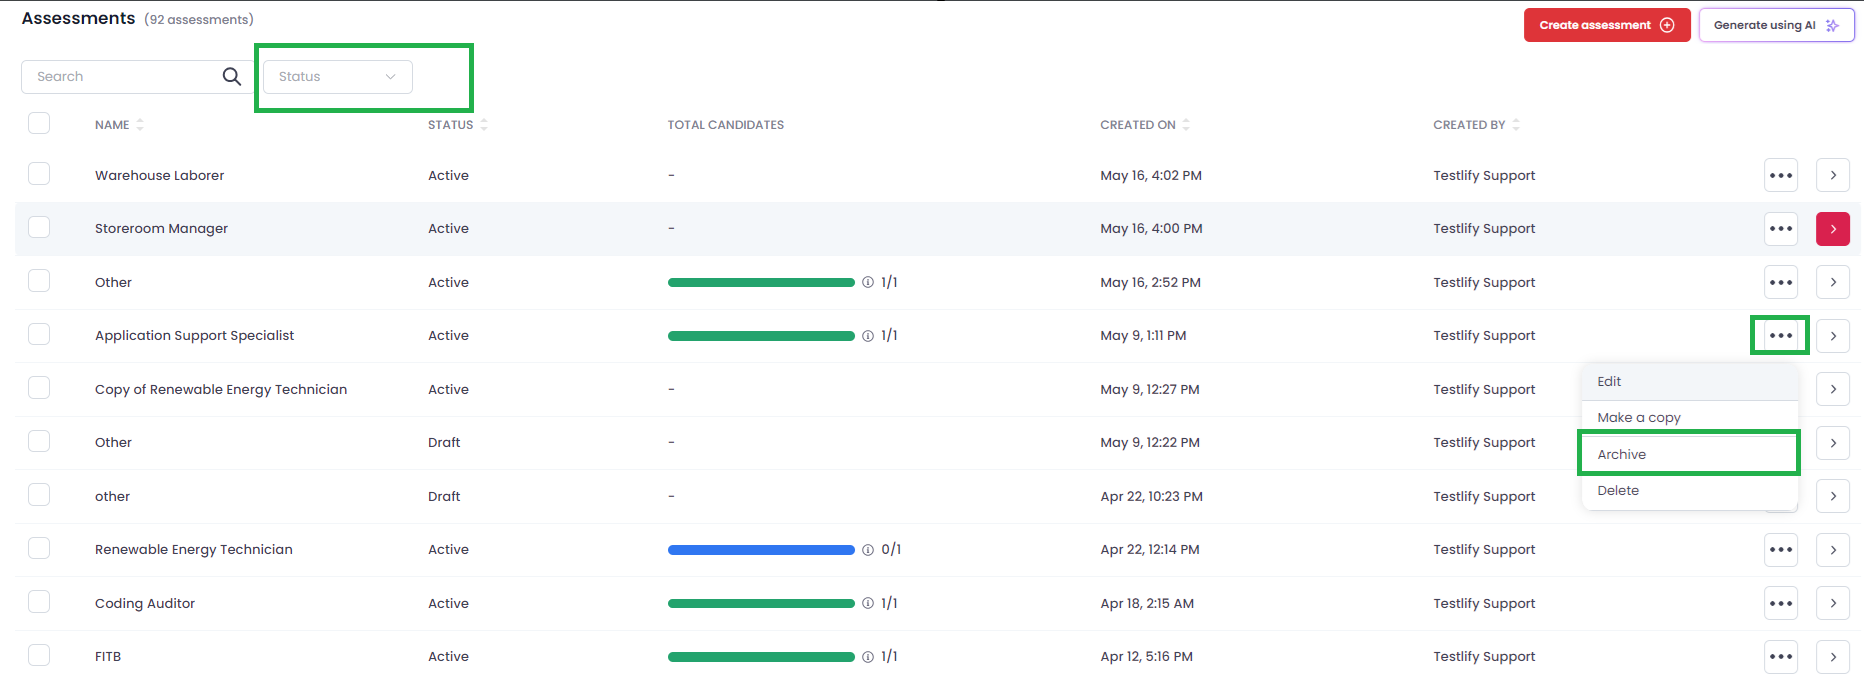
Archiving removes an assessment from your active list without deleting it. You can view and restore archived assessments at any time.
- Click the three-dot menu on the far right of the assessment row.
- Select Archive.
- To view archived assessments, click the Status filter next to the search bar and select Archived.
Important: Once archived, the assessment becomes inactive. Candidates already invited will see an "Unavailable Access" error. Confirm you are ready before archiving.
Delete an assessment
You can only delete an assessment if no candidates have been invited. Deletion is permanent and cannot be undone.
- Click the arrow button on the far right of the assessment row.
- Select Delete and confirm.

Need help? Contact support.