How to Integrate Testlify with Recruitee
Connect Recruitee with Testlify to automatically send assessment invitations when candidates advance to a specific pipeline stage. Complete Part 1 once per workspace, then repeat Part 2 for each assessment you want to link.
Before you begin
Make sure you have:
- Admin access to Testlify
- Admin access to the Recruitee Admin Panel
- Permission to create Webhooks and API tokens in Recruitee
Part 1: Workspace-Level Integration
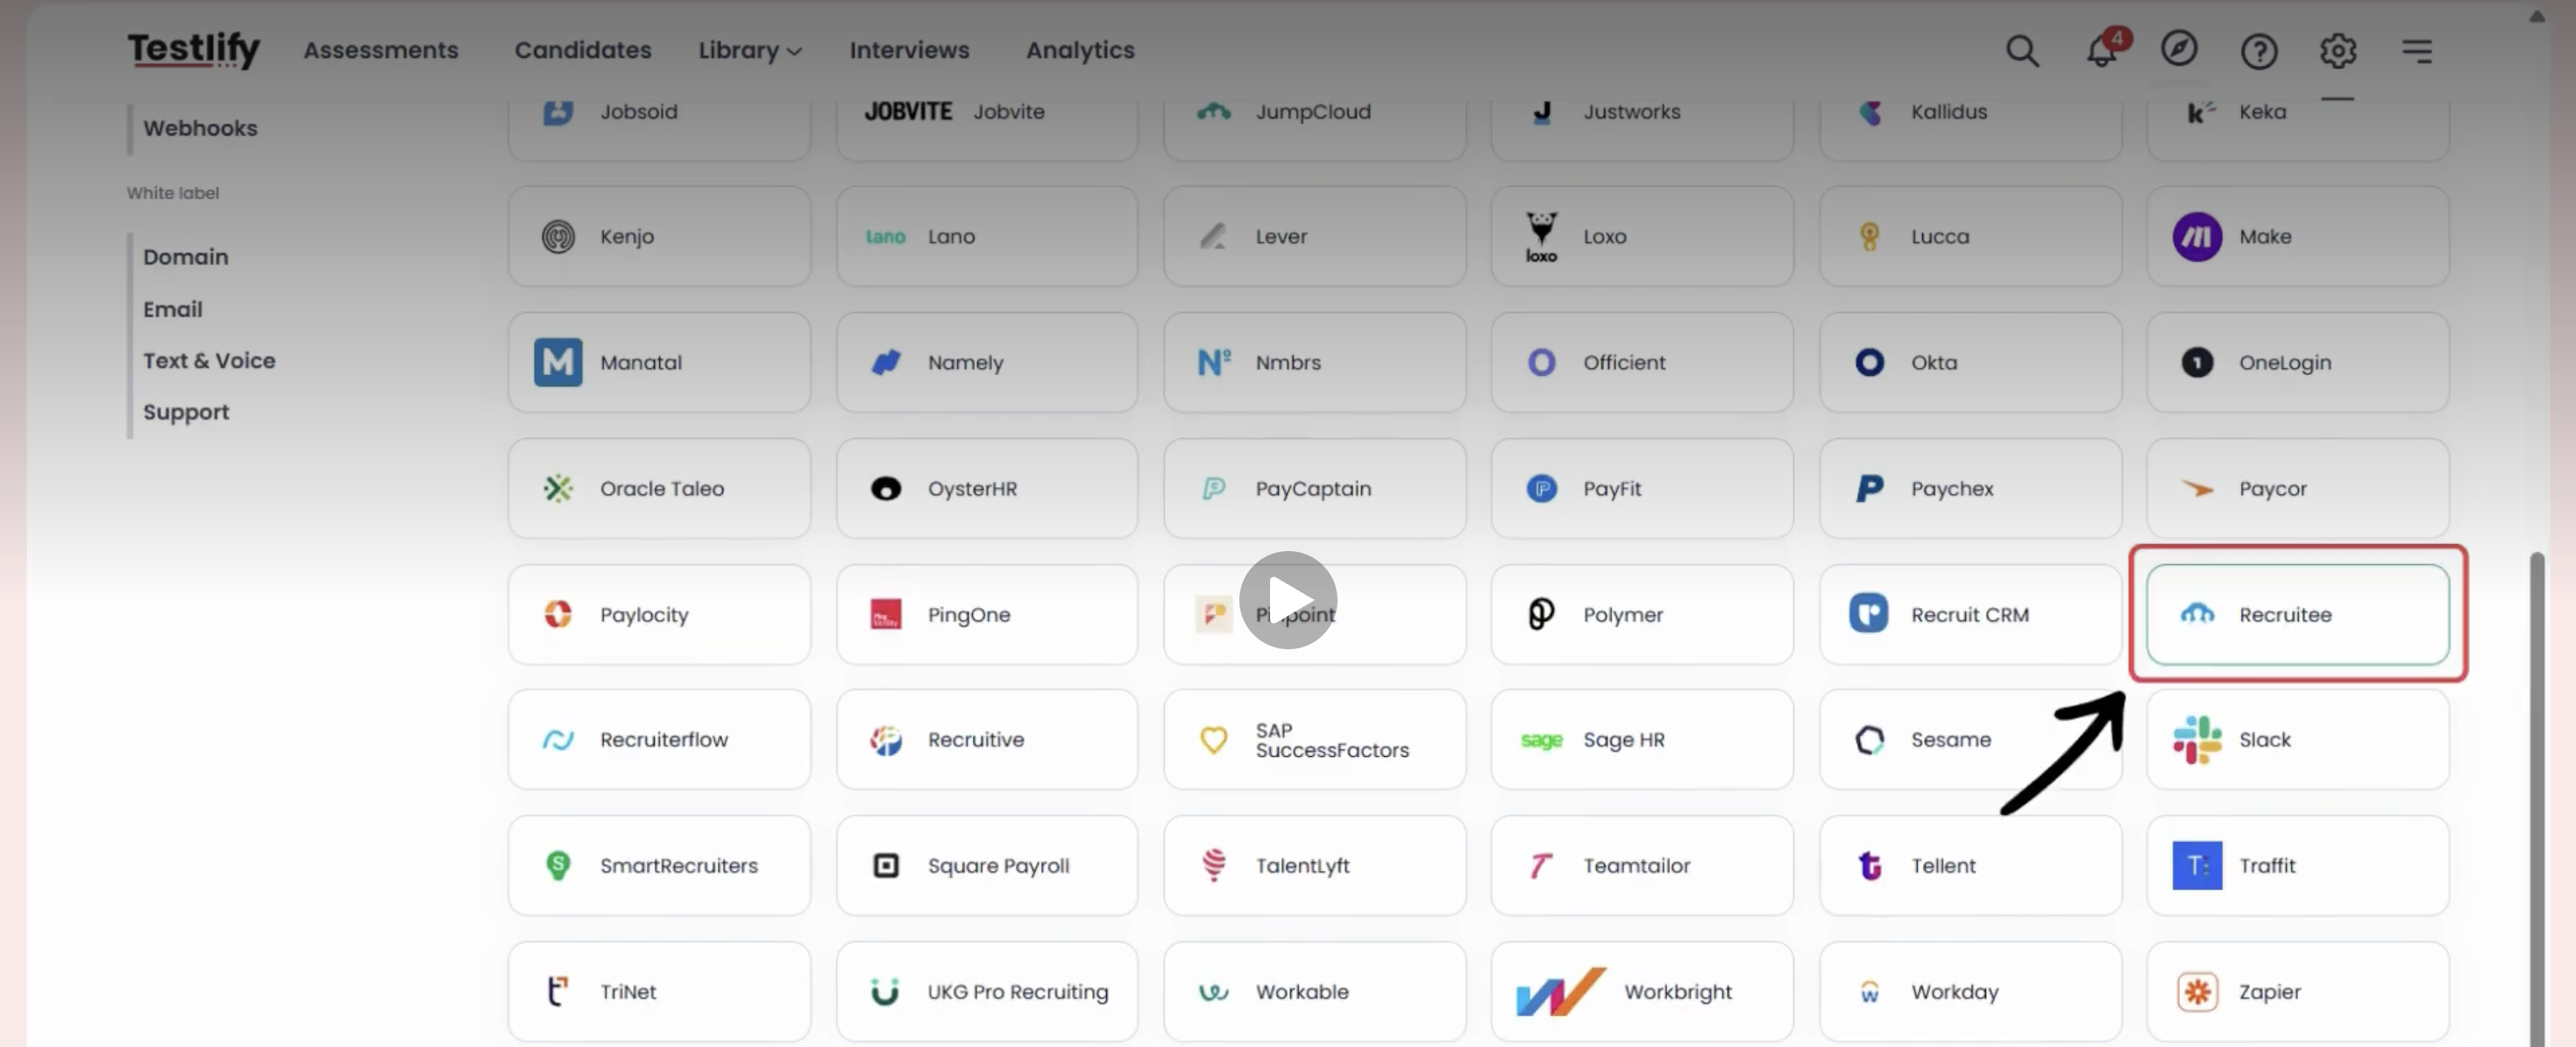
Step 1: Open the Recruitee Integration in Testlify
- Log in to Testlify.
- Go to Settings > Integrations Module.
- Select Recruitee Integration.
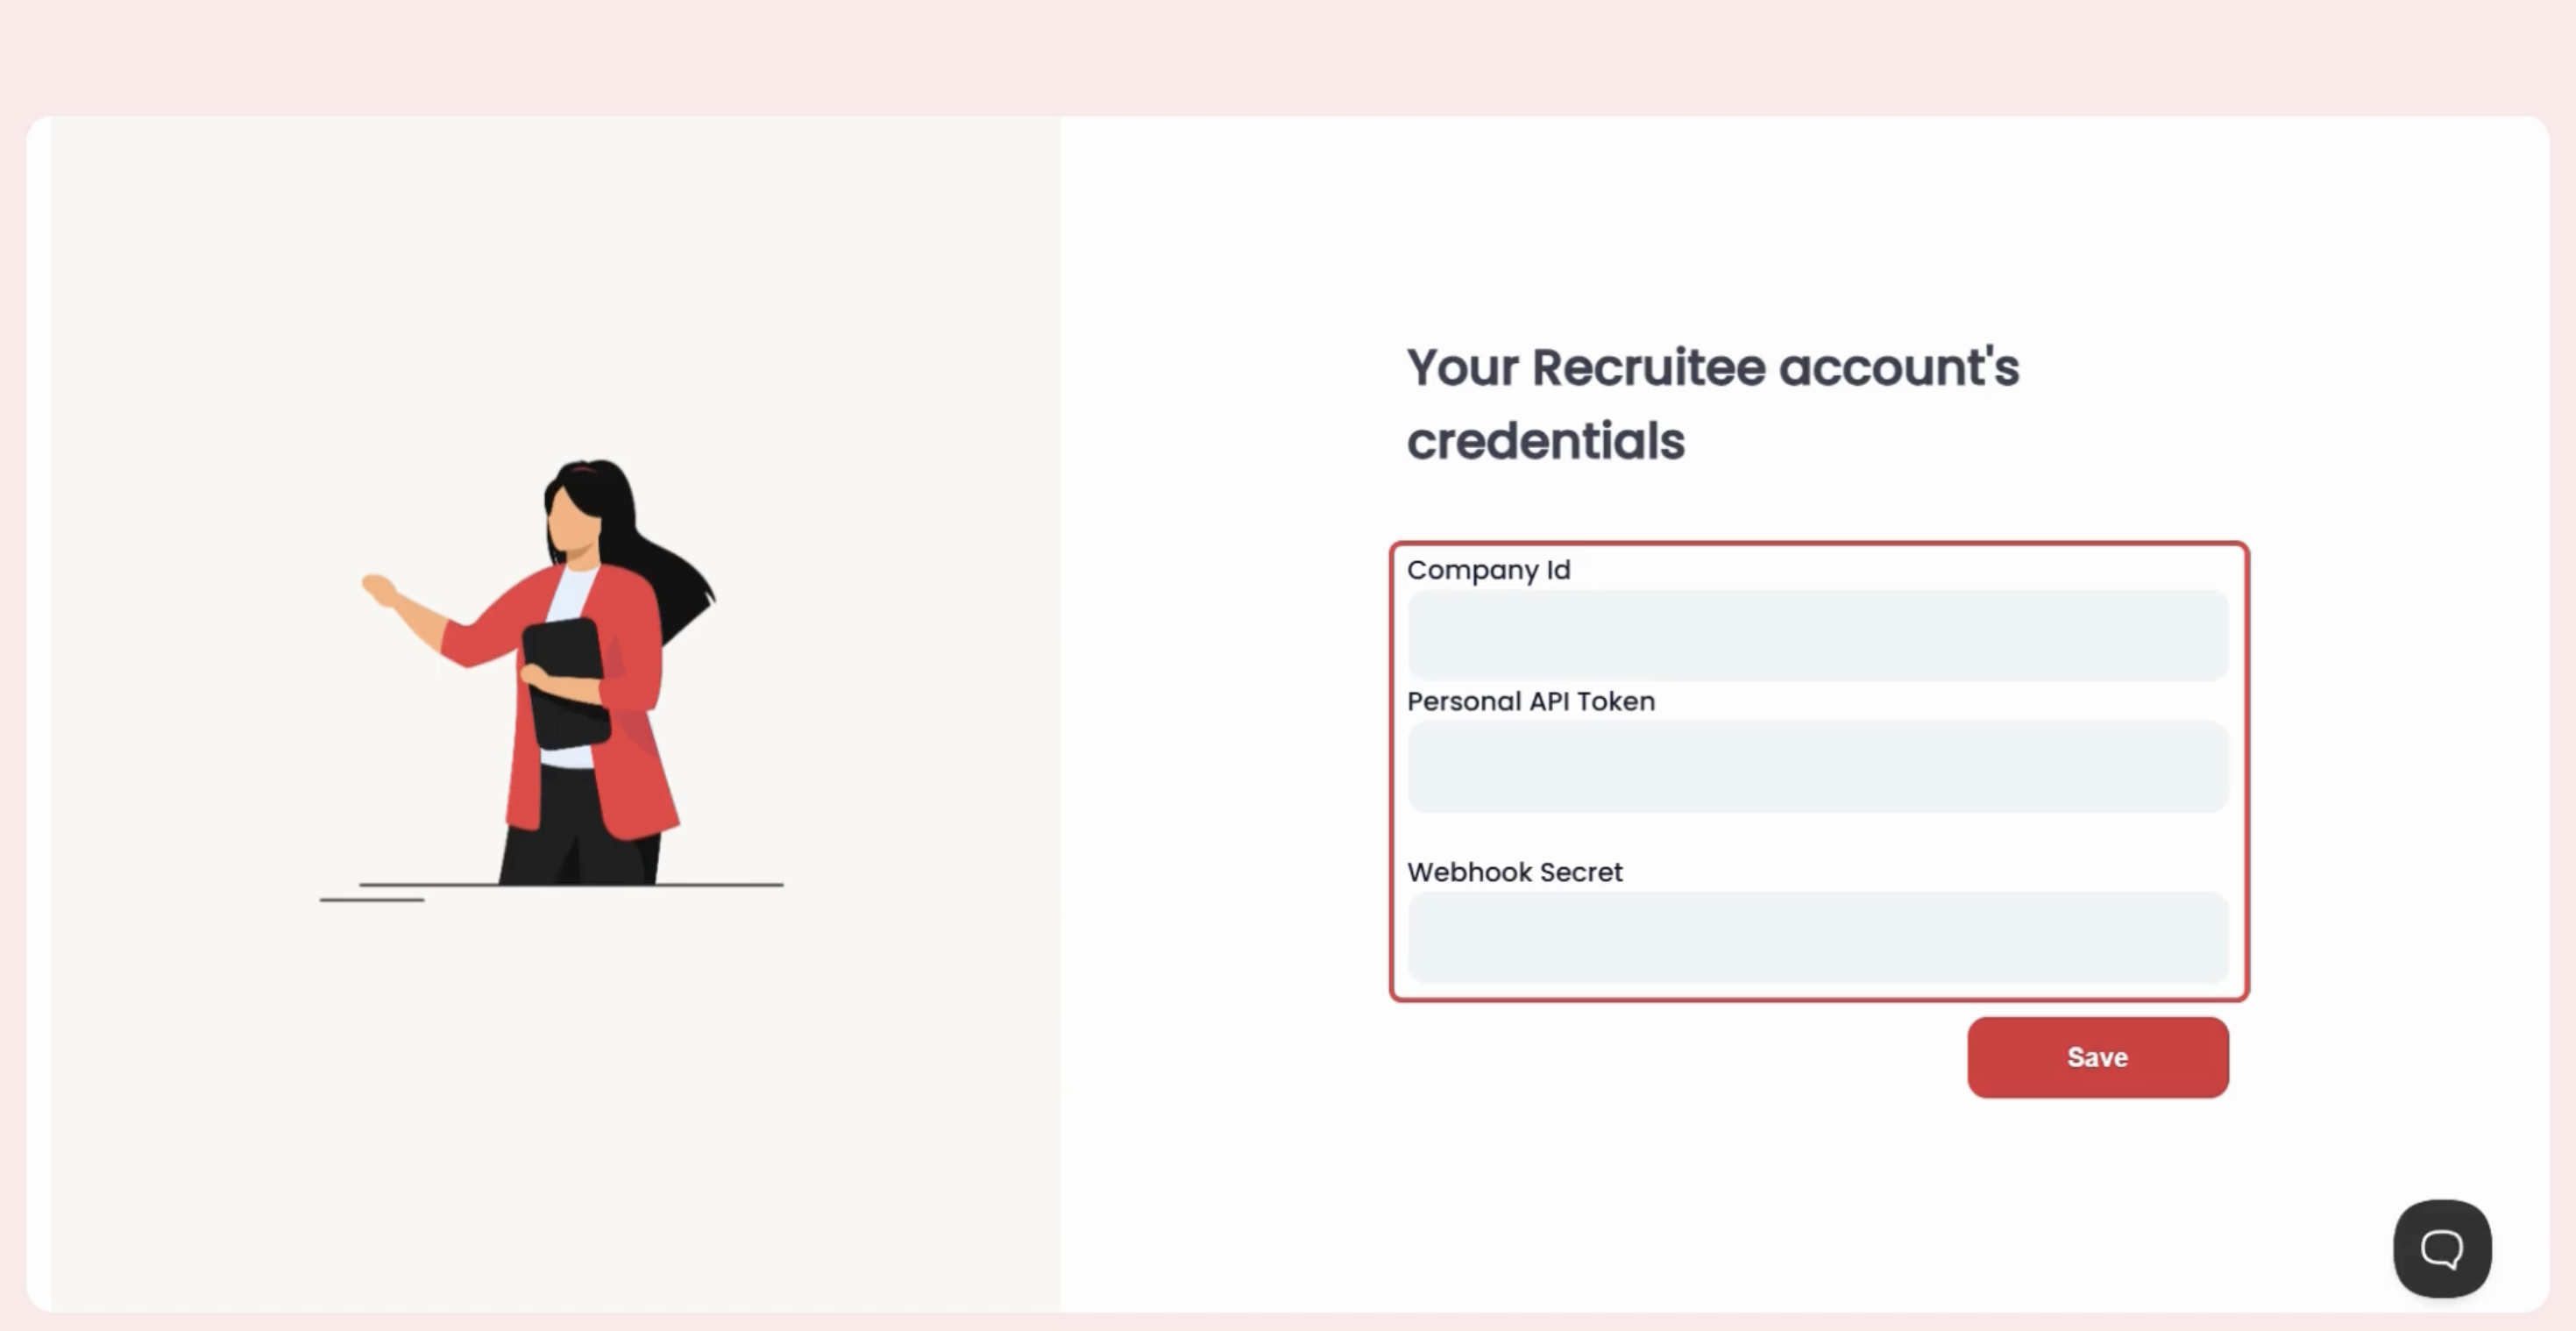
Step 2: Collect your Recruitee credentials
You will need three values from Recruitee — collected in Steps 3–5 below:
- Company ID
- Personal API Token
- Webhook Secret Key
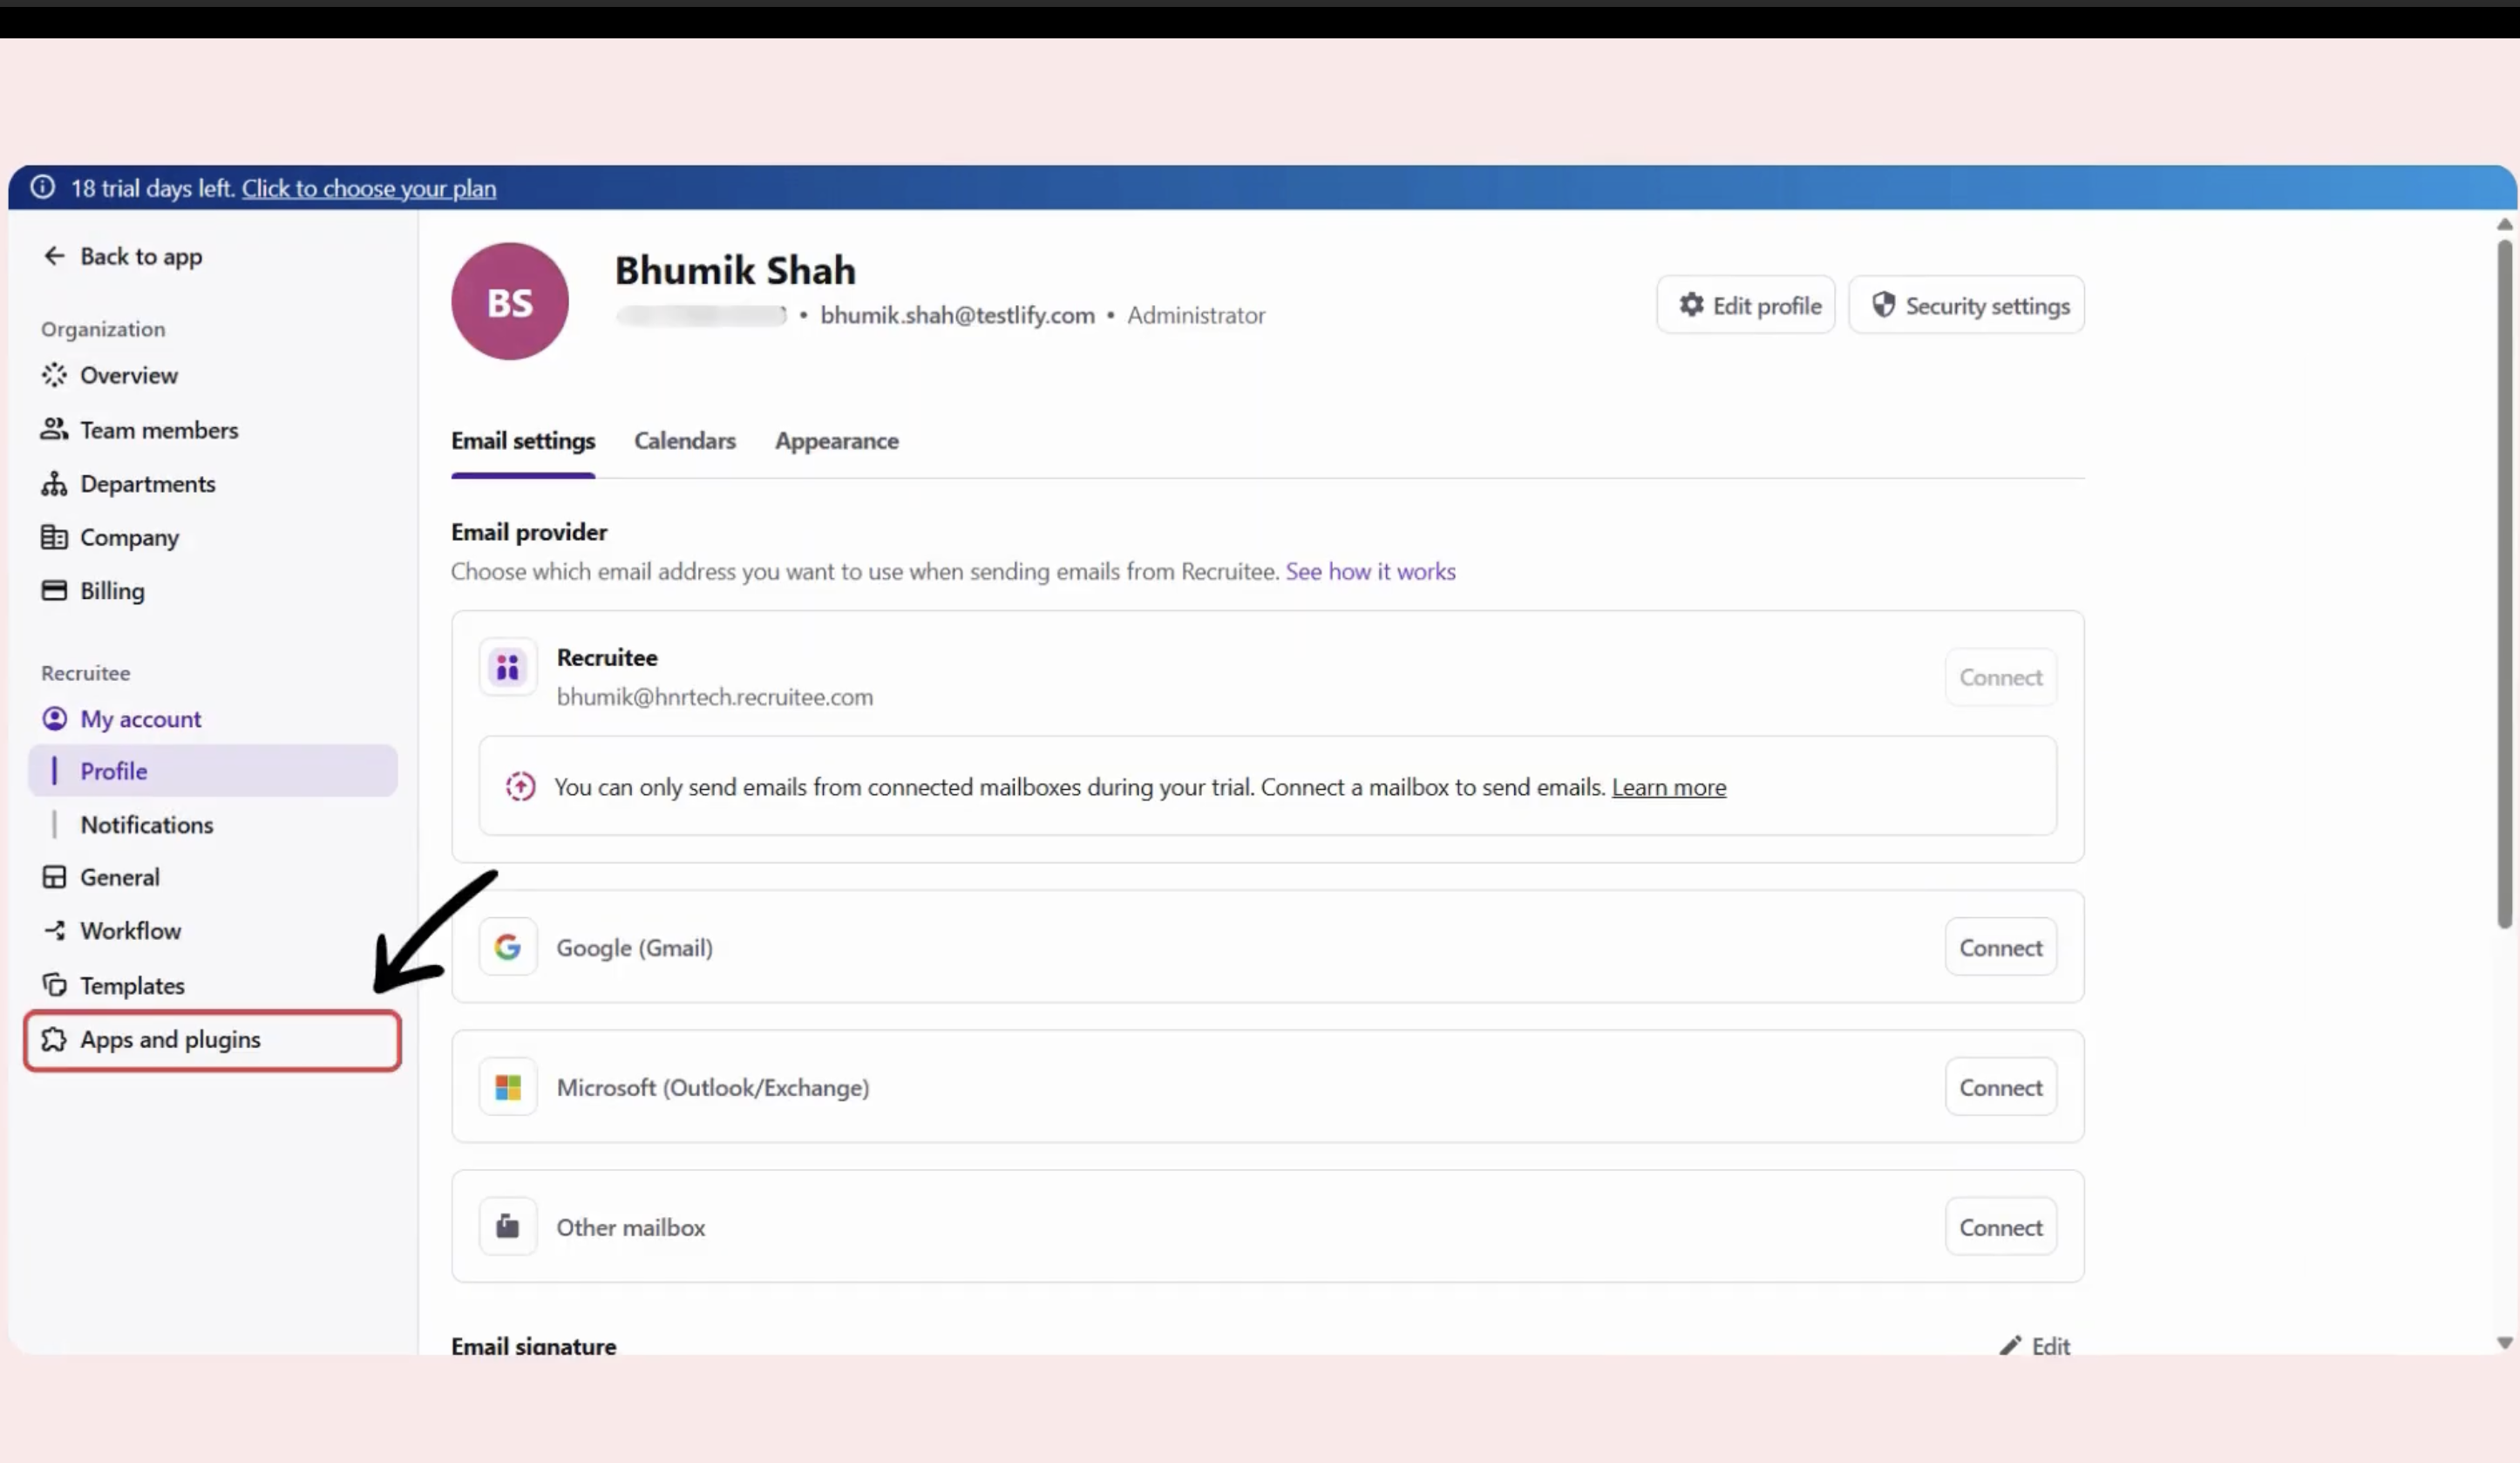
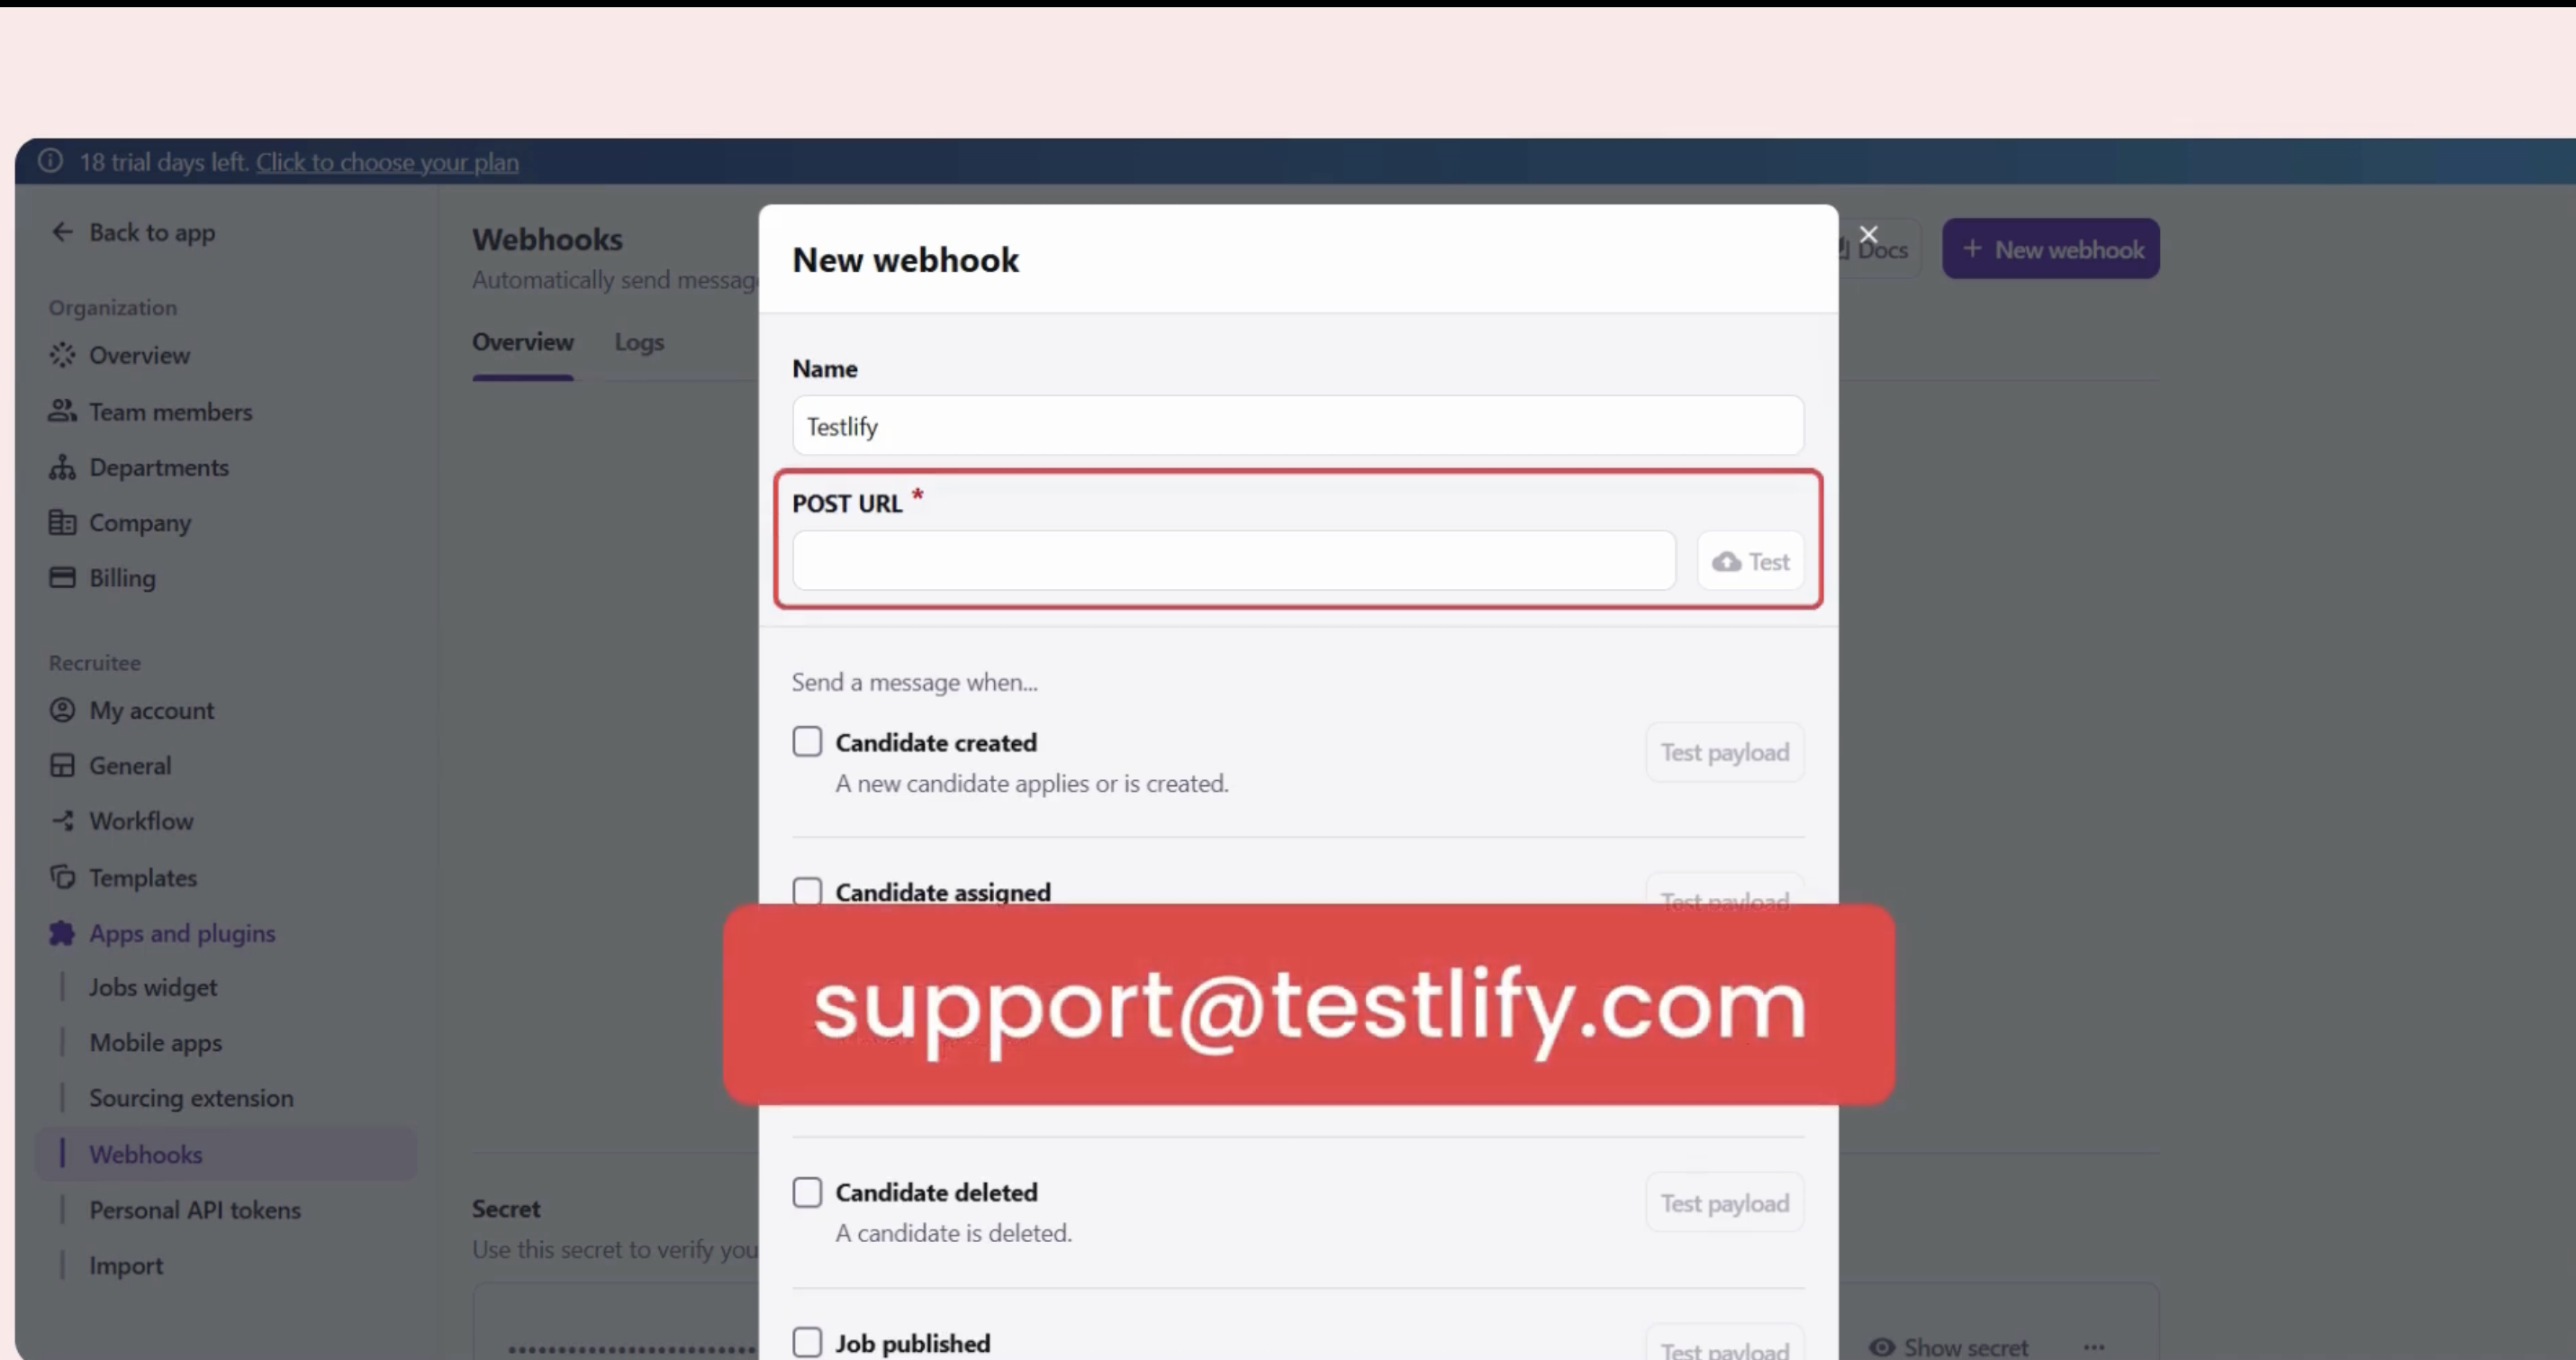
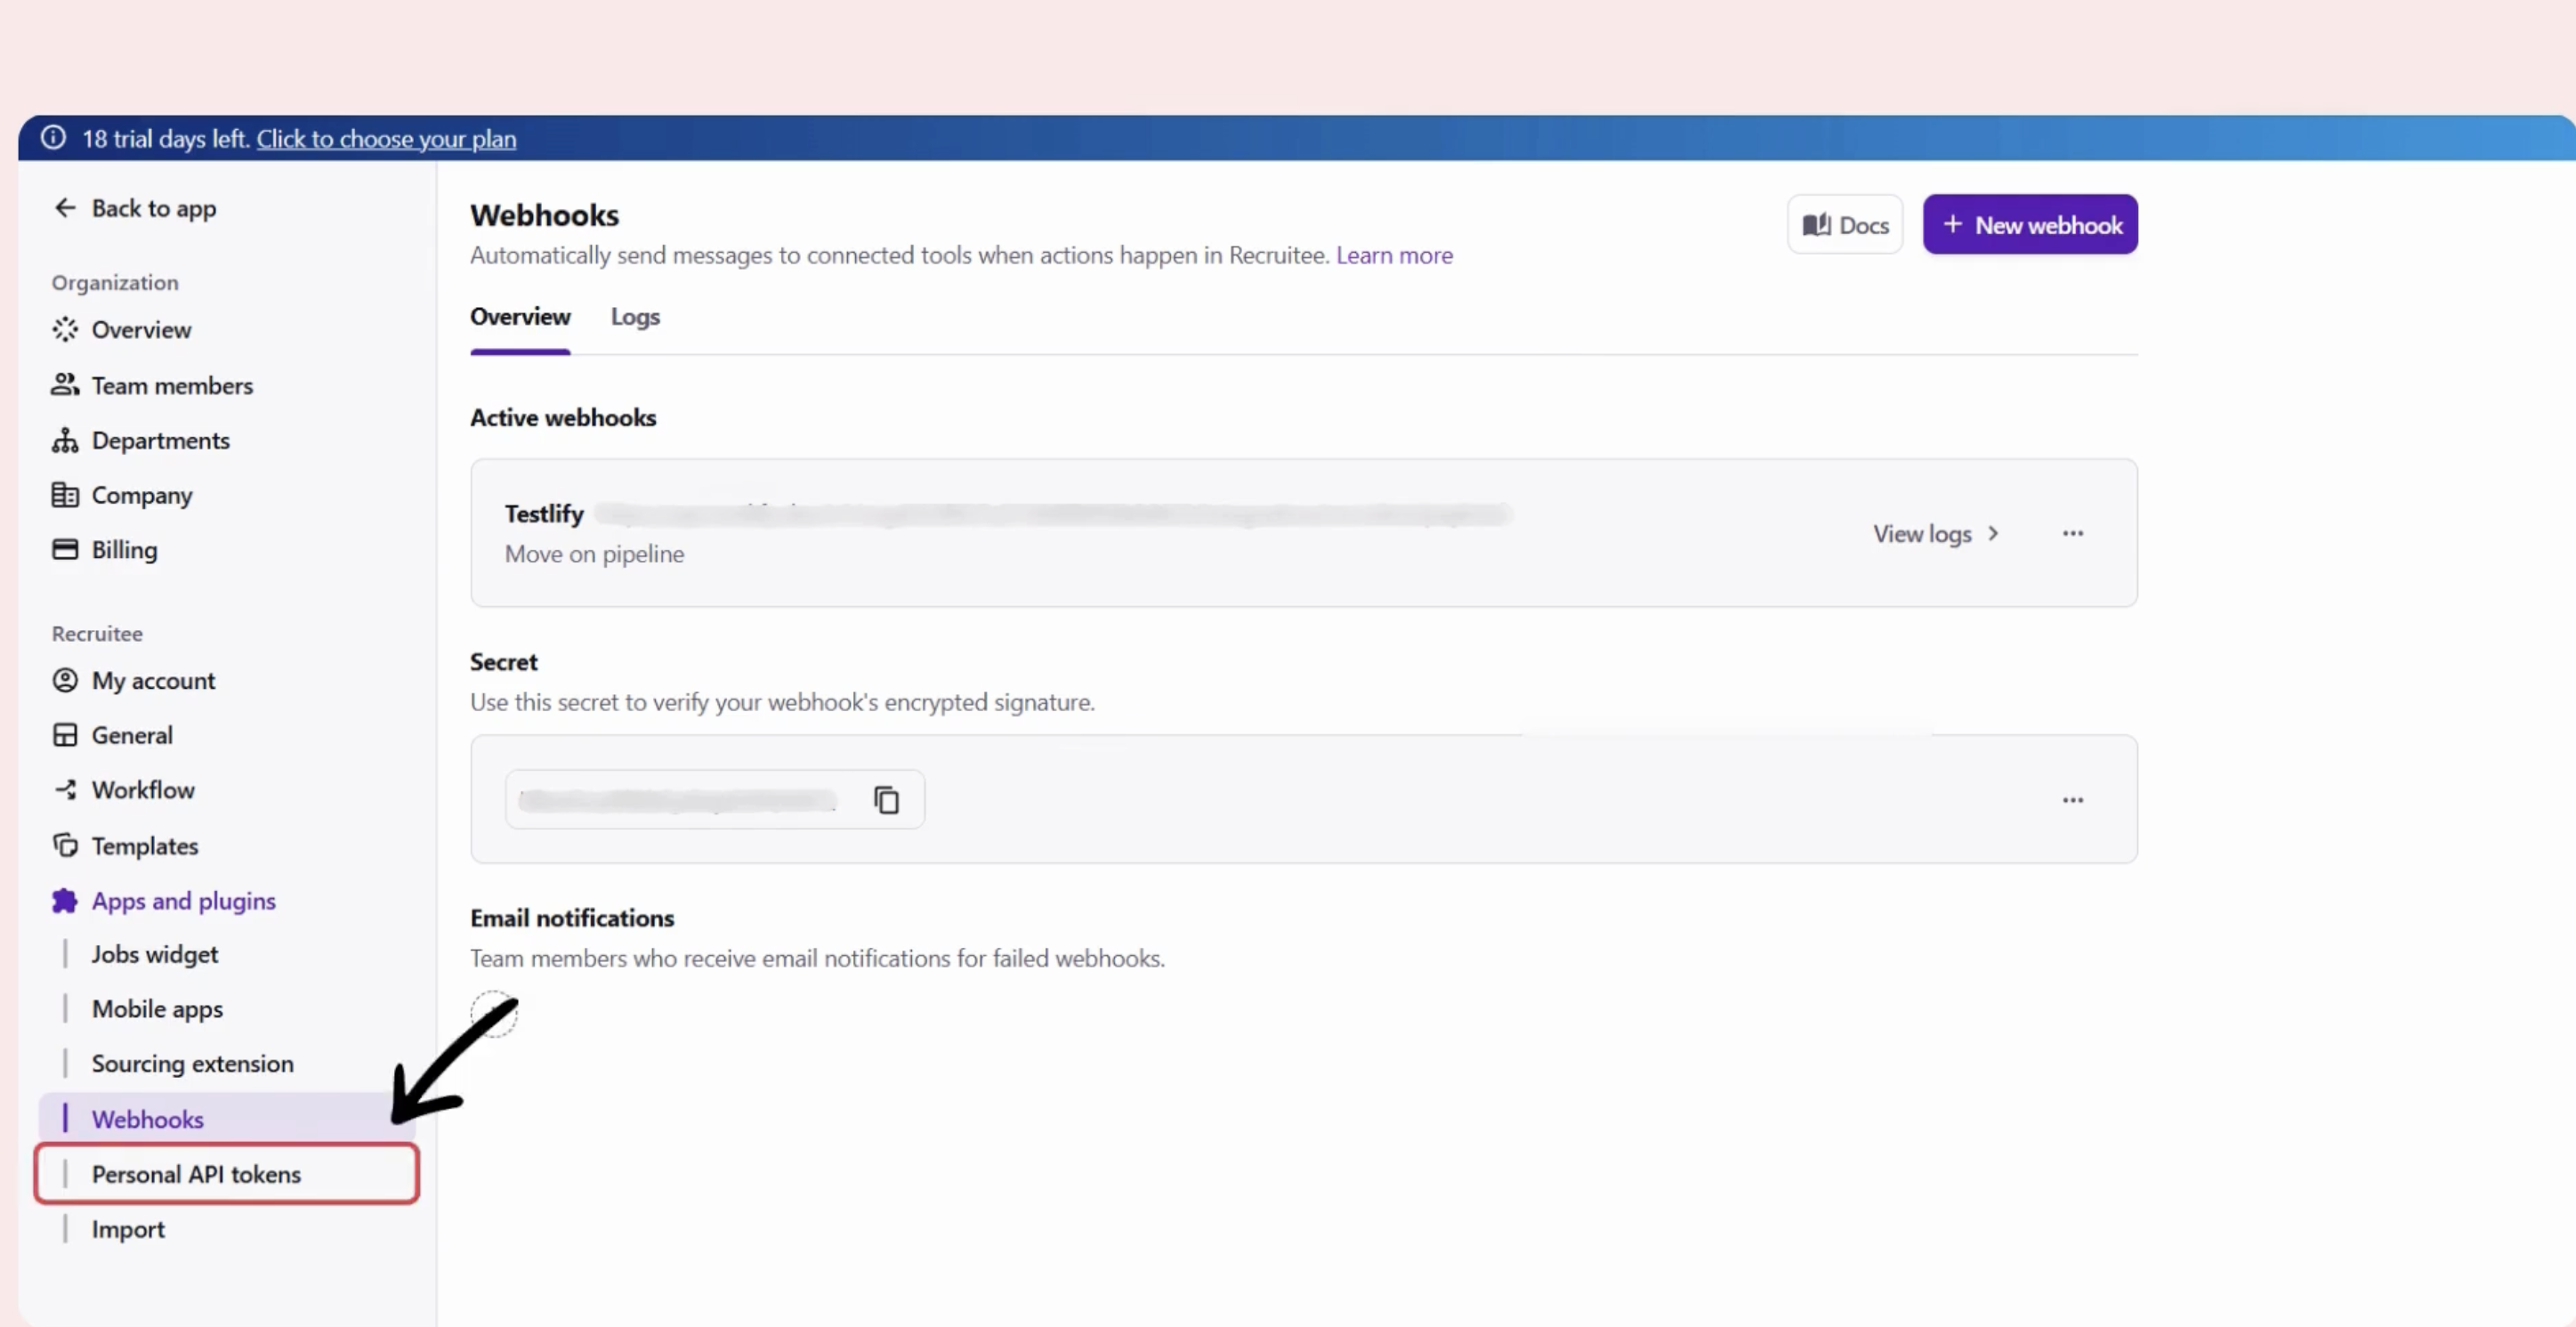
Step 3: Create a webhook in Recruitee
- Log in to Recruitee.
- Go to Settings > Apps & Plug-ins > Webhooks.
- Click Create New Webhook.
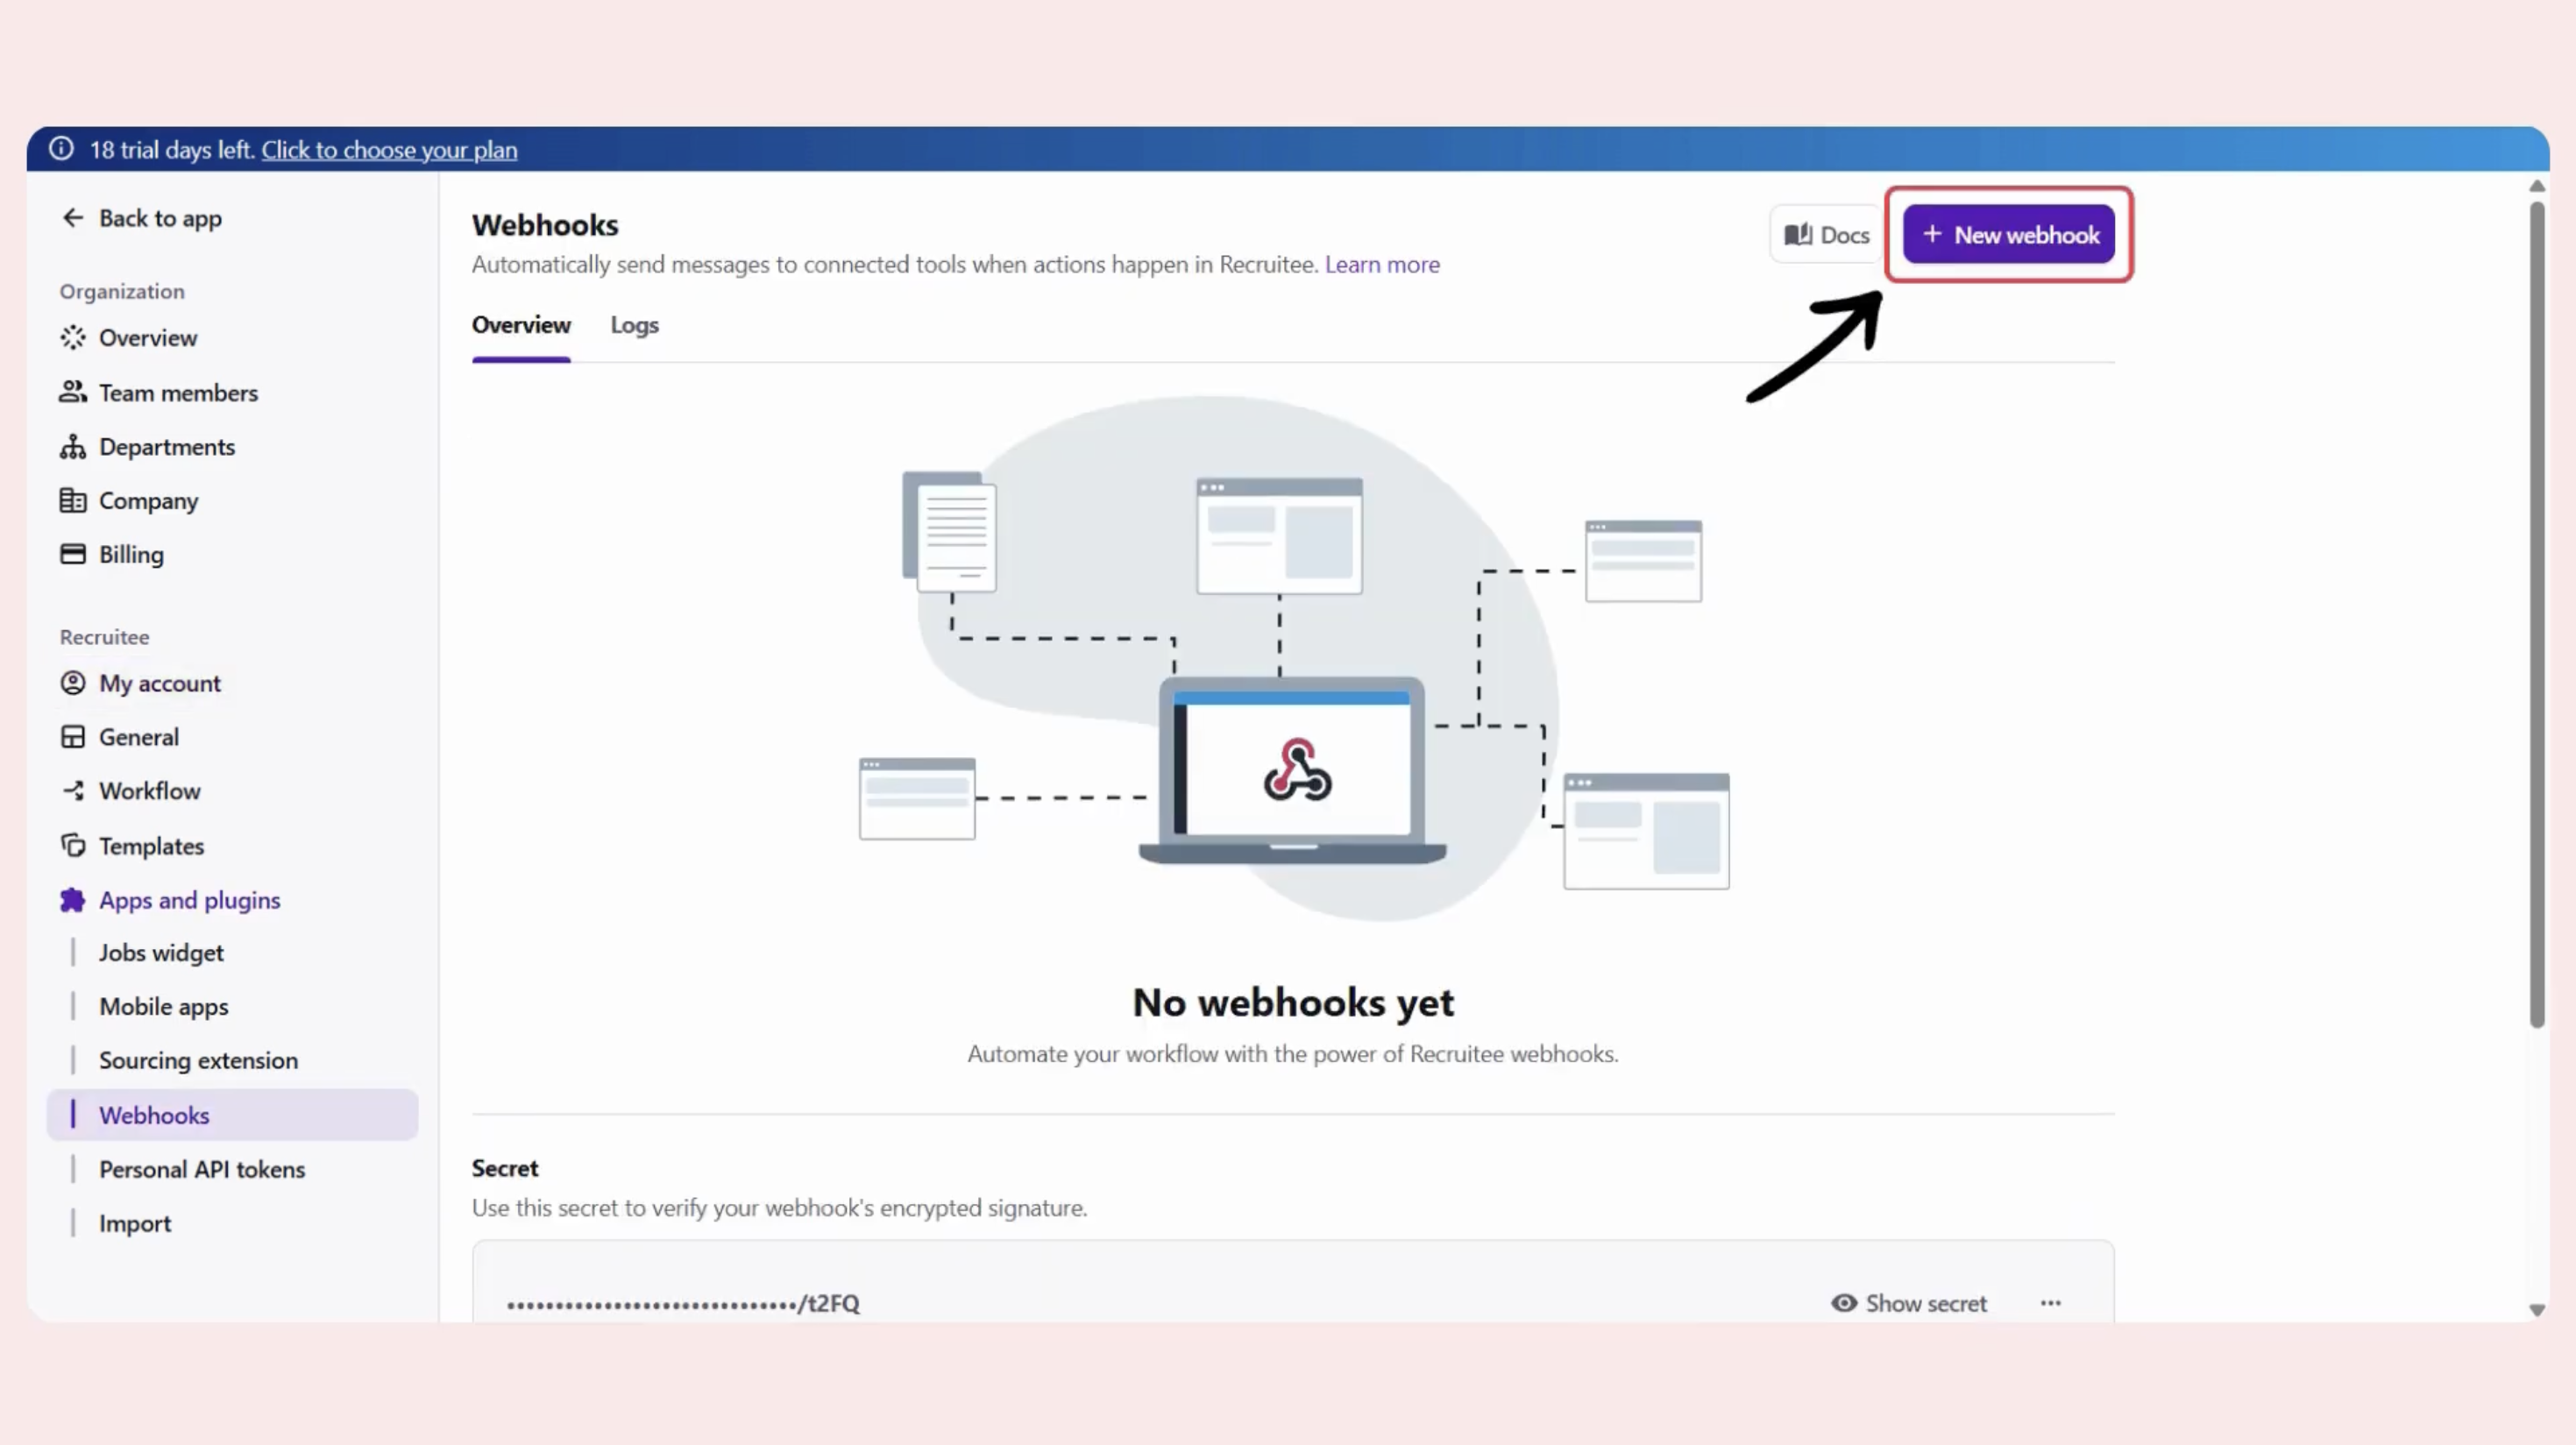
Fill in the webhook details:
- Webhook Name: Any descriptive name for your reference
- Post URL: Contact Testlify Support to get this URL — use only the URL provided, do not substitute a different one
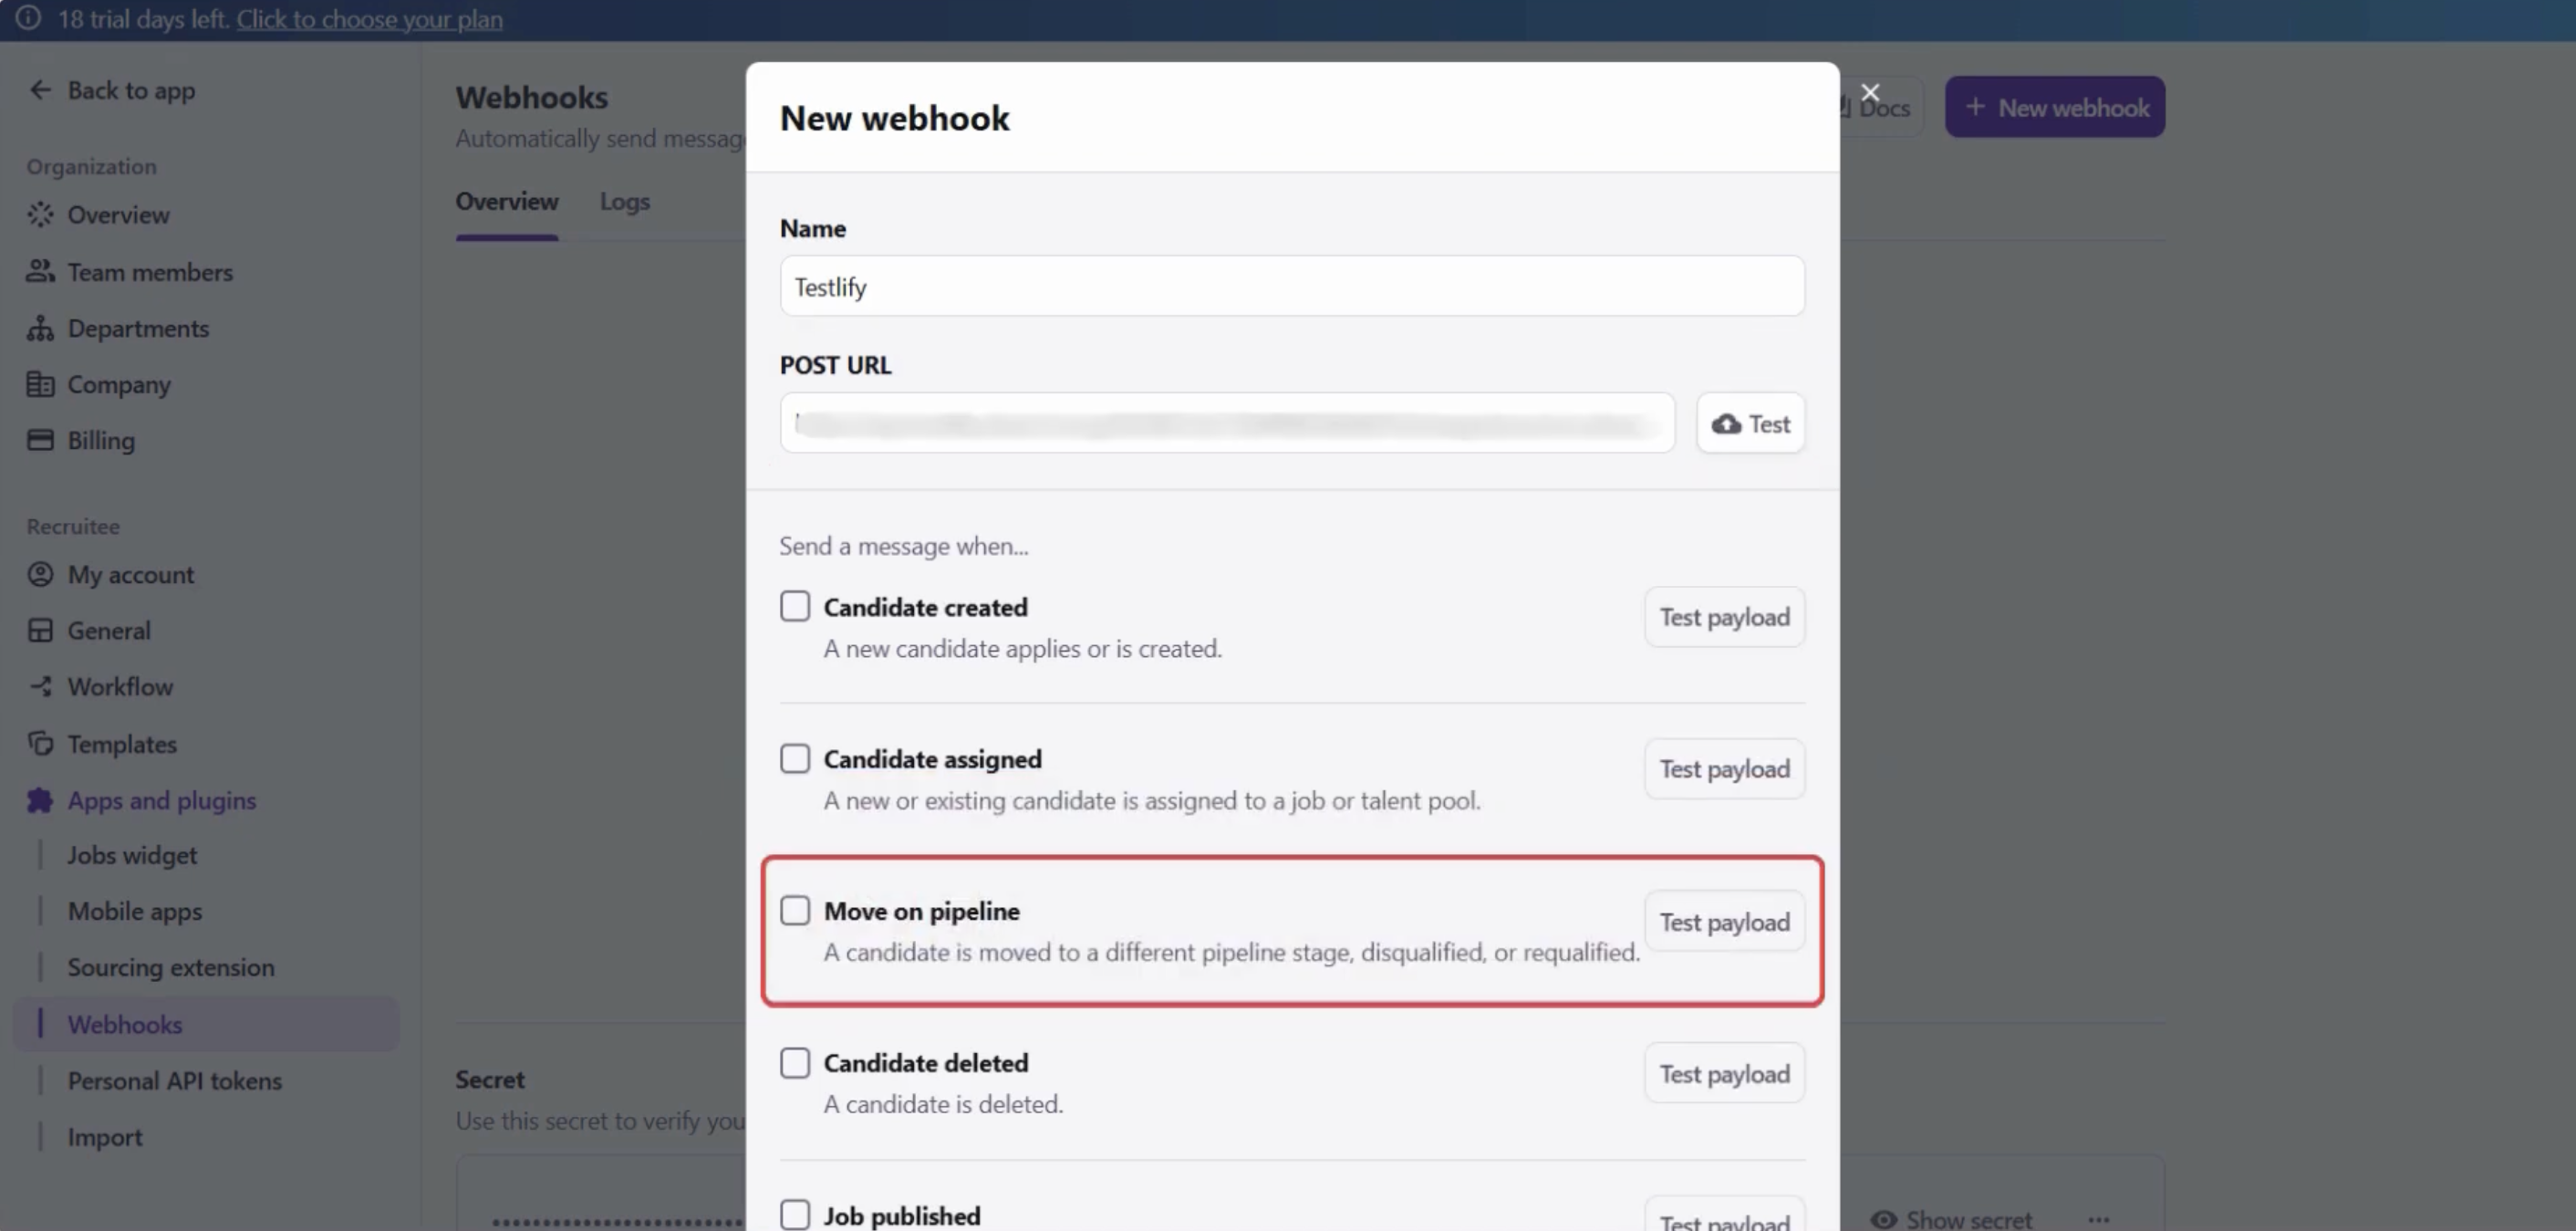
- Select the Move on Pipeline trigger.
- Click Verify & Create.
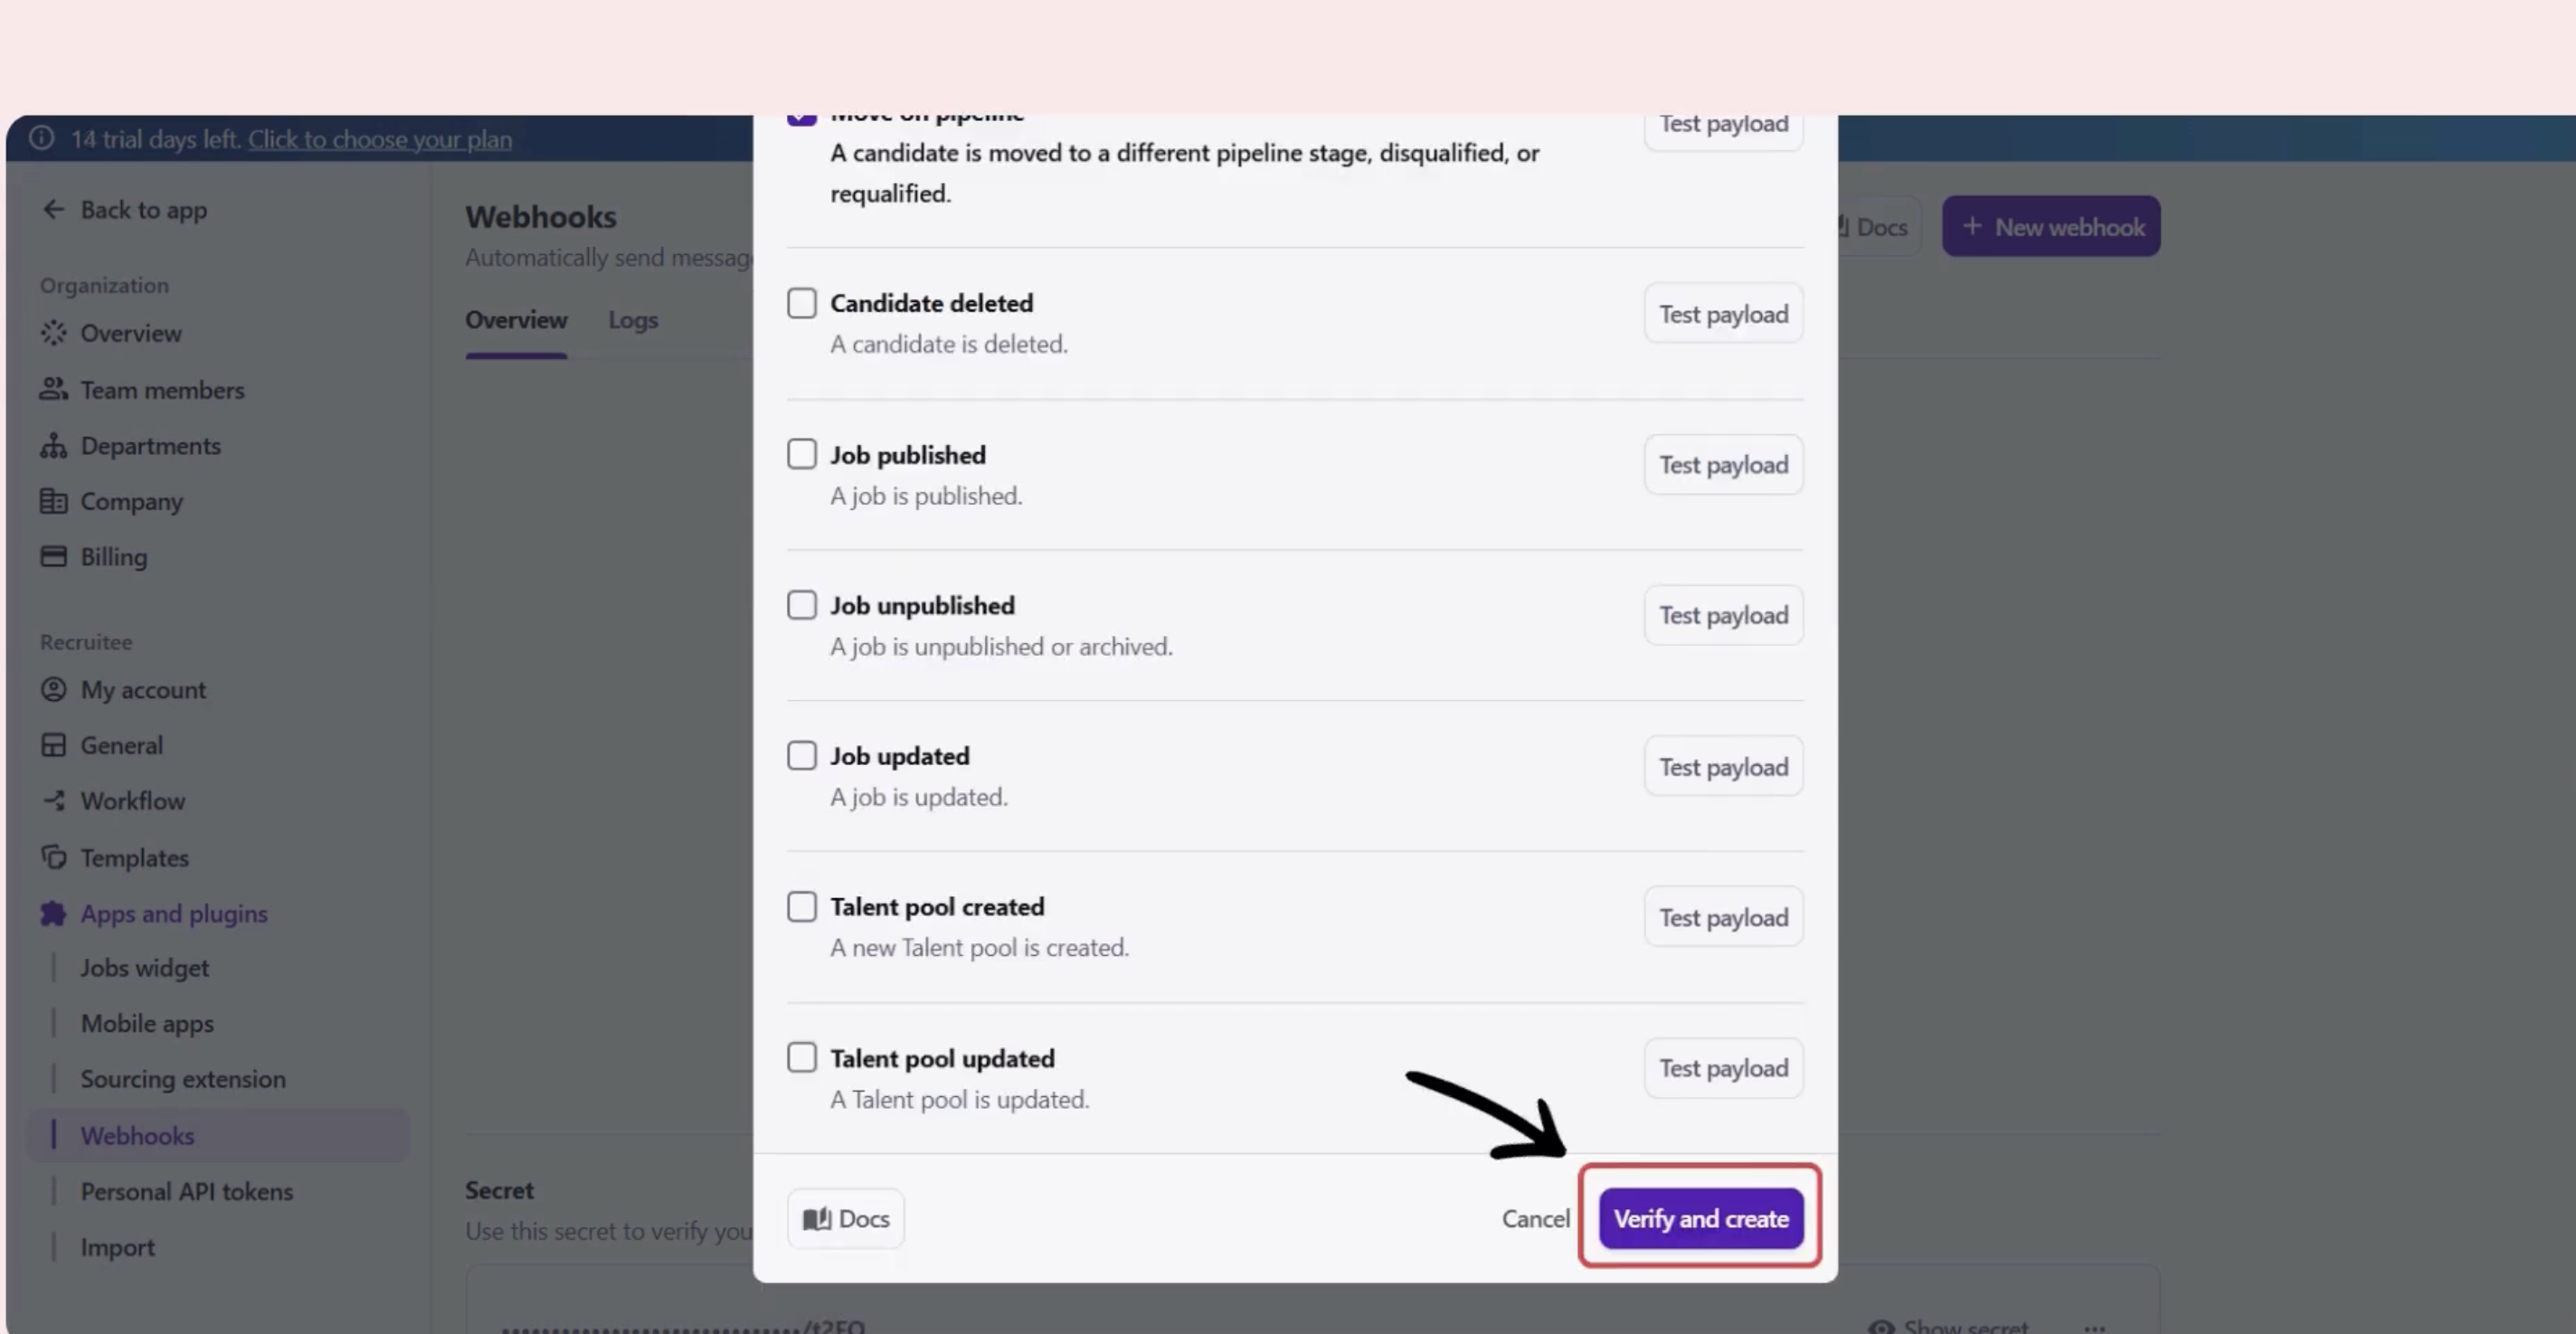
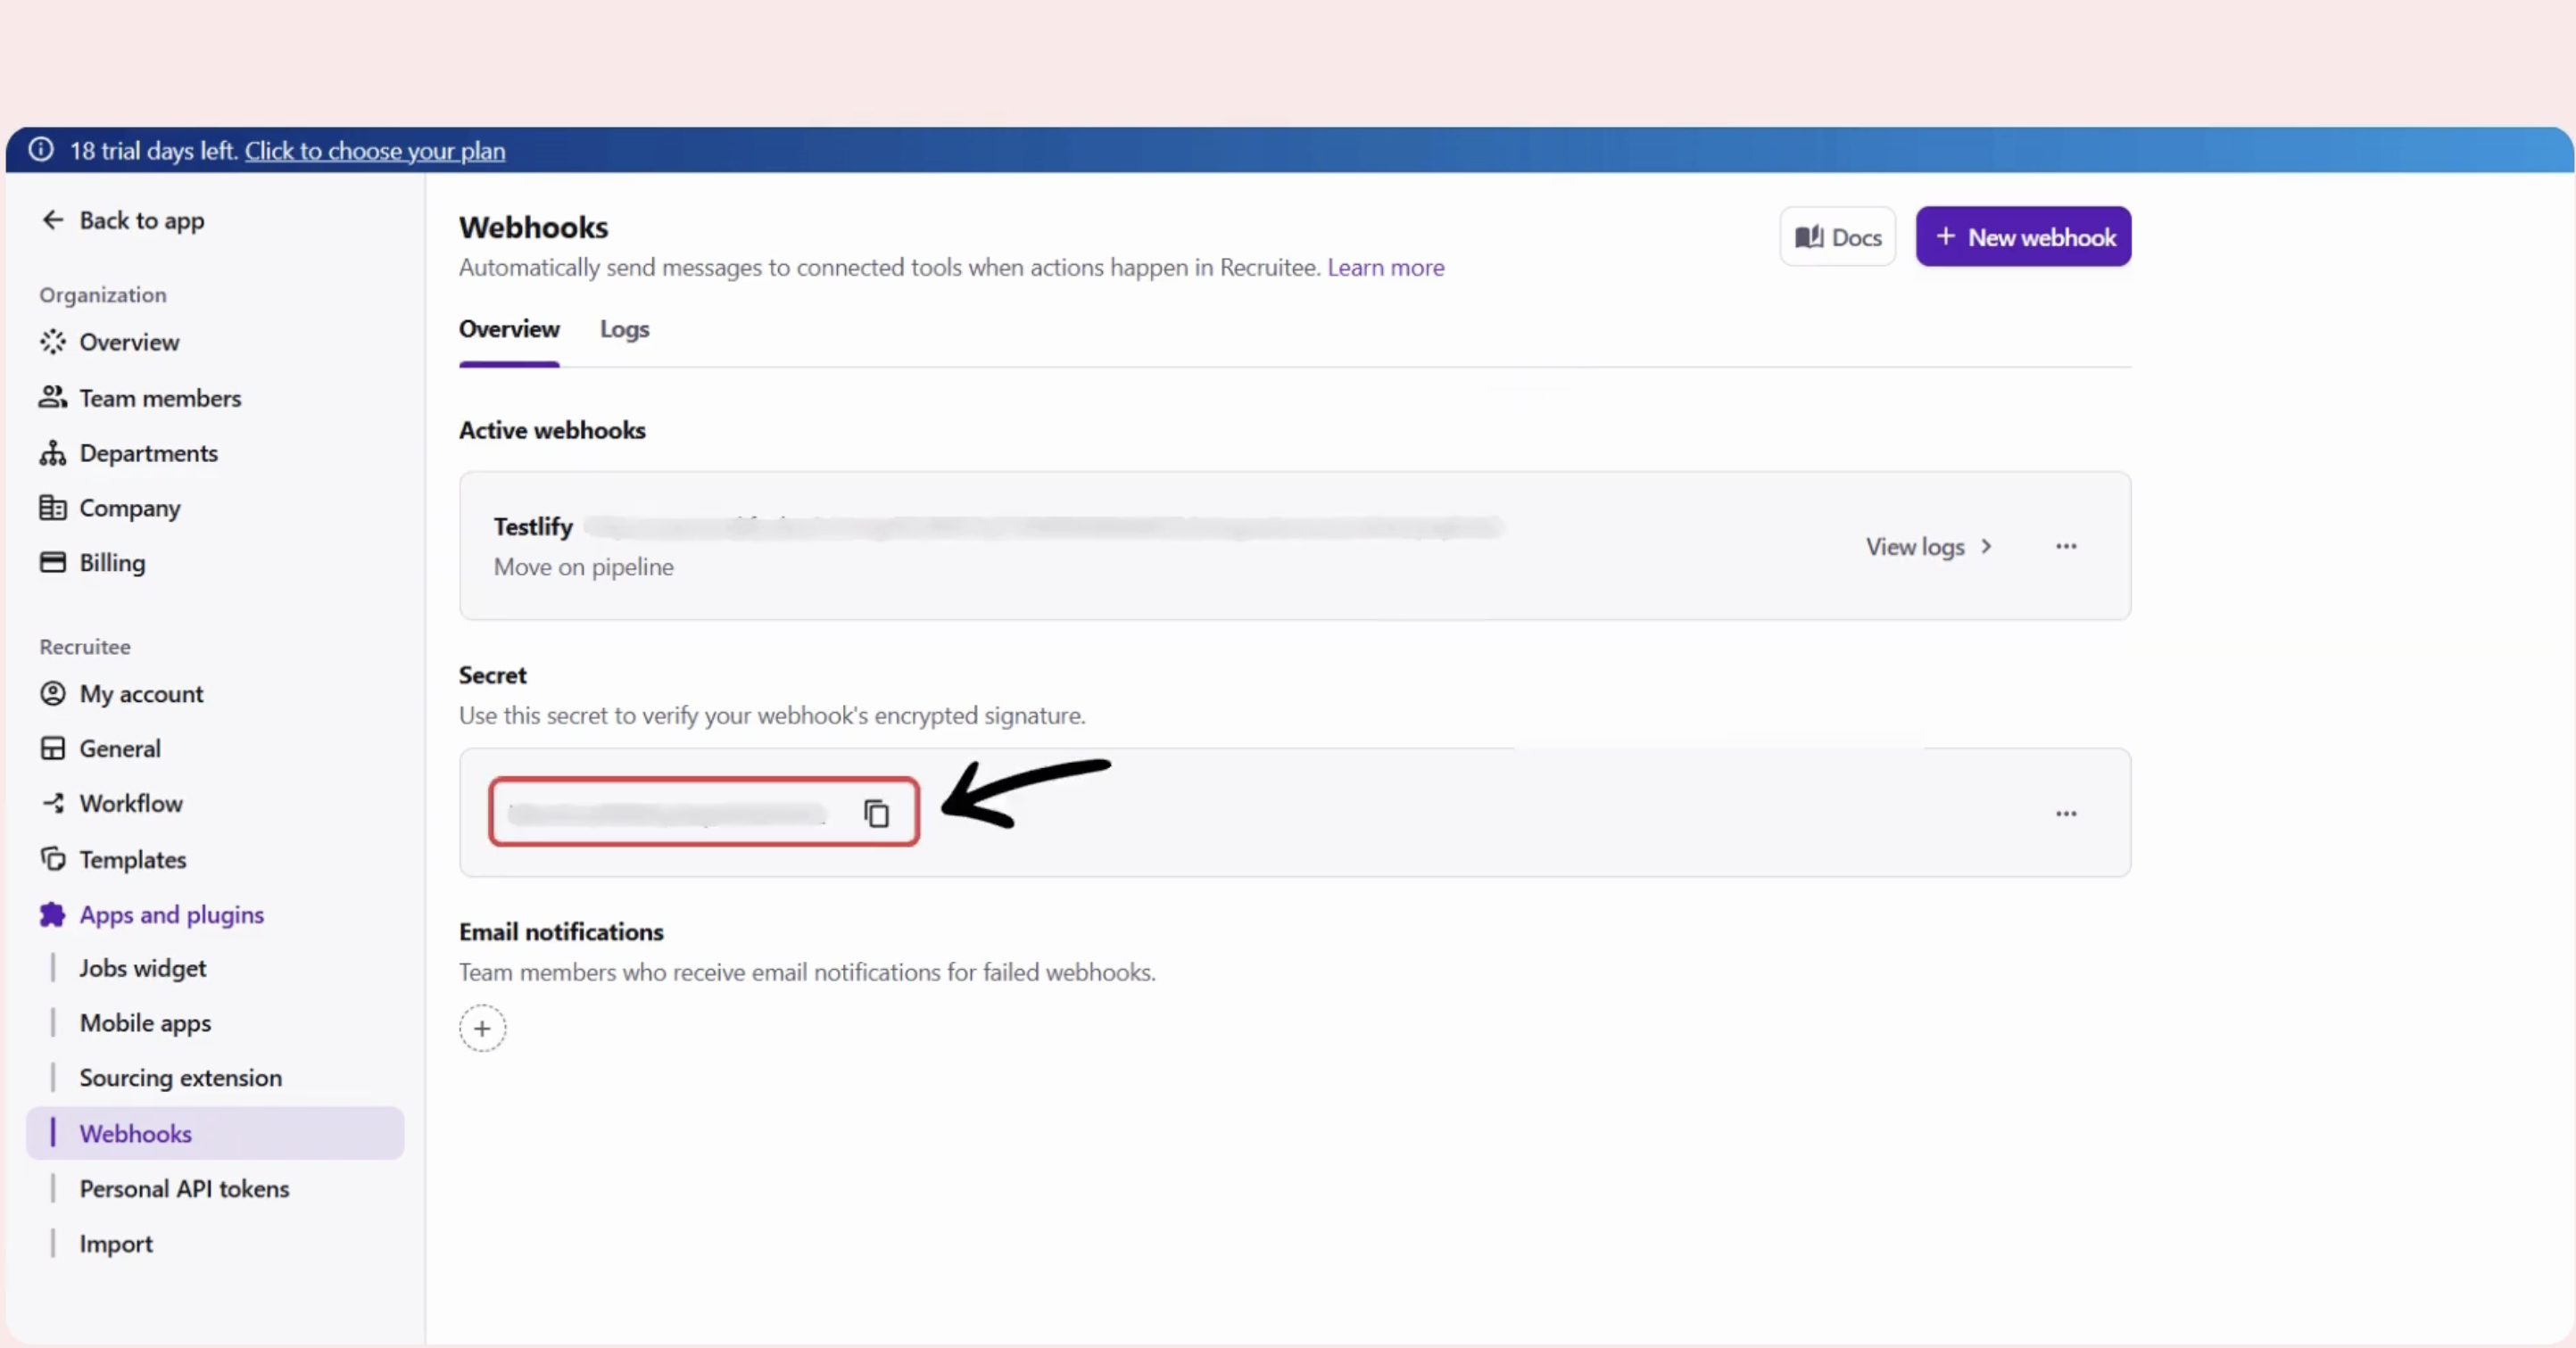
Step 4: Copy the Webhook Secret Key
After creation, Recruitee generates a Webhook Secret Key. Copy it and store it securely — you will enter it in Testlify in Step 6.
Step 5: Get your Company ID and Personal API Token
- In Recruitee, go to Personal API Token.
- Click Create New Token, enter a Token Name, then click Save.
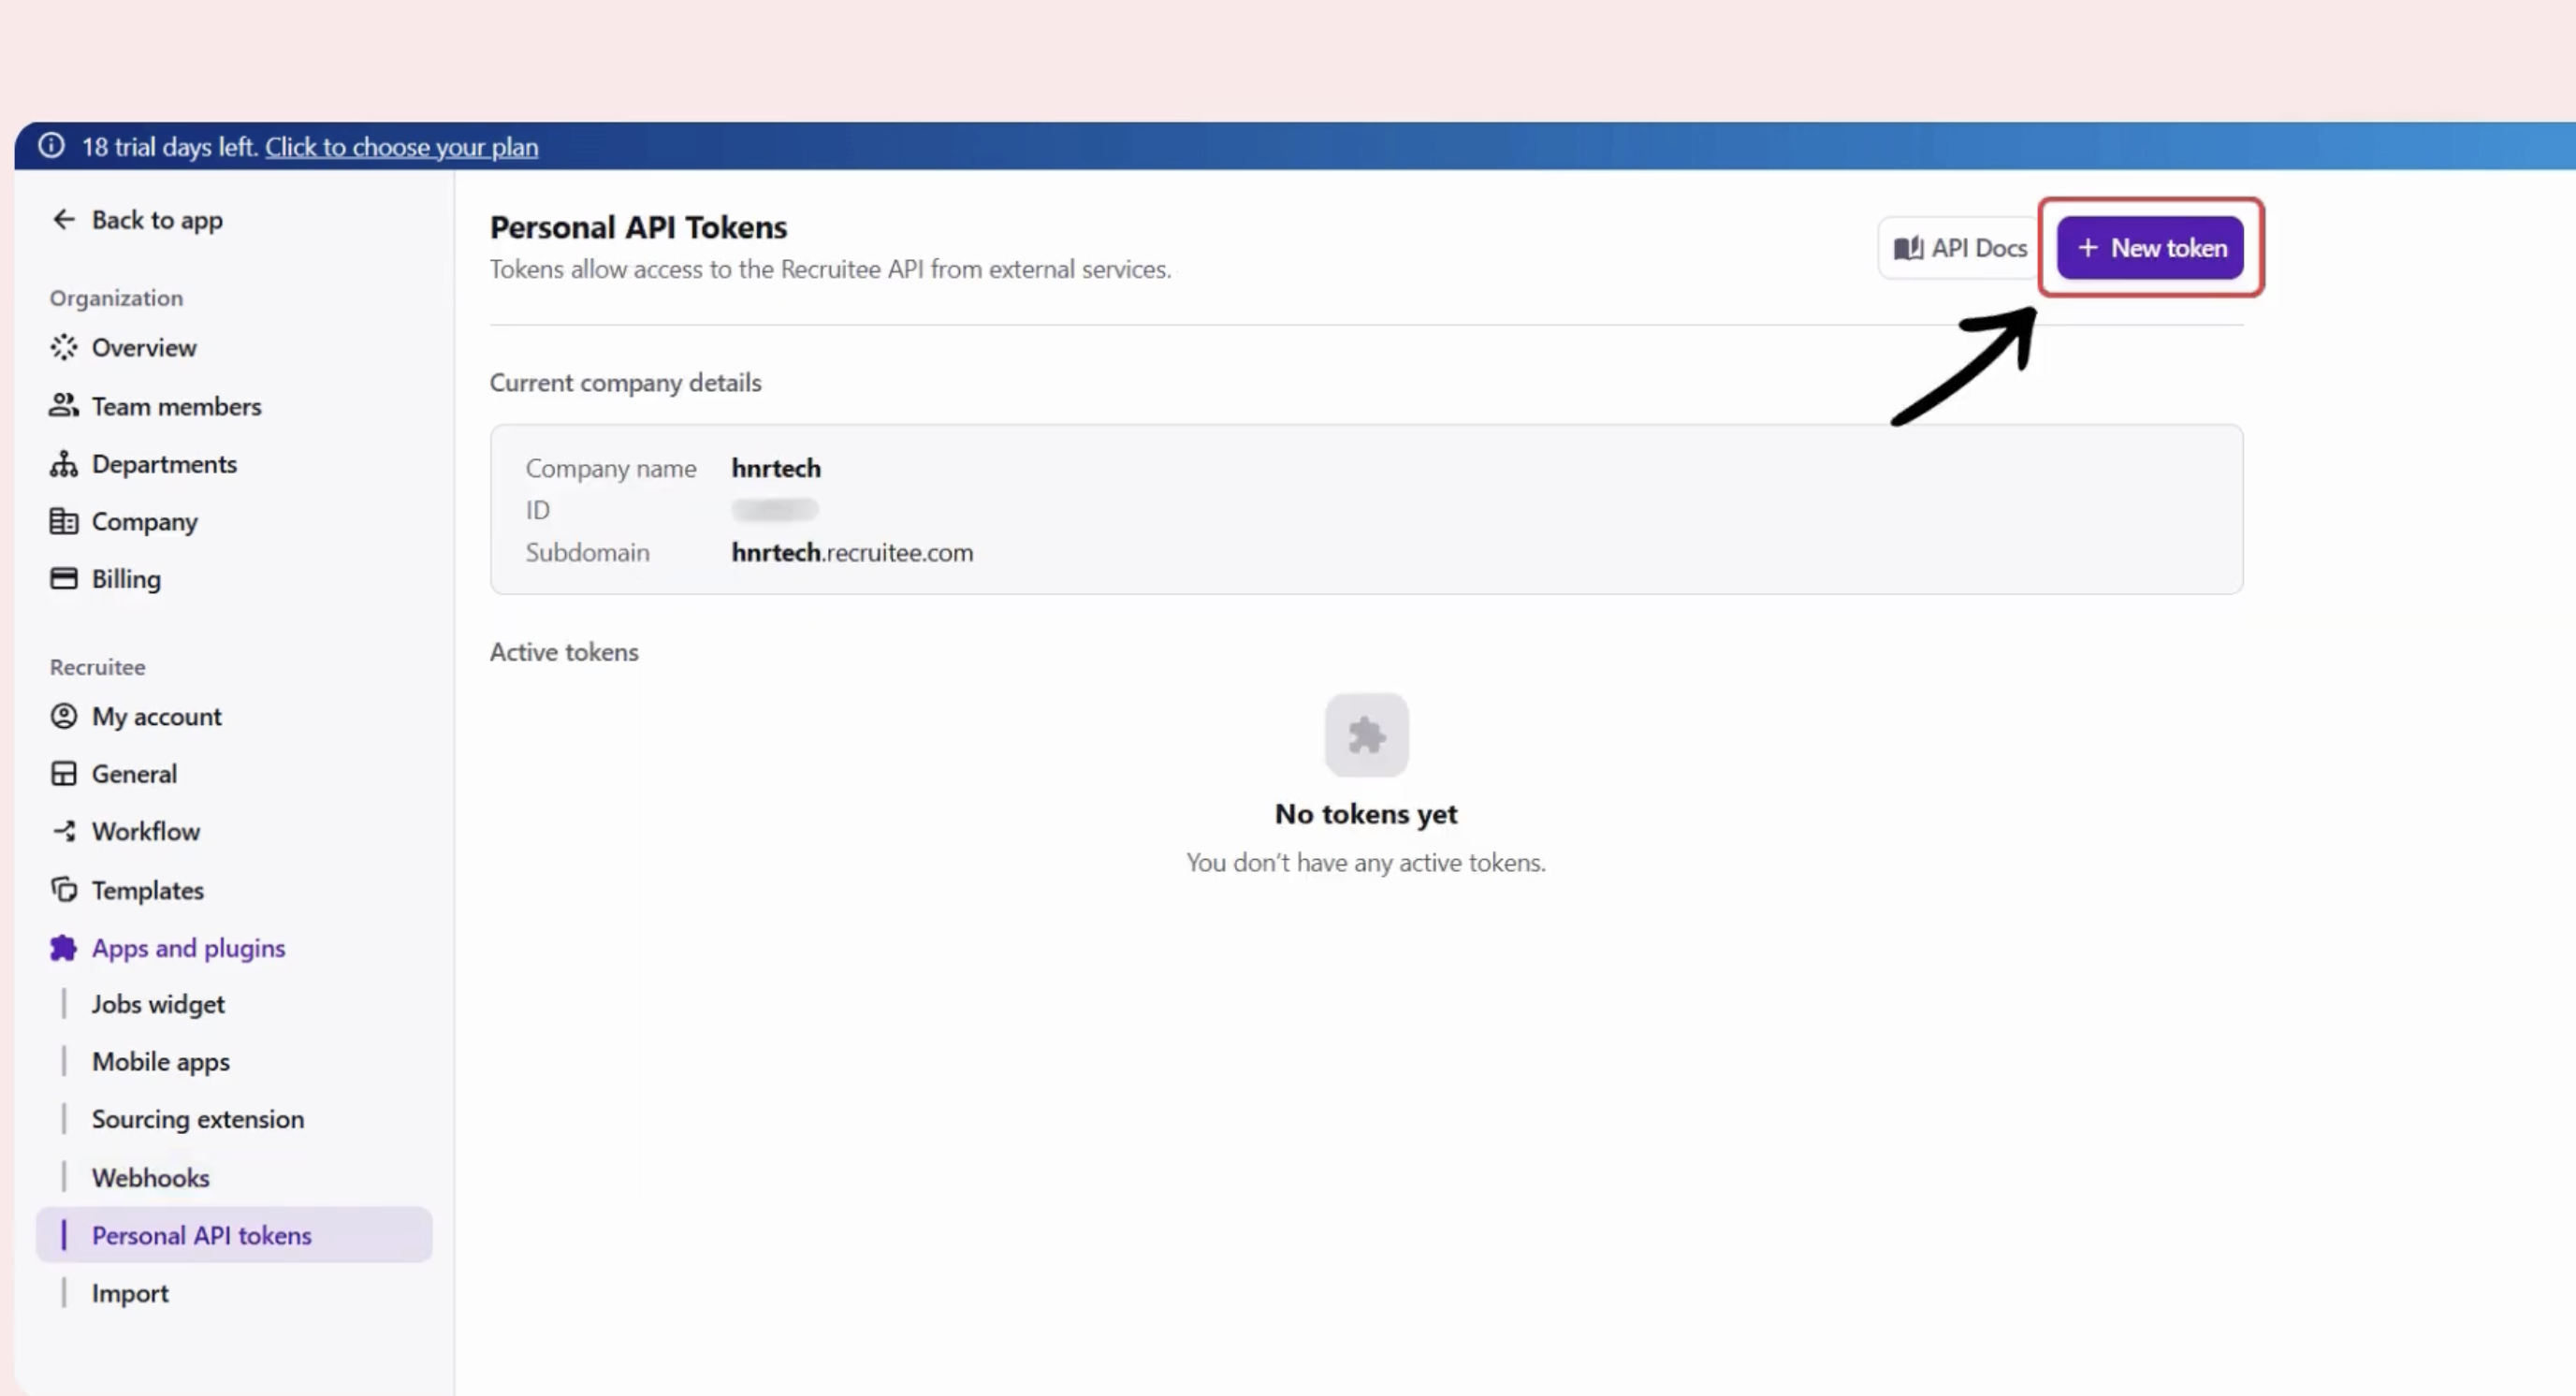
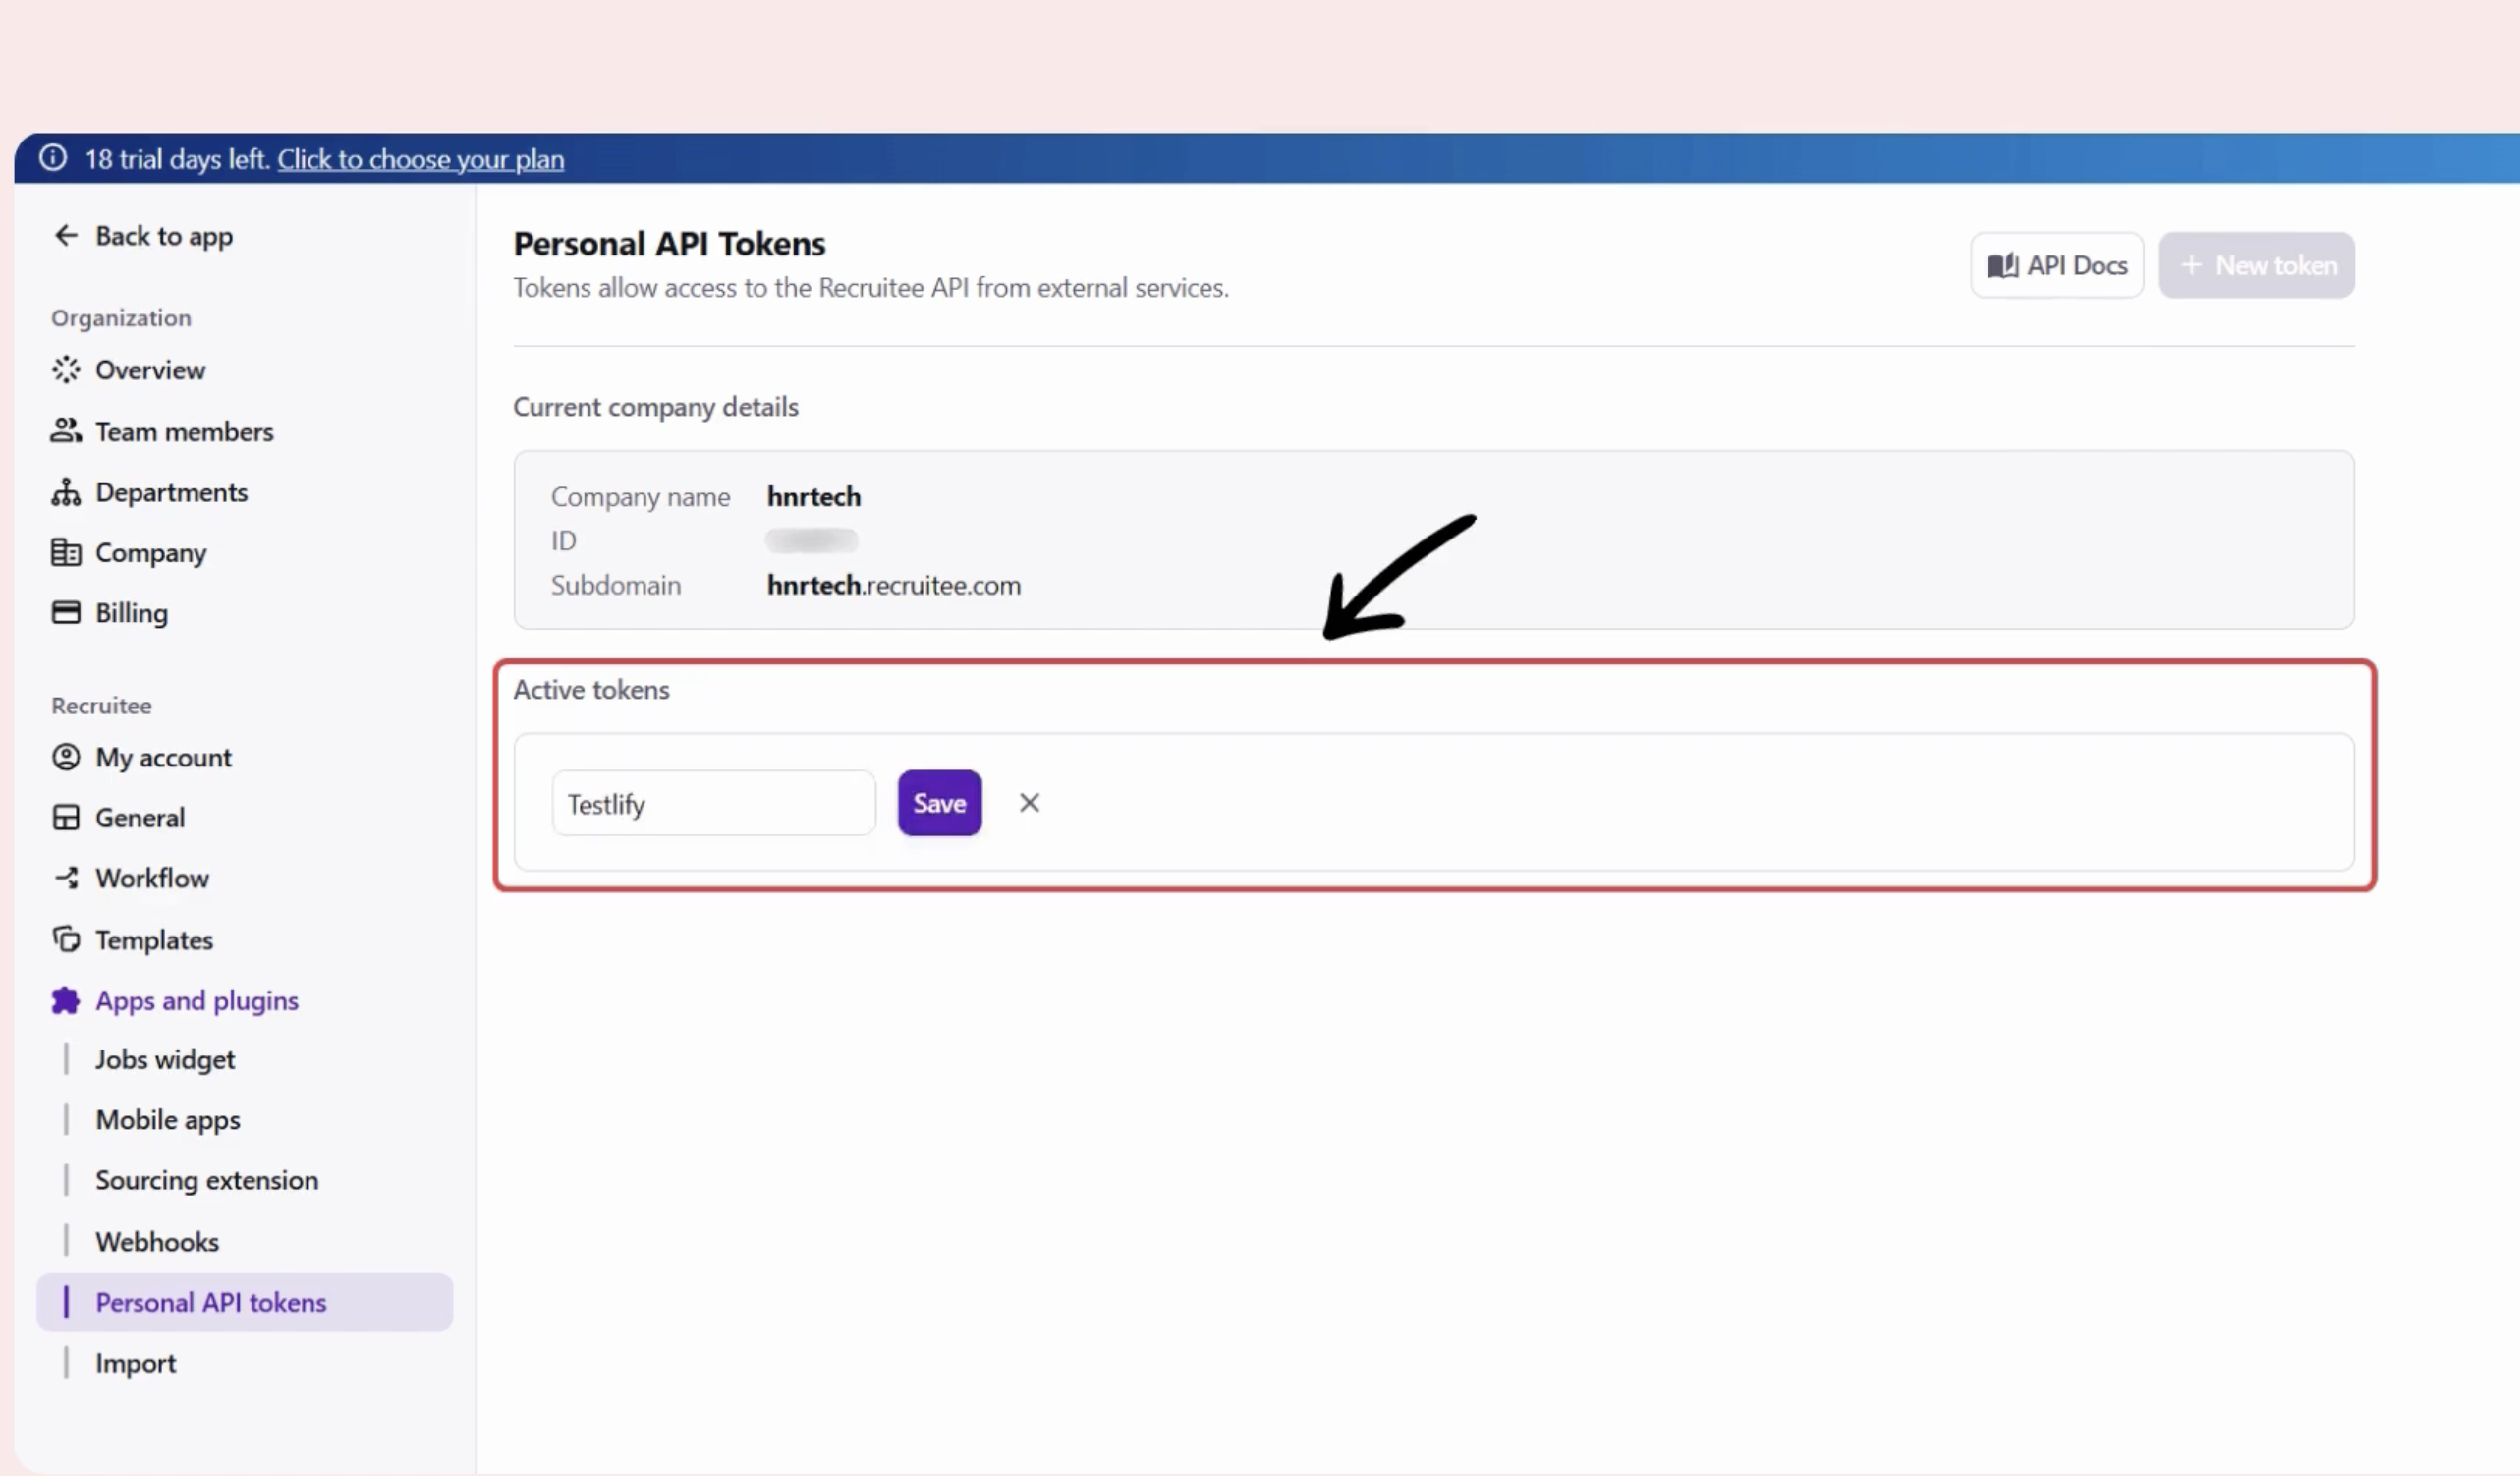
The same page displays your Company ID — copy both values.

Step 6: Enter your credentials in Testlify
Back in Testlify's Recruitee Integration page, enter your Company ID, Personal API Token, and Webhook Secret Key, then click Save. Workspace-level integration is now complete.
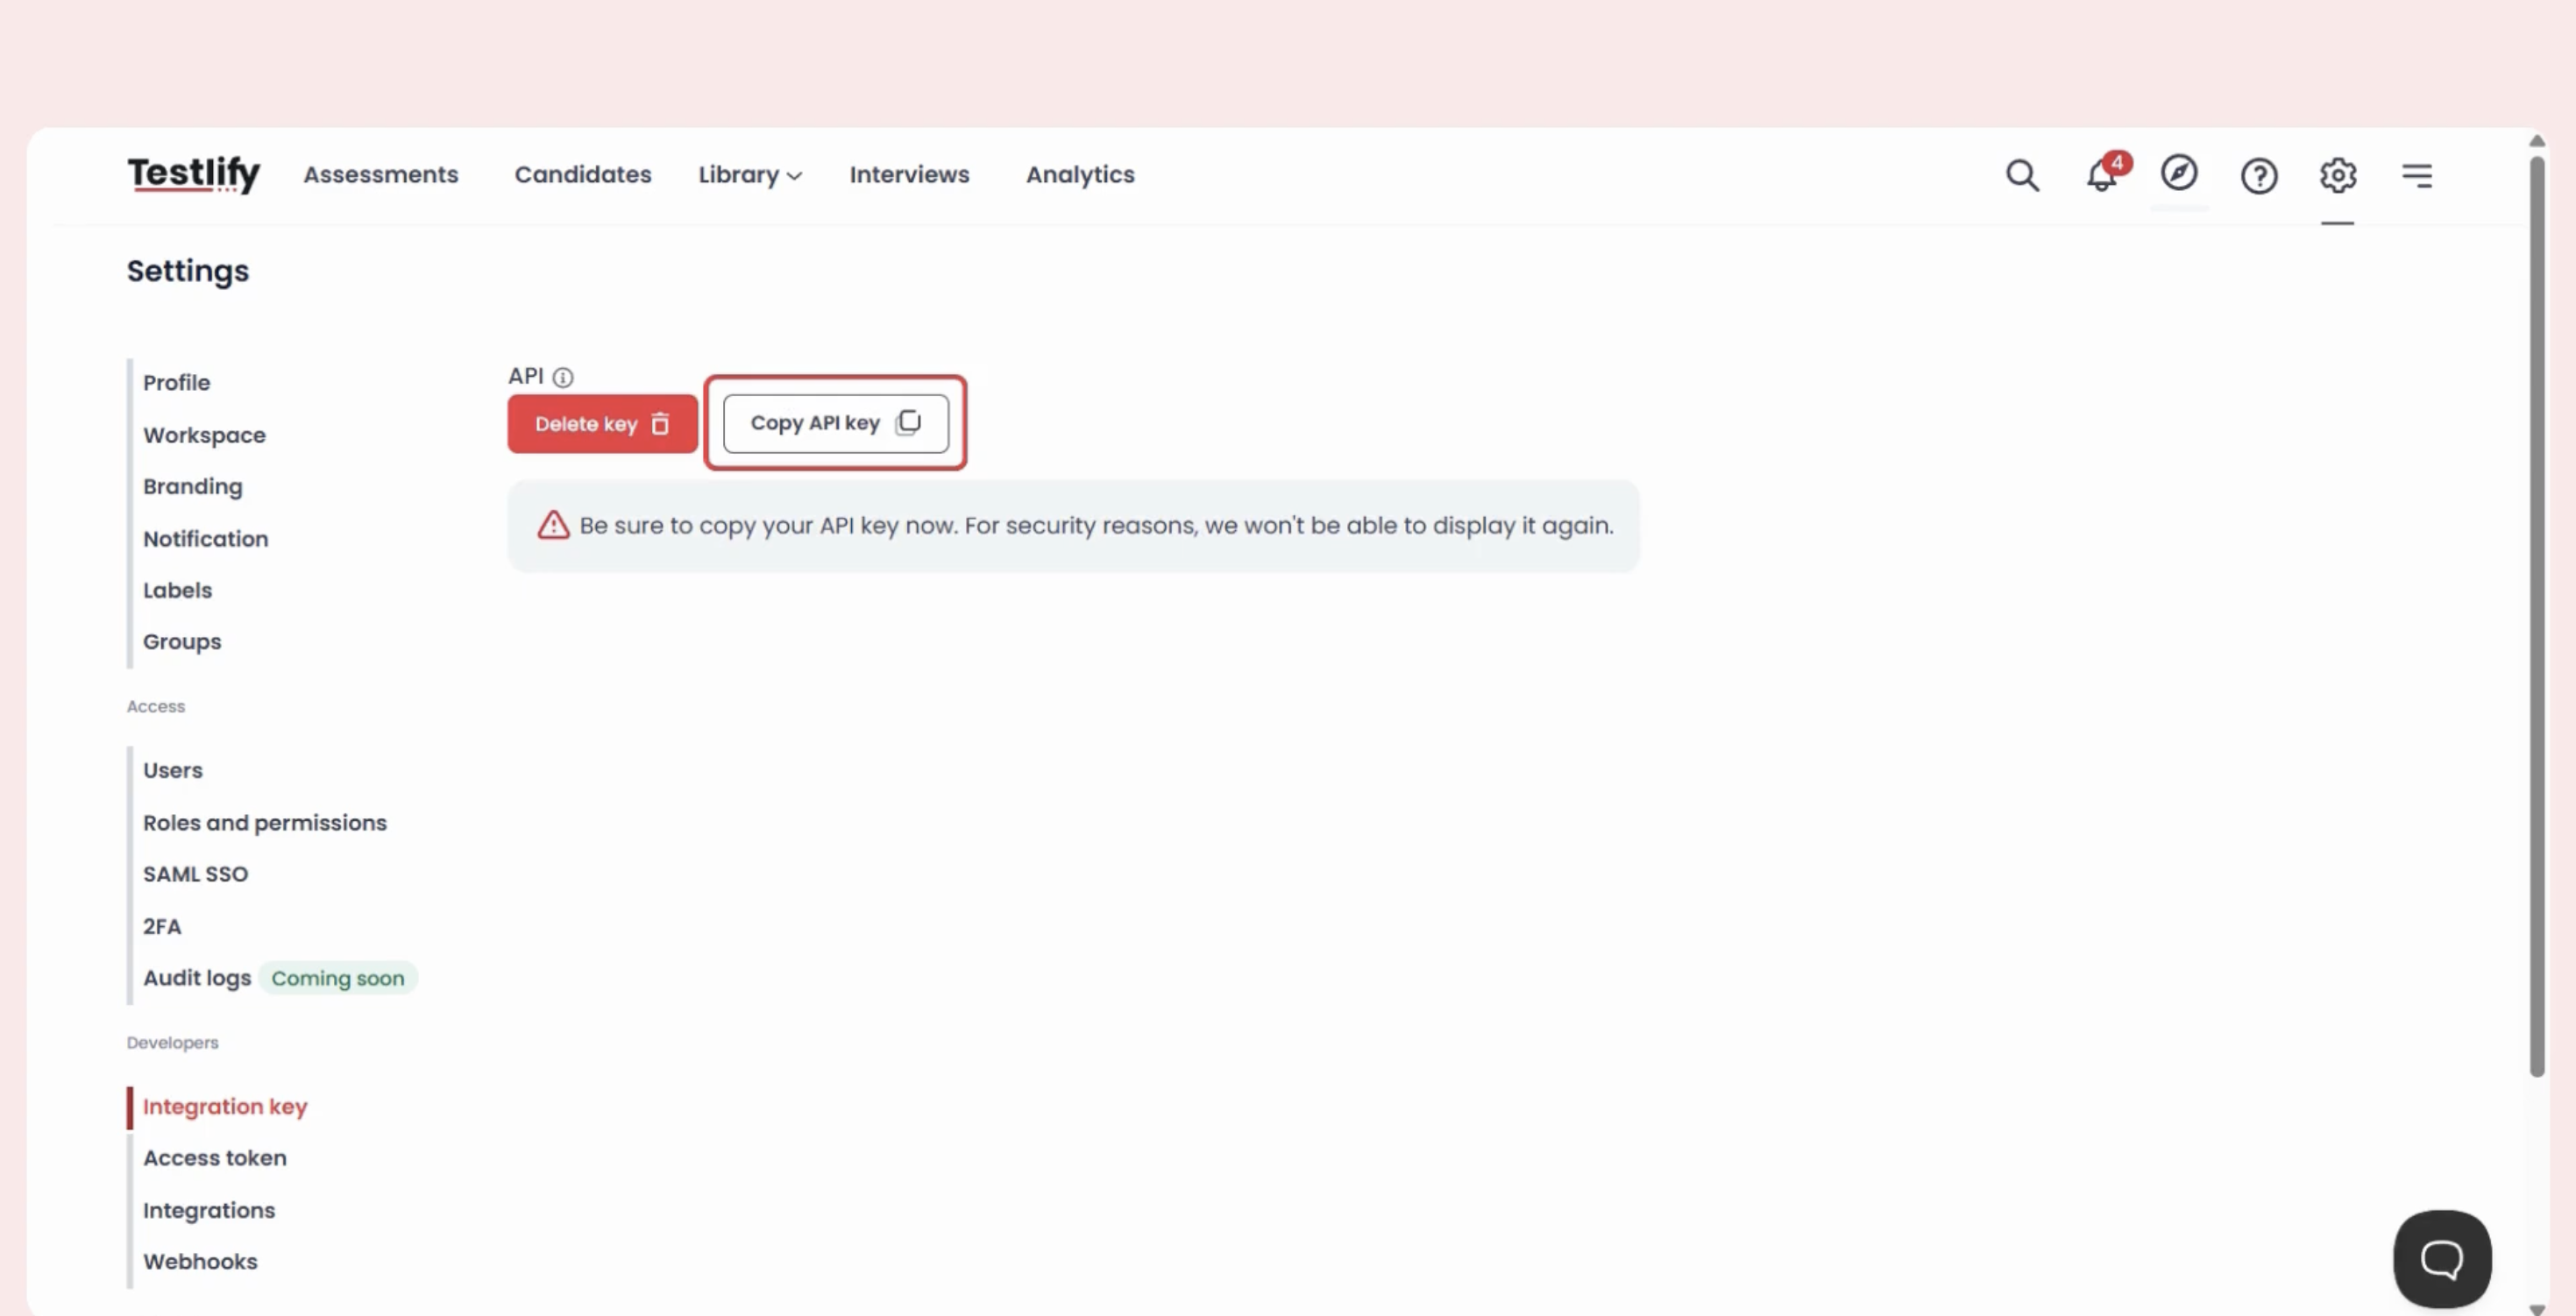
Step 7: Generate an Integration Key in Testlify
- Go to Settings > Integration Key.
- Create a new Integration Key.
- Copy and save it securely for future use.
Part 2: Assessment-Level Integration
Repeat the following steps for each assessment you want to connect to a Recruitee job.
Step 1: Open the assessment's Integration settings
- Go to Assessments and open the assessment.
- Click Settings > Integration tab.
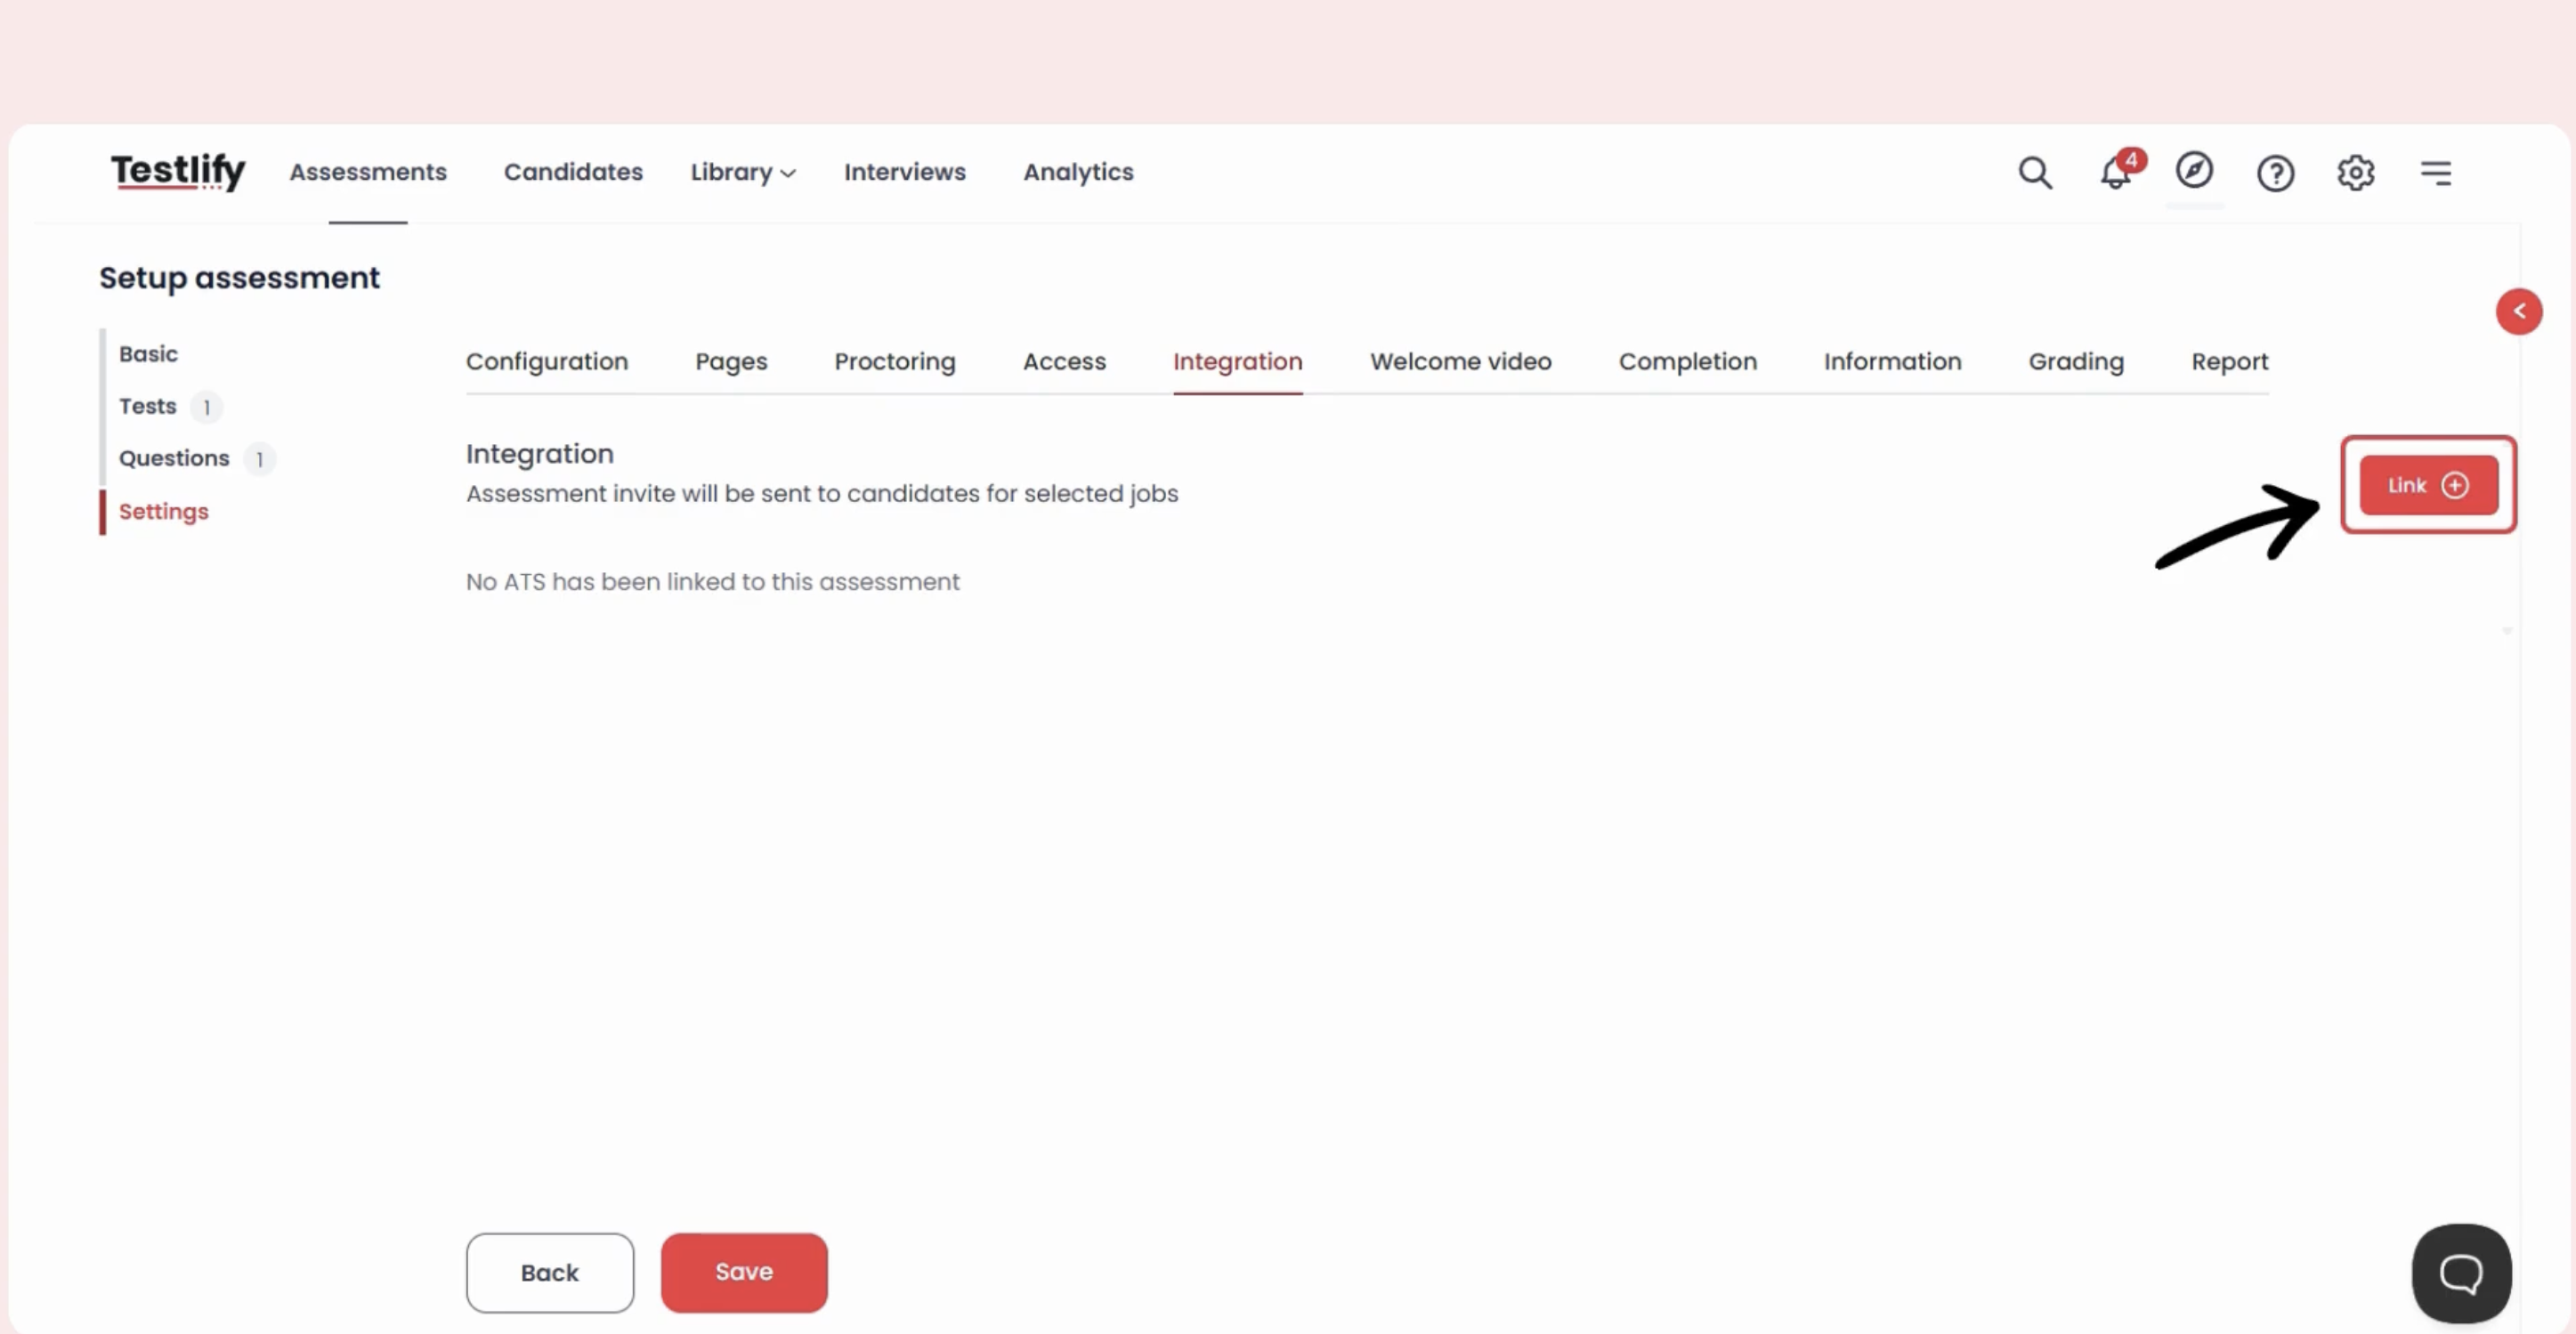
Step 2: Link Recruitee to the assessment
- Click Link.
- From the ATS dropdown, select Recruitee Integration.
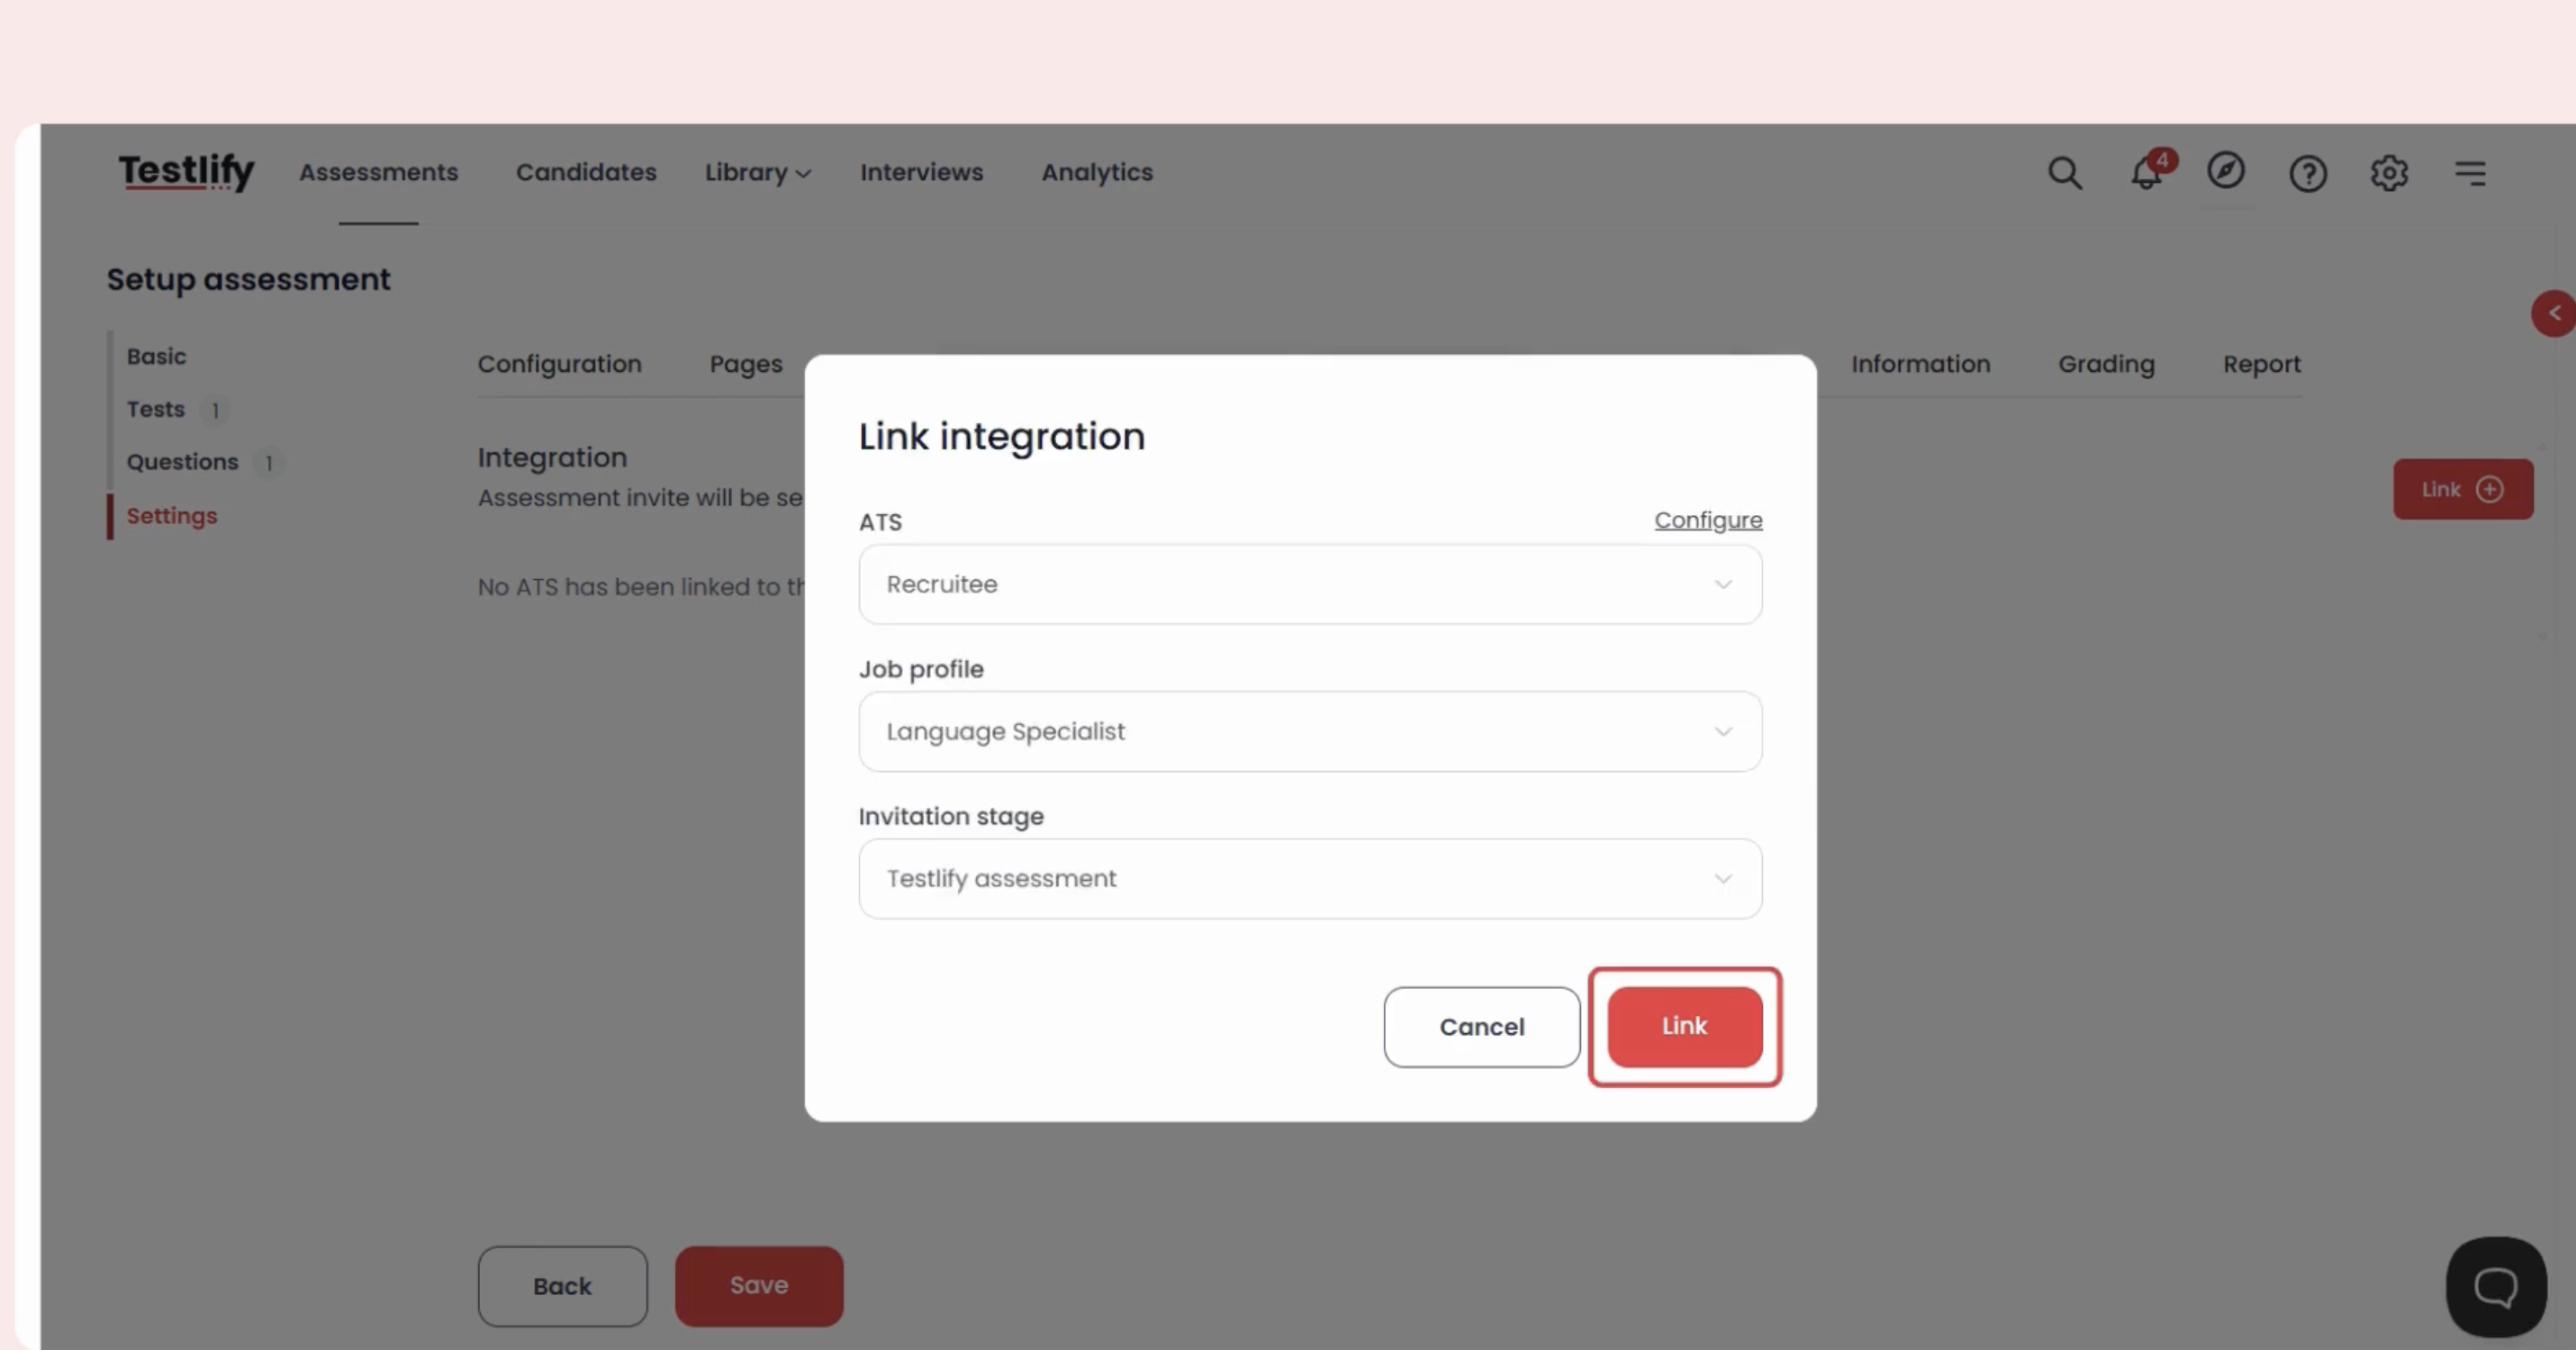
Step 3: Select the Job Profile
Your active Recruitee jobs appear automatically. Select the Job Profile that matches this assessment.
Step 4: Configure the Invitation Stage
Select an Invitation Stage — the pipeline stage in Recruitee that triggers the assessment invitation.
Tip: Selecting Phone Screen means any candidate moved to that stage automatically receives an assessment invite from Testlify.
Step 5: Save and verify
- Click Save to complete assessment-level setup.
- Move a test candidate to the configured stage in Recruitee to confirm the invitation is sent correctly.
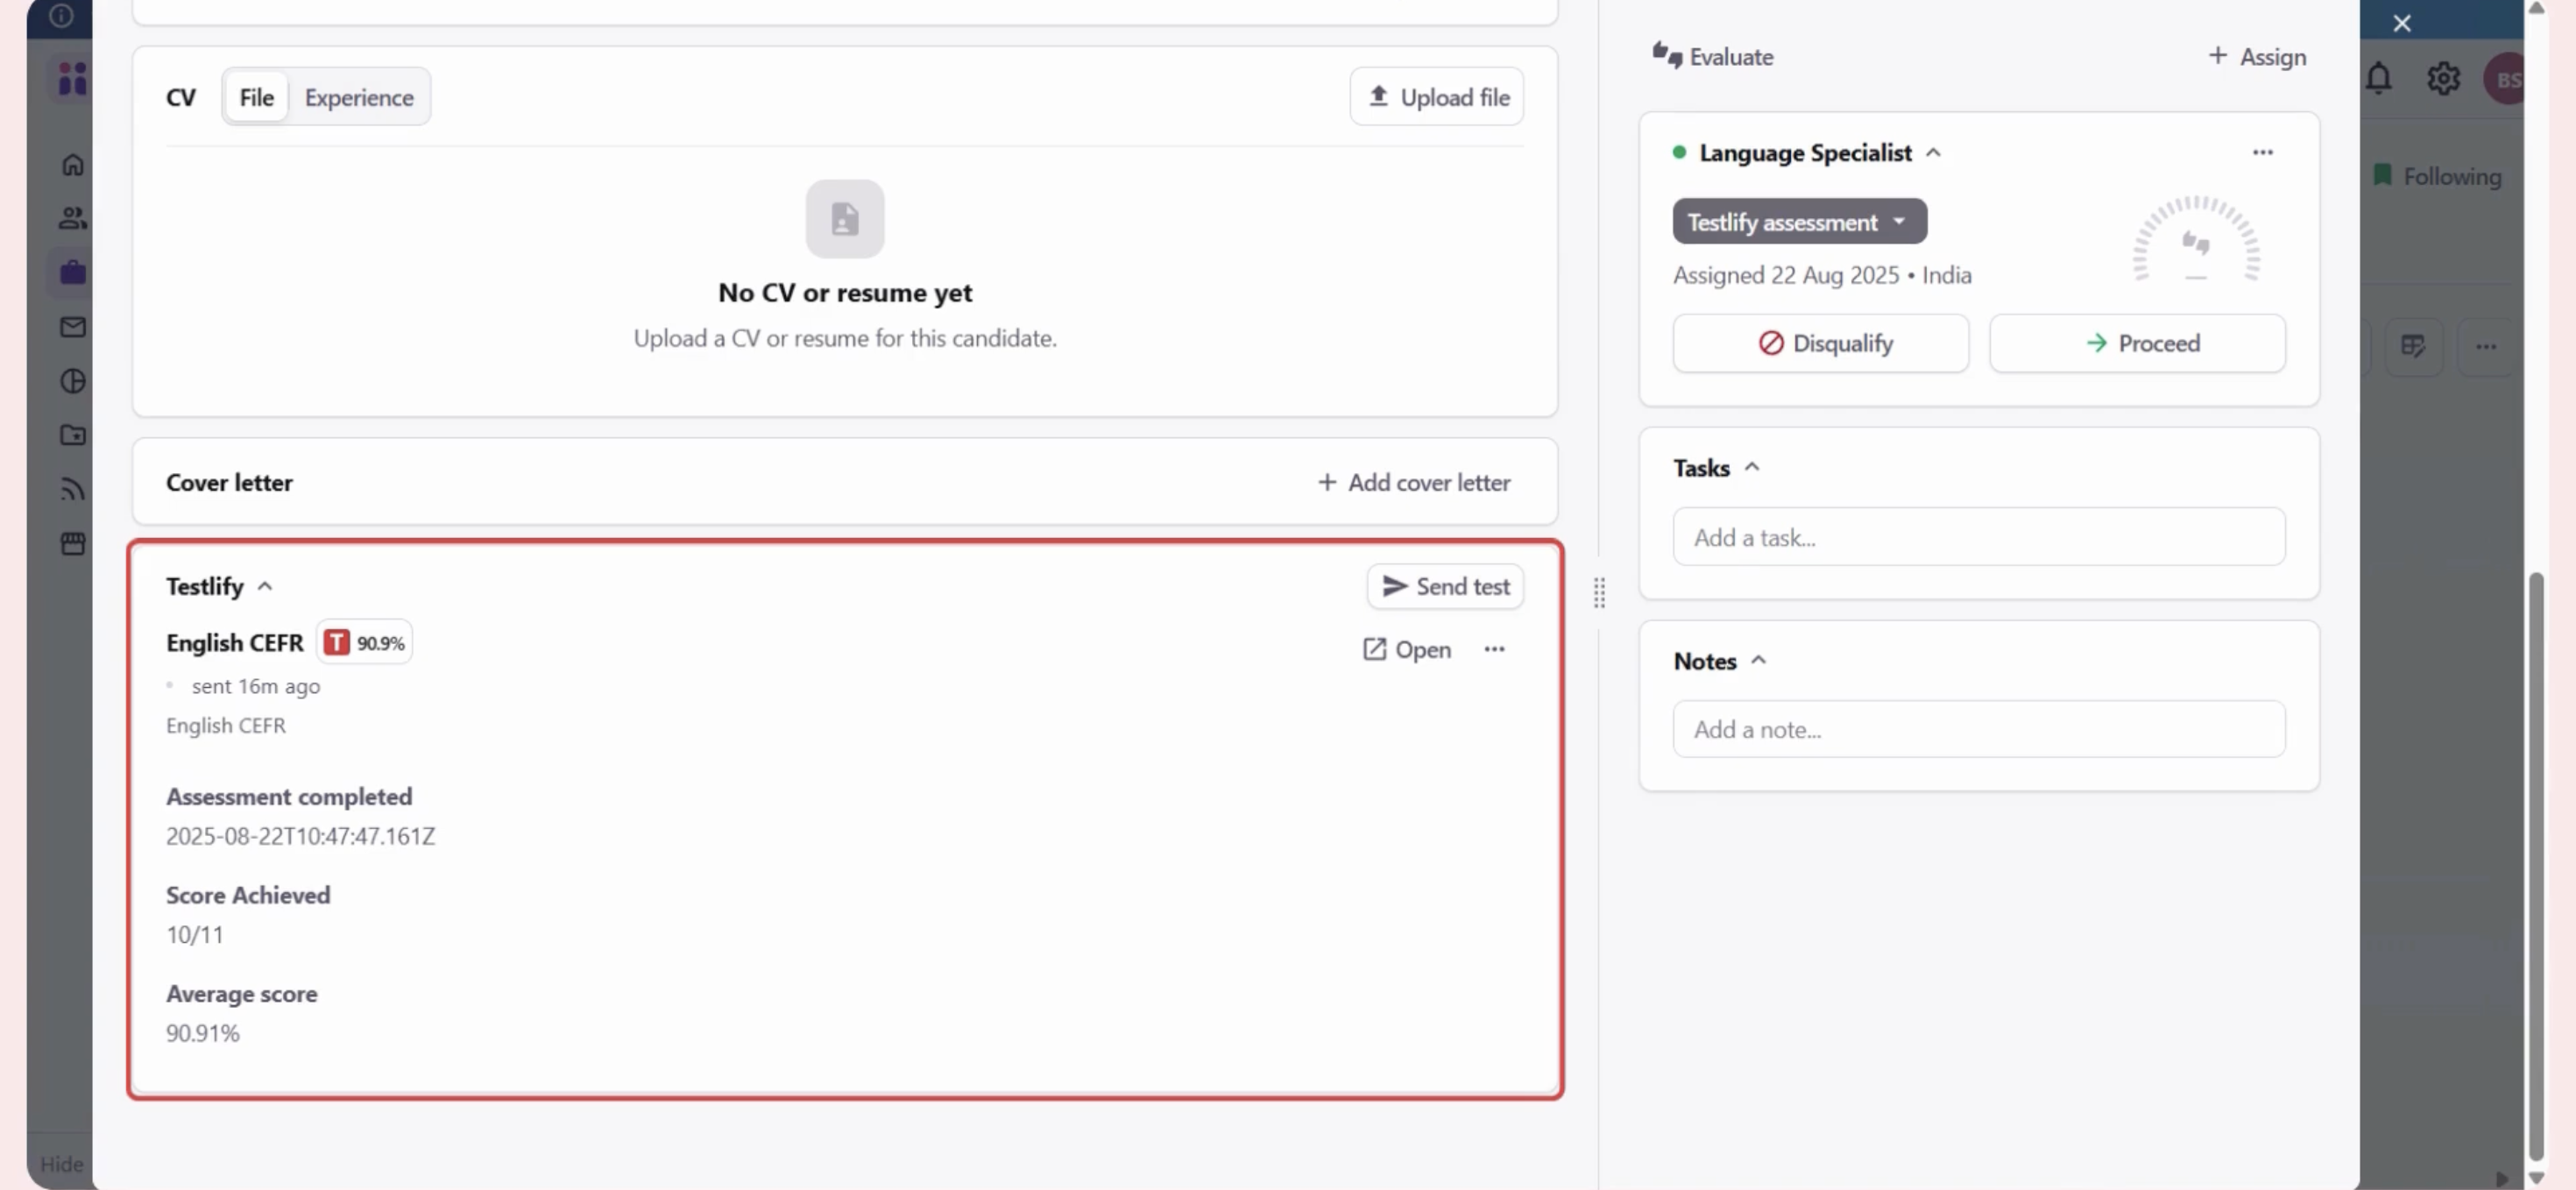
How the integration works
- A candidate is moved to the configured stage in Recruitee.
- Testlify automatically sends the assessment invitation.
- The candidate completes the assessment.
- Scores appear on both platforms.
Important notes
- Confirm the webhook Post URL from Testlify Support is correctly entered in Recruitee.
- Keep your API Token and Webhook Secret Key secure — do not share them.
Need help? Contact support.