
How to Set Invitation Expiry for Your Assessment
Control how long candidates have to complete your assessment by setting an invitation expiry. Once the deadline passes, Testlify automatically blocks access — no manual action required.
Before you begin
Make sure you have an existing assessment in your Testlify workspace and an Editor or Admin role to change its settings.
Set the invitation expiry
-
Log in to your Testlify workspace at app.testlify.com/login.

-
Open the Assessment Dashboard.

-
Click the assessment you want to configure.
-
Click Edit to open the assessment editor.
-
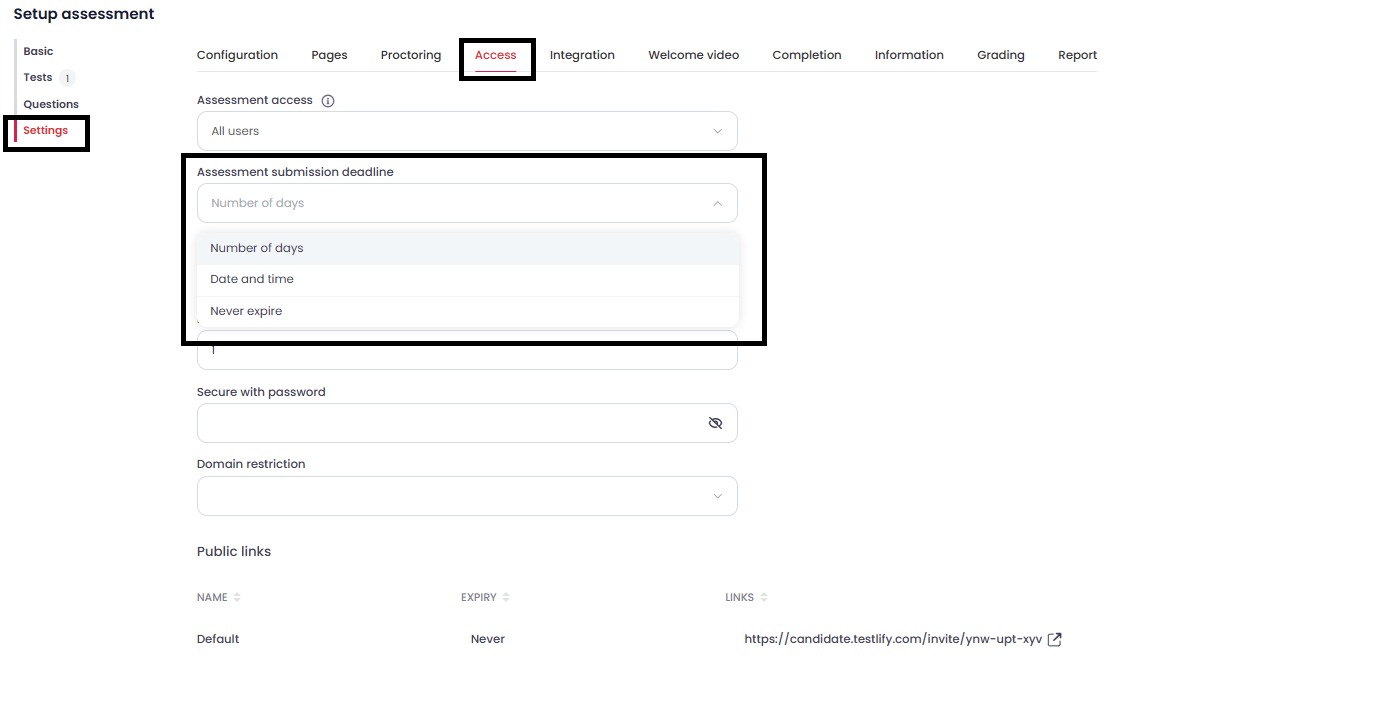
In the left sidebar, select Settings.
-
Click Access. Configure the following options, then click Save:
- Validity — set a number of days from invitation, or a specific date and time when access expires.
- Attempts — optionally limit how many times a candidate can attempt the assessment.
What happens next
Testlify enforces the expiry automatically. Candidates who attempt to open the assessment after the deadline will be blocked from accessing it.
Tip: Use a date-and-time expiry (rather than a day count) when all candidates must finish by the same deadline — for example, at the close of a hiring round.
Need help? Contact support.