
How to Bulk Invite Candidates for Assessments
Use Bulk Invite to send assessment invitations to multiple candidates at once by uploading a CSV file. This saves time and ensures every candidate receives a consistent invite.
Before you begin
Prepare a CSV file with your candidates' details. Each row must include all three of the following fields:
- First name
- Last name
- Email address — do not include spaces or special characters in the email column
Download the CSV template from the bulk invite screen (step 3) to ensure your file matches the required format before importing.
Steps to bulk invite candidates
-
Open the assessment — Go to an existing assessment or create a new one in your Testlify account.
-
Select Bulk Invite — In the Invite Candidates section, select the Bulk Invite option.

-
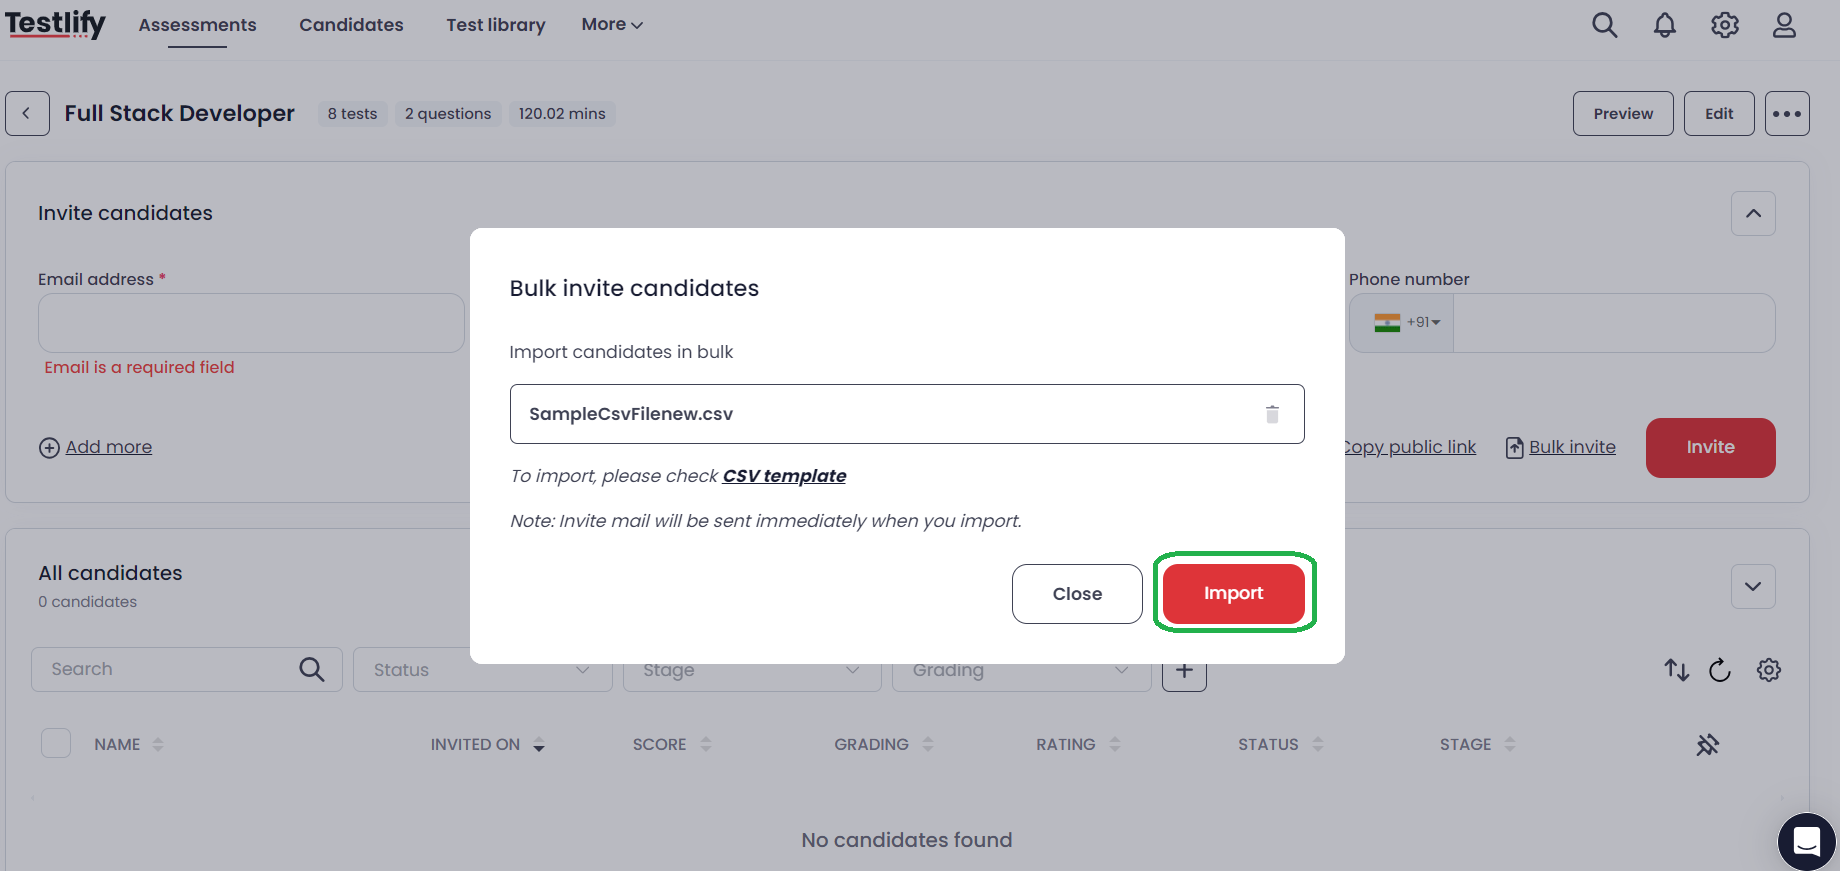
Download and complete the CSV template — Select the CSV template link, fill in each candidate's first name, last name, and email address, then save the file.


-
Import the CSV file — Upload your completed file and select Import. Invitation emails are sent to all candidates immediately when you select Import.
Tip: If some invitations fail to send, check the email column in your CSV for extra spaces or special characters — these are the most common cause of import errors.
Need help? Contact support.