
How to View and Manage Your Testlify Plan
View your current Testlify plan, compare available tiers, switch plans, and add optional features — all from the Billing page.
Before you begin
You need Admin access on your Testlify workspace to view or change billing settings.
Step 1: View your current plan and compare options
- Log in to your Testlify account.
- Click your profile icon in the top-right corner.
- Select Billing from the dropdown.
- On the Billing page, click View Plans.


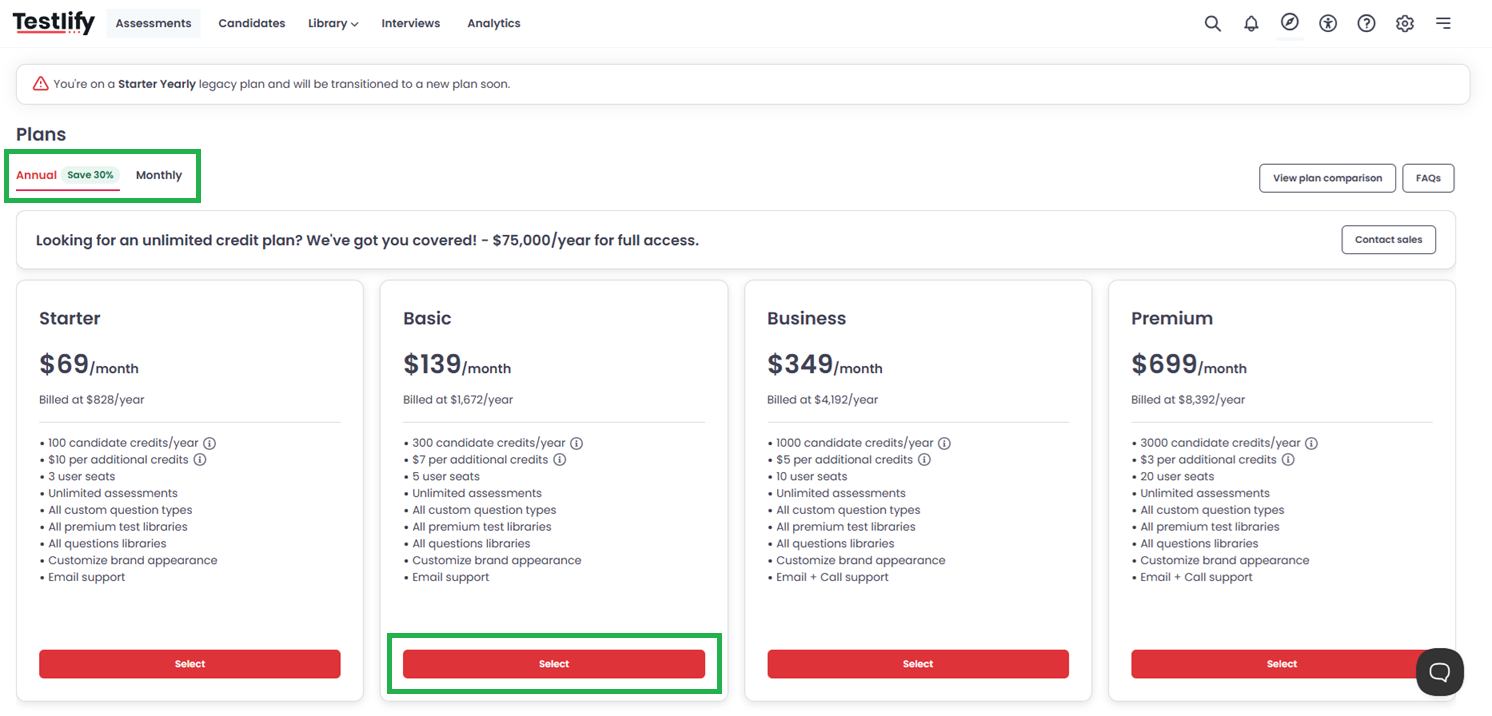
The View Plans page shows all available tiers — Starter through Enterprise — with monthly and annual pricing, feature limits, and included benefits.
Step 2: Switch to a different plan
- On the View Plans page, select your preferred plan.
- Choose Monthly or Annual billing. Annual billing costs less per month than monthly.
- Click Select Plan to confirm. The change takes effect immediately; billing is prorated so you are charged only for the remaining period.
Tip: Not sure which plan fits your needs? Email sales@testlify.com for a personalized recommendation before switching.
Step 3: Add optional features to your plan
- Go to your Billing page.
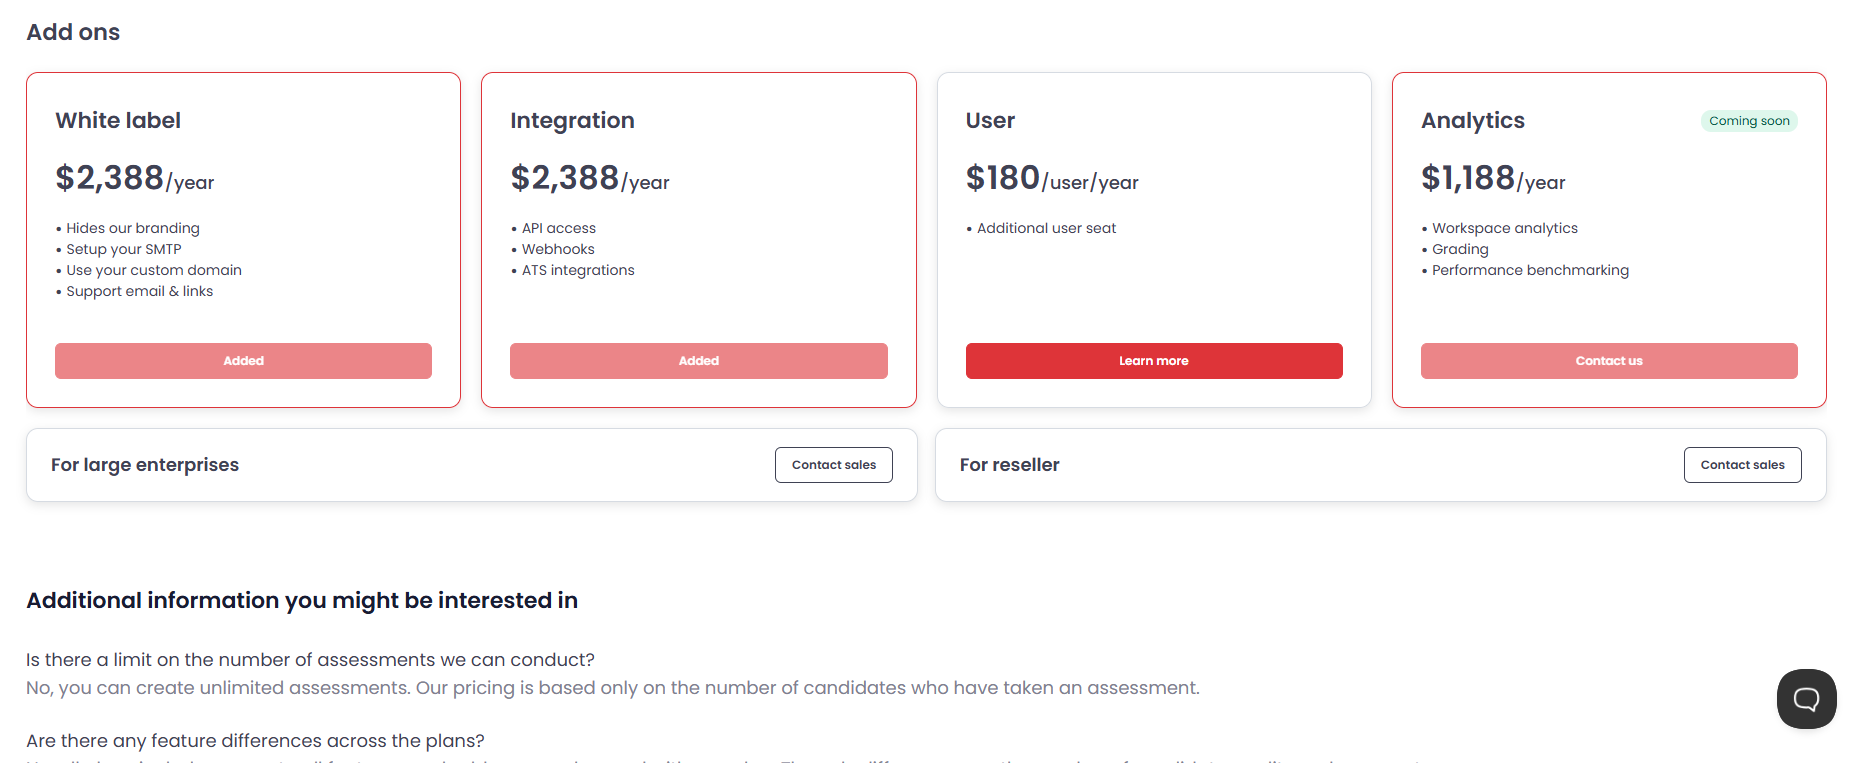
- Scroll to the Add-Ons section.
- Select the features you want and confirm the purchase.
Available add-ons:
- Integrations — Connect Testlify with your ATS (such as Greenhouse or Lever) and other HR tools.
- Additional Users — Add team members to collaborate on hiring projects.
- Advanced Analytics — Access custom reports and deeper data dashboards.
- White-Labeling — Remove Testlify branding for a fully branded candidate experience.
Need help? Contact support.