
How to Upgrade to a Paid Testlify Plan
Before you begin
Have your billing address and payment card ready. You must have Admin access to upgrade your account.
Steps to upgrade
- Log in to your Testlify account.
- Open the upgrade flow — choose either method:
- Click the Upgrade button at the top of your dashboard.
- Or go to Menu icon > Billing > View Plans.
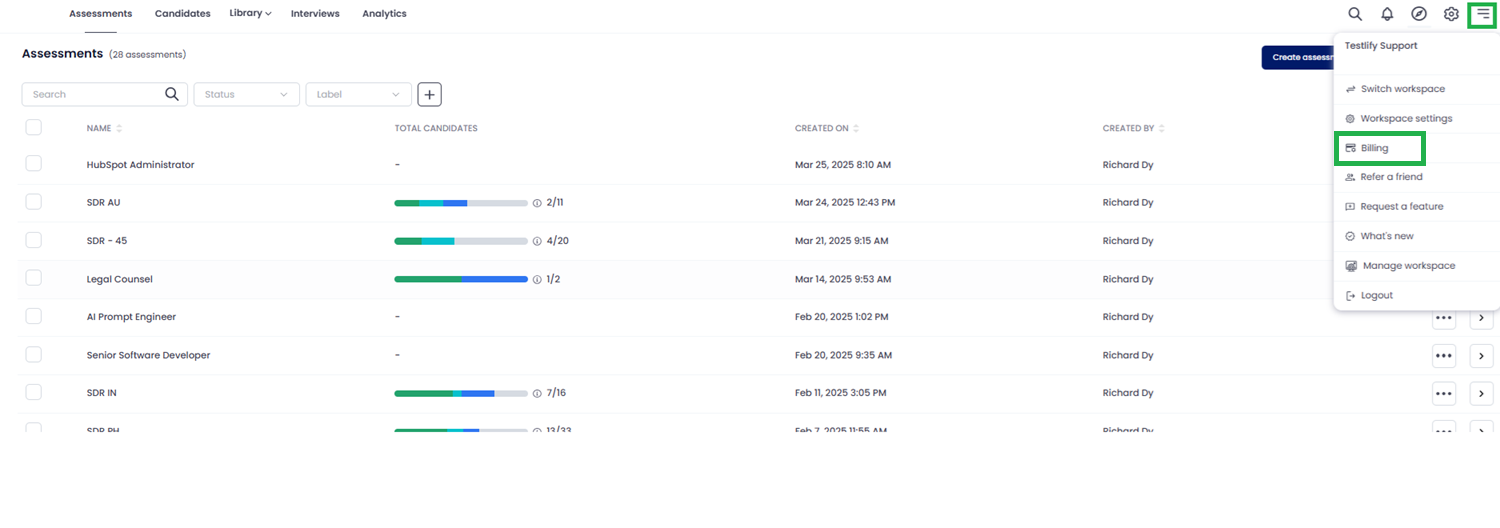
- Choose your plan — browse the available plans and select the one that fits your needs.

- Review your order — confirm the plan name and total on the order page. Optionally add integrations or the white-label add-on, then click Proceed to Checkout.

- Enter your account details — fill in your company name, email, and any other required fields.

- Add your billing address in the designated fields.

- Enter payment details — provide your card information, then click Next. Your card is saved for future billing cycles.

- Complete the upgrade — once all details are submitted, your account upgrades immediately to the selected paid plan.

Tip: Add integrations or the white-label add-on during step 4 (Review your order) to bundle everything in one purchase and avoid paying separately later.
Need help? Contact support.