Set Up Workday Integration with Testlify
Connect Workday with Testlify to automatically send assessment invitations, sync candidate results, and keep your recruitment pipeline current — without manual data entry between platforms.
Before you begin
- You have admin access to both your Testlify workspace and your Workday tenant.
- Your Workday instance is configured as an ATS (Applicant Tracking System) or HRIS (Human Resource Information System).
- You have permission to create Integration System Users and Security Groups in Workday.
Video Overview
Step 1: Start the Workday integration on Testlify
- In your Testlify workspace, open Workspace Settings and click Integrations.
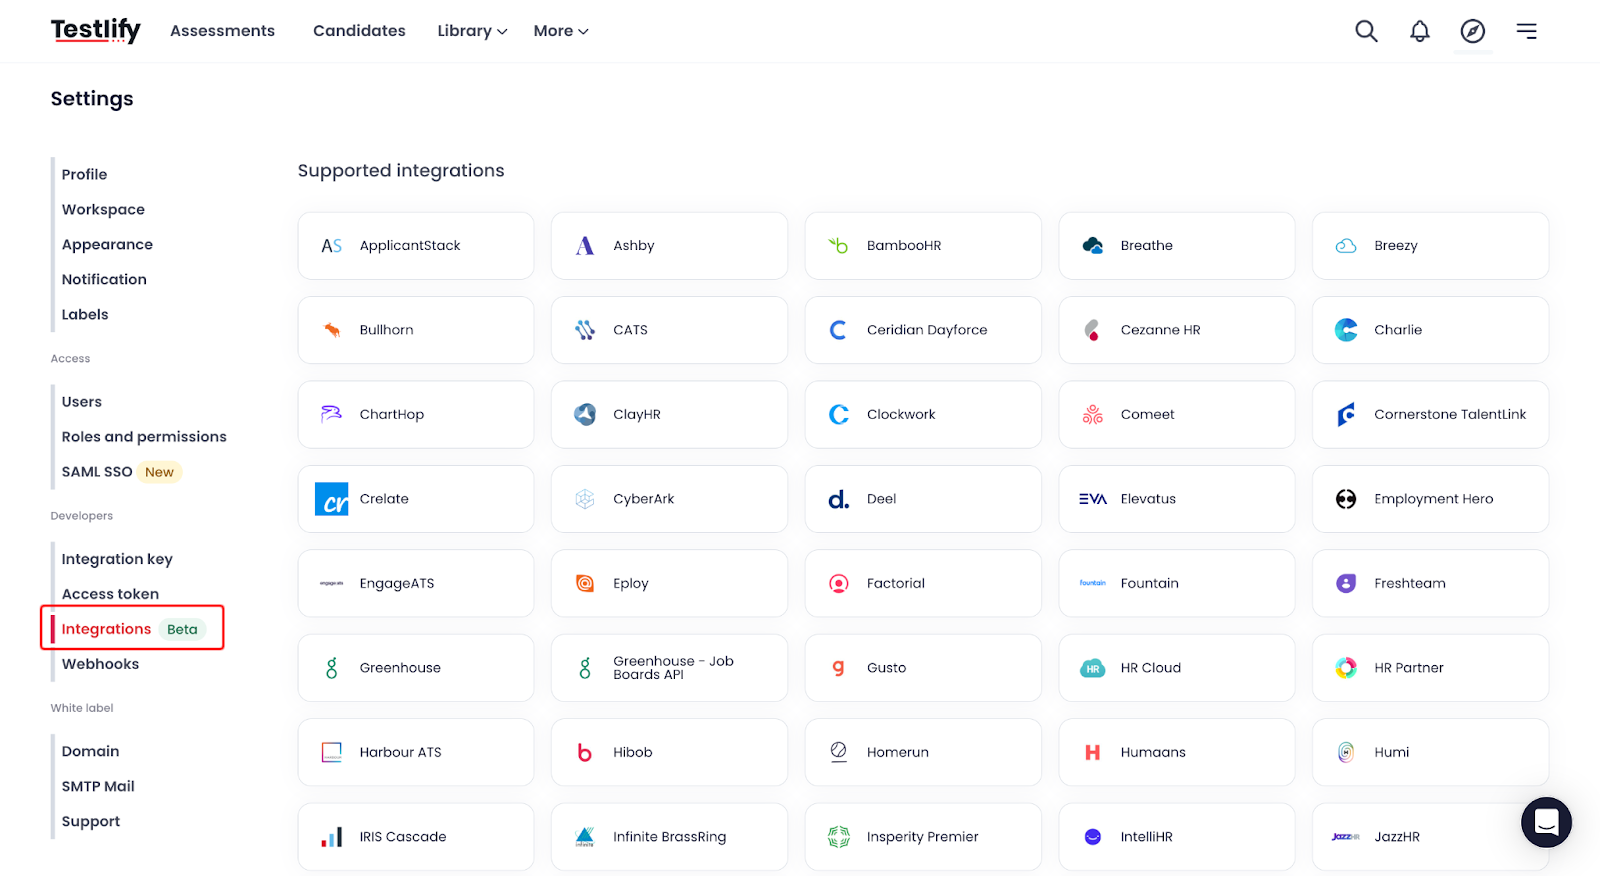
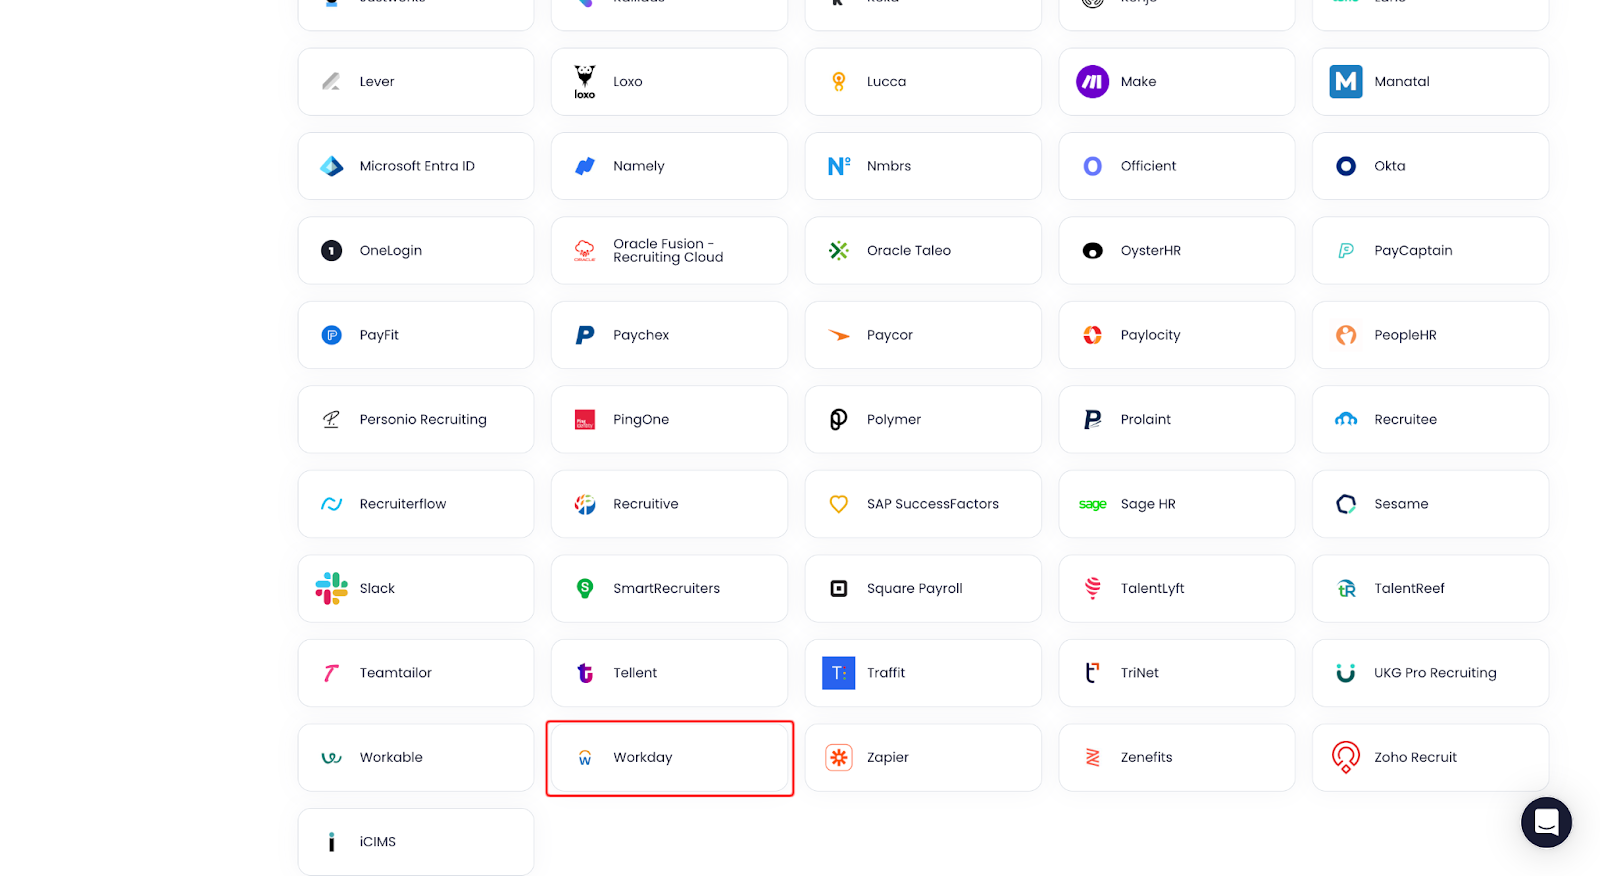
- Select Workday from the integrations list.
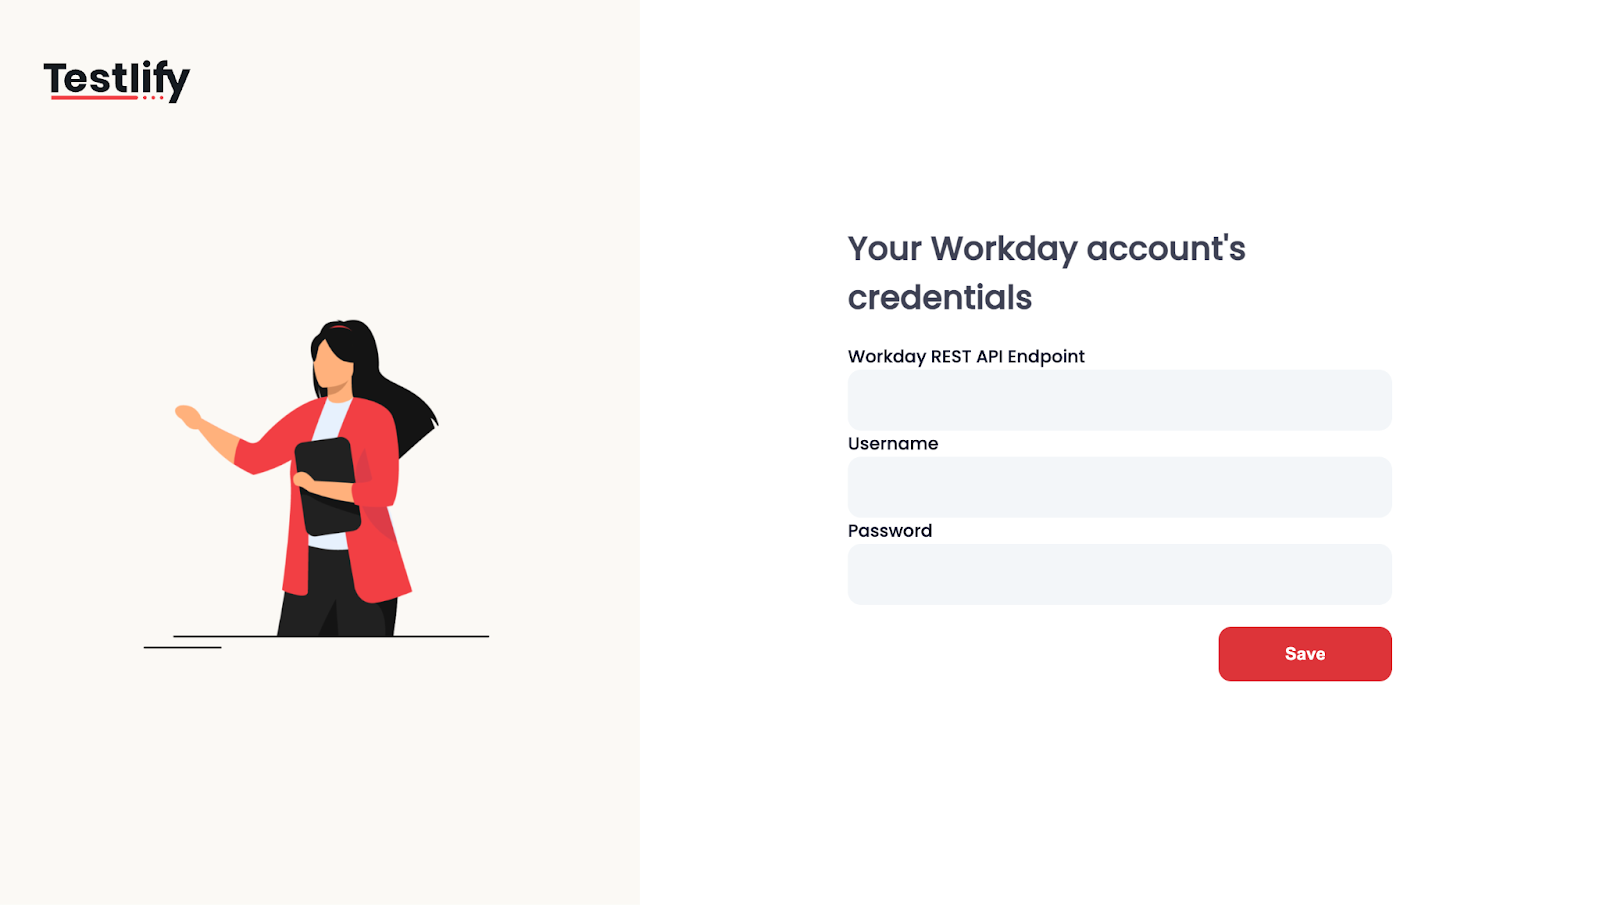
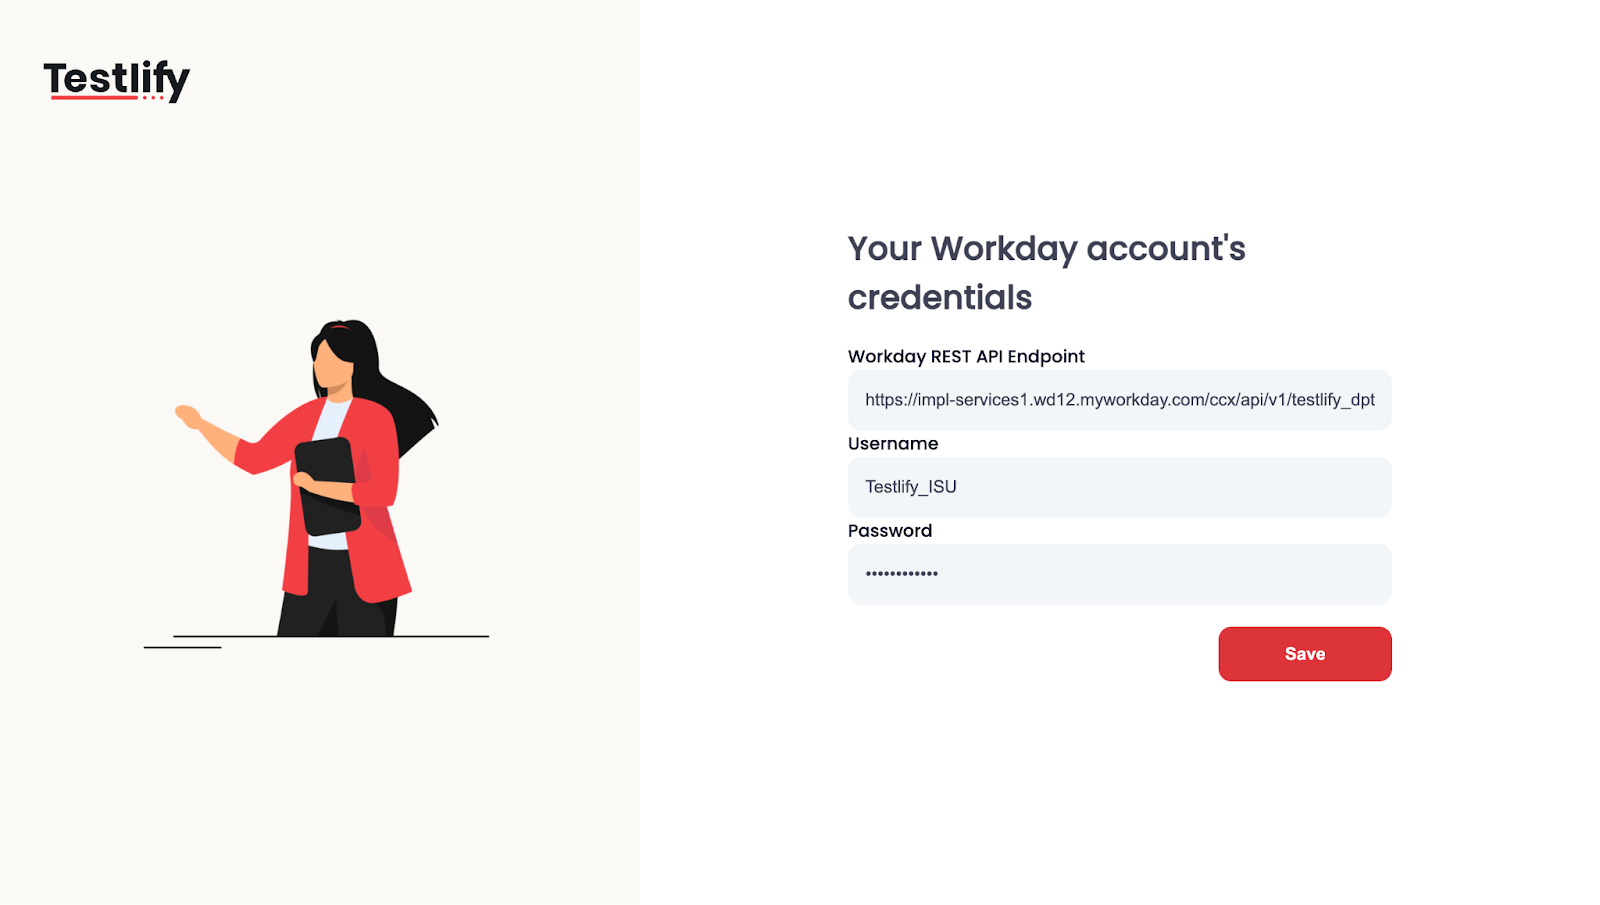
- Fill in the connection details as described in the steps below.


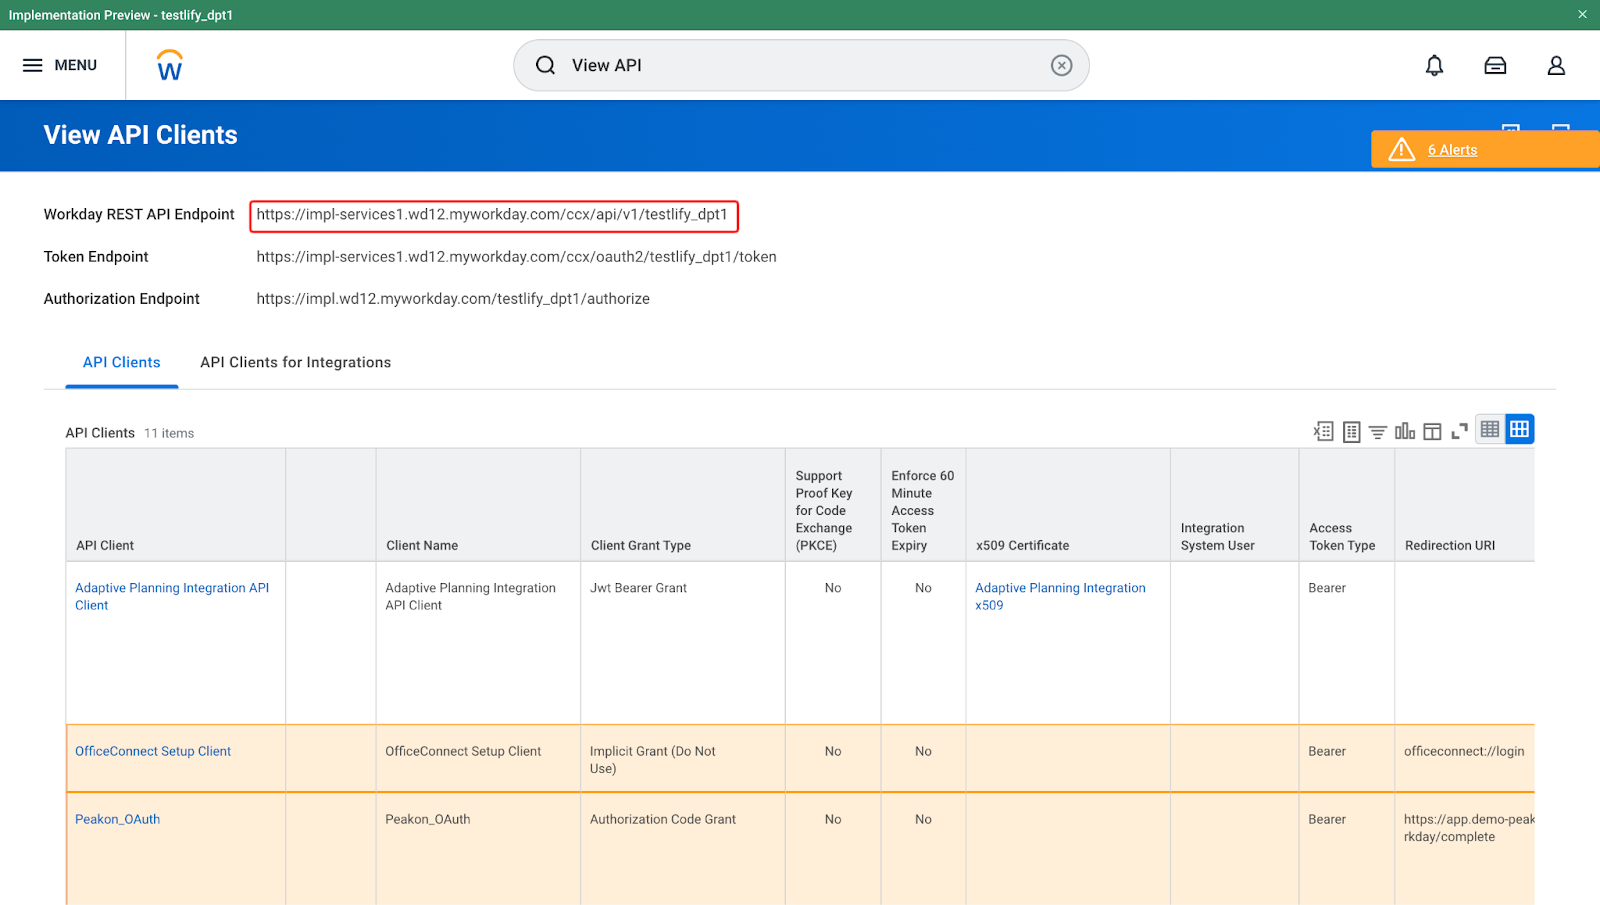
Step 2: Obtain the REST API endpoint
- Log in to your Workday tenant.
- In the Search field, type View API Clients.
- Copy the URL from Workday REST API Endpoint and paste it into the integration connection page on Testlify.

Step 3: Create an Integration System User (ISU)
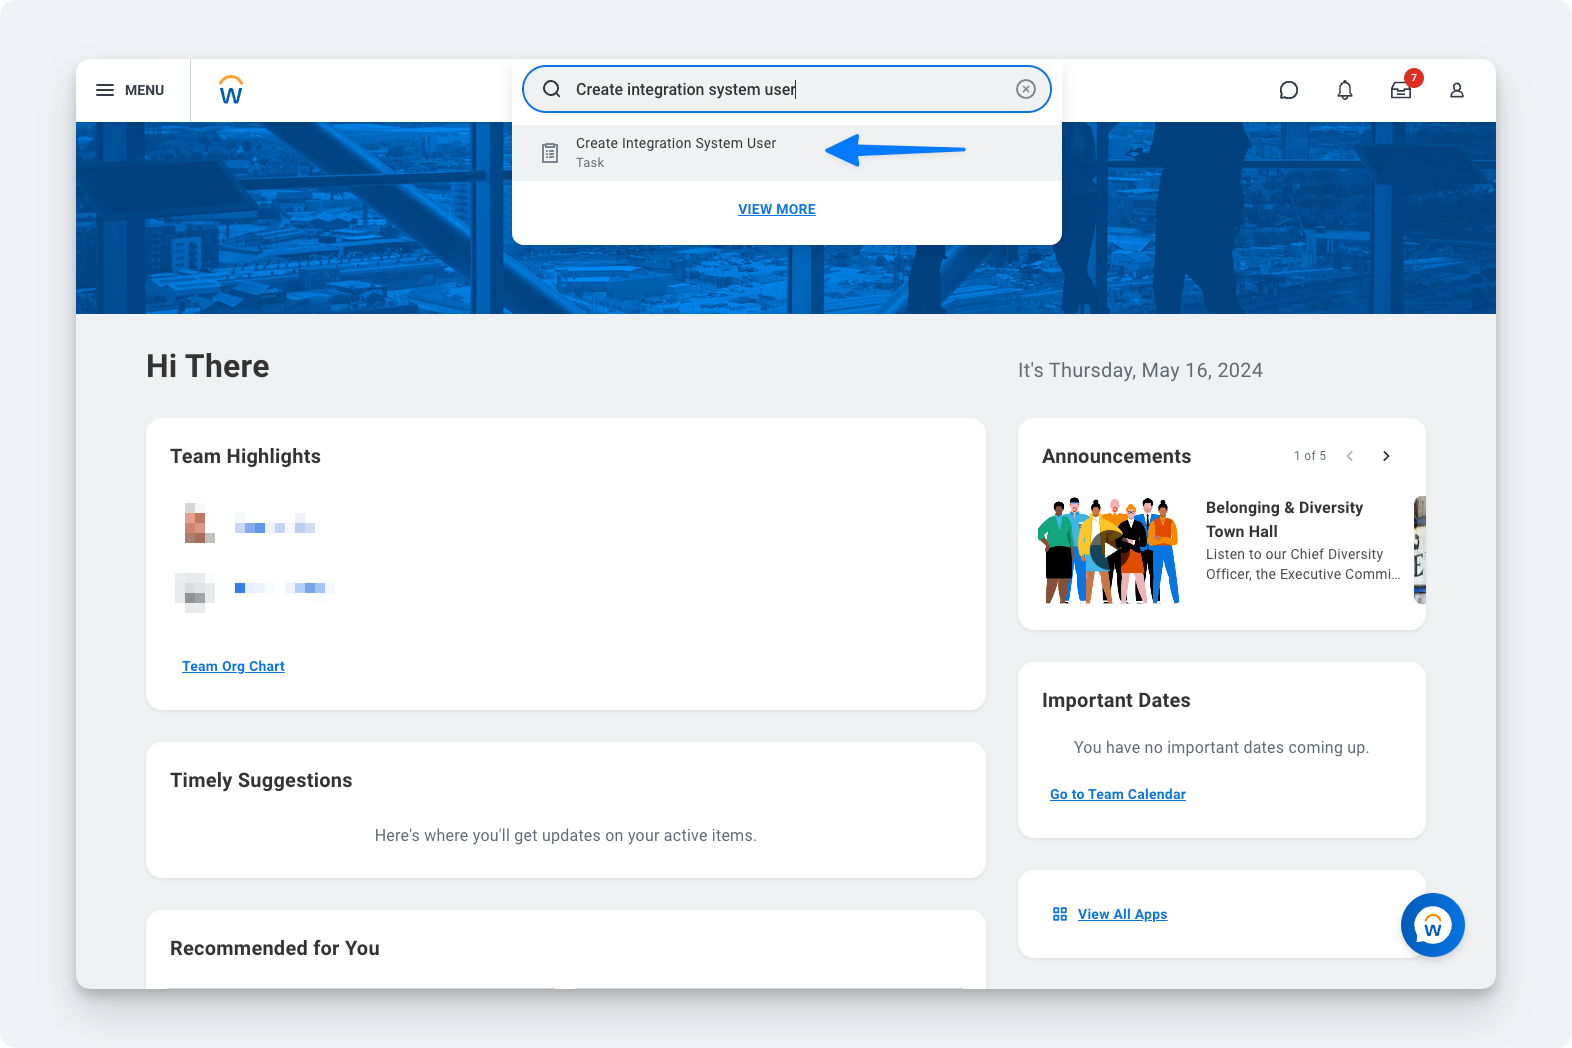
- Log in to your Workday tenant.
- In the Search field, type Create Integration System User and select the task.
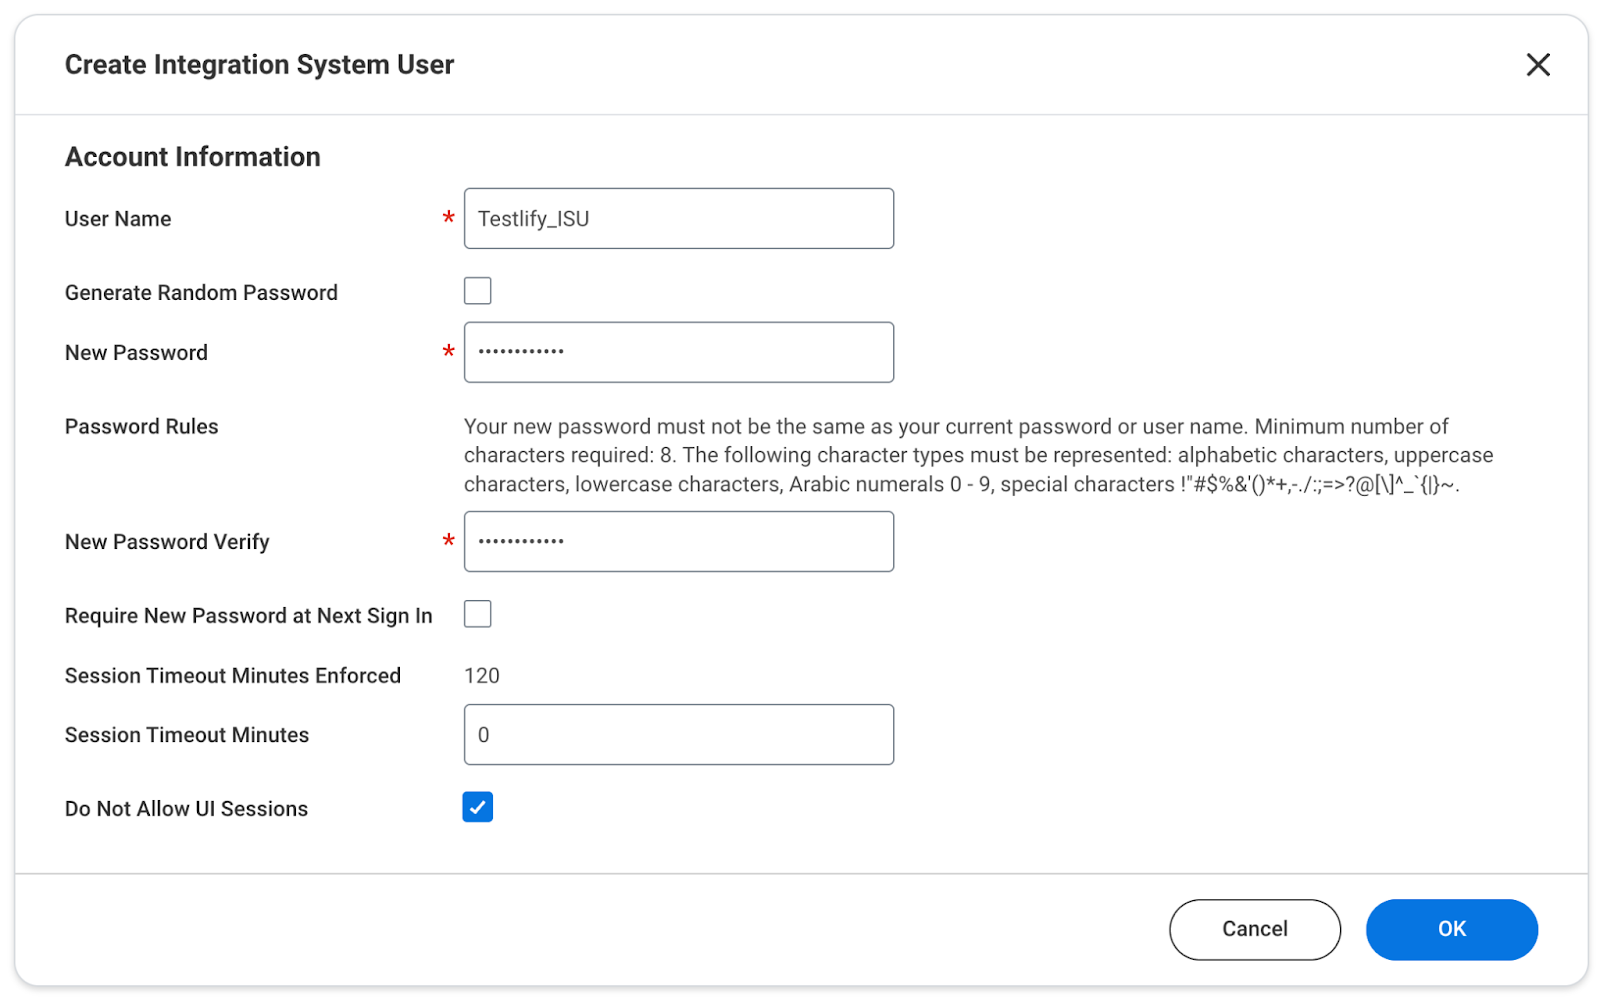
- Configure the new account for the integration:
- Name the account Testlify_ISU.
- Set Session Timeout Minutes to 0 — this prevents session expiration, which would otherwise halt the integration mid-run.
- Select Do Not Allow UI Sessions to block direct sign-in via the Workday UI.
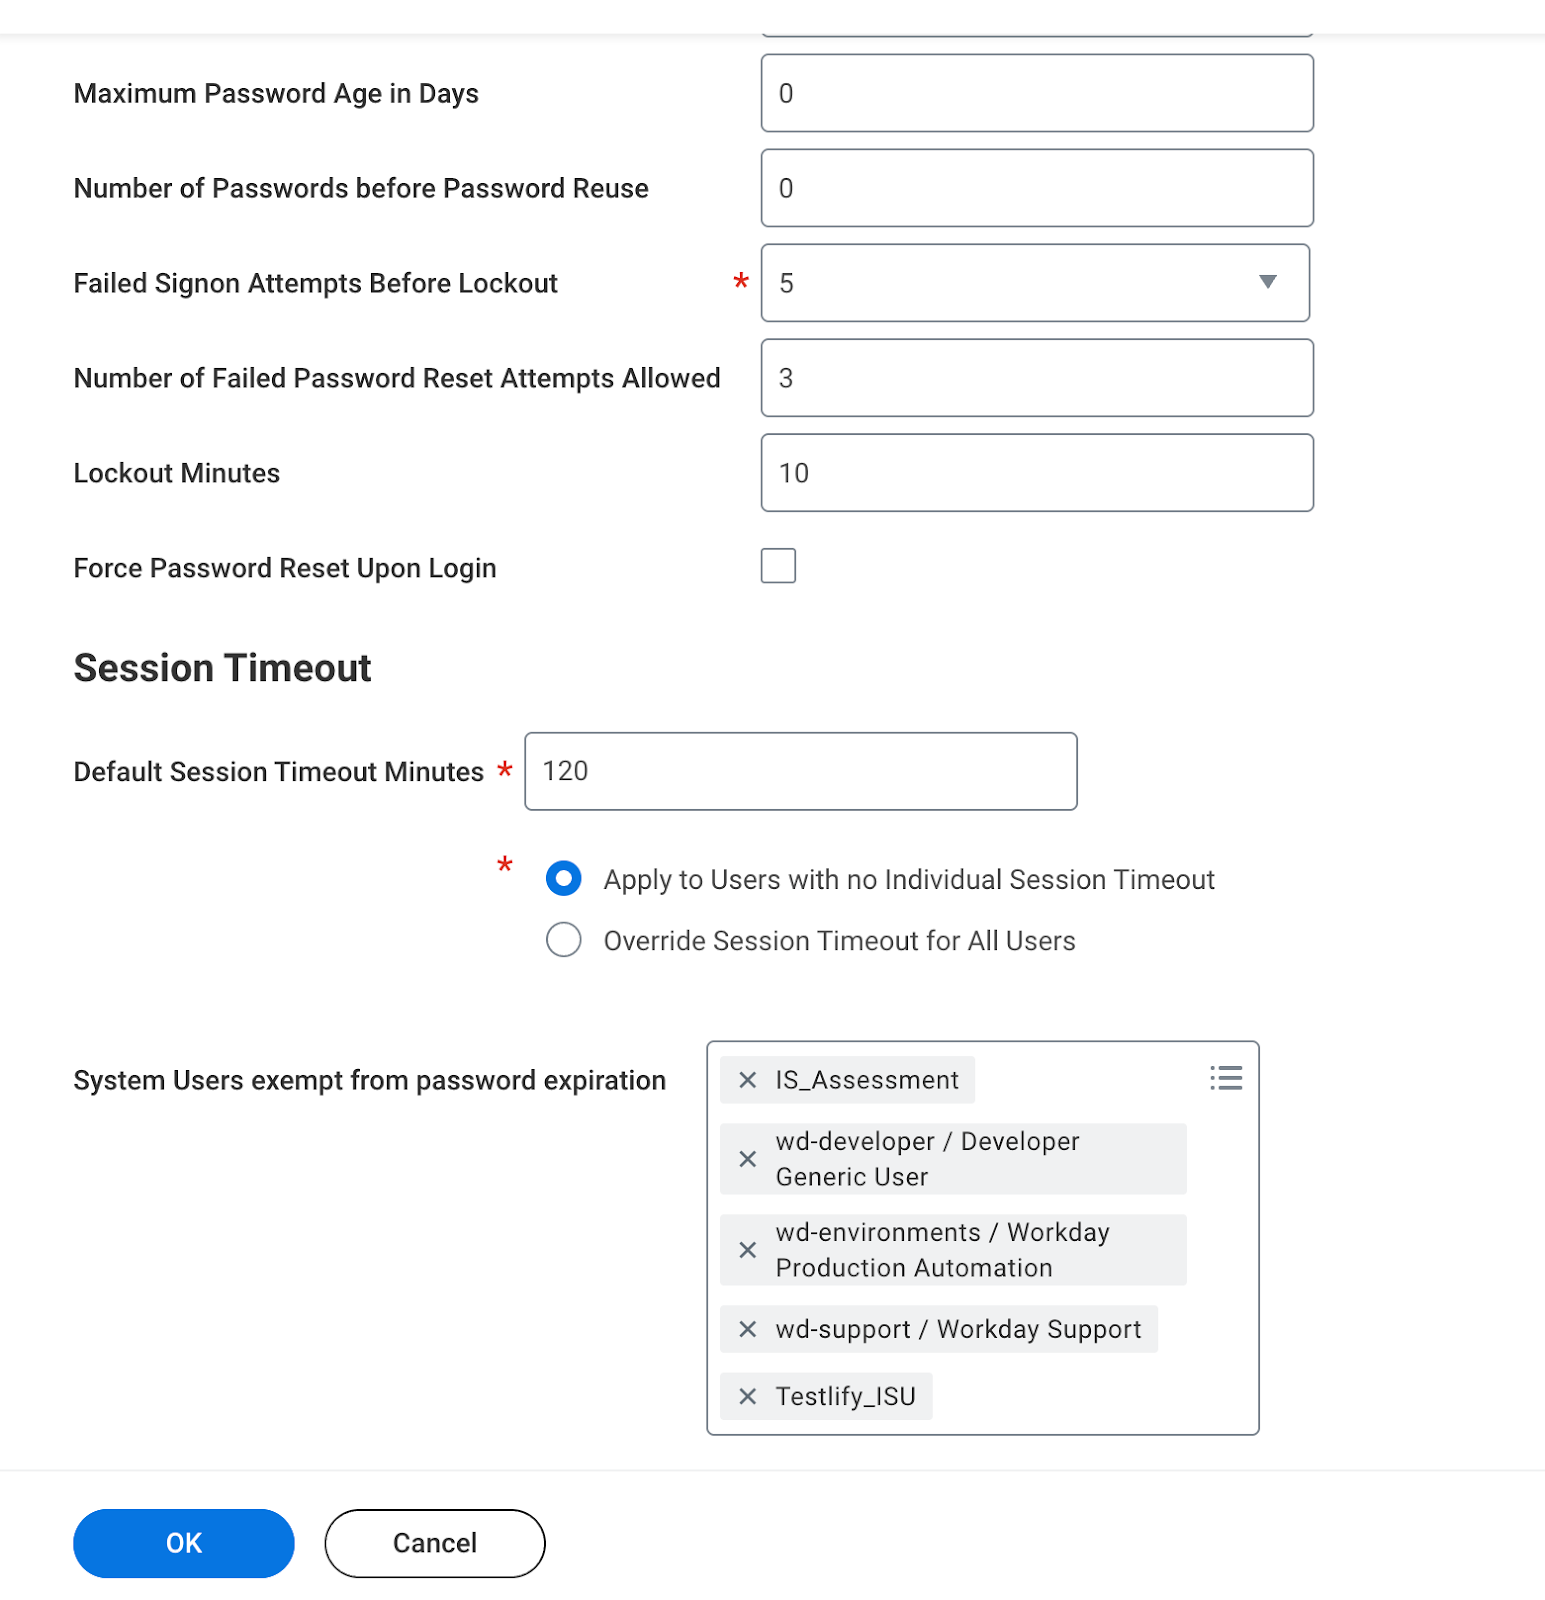
- To prevent password expiration, search for the Maintain Password Rules task.
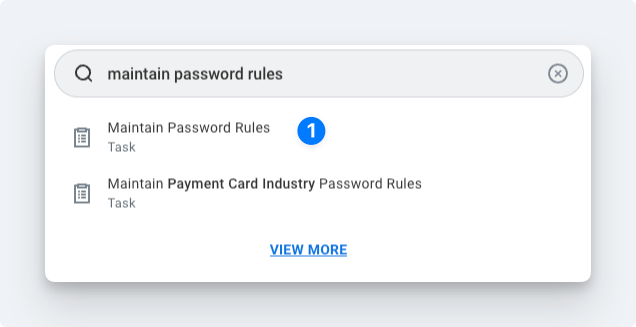
- Add the ISU to the System Users exempt from password expiration field.
- Enter the ISU Username and Password.


Step 4: Create a security group and assign the ISU
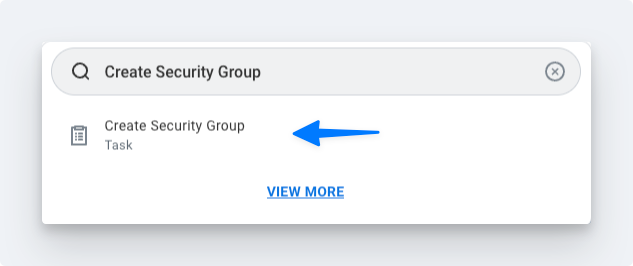
- In the Search field, type Create Security Group and select the task.
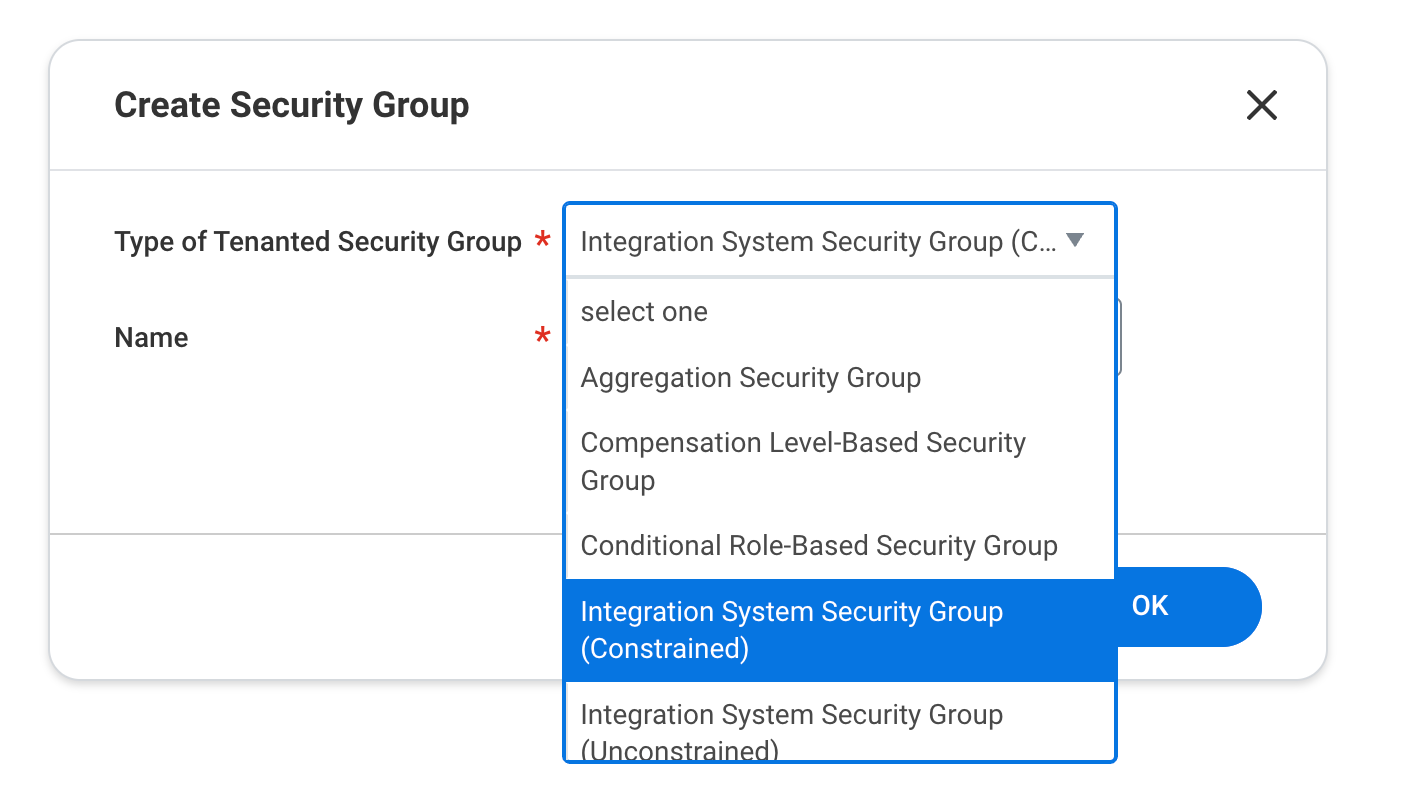
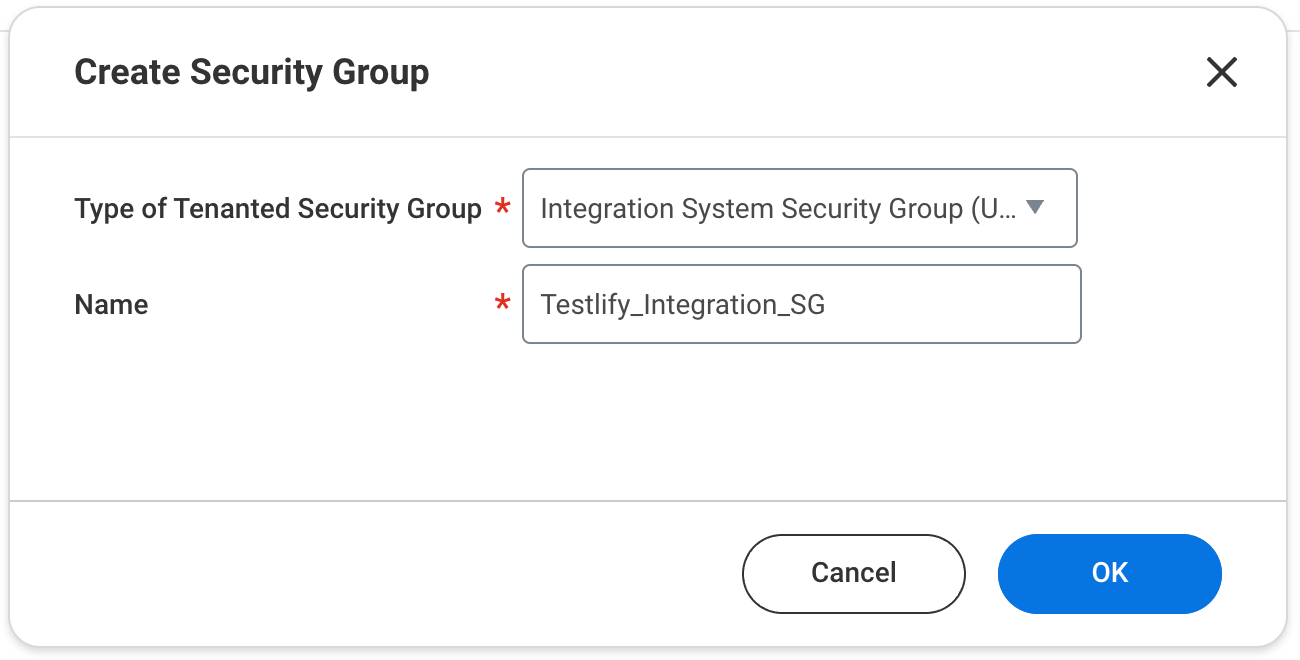
- Select Integration System Security Group (Unconstrained) from the Type of Tenanted Security Group menu.
- In the Name field, enter Testlify_Integration_SG and click OK.
- On the Edit Integration System Security Group page, enter the ISU name you created in Step 3 in the Integration System Users field.
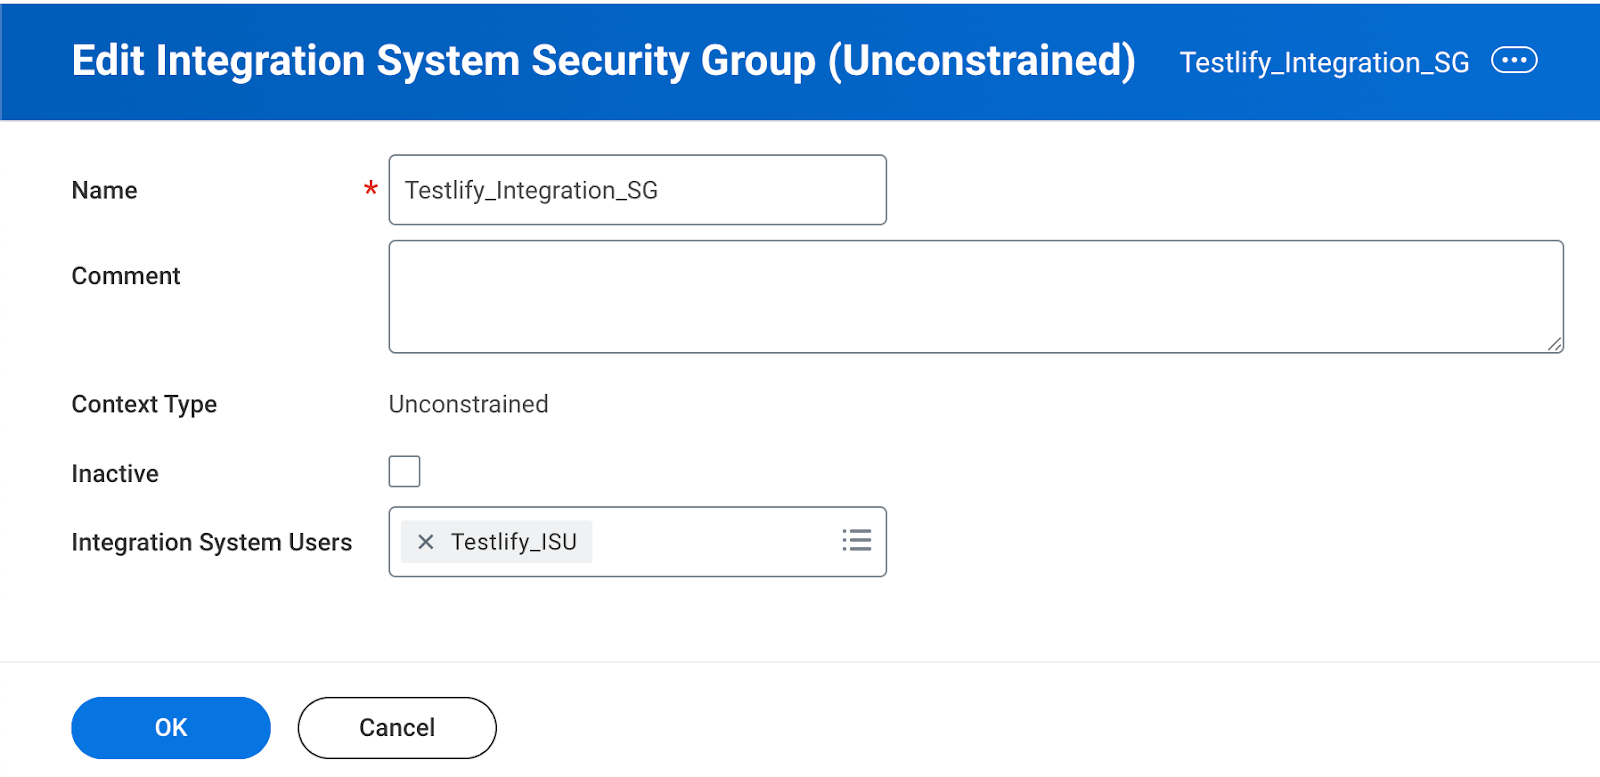
- Click OK.


Step 5: Configure domain security policy permissions
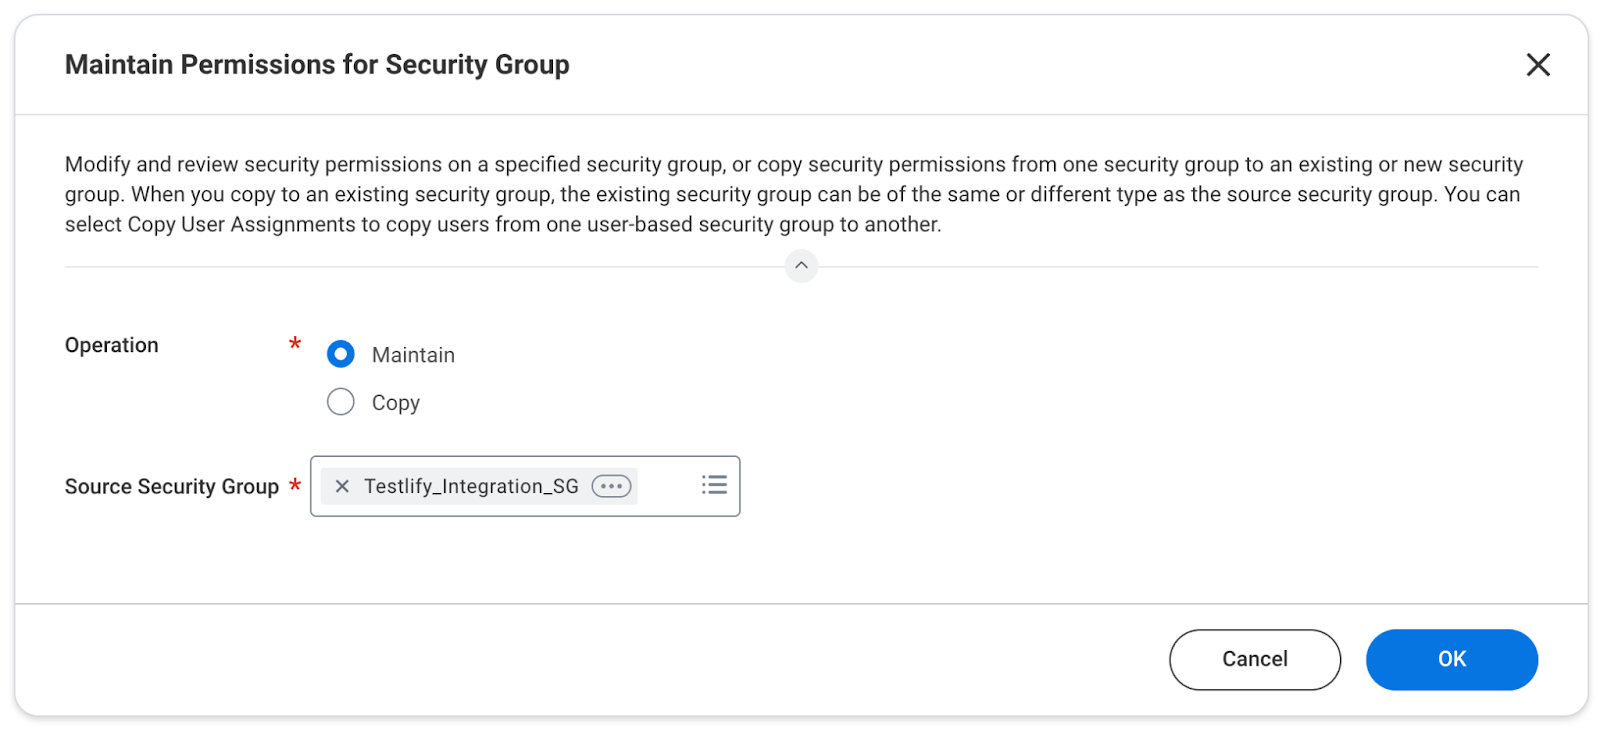
- In the Search field, type Maintain Permissions for Security Group.

- Set the Operation to Maintain and set the Source Security Group to the group created in Step 4.
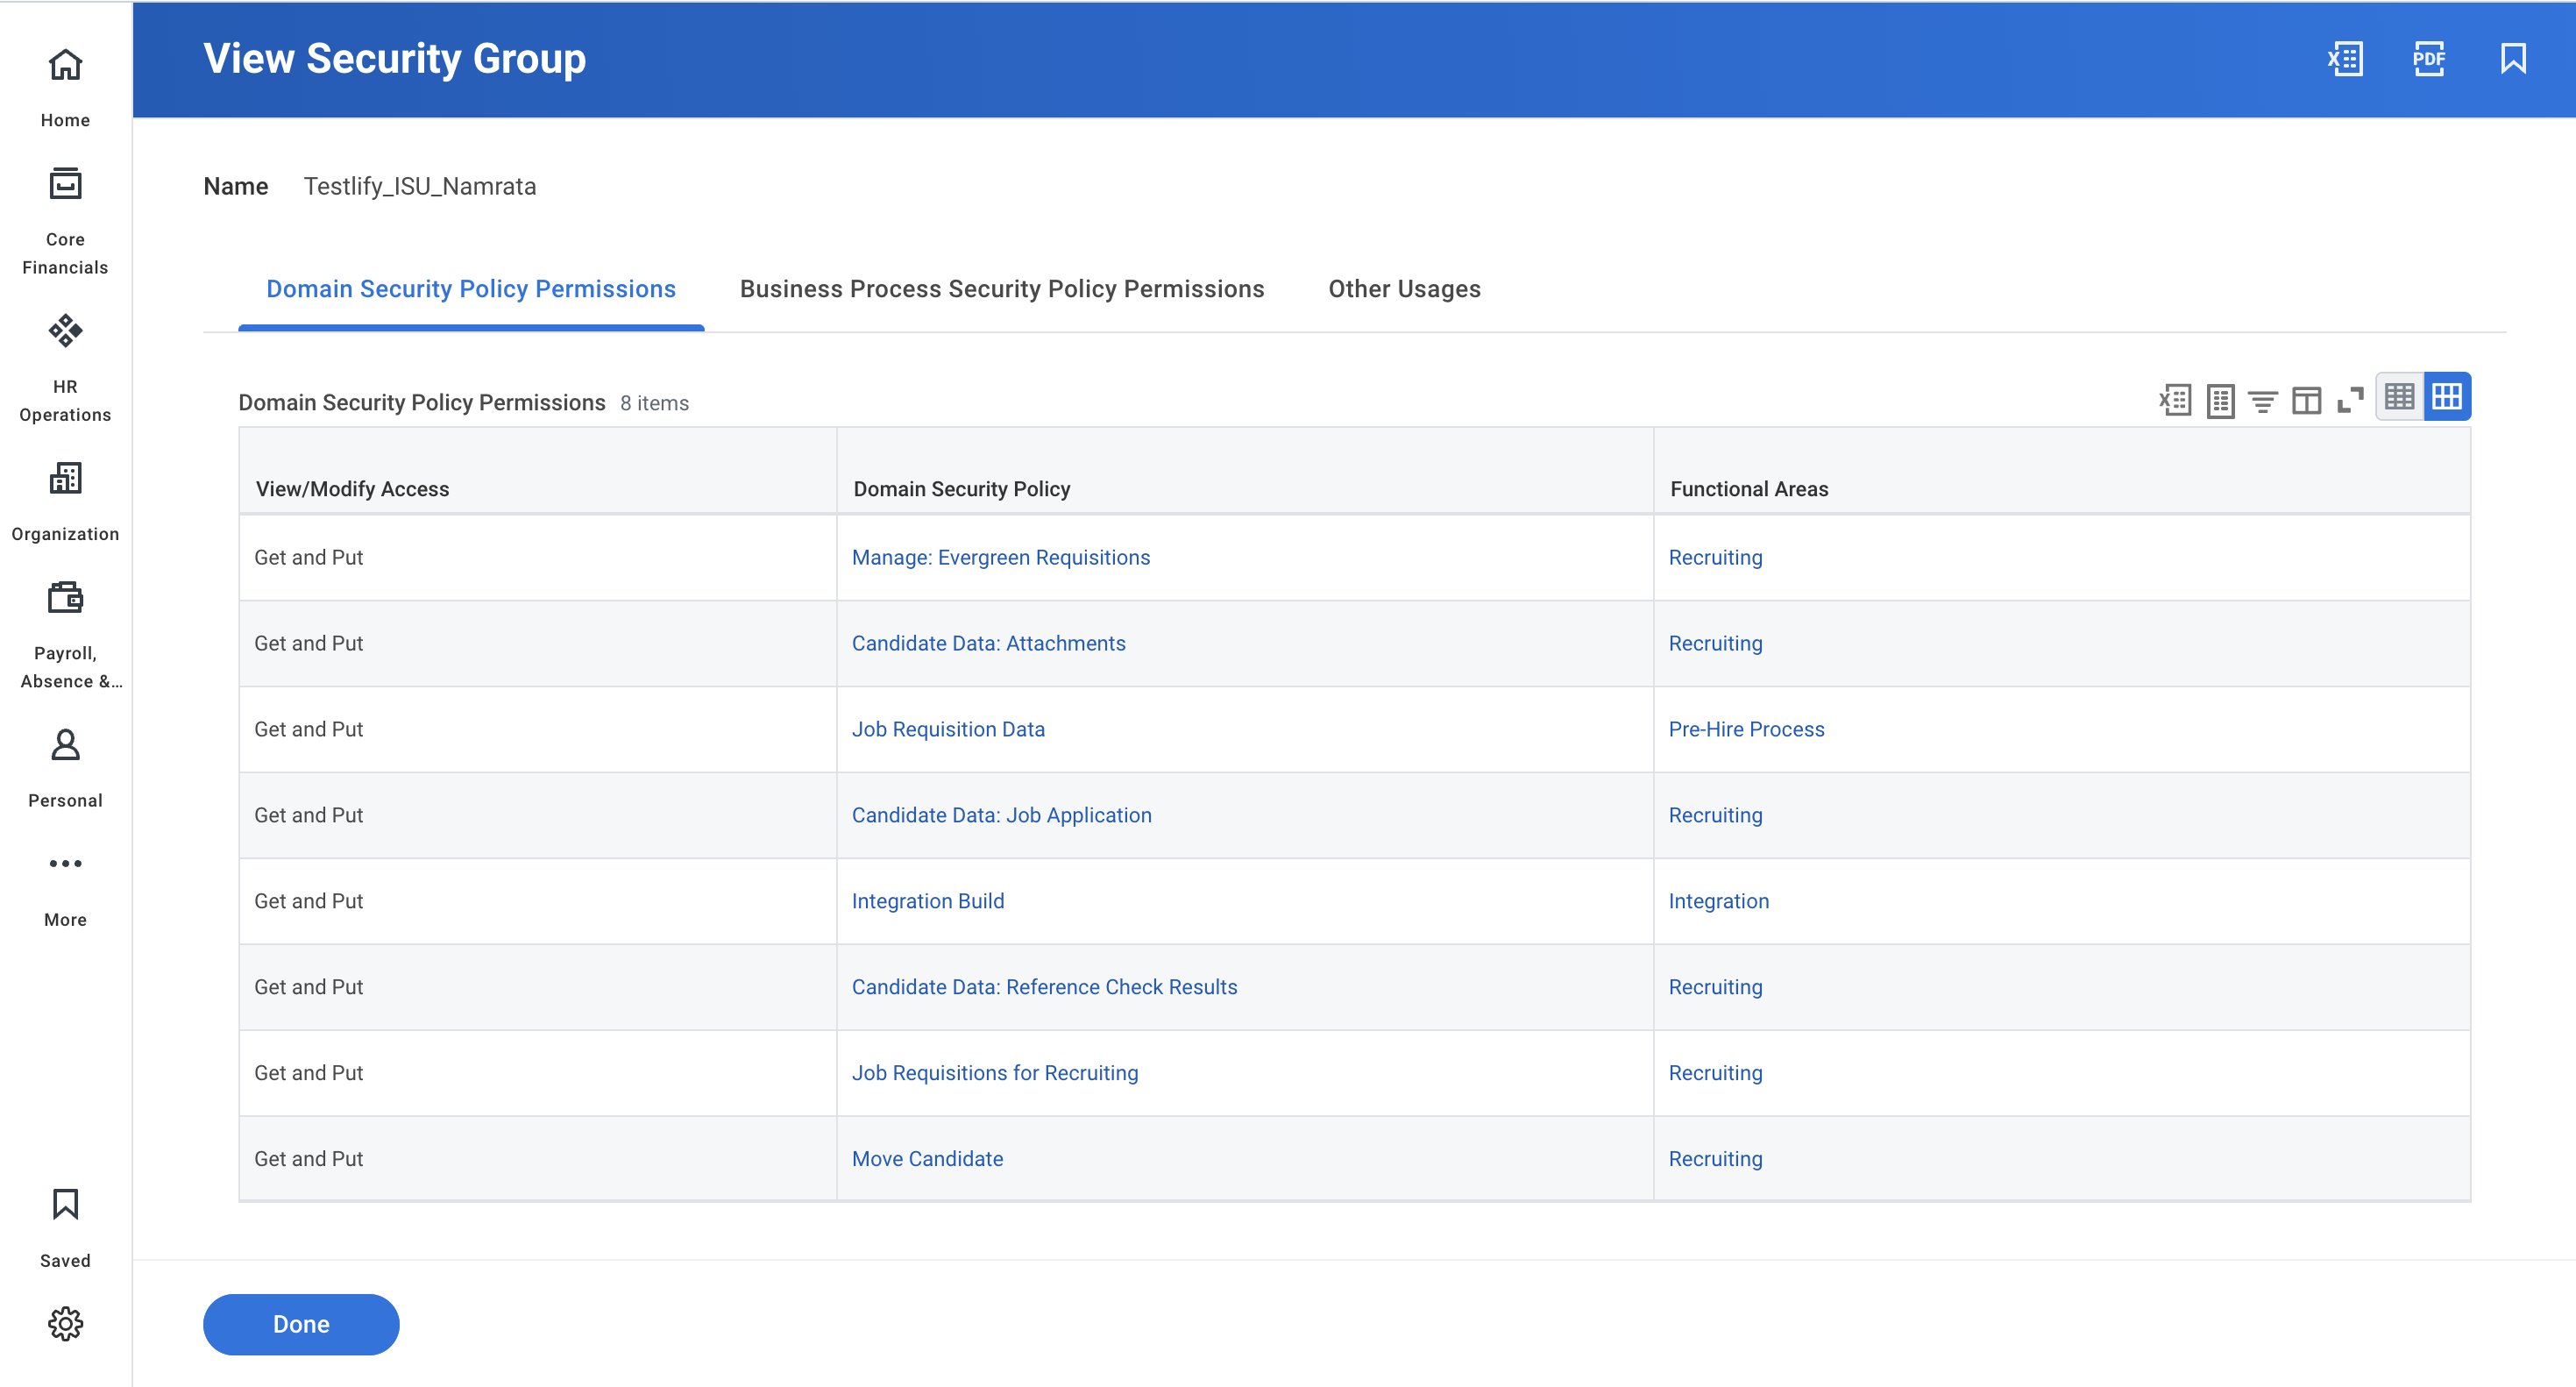
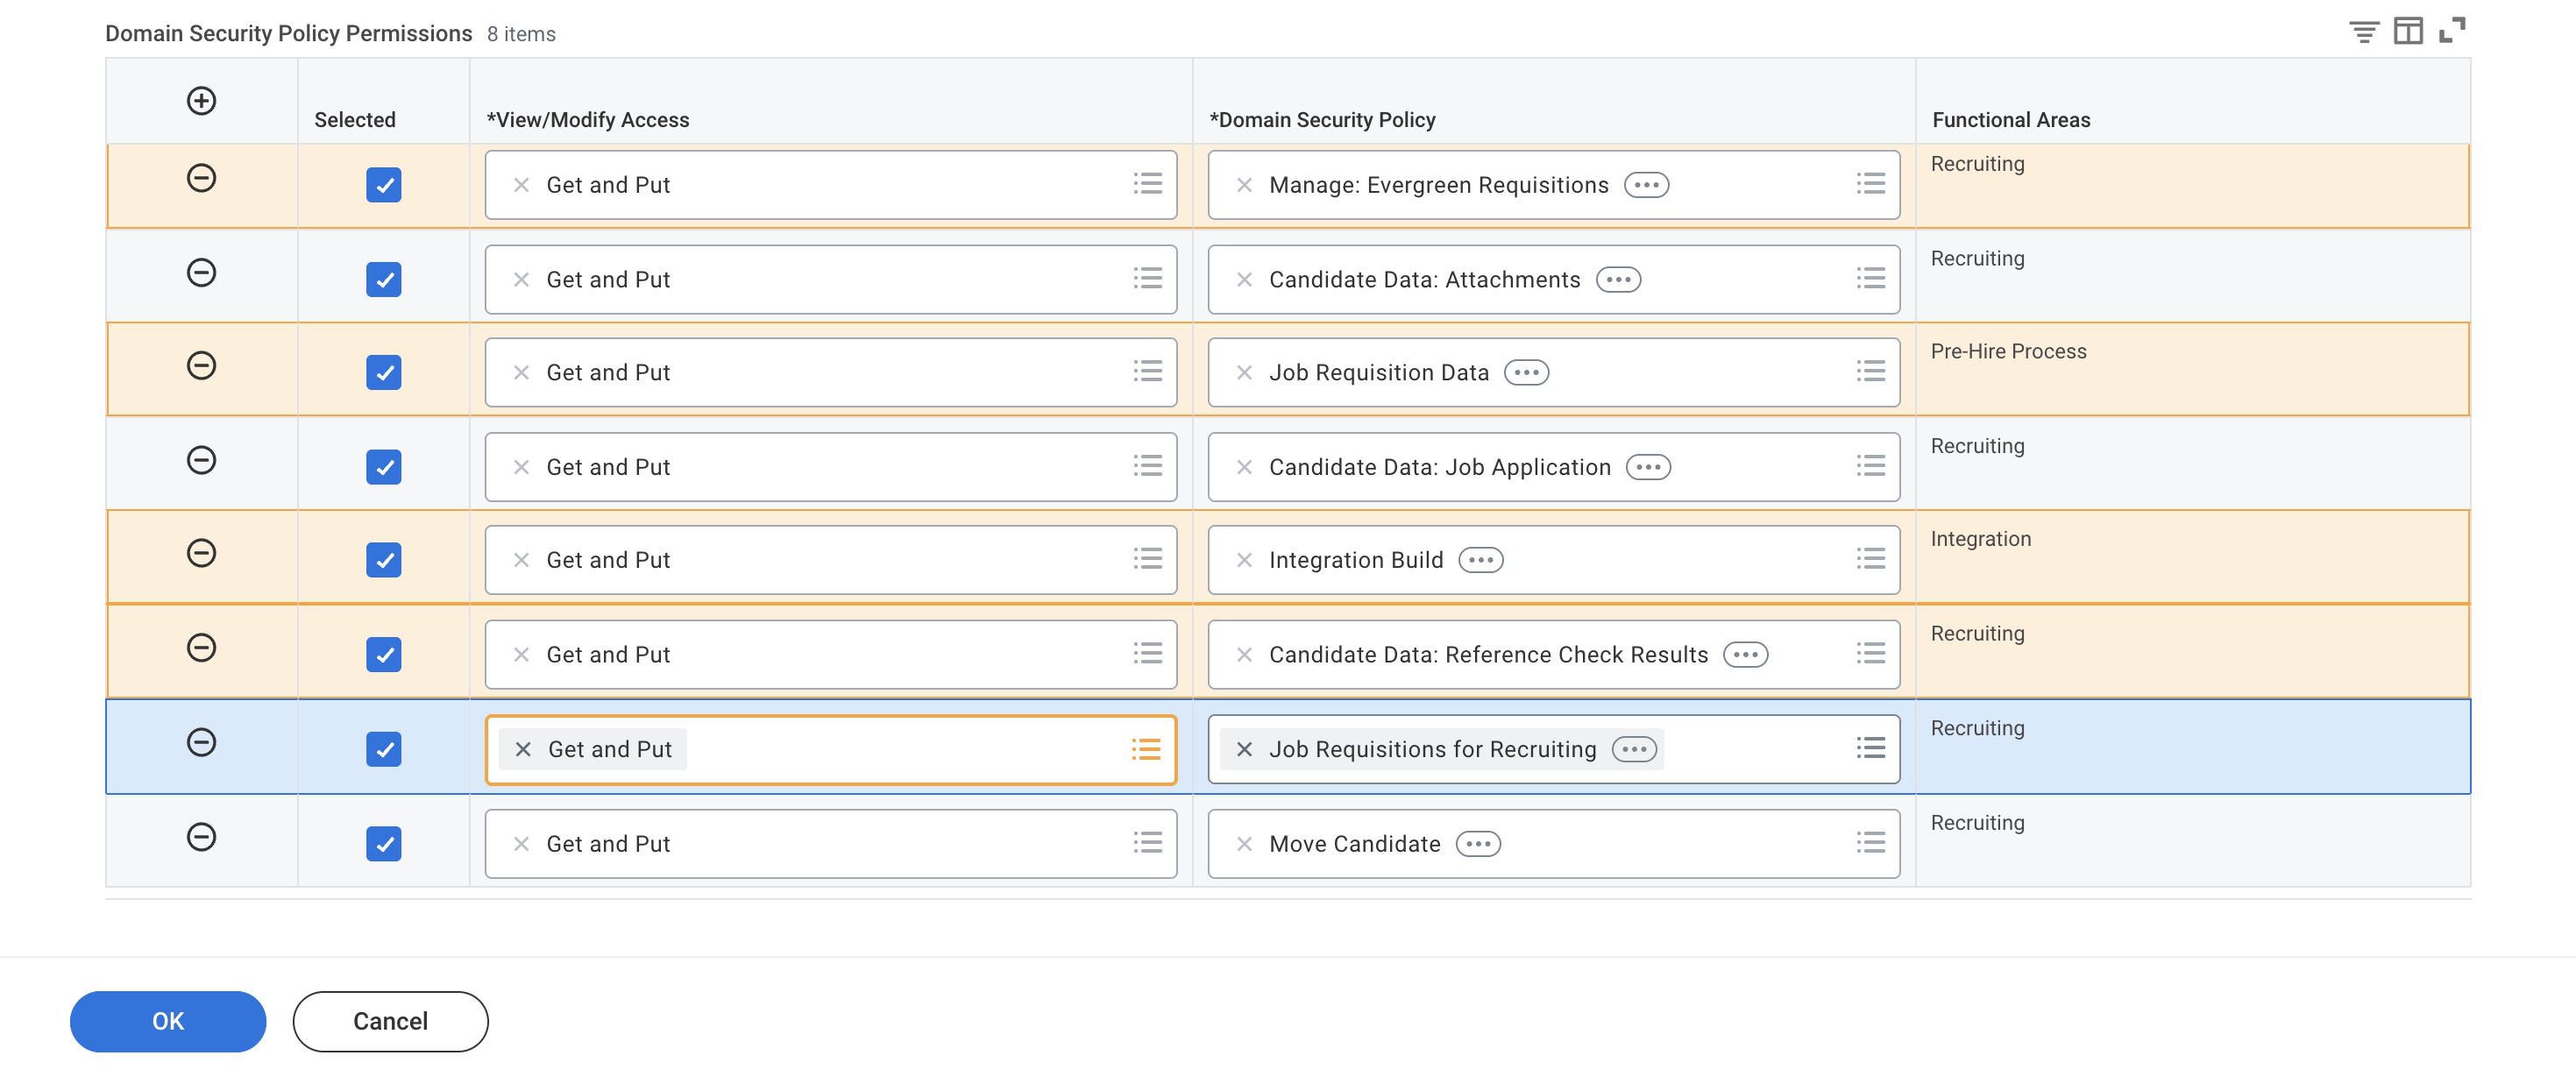
- Add the following Domain Security Policies with Get and Put access:
- Integration Build
- Job Requisition Data
- Manage: Evergreen Requisitions
- Candidate Data: Job Application
- Candidate Data: Attachments
- Candidate Data: Reference Check Results
- Note: Any warnings on this screen are expected and can be safely ignored.


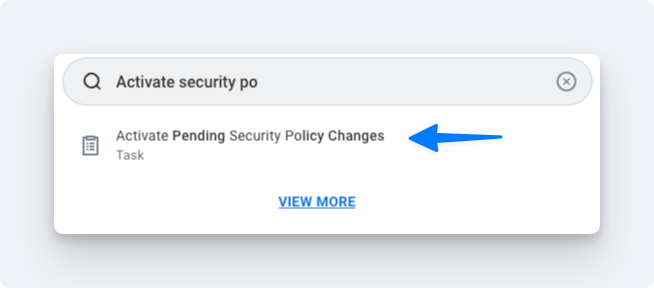
Step 6: Activate security policy changes
- In the Search field, type Activate Pending Security Policy Changes.
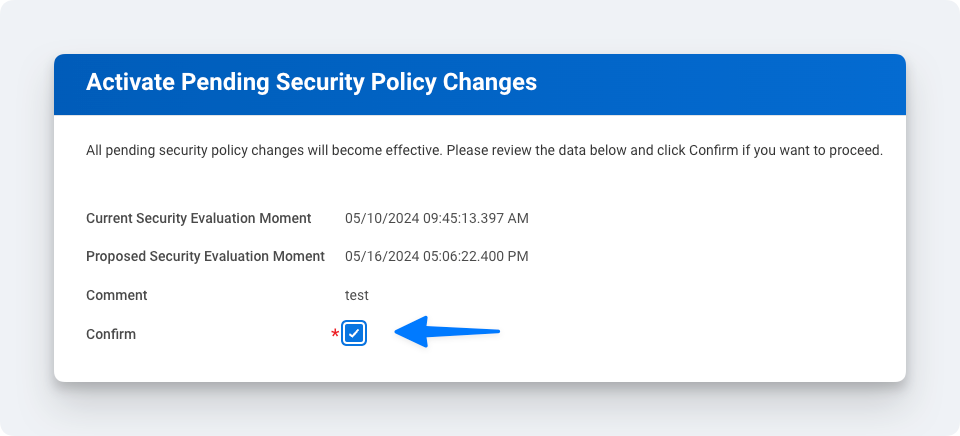
- Add any relevant comments in the confirmation window.
- Click OK to confirm and apply the changes.
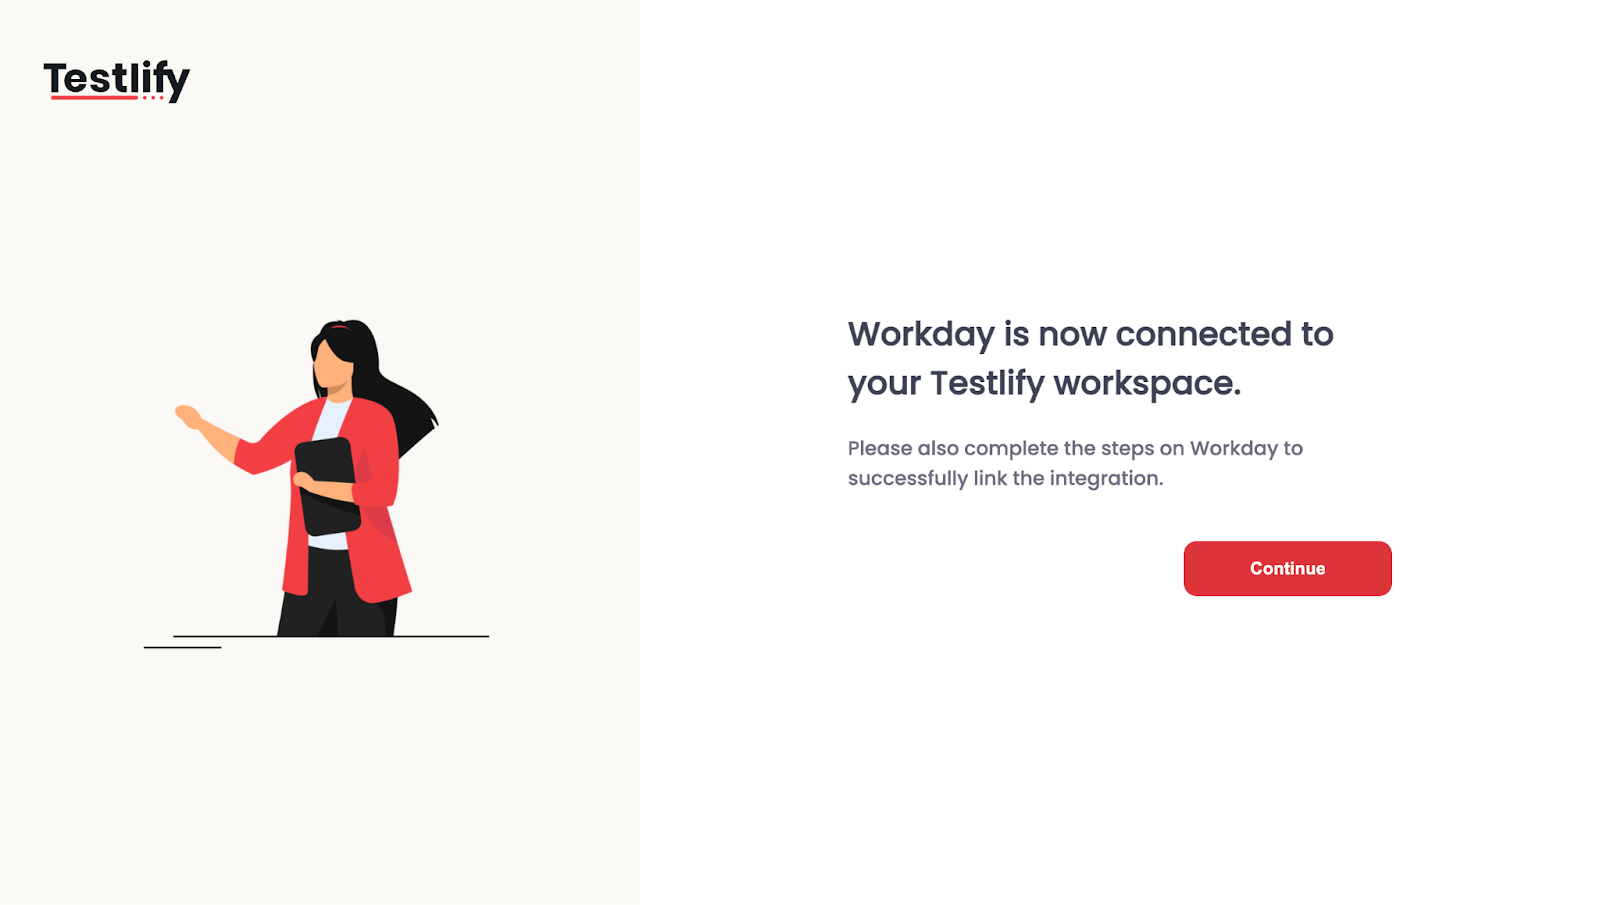
- Back on Testlify, click Save on the Workday Integration linking page.
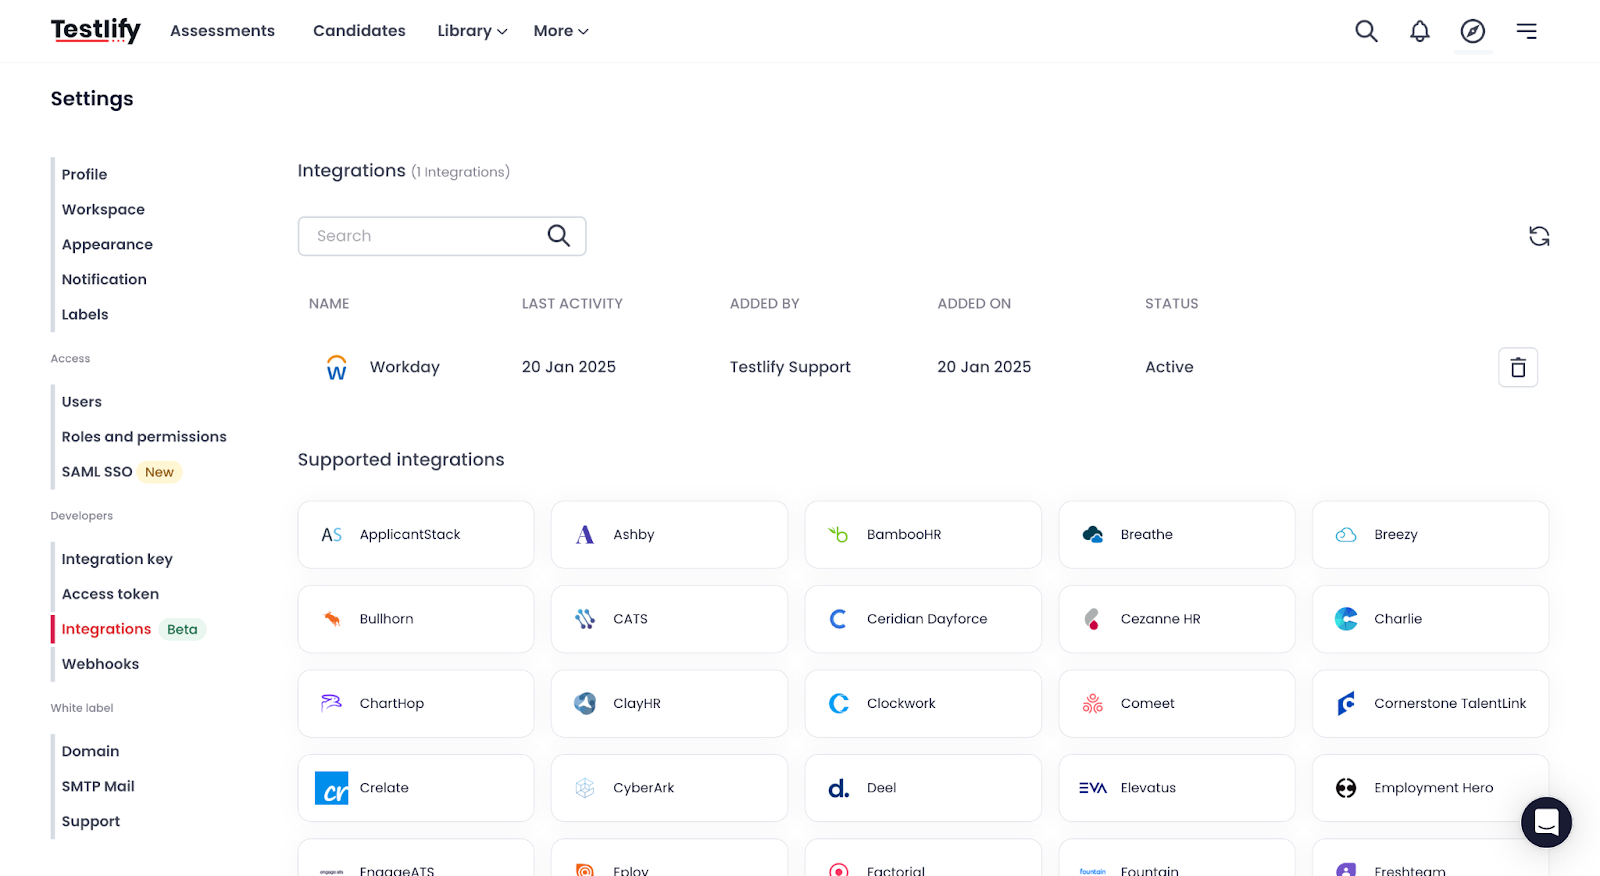
- Return to Testlify's Settings page and refresh. Workday now appears in your integrations list.


Step 7: Add assessment statuses in Workday
Add the following statuses exactly as shown. The Reference IDs must match precisely — Testlify uses them to track invitation and completion events.
| Assessment Status Name | Reference ID | Overall Status | Test Status |
|---|---|---|---|
| Testlify Send Invite | Testlify_Send_Invite | ✓ | |
| Testlify Accepted | Testlify_Accepted | ✓ | |
| Testlify Declined | Testlify_Declined | ✓ | |
| Testlify Invited | Testlify_Invited | ✓ | |
| Testlify Completed - Pass | Testlify_Completed_Pass | ✓ | |
| Testlify Completed - Fail | Testlify_Completed_Fail | ✓ | |
| Testlify Completed | Testlify_Completed | ✓ |
- Click the + button to add each status from the table above.
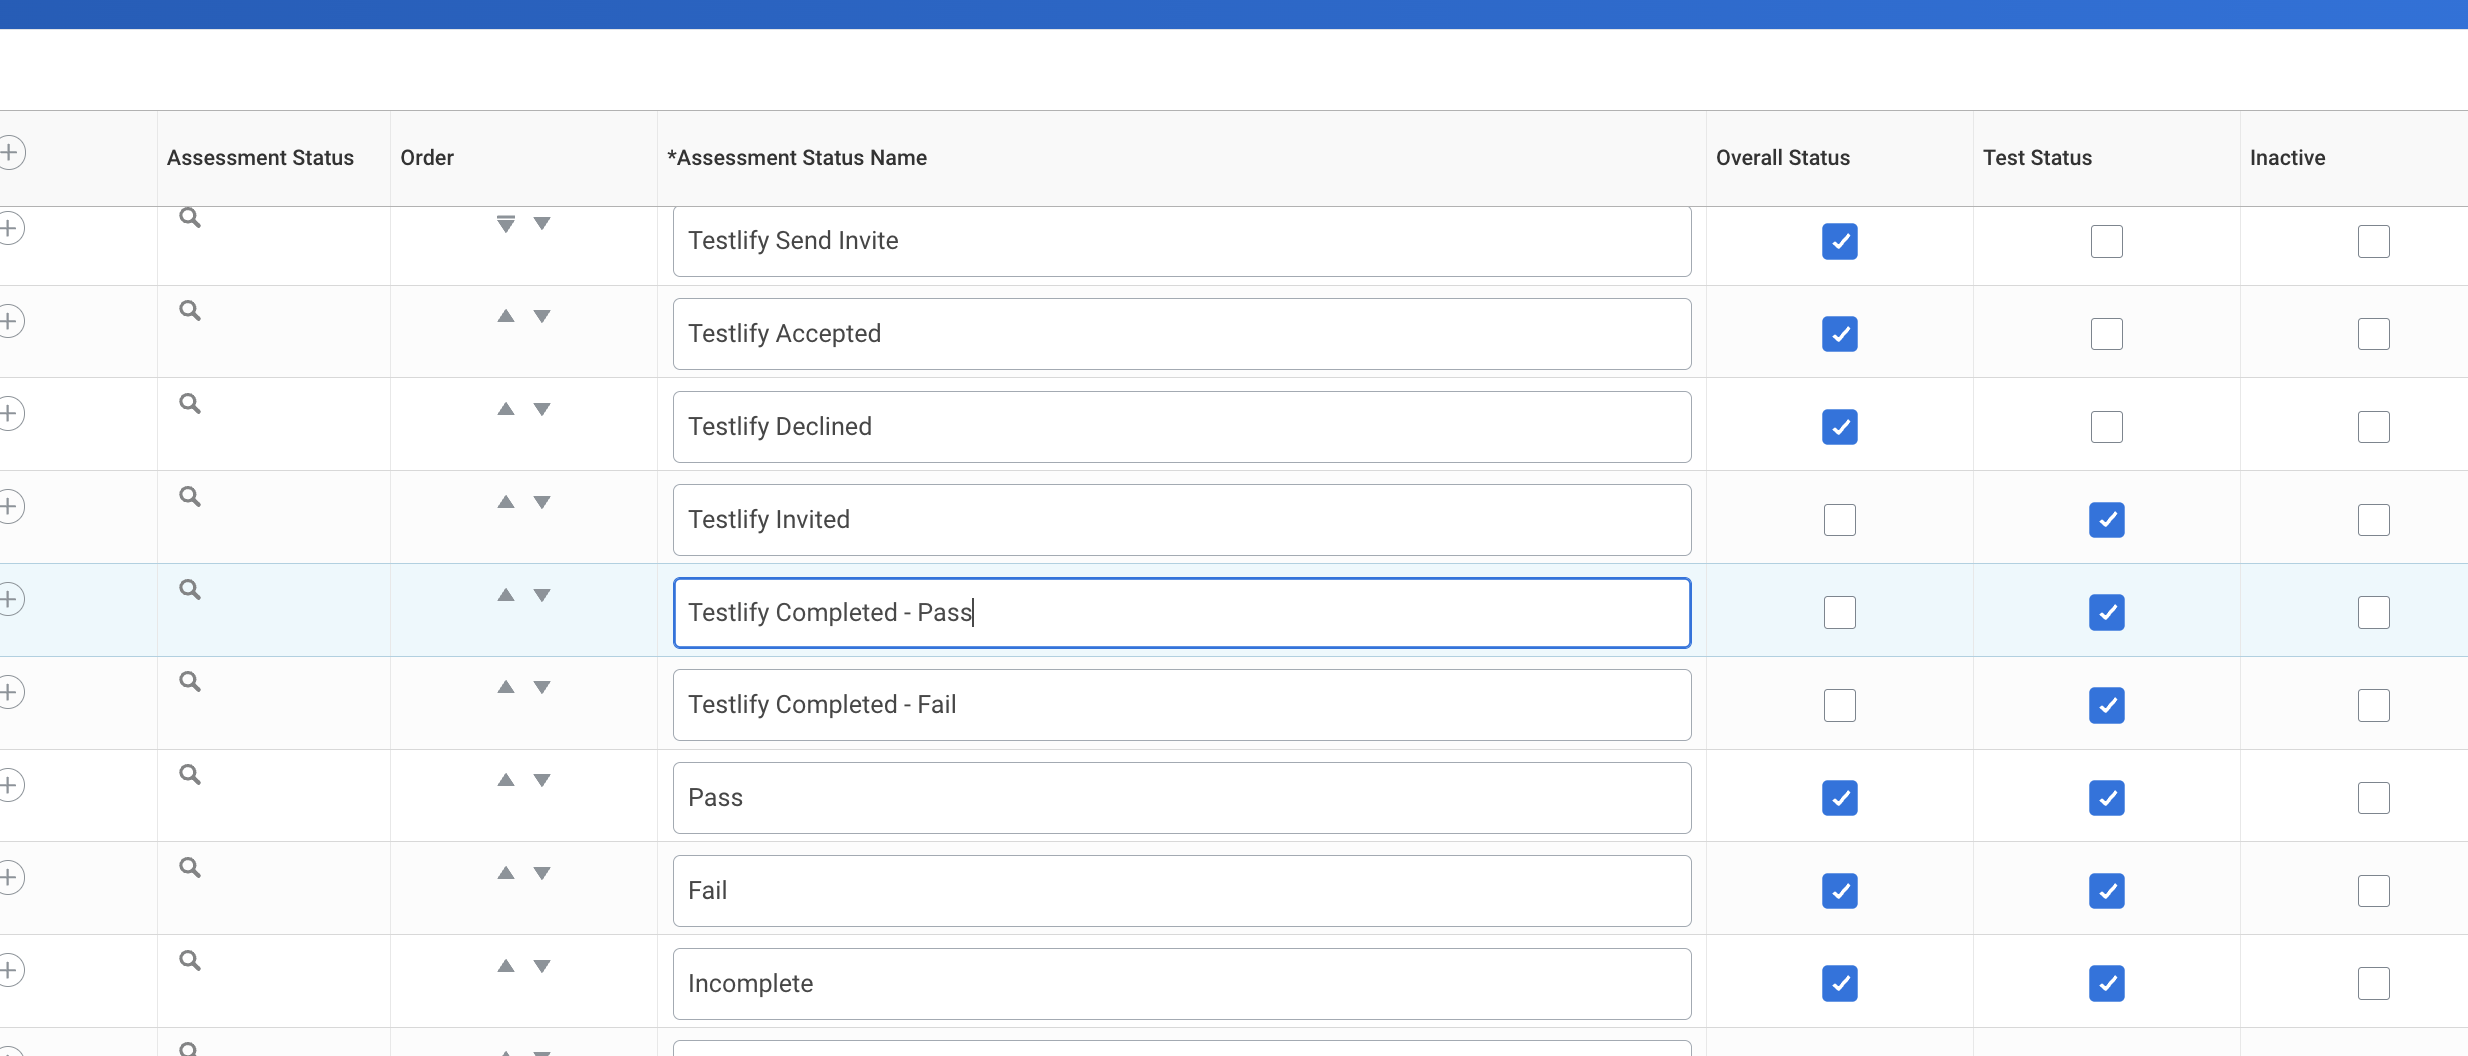
- Save each status after adding it.
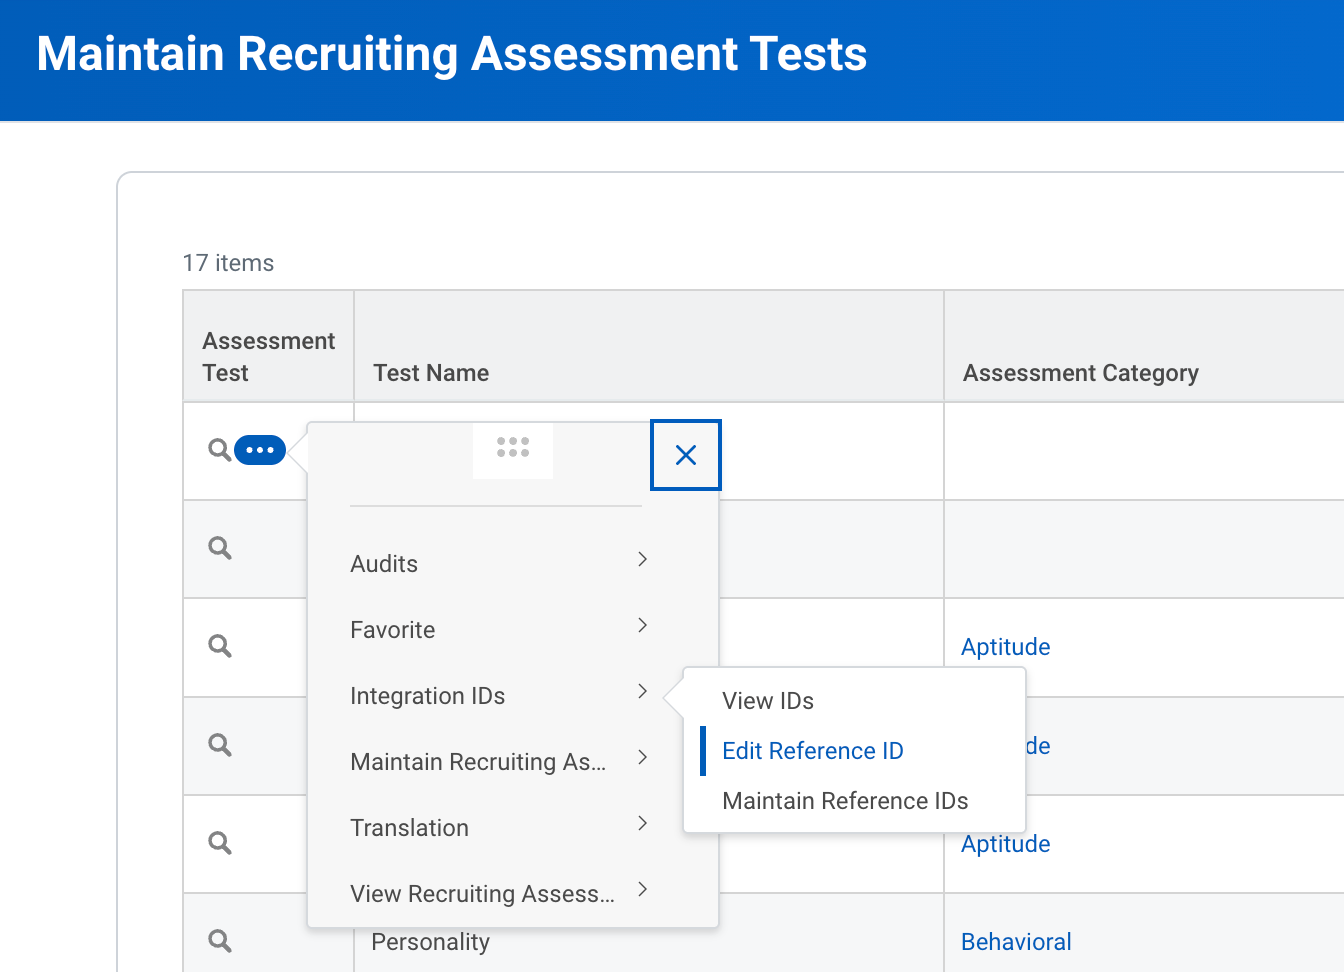
- After saving, hover over the magnifying glass icon and click the three dots. Go to Integration IDs → Edit Reference ID.
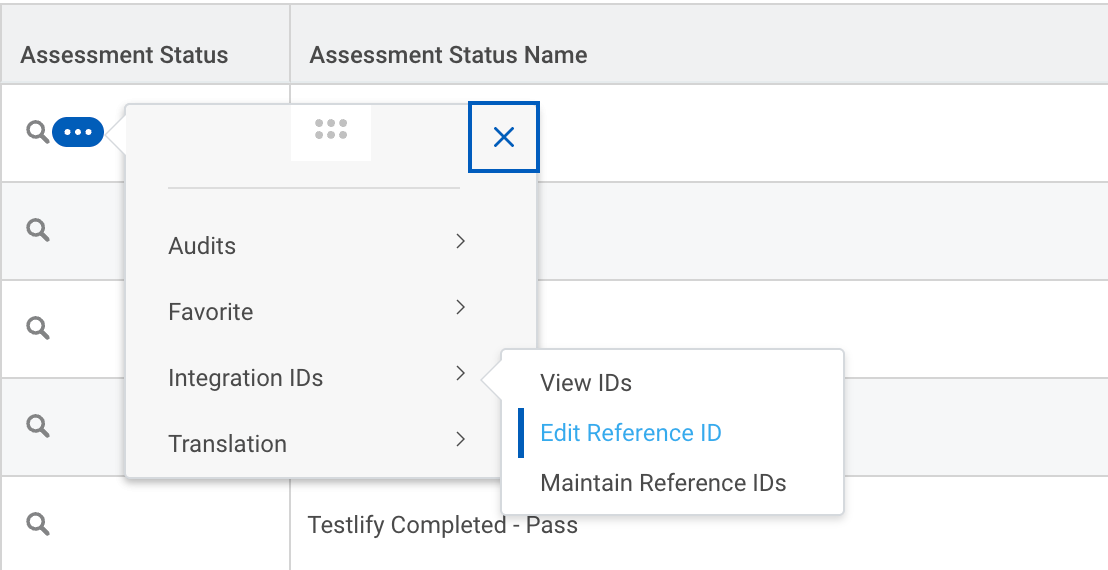
- Enter the Reference ID from the table and save.
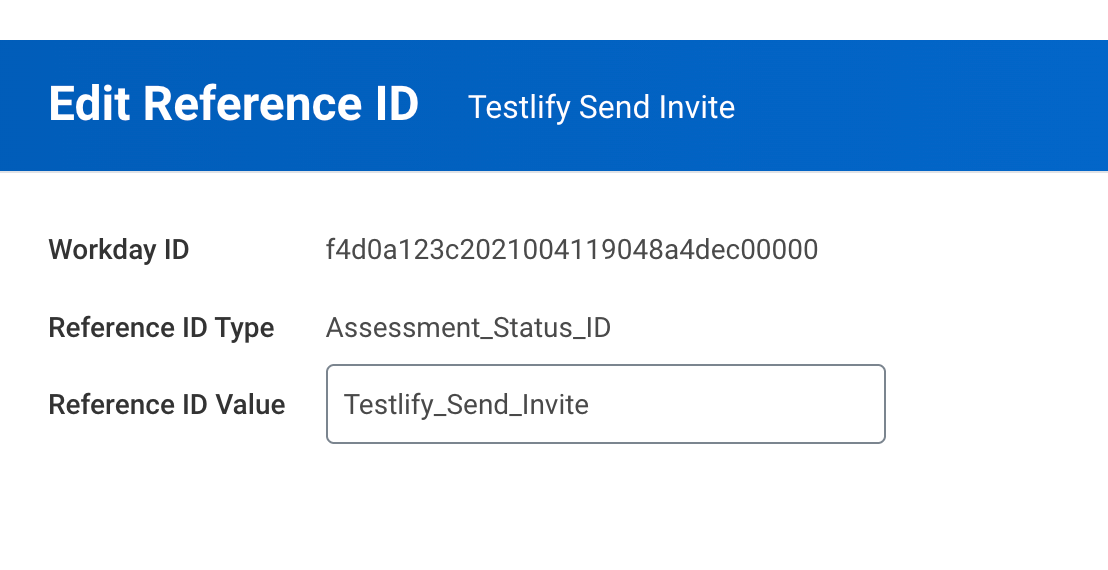
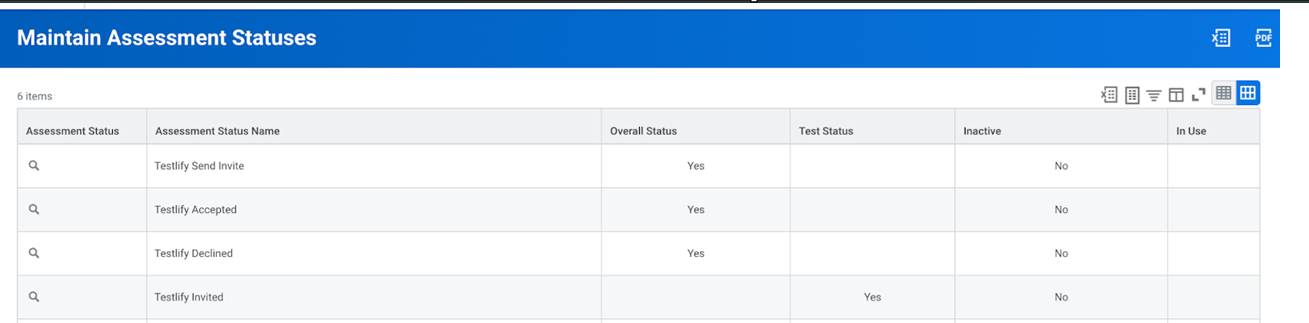
- Repeat for all seven statuses. Leave any pre-existing statuses in place — your final table should match the example below.


Step 8: Add recruiting assessments in Workday
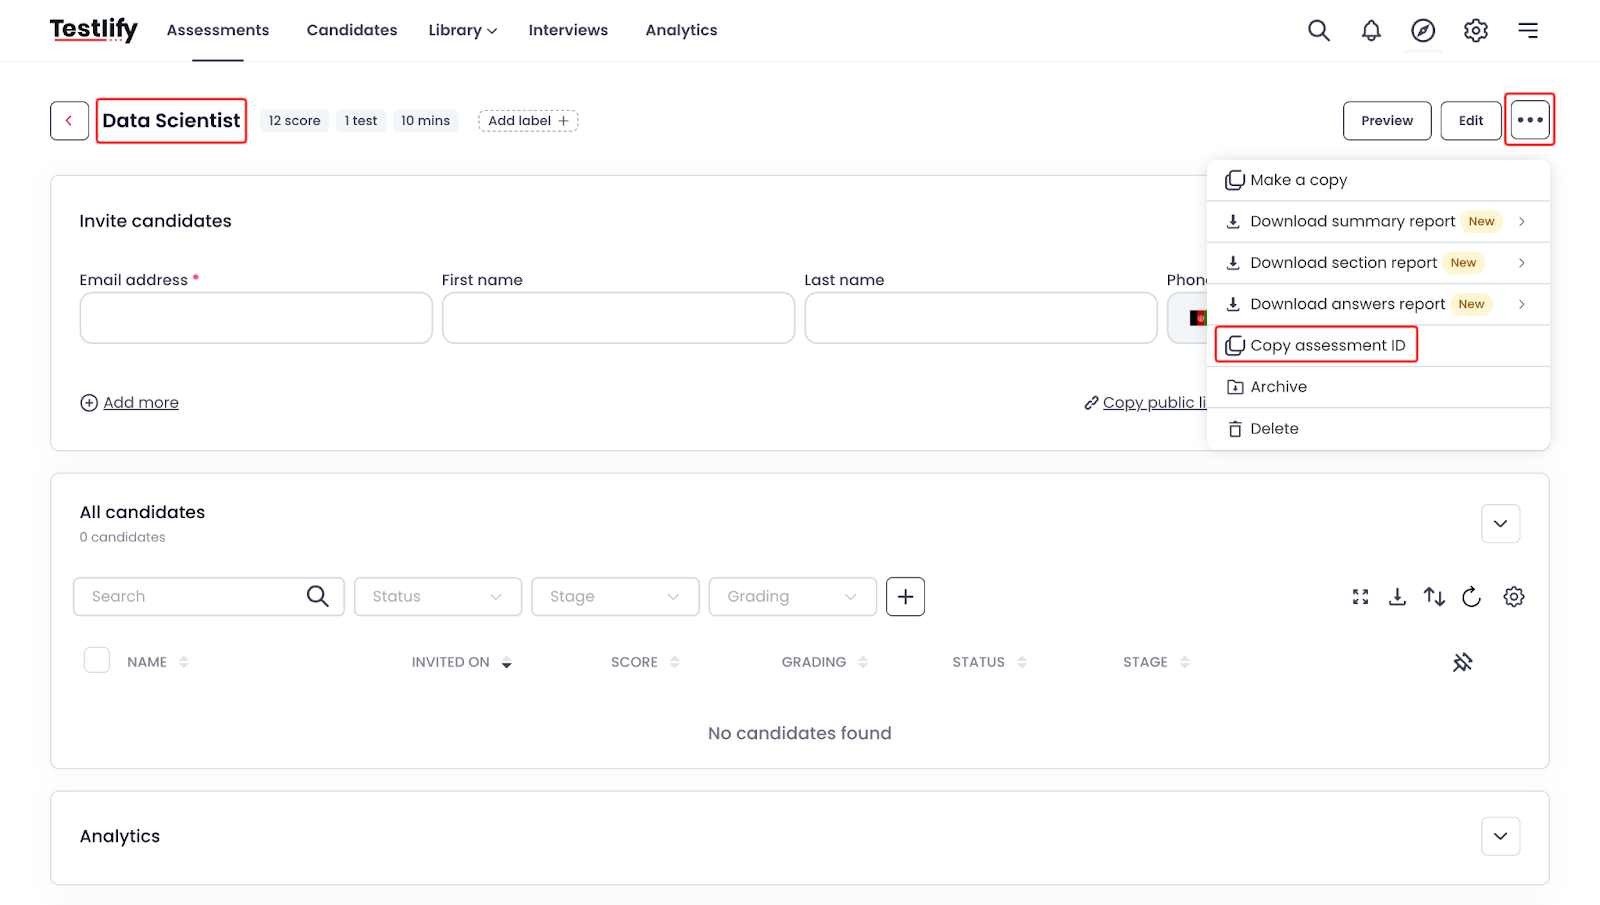
- In your Testlify dashboard, navigate to the assessment you want to link to Workday.
- Note the Assessment Name and Assessment ID.
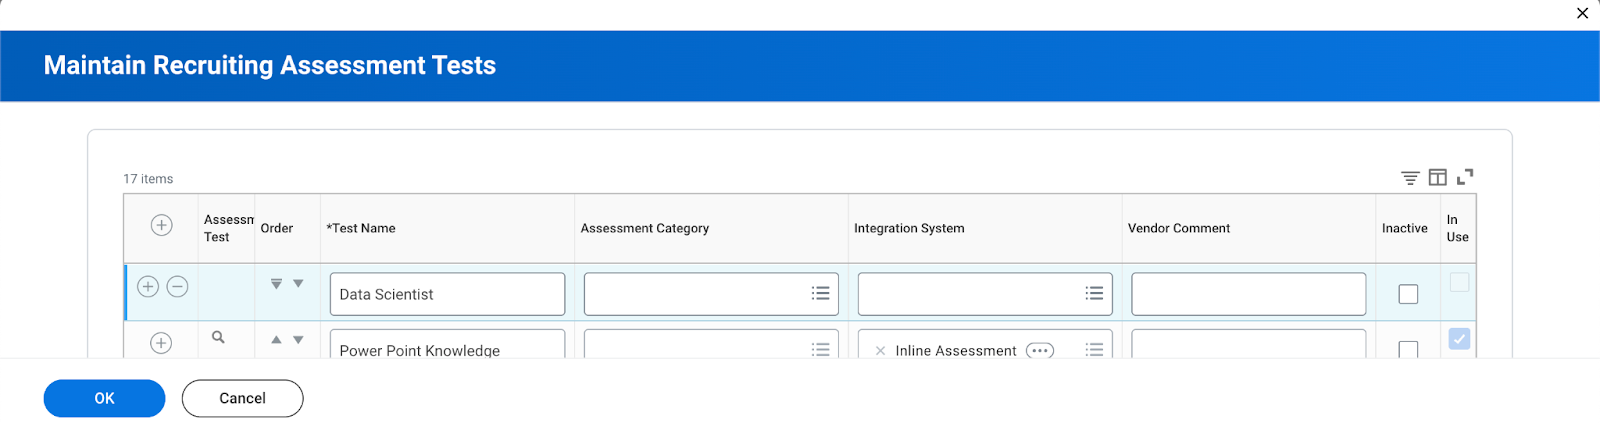
- In Workday, use the Maintain Recruiting Assessment Tests task to add the assessment name and click OK.
- After saving, hover over the magnifying glass icon and click the three dots. Go to Integration IDs → Edit Reference ID.
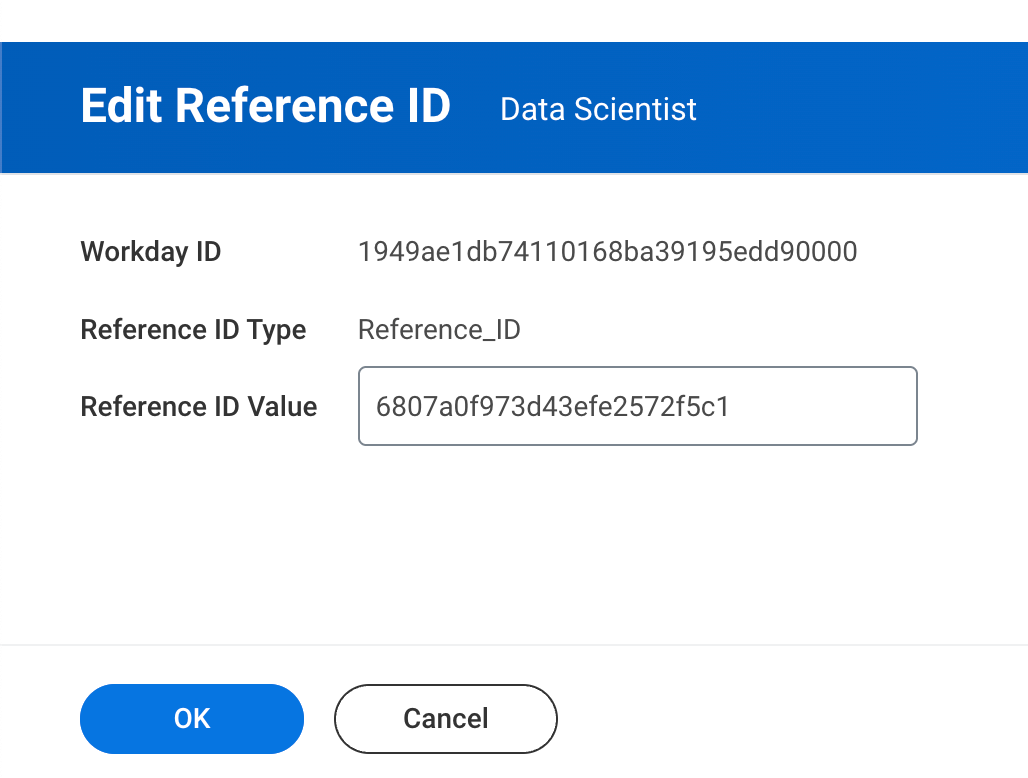
- Paste the Assessment ID copied from Testlify and click OK.


Step 9: Invite candidates for assessment
- In Workday, navigate to your target Requisition.
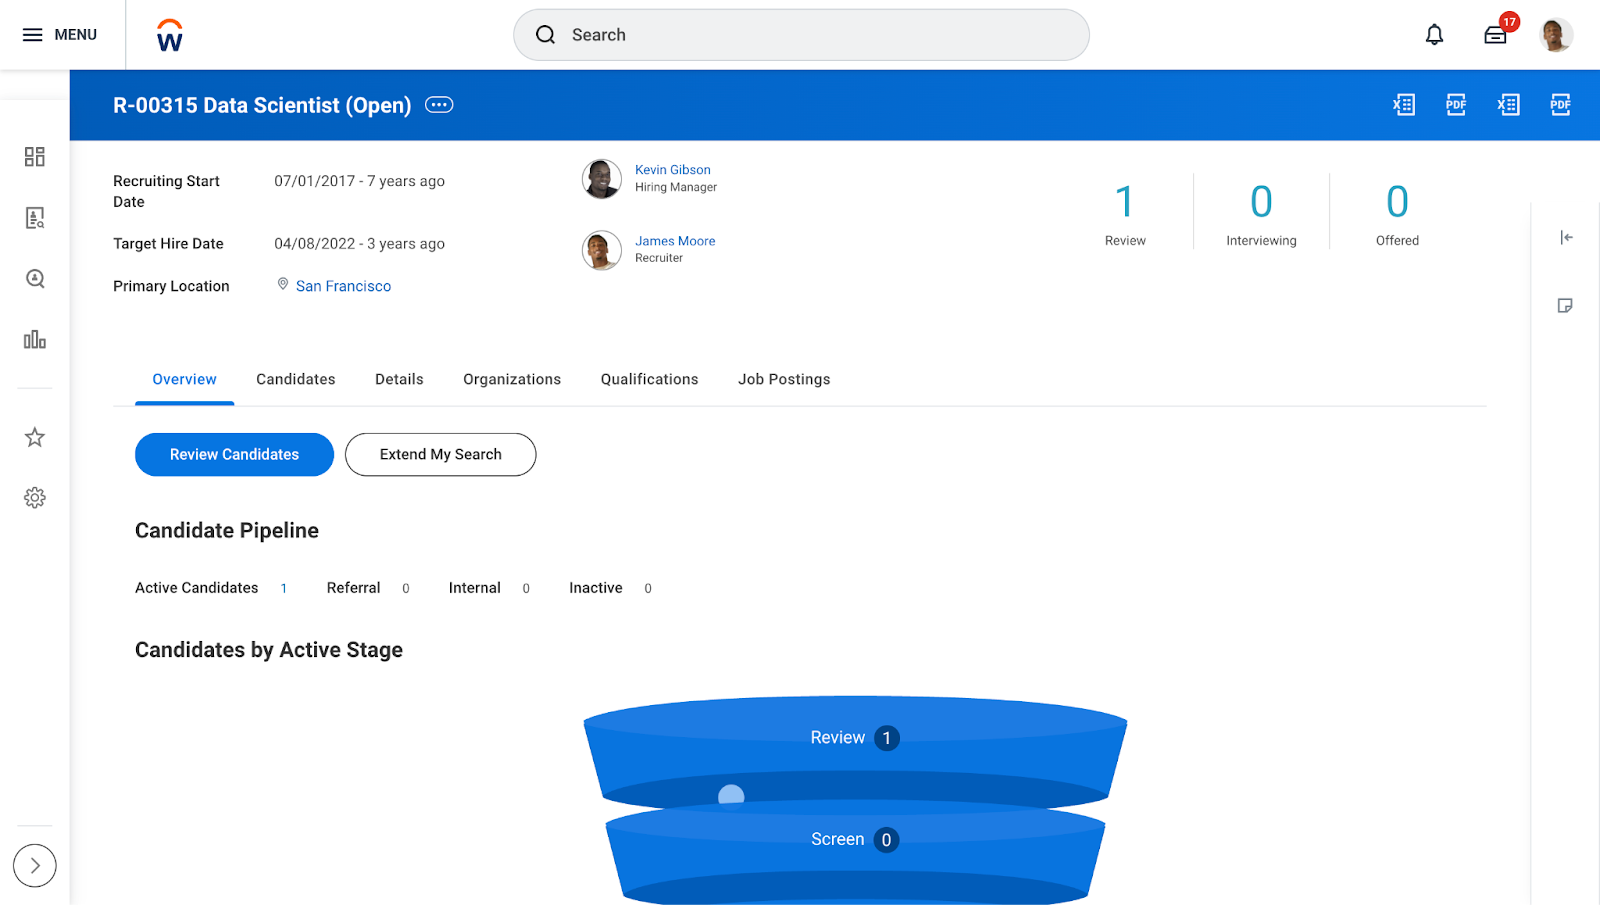
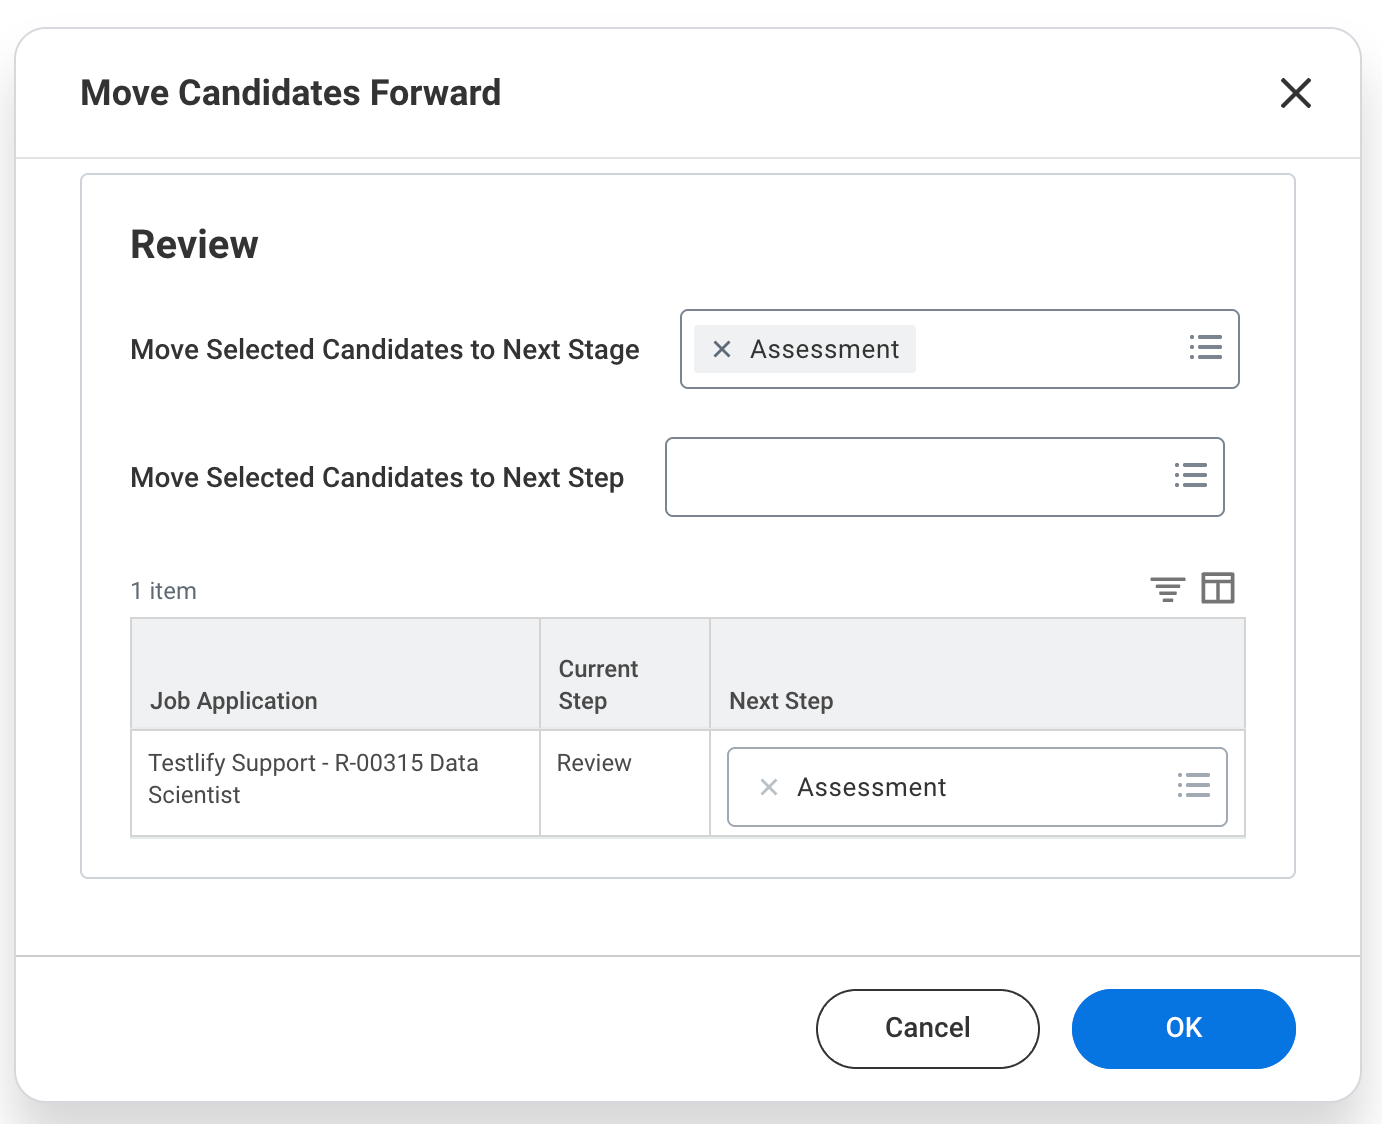
- Select the Candidates tab and move the desired candidates to the Assessment stage.
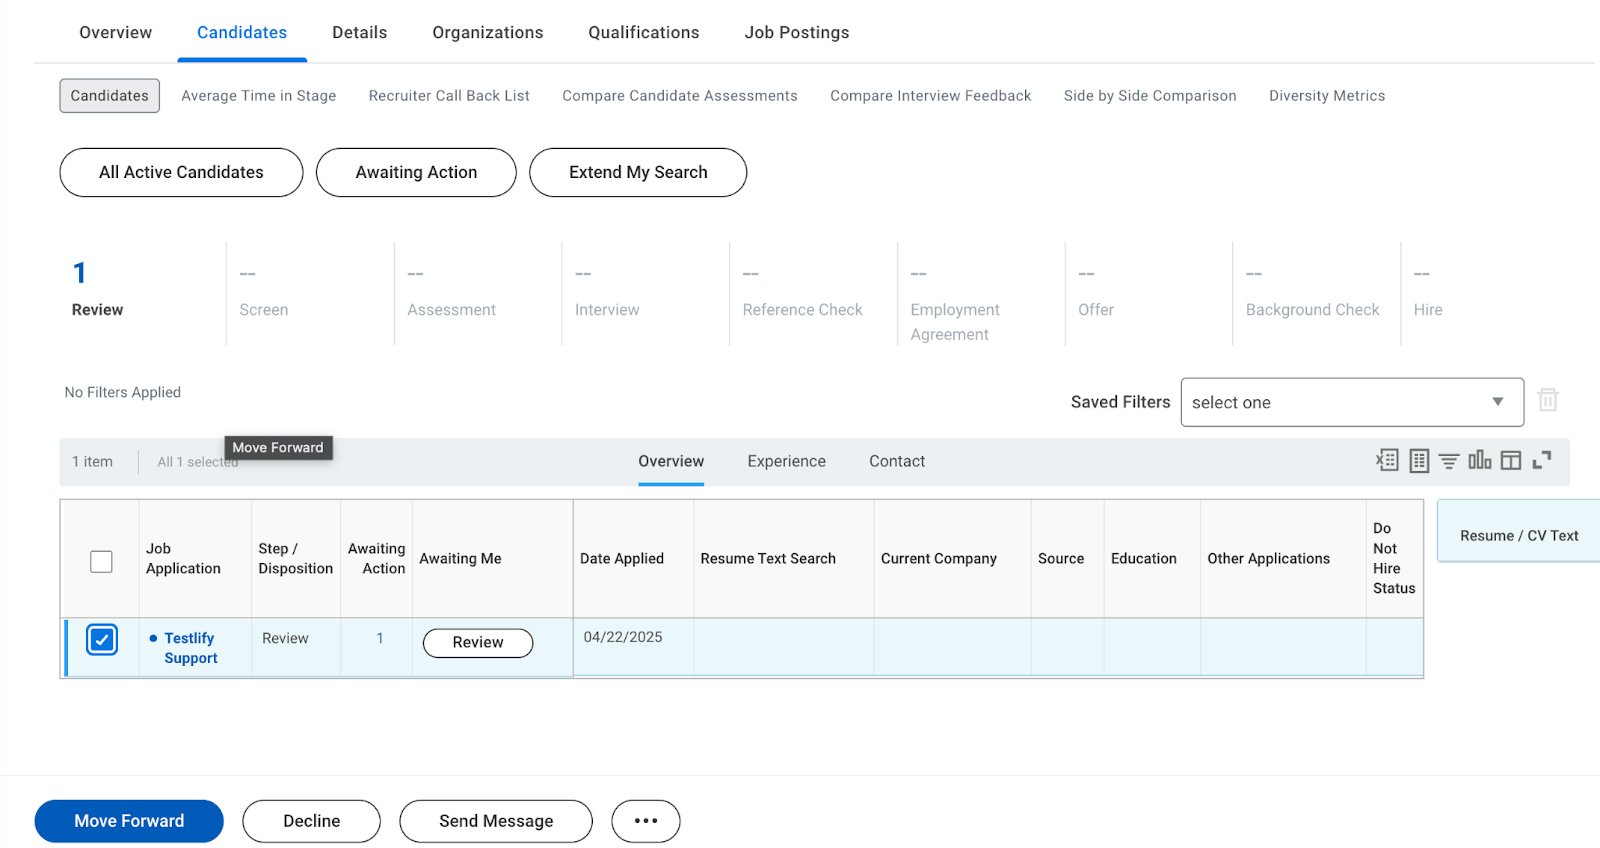
- Click the Assess button next to the candidate.
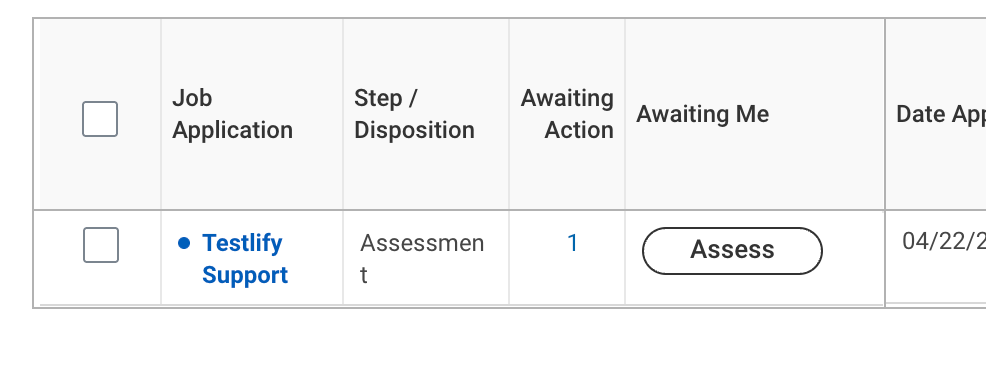
- Set Overall Status to Testlify Send Invite, select the assessment test, and click Submit. Add only one assessment test per submission.
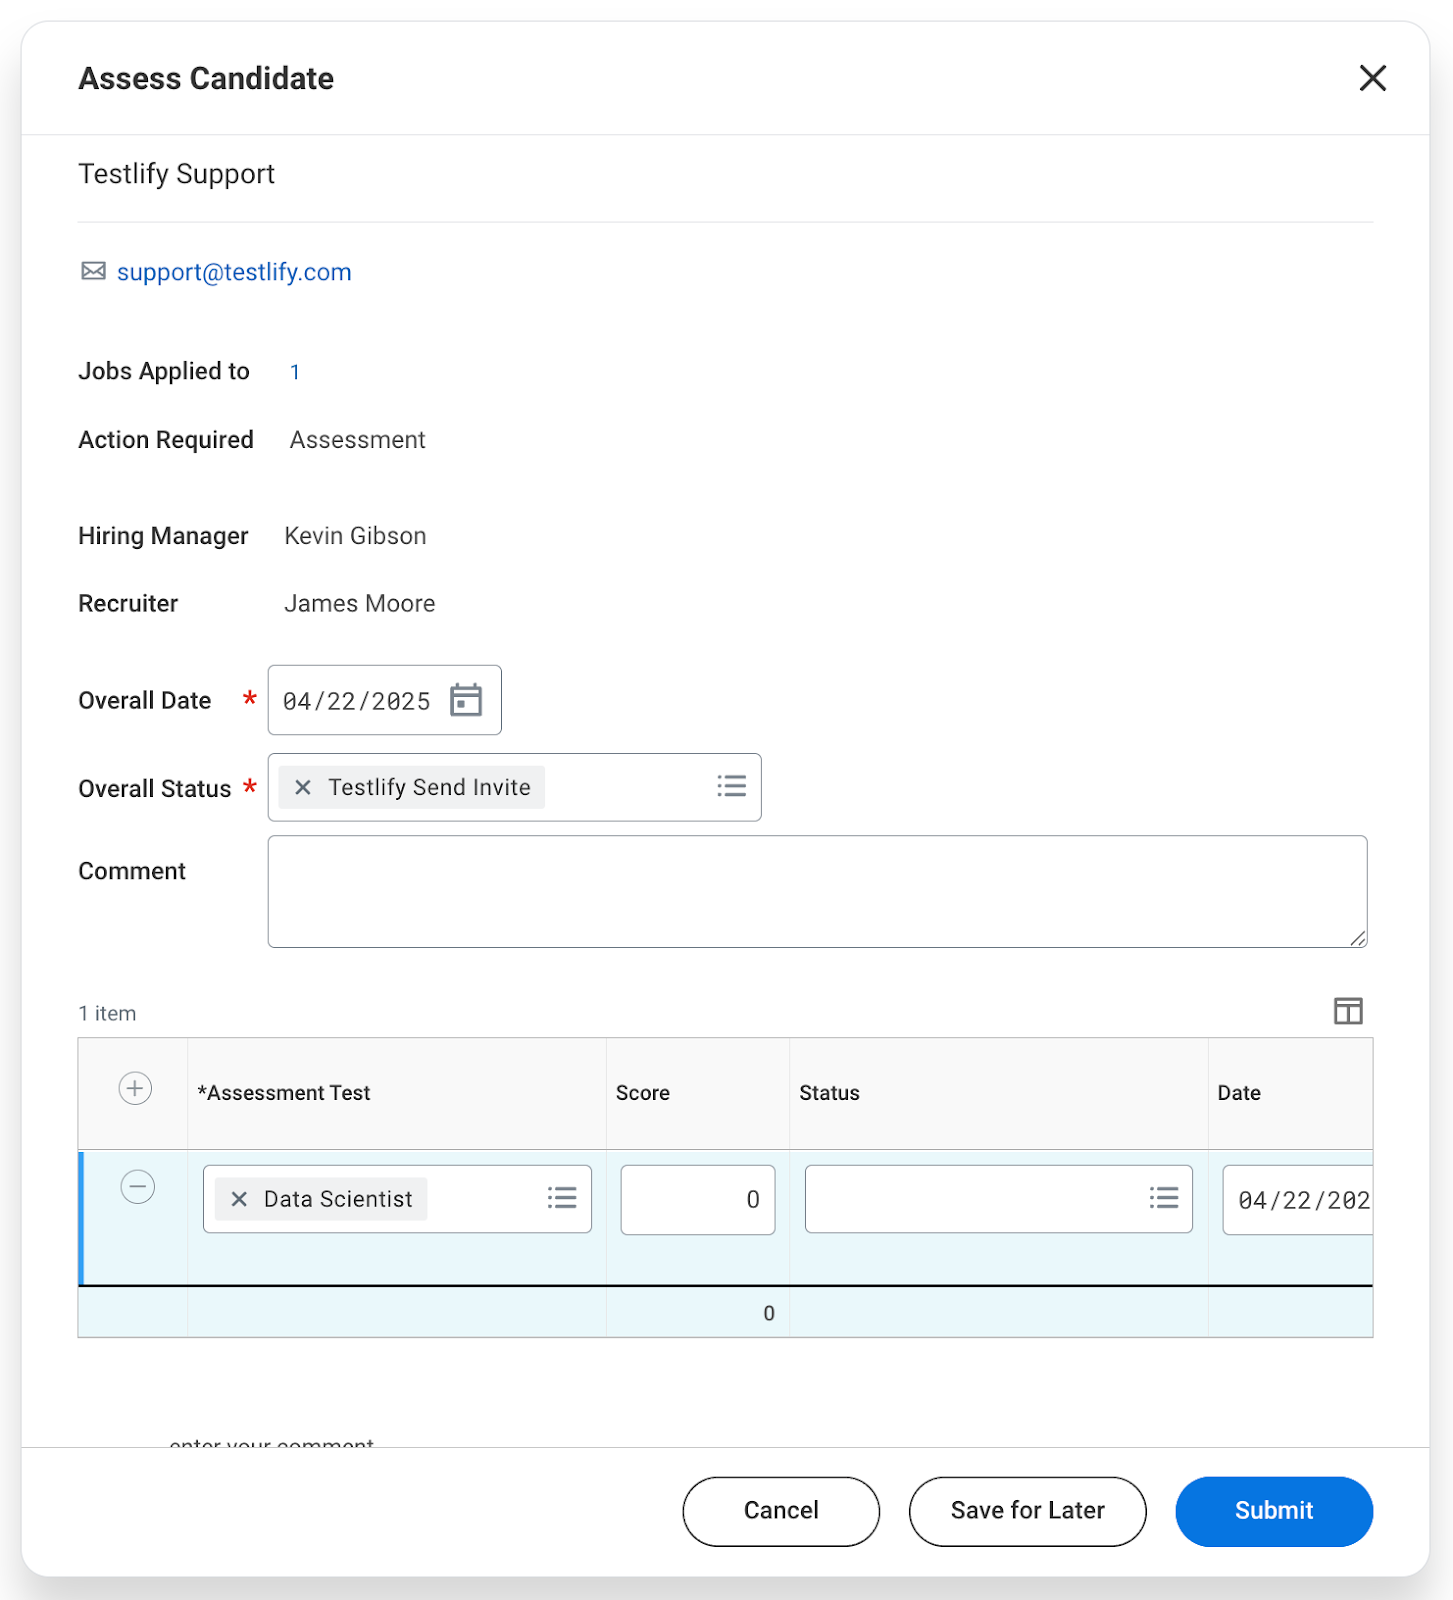
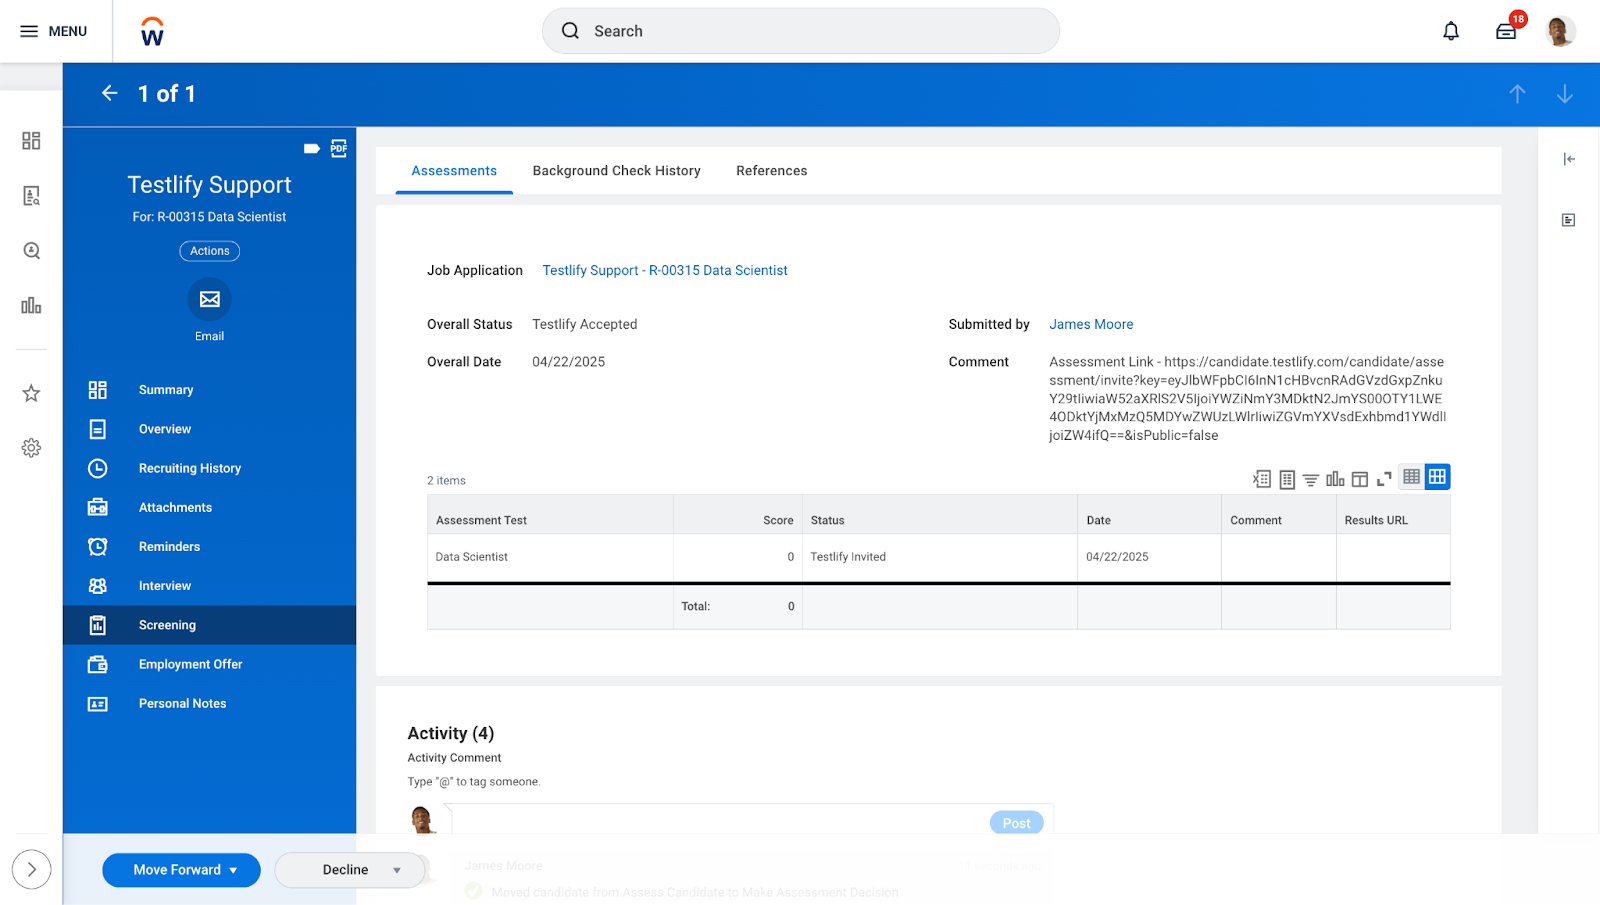
- What happens next: A background job runs every 15 minutes and sends the assessment invitation to each candidate in Testlify Send Invite status. Once invited, the candidate's status updates to Testlify Accepted and the test status shows Testlify Invited. If the invitation fails, the overall status becomes Testlify Declined with the reason shown in the Overall Comment field.
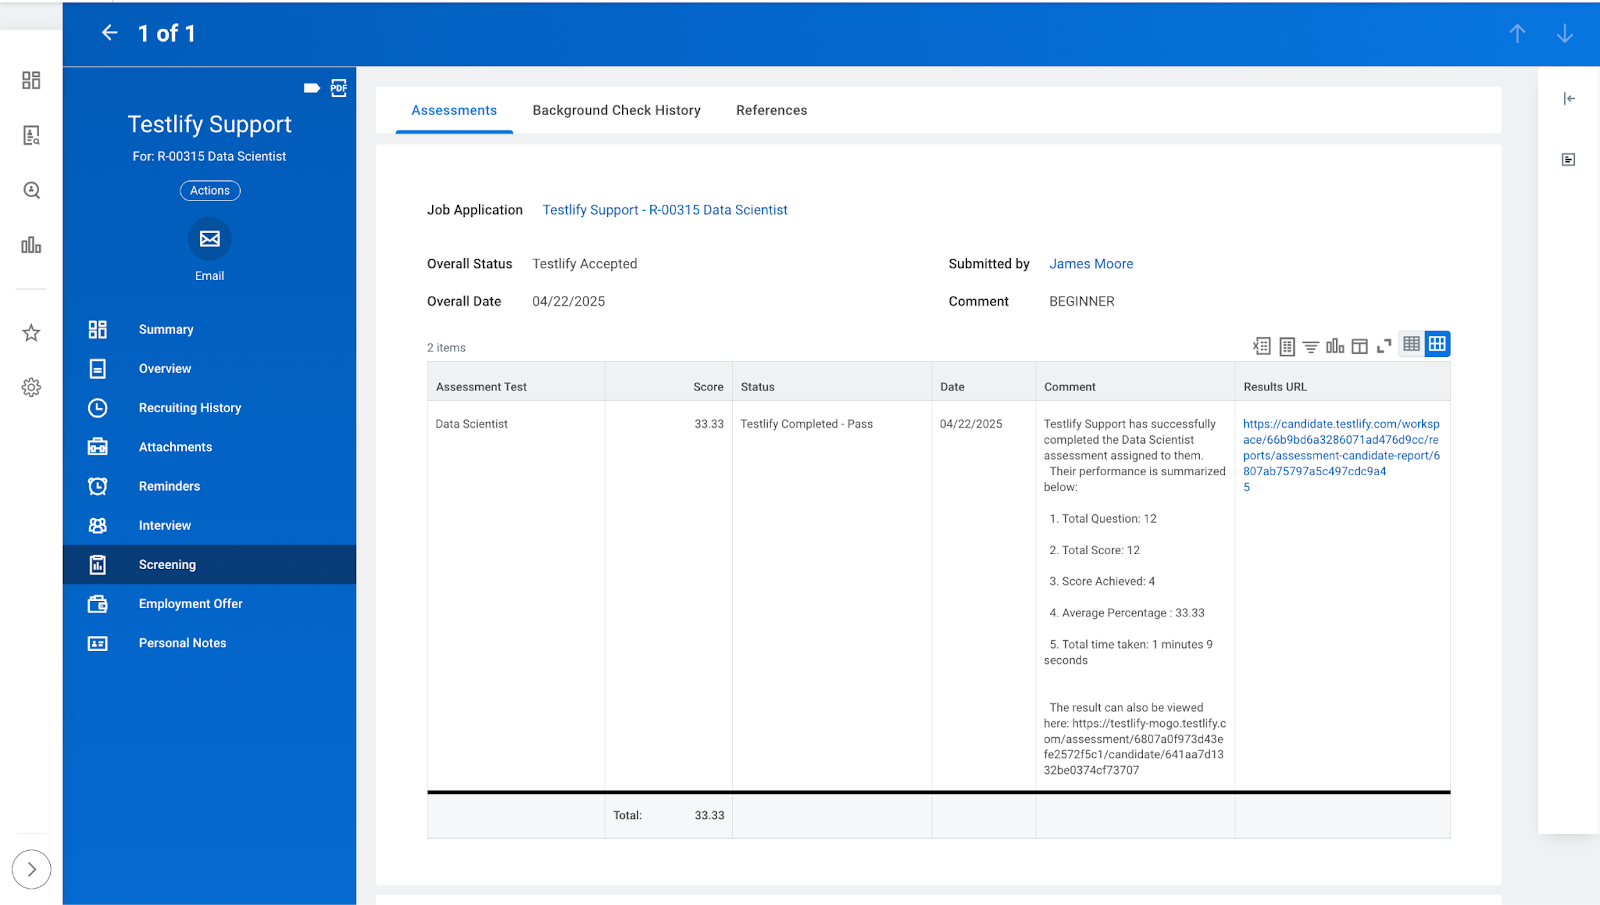
- When the candidate completes the assessment, Workday automatically updates the results.


Step 10: Send bulk invitations (optional)
Tip: Use bulk invitations to automatically assess every candidate who reaches the Assessment stage for a given requisition — no per-candidate manual action required.
- Log in to Workday and search for Edit Job Requisition.
- Enter the requisition name, press Enter, and click OK.
- Click the Job tab in the sidebar.
- In the Assessments section, click the pencil icon to edit.
- Click the Default Assessments field, add the assessment test(s) for this requisition, and click the checkmark to save.
- Click the Summary tab in the sidebar.
- Click Submit.
- Once approved, candidates are automatically invited to the configured assessment when they reach the Assessment stage.
- When candidates complete the assessment, Workday automatically updates their results.
Need help? Contact support.