
Workable Integration
Introduction
This guide provides step-by-step instructions to integrate Testlify with your Workable Applicant Tracking System (ATS). Follow these steps for a seamless integration process.
Steps for Integration
Accessing Integration Settings in Testlify
- Navigate to Testlify Workspace: Log in to your Testlify account.
- Open Settings: Locate the 'Settings' option.
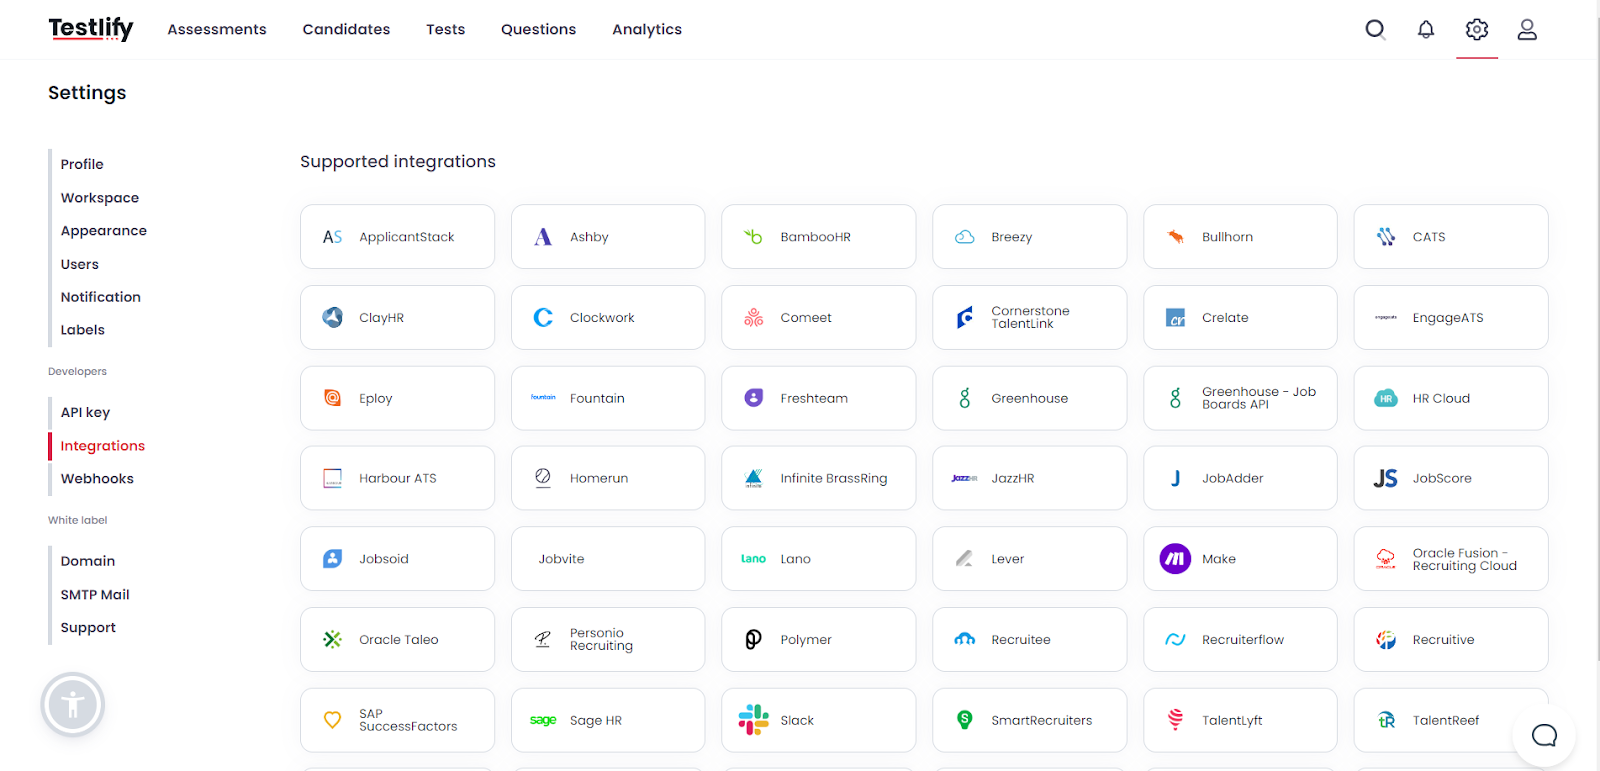
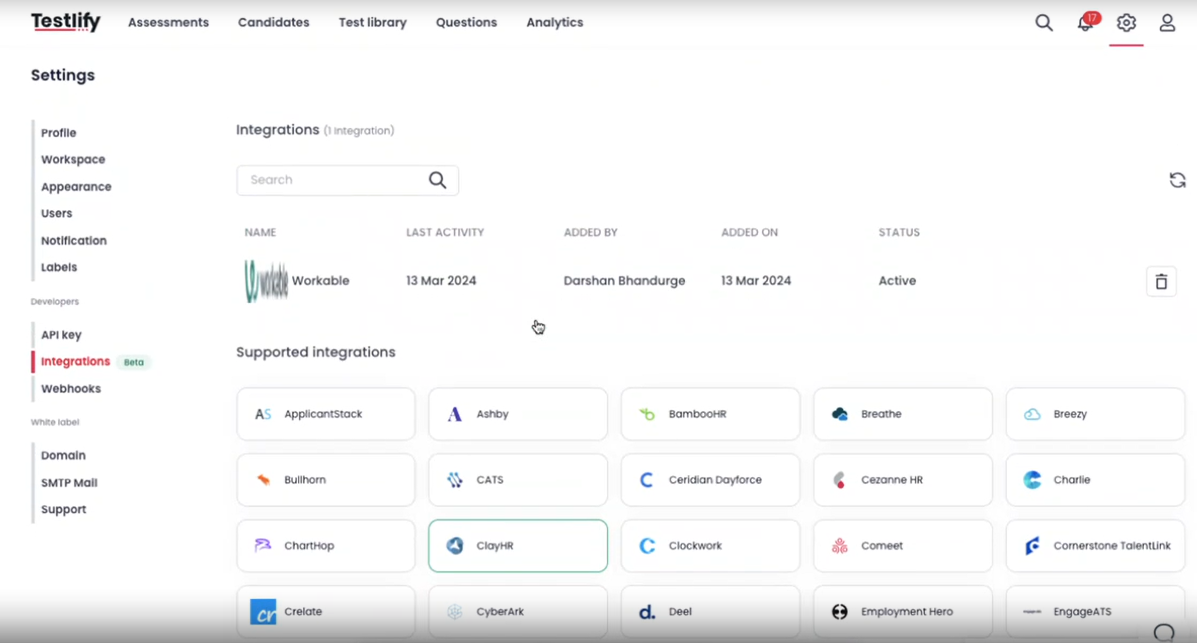
- Find Integration Tab: In the settings menu, find and select the 'Integrations' tab on the left side.
Selecting Workable ATS
- View Available Integrations: A list of possible integrations will be displayed.
- Select Workable ATS: Find and click on the Workable ATS option.
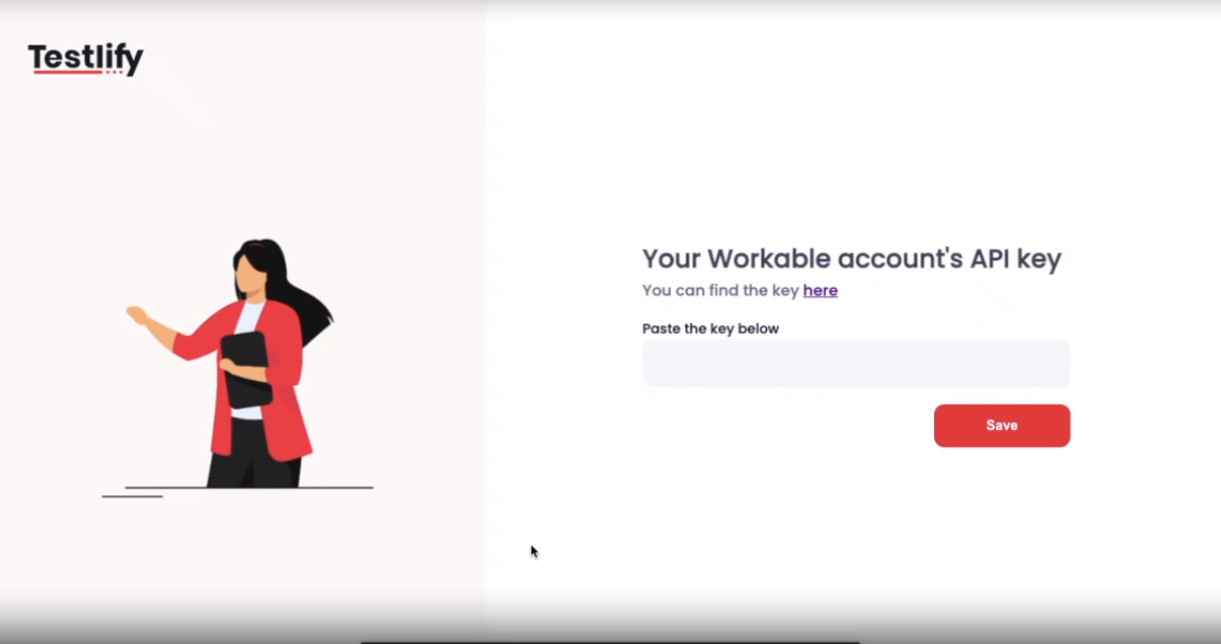
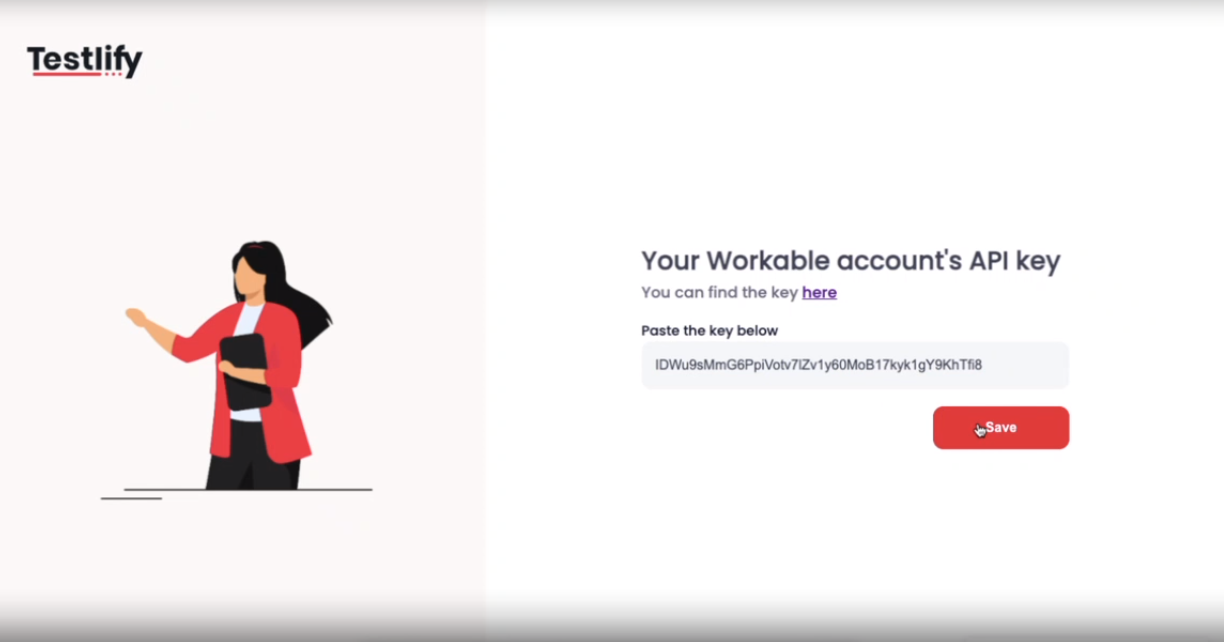
- When you choose Workable from the supported integrations list, you are taken to a page where you must enter your Workable account's API key.
- Navigate to your Workable account and look for the profile icon; upon clicking it, choose "Settings" from the options.
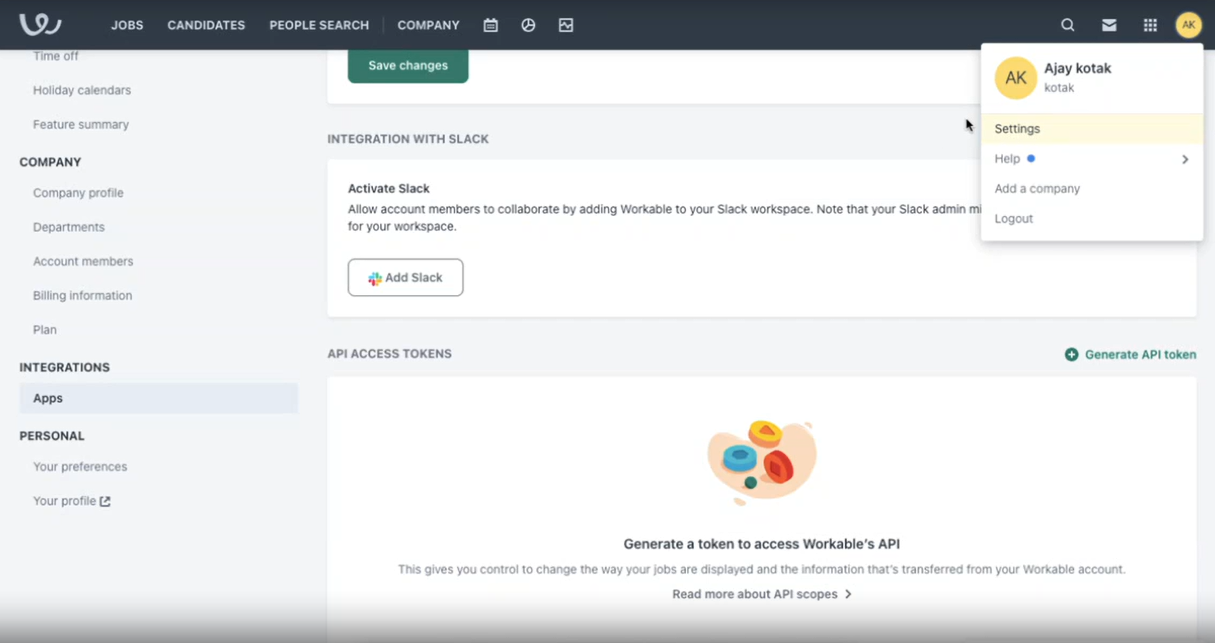
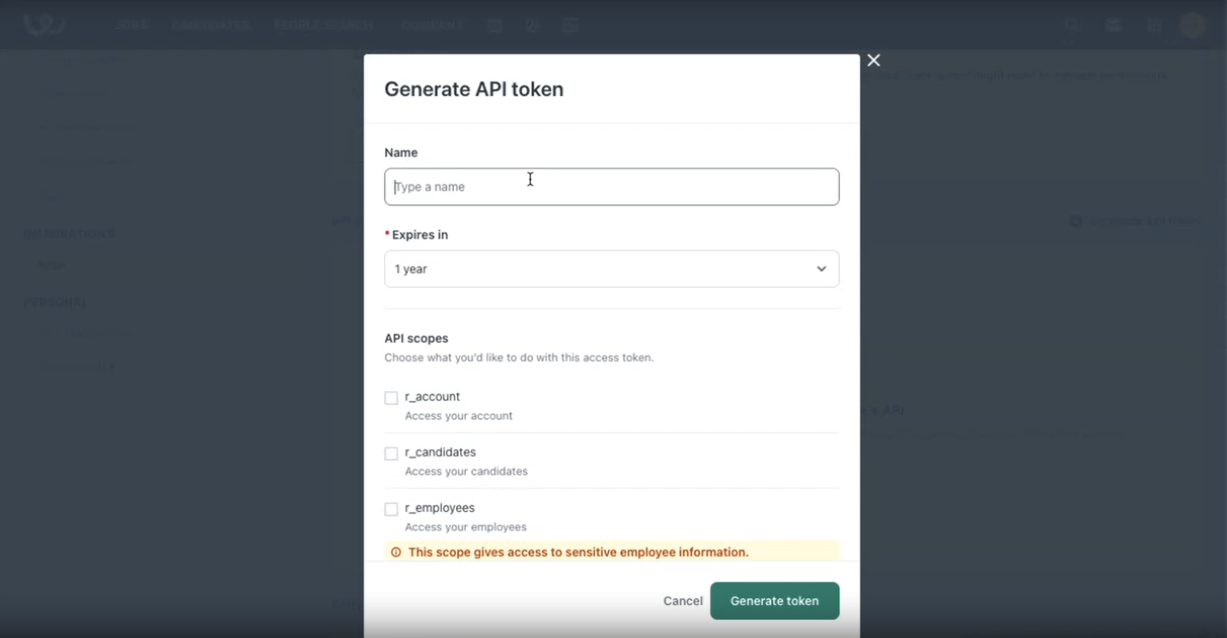
- After selecting "Settings," find the "Integrations" section in the left-side panel. Within that, click on "Apps," and then proceed to select "Generate API token."
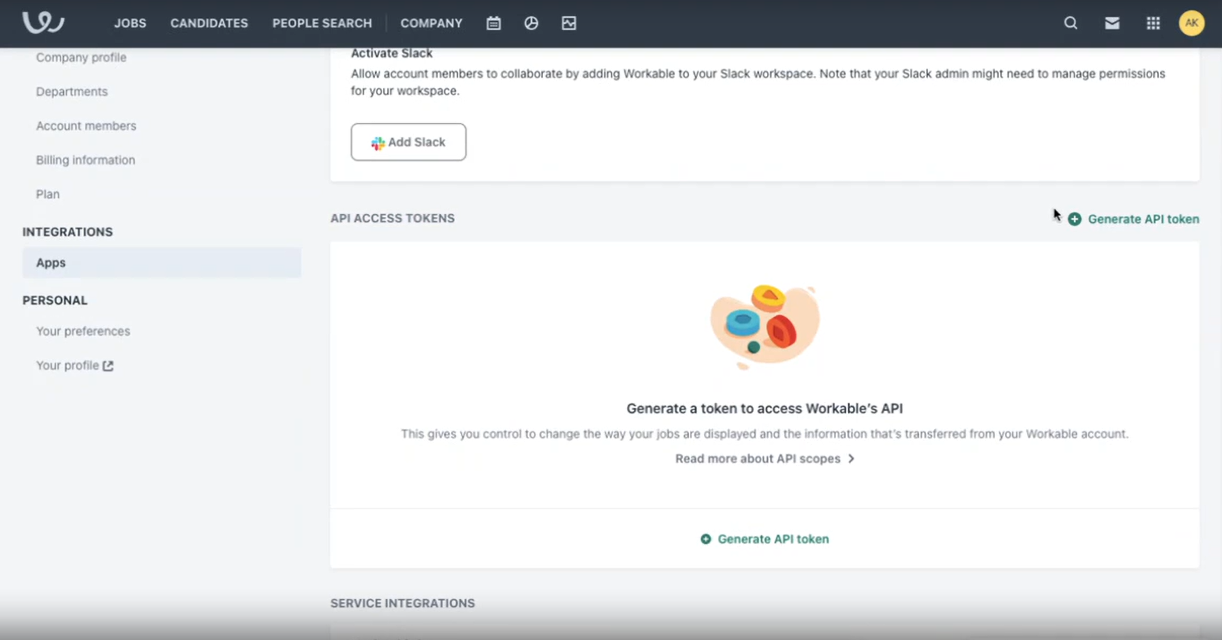
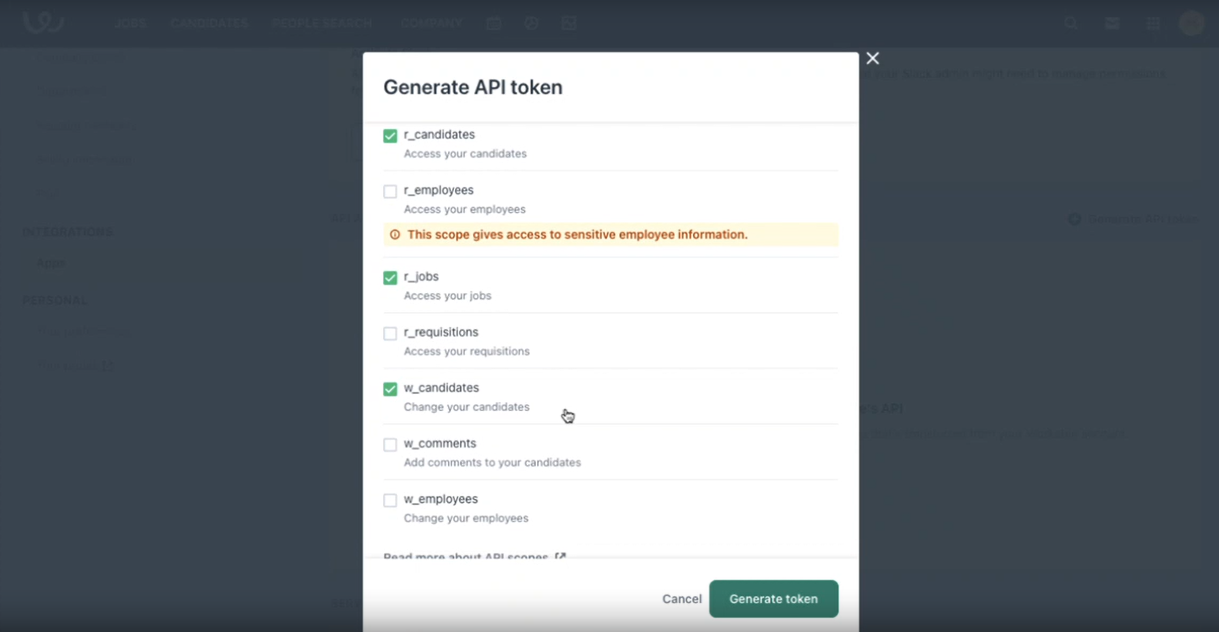
- To create an API token, enter a Name and select the following three options: read candidates, read jobs, and write candidates. Finally, click on "Generate API token."
- After generating the token, click "copy to clipboard.”
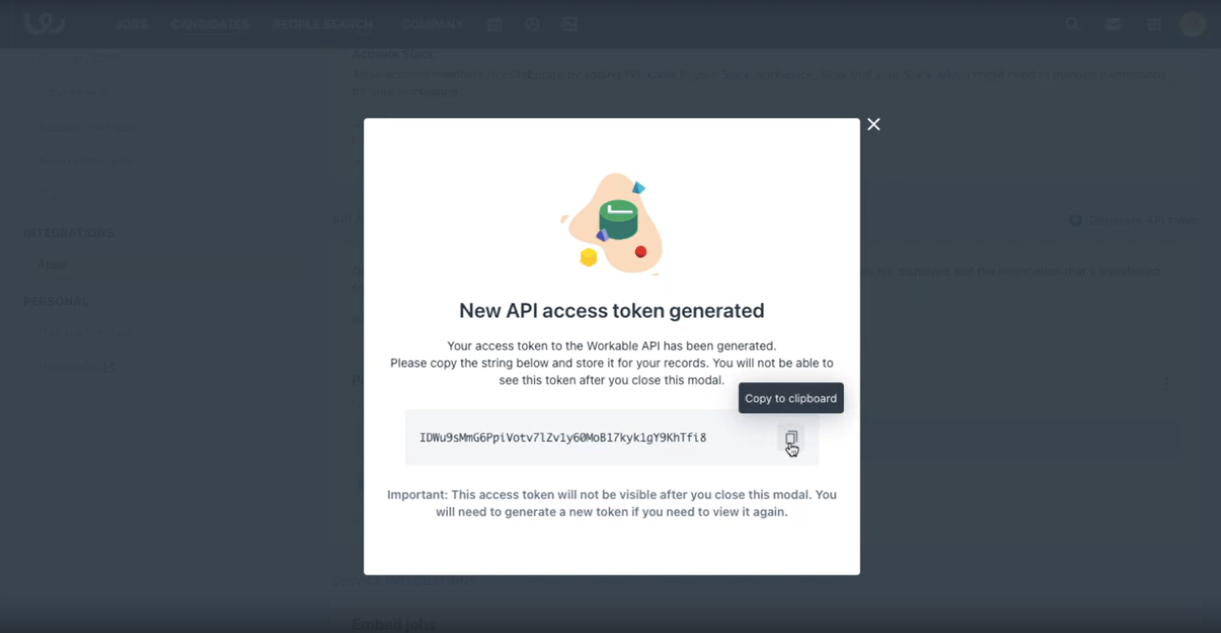
- Paste the token in the designated area and click "Save."
- You will then see that Workable is connected to your Testlify workspace. Click "Continue" to proceed.

You will be directed to this page, where you can now observe that the workspace-level integration with your Workable account has been successfully established.
Final Steps
Here are the final steps to complete the integration of Workable ATS with Testlify, focusing on setting up assessments relevant to specific job roles.
Steps to Finalize Integration
Creating an Assessment in Testlify
- Access Testlify Account: Log back into your Testlify account.
- Initiate Assessment Creation: Navigate to the Assessment section for creating a new assessment.
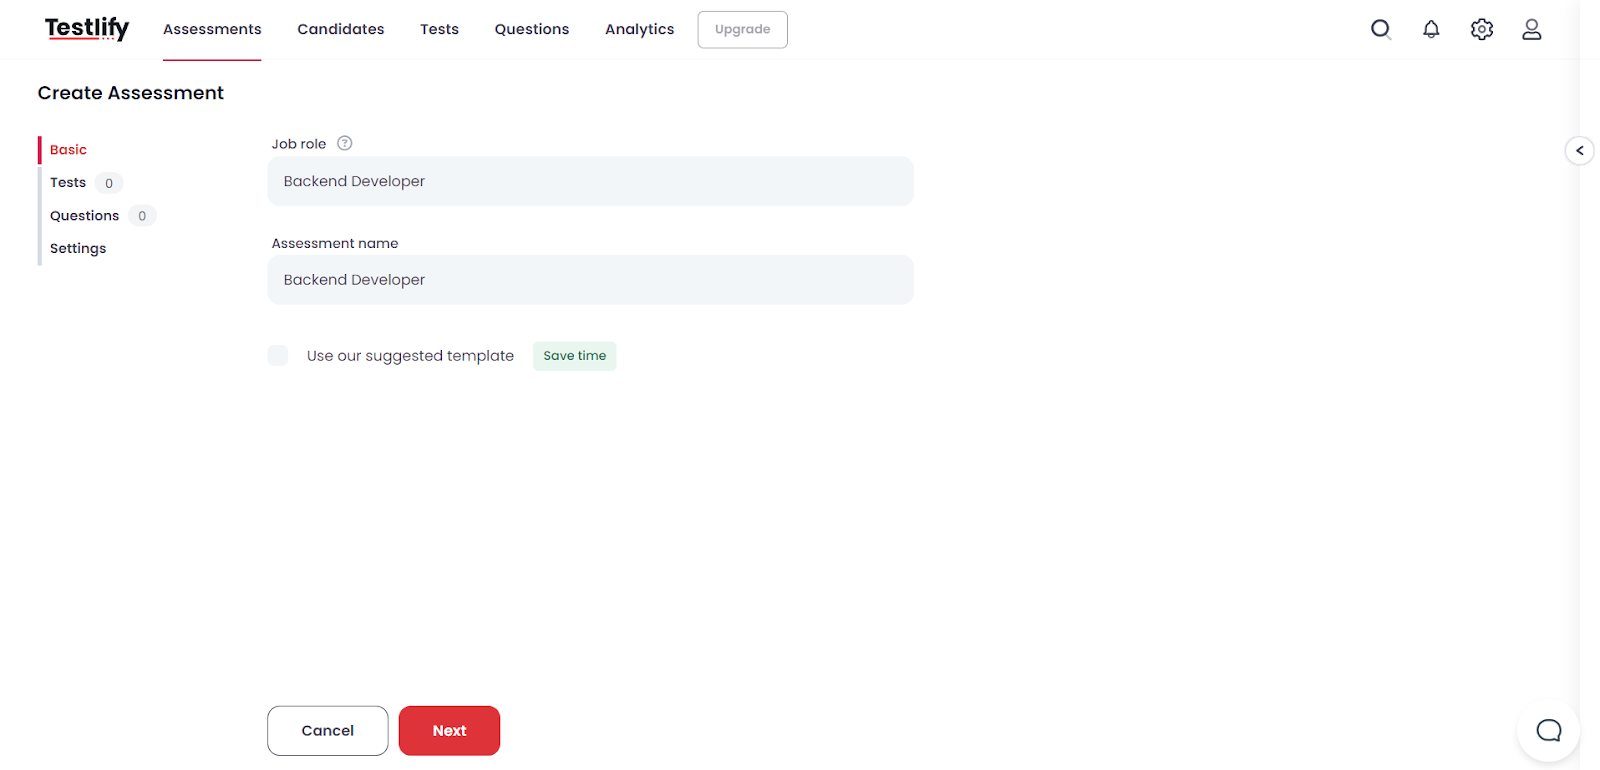
- Select Relevant Tests: Choose tests that are relevant to the specific job role.
Configuring Integration Settings
- Locate Integration Tab: In the final part of the settings, find the 'Integration' tab.
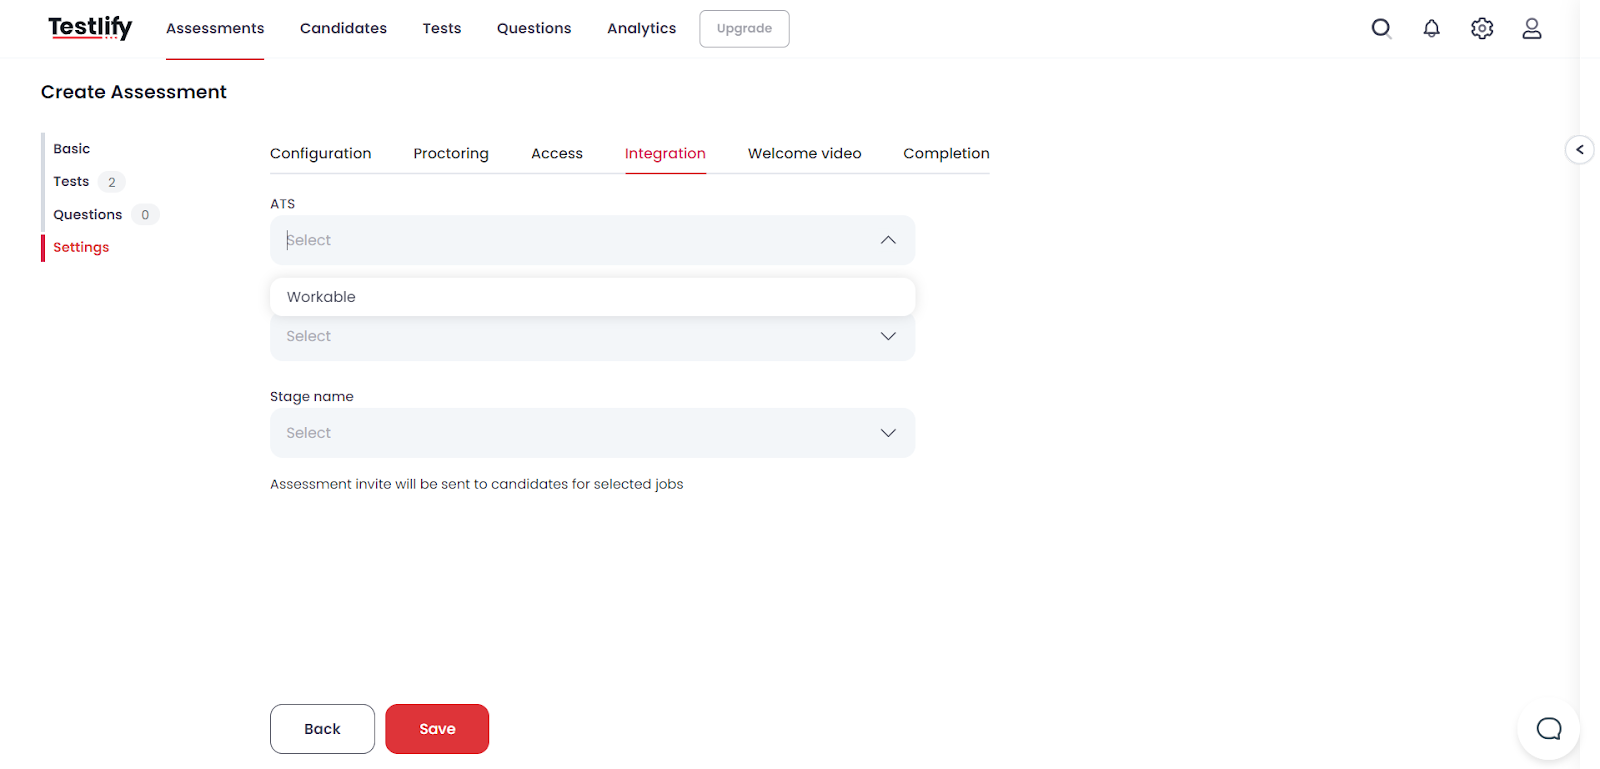
- Select ATS: From the ATS dropdown menu, and choose the 'Workable’
- Choose Job Posting: Select the job that is currently live on your Workable account from the dropdown list.
- Stage Name Selection: From the 'Stage Name' dropdown, pick the stage at which you want candidates to receive the assessment.
- Save Settings: Click on 'Save' to finalize the settings.
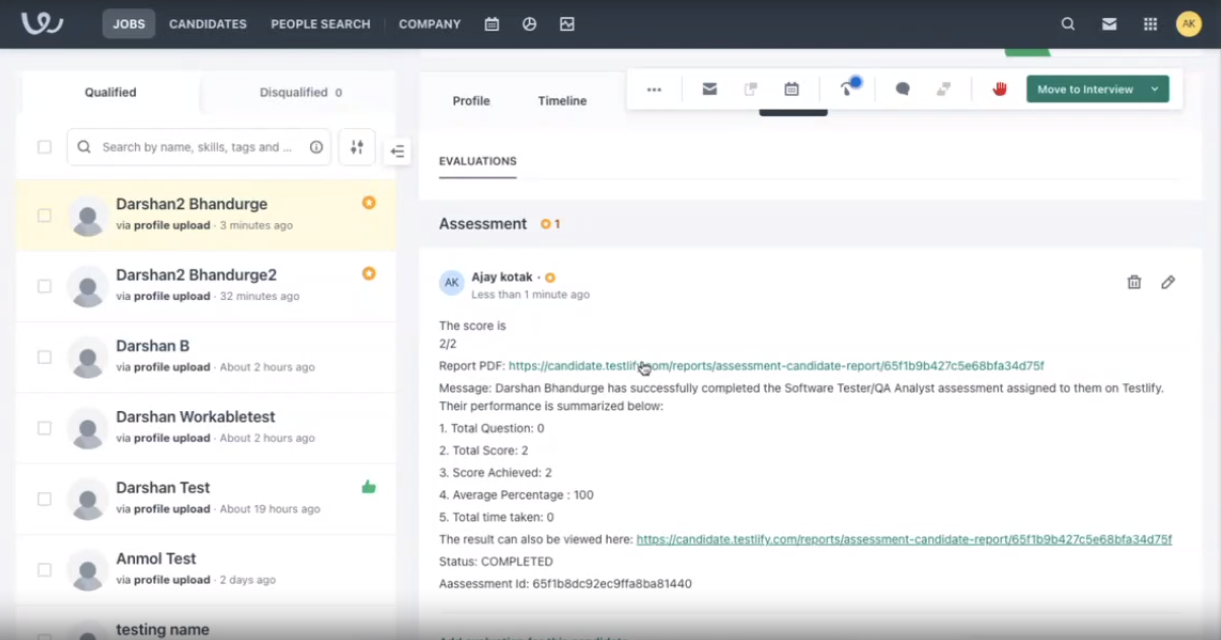
Once the candidate has completed the assessment they will be able to see the score on Workable platform and Testlify workspace.
Confirmation
- Integration Completion: With these steps, the integration of Workable with Testlify’s assessment feature is now complete.
Note: Ensure all selected tests and stages align with your recruitment strategy and comply with relevant guidelines. For any issues or queries, contact the support team of Testlify at support@testlify.com